My neighbor Agnes watched me hauling groceries up the porch steps one drizzly October evening and didn’t say anything at first. Then she just shook her head, wiped her hands on her apron, and disappeared back inside her little yellow house. I figured I’d done something odd—maybe the bag of green chiles had tipped her off that I was attempting something suspicious. Five minutes later, she came back with a steaming bowl wrapped in a dish towel. “You looked like you needed this more than a lecture about buying pre-shredded cheese,” she said, and that was that.
The bowl held the strangest, most comforting mac and cheese I’d ever tasted. It was green—not in a moldy way, but in a fresh, roasted-chile way that made no sense with elbow macaroni but worked beautifully anyway. She called it her “broom chili mac,” which I later learned was her family’s name for a clean-out-the-fridge, end-of-week chili that swept up whatever was left in the pantry. The name stuck, and honestly, I’ve never found a better one.
I tweaked her original version over the years—added more cheese, swapped the canned chiles for roasted ones when I have time, and figured out how to make it all in one pot so the cleanup matches the cozy vibe. Maybe you’ve had one of those weeks where you just need dinner to hug you back. This is that meal. It’s the kind of thing you make when you’re not trying to impress anyone but yourself, and that’s exactly why it’s so good.
Why You’ll Love This Recipe
This isn’t your average boxed mac and cheese dressed up with a can of green chiles. I’ve tested this recipe at least a dozen times to get the cheese sauce silky without breaking, the green chile flavor present but not overwhelming, and the whole thing done in under forty minutes with a single pot to wash. Here’s why it keeps showing up on my dinner rotation:
- One-Pot Wonder: Everything happens in one pot—no draining, no separate sauce pan, no colander to scrub. You boil the pasta right in the milk and broth, which also builds flavor into the noodles from the inside out.
- Pantry-Friendly Ingredients: Green chiles, pasta, cheese, milk, and a few spices. That’s it. No chasing down specialty items at three different stores.
- Perfect for Cold-Weather Comfort: When the wind picks up and the sky gets that gray November look, this is the dinner that makes the house feel warm again. It’s like a blanket you can eat.
- Crowd-Pleasing Heat Level: The green chiles add flavor, not fire. My kids eat this without complaint, and my spice-loving husband adds hot sauce at the table. Everyone wins.
- Unbelievably Creamy Texture: The secret is cooking the pasta in a mixture of milk and chicken broth, which creates a naturally creamy sauce without heavy cream or a roux. The starches from the pasta do the work for you.
What makes this version different from the hundreds of green chile mac and cheese recipes out there? It’s the “broom” part—the slightly smoky, slightly spicy chili undertone that comes from adding a bit of cumin and smoked paprika alongside the green chiles. It gives the dish a savory depth that plain green chile mac doesn’t have. Plus, the one-pot method means you get that creamy texture without the fuss of making a separate béchamel. It’s comfort food that actually fits into a weeknight.
This is the recipe that makes you close your eyes after the first bite. It’s not trying to be fancy. It’s trying to be exactly what you need after a long day, and honestly, it nails it every time.
What Ingredients You Will Need
This recipe uses simple, honest ingredients that come together to create something greater than the sum of their parts. Most of these are probably in your kitchen right now, which is exactly the point.
For the Mac and Cheese Base
- 1 pound elbow macaroni (or any short pasta—cavatappi, shells, or rotini work great too)
- 4 cups chicken broth (I prefer low-sodium so I can control the salt; vegetable broth works for a vegetarian version)
- 2 cups whole milk (don’t use skim here—the fat is what makes it creamy; 2% works in a pinch)
- 3 tablespoons unsalted butter (salted butter is fine, just reduce the added salt later)
- 1 small yellow onion, diced (about 1 cup; sweet onion works too if that’s what you have)
- 4 cloves garlic, minced (I use a microplane for this—it melts right into the sauce)
- 1 can (4 ounces) diced green chiles (mild or medium, depending on your heat preference; I usually grab the mild ones for general company)
- 1 can (7 ounces) whole green chiles, chopped (these have more texture than the diced ones; if you can only find one type, use two cans of diced)
- 1 teaspoon ground cumin (toast it in the pan for thirty seconds before adding liquid—trust me on this)
- 1/2 teaspoon smoked paprika (regular paprika works, but the smoked version gives that “broom chili” depth)
- 1/2 teaspoon salt (plus more to taste at the end)
- 1/4 teaspoon black pepper
For the Cheese Situation
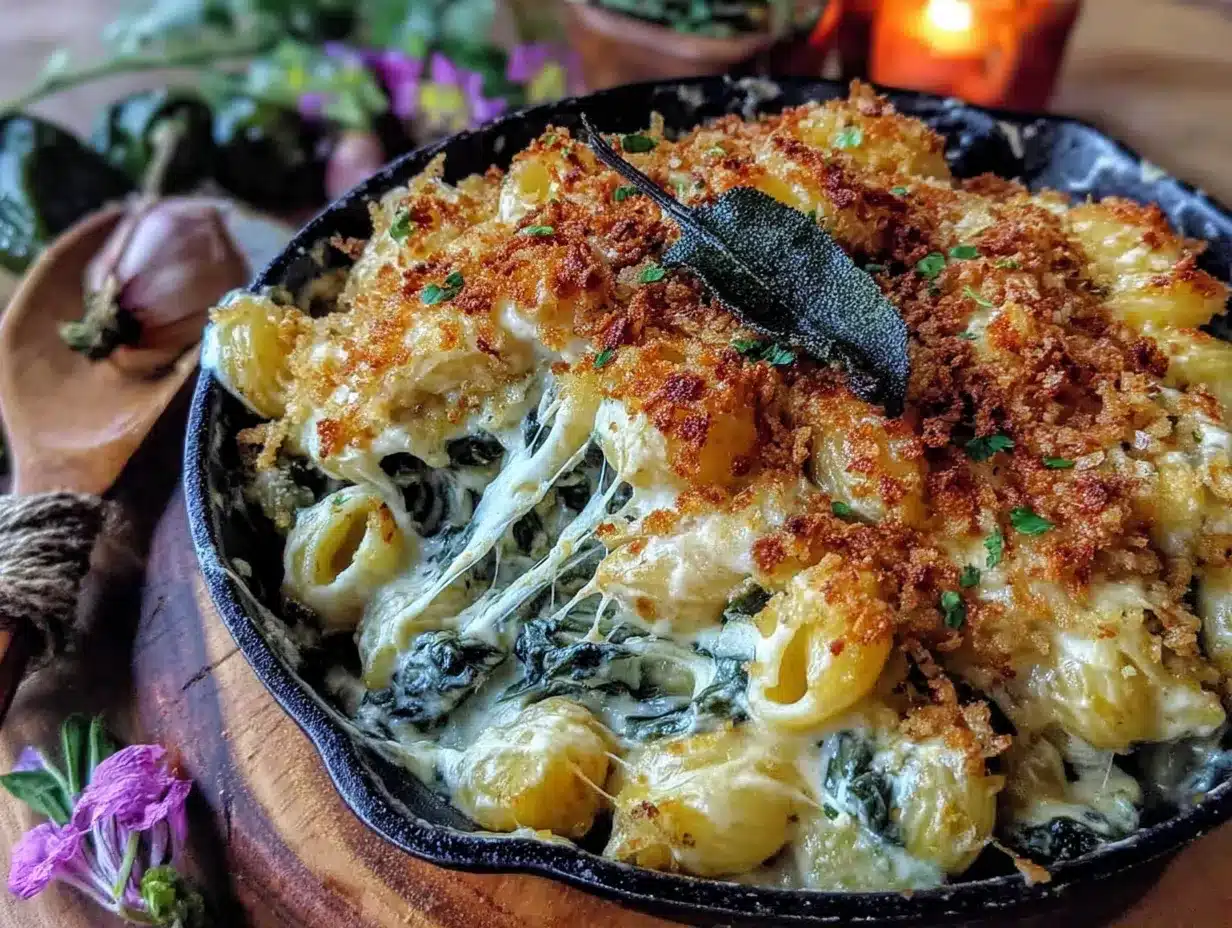
- 2 cups sharp cheddar cheese, shredded (buy a block and shred it yourself—the pre-shredded stuff has anti-caking agents that make the sauce grainy; I learned this the hard way)
- 1 cup Monterey Jack cheese, shredded (adds that melty, stretchy quality; pepper jack works if you want more heat)
- 1/2 cup cream cheese, softened and cut into cubes (this is the secret to the ultra-creamy texture—don’t skip it)
For the Topping (Optional but Recommended)
- 1/2 cup panko breadcrumbs (regular breadcrumbs work, but panko gives better crunch)
- 2 tablespoons melted butter
- 1/4 cup grated Parmesan cheese
- Fresh cilantro or green onion for garnish (if you’re the type of person who garnishes—I usually forget and it’s still good)
I recommend Tillamook or Cabot for the cheddar—they melt beautifully and have real flavor. For the cream cheese, Philadelphia is my go-to because it’s consistent. If you’re dairy-sensitive, you can substitute full-fat oat milk for the whole milk and use dairy-free cream cheese and shredded cheese alternatives, but honestly, this recipe really shines with the real stuff.
Equipment Needed
You don’t need much for this one, which is part of the charm. Here’s what you’ll need:
- A large Dutch oven or heavy-bottomed pot (at least 5-quart capacity; I use my trusty enameled cast iron Le Creuset that I found at a garage sale for twenty bucks—best kitchen investment ever)
- A wooden spoon or silicone spatula (for stirring; avoid metal if you’re using enameled cast iron)
- A box grater or food processor (for shredding cheese; I use the grating disc on my food processor when I’m feeling efficient)
- A chef’s knife and cutting board
- Measuring cups and spoons
- An oven-safe baking dish (only if you’re doing the broiled topping; otherwise, skip it)
If you don’t have a Dutch oven, any heavy-bottomed pot with a lid will work. The key is even heat distribution so the milk doesn’t scorch on the bottom. I’ve made this in a stainless steel stockpot and it turned out fine—just stir more frequently and keep the heat on medium-low.
Preparation Method
This comes together in about 35 minutes from start to finish. Here’s the play-by-play:
- Start the aromatics (5 minutes): Place your Dutch oven over medium heat and melt the 3 tablespoons of butter. Add the diced onion and cook until it’s soft and translucent—about 3-4 minutes. Don’t rush this step; raw onion in mac and cheese is a sad thing. Add the minced garlic and cook for another 30 seconds until it’s fragrant. If you smell garlic burning, your heat is too high—turn it down.
- Toast the spices (30 seconds): Sprinkle the cumin and smoked paprika over the onions and garlic. Stir constantly for about 30 seconds until the spices smell toasty and aromatic. This little step makes a huge difference in the final flavor—it wakes up the spices in a way that just dumping them into liquid never does.
- Add the chiles and liquids (2 minutes): Pour in both cans of green chiles (diced and whole, chopped) and stir for about a minute. Then add the chicken broth and milk. Stir everything together, scraping up any browned bits from the bottom of the pot. Those bits are pure flavor.
- Cook the pasta (10-12 minutes): Add the elbow macaroni, salt, and pepper. Bring the liquid to a gentle boil, then reduce the heat to a steady simmer. Cook the pasta according to the package directions, stirring every couple of minutes to prevent sticking. The pasta will absorb most of the liquid as it cooks—this is normal and exactly what you want. If the mixture looks too dry before the pasta is done, add a splash of warm water or broth.
- Check for doneness (2 minutes): When the pasta is al dente (tender but still has a little bite), remove the pot from the heat. The liquid should be mostly absorbed, with just a little saucy goodness left at the bottom. If there’s too much liquid, let it sit off the heat for a minute or two—the pasta will continue absorbing.
- Add the cheeses (3 minutes): This is the crucial moment. Working quickly, add the shredded cheddar, Monterey Jack, and cubed cream cheese. Stir vigorously until everything is melted and smooth. The residual heat from the pasta should be enough to melt the cheese—if you need to, return the pot to low heat for 30 seconds, but don’t overdo it or the cheese can separate. You’re looking for a thick, creamy sauce that coats each piece of pasta.
- Optional broiled topping (5 minutes): If you want that crispy, golden crust (and honestly, why wouldn’t you?), preheat your broiler. Transfer the mac and cheese to an oven-safe baking dish or use your Dutch oven if it’s broiler-safe. Mix the panko with melted butter and Parmesan, sprinkle over the top, and broil for 2-3 minutes until golden brown. Watch it like a hawk—broilers go from golden to burnt in about 15 seconds.
- Rest and serve (5 minutes): Let the mac and cheese sit for 5 minutes before serving. This lets the sauce set up a bit so it’s creamy but not soupy. Garnish with fresh cilantro or green onion if you’re feeling fancy, and serve hot.
One note: if your sauce looks a little thin right after adding the cheese, don’t panic. It will thicken as it sits. If it’s still thin after resting, you can stir in a little more shredded cheese or let it sit uncovered for a few more minutes.
Cooking Tips & Techniques
I’ve made this recipe probably thirty times by now, and I’ve made every mistake you can imagine. Here’s what I’ve learned:
Don’t rush the cheese-grating step. I know it’s tempting to buy the pre-shredded bags—I’ve done it myself when I was short on time. But those bags have potato starch and cellulose coating the shreds to keep them from clumping, and that coating also prevents the cheese from melting smoothly. Your sauce will end up grainy instead of silky. Grate your own cheese. It takes five extra minutes and makes a genuinely noticeable difference.
Keep the heat gentle when adding the cheese. High heat is the enemy of smooth cheese sauce. It causes the proteins in the cheese to tighten up and squeeze out the fat, leaving you with a greasy, separated mess. Always remove the pot from the heat before adding the cheese, and stir until it’s fully incorporated before returning to low heat if needed.
Toast the cumin. I mentioned this in the instructions, but it bears repeating. Raw cumin tastes dusty and flat. Toasted cumin tastes warm, earthy, and slightly nutty. The thirty seconds it takes to toast it in the hot butter and onions transforms the entire dish. I learned this after making a batch that tasted strangely like dirt—never again.
Taste before you salt. Canned green chiles and broth both contain salt, and different brands vary wildly. Always taste the pasta before adding the cheese, then adjust the salt. You can always add more, but you can’t take it out.
Double the recipe if you’re smart. This mac and cheese freezes beautifully (see the storage section below), and having a container in the freezer for those nights when you just can’t is a gift to your future self. I always make a double batch and freeze half in a disposable aluminum pan.
Variations & Adaptations
This recipe is forgiving and flexible. Here are some ways to make it your own:
Vegetarian Version: Swap the chicken broth for vegetable broth and you’re done. Everything else is already vegetarian-friendly. I’ve made it this way for my vegetarian sister-in-law and she couldn’t tell the difference.
Extra Protein: Stir in 2 cups of shredded rotisserie chicken or cooked ground beef after adding the cheese. The smoky-spicy flavors pair beautifully with both. I sometimes do this when I want the mac and cheese to be a complete meal in one bowl.
Spicy Upgrade: Use hot green chiles instead of mild, add a diced jalapeño with the onions, and finish with a drizzle of hot sauce on top. My husband does this to his bowl and calls it “fire broom chili mac.”
Gluten-Free Adaptation: Use gluten-free pasta (I like the brown rice pasta from Jovial or Banza chickpea pasta) and gluten-free panko for the topping. The cooking time might vary by a minute or two, so start checking for doneness a little early.
Baked Version: If you prefer a firmer, casserole-style mac and cheese, undercook the pasta by 2 minutes in step 4, then transfer everything to a baking dish after adding the cheese. Top with the panko mixture and bake at 375°F for 20 minutes until bubbly and golden. The texture is different—denser, more set—but equally delicious.
Smoky Bacon Addition: Cook 4 slices of bacon until crispy, crumble them, and stir half into the mac and cheese before serving. Sprinkle the rest on top. The smoky bacon and the smoked paprika create a beautiful flavor harmony that I accidentally discovered when I had leftover bacon from breakfast.
Serving & Storage Suggestions
Serve this mac and cheese hot, straight from the pot or baking dish. It’s a meal in itself, but it also pairs beautifully with a simple green salad dressed with lemon vinaigrette—the acidity cuts through the richness perfectly. A side of roasted broccoli or green beans works too, if you want to pretend you’re eating a balanced meal.
For drink pairings, a crisp lager or pale ale cuts through the creaminess nicely. If you’re a wine person, a Sauvignon Blanc or unoaked Chardonnay works well. My personal favorite is an ice-cold Mexican Coke with the glass bottle—something about the cane sugar and the carbonation just works with the green chiles.
Storage: Let the mac and cheese cool completely, then transfer to an airtight container. It will keep in the refrigerator for up to 5 days. The texture will firm up as it sits, so don’t be alarmed when it seems more solid than when you made it.
Reheating: The best way to reheat is in a skillet over medium-low heat with a splash of milk or broth. Stir frequently until heated through and creamy again. The microwave works in a pinch, but add a tablespoon of milk and stir halfway through, or you’ll end up with dry, sad pasta. I speak from experience.
Freezing: This freezes beautifully for up to 3 months. Let it cool completely, transfer to a freezer-safe container, and press a piece of parchment paper directly onto the surface before sealing to prevent freezer burn. To thaw, move it to the refrigerator overnight, then reheat using the skillet method. The texture won’t be quite as creamy as fresh, but it’s still remarkably good—about 85% of the way there.
The flavors actually deepen after a day in the fridge. The green chiles and cumin meld together into something even more cohesive. I sometimes make this specifically to eat as leftovers the next day.
Nutritional Information & Benefits
Here’s the honest truth: this is comfort food, not health food. But it’s made with real ingredients, and there are some nutritional bright spots worth noting.
Estimated nutritional values per serving (1/6 of recipe):
| Nutrient | Amount |
|---|---|
| Calories | 485 |
| Total Fat | 24g |
| Saturated Fat | 14g |
| Cholesterol | 68mg |
| Sodium | 720mg |
| Total Carbohydrates | 47g |
| Dietary Fiber | 3g |
| Sugars | 6g |
| Protein | 18g |
| Calcium | 320mg |
| Iron | 2mg |
Health highlights: Green chiles are surprisingly nutritious—they’re rich in vitamin C (more than an orange by weight) and contain capsaicin, which may boost metabolism and reduce inflammation. The calcium from the cheese is good for bone health, and the protein from the dairy and pasta helps keep you full. Plus, making dinner from scratch means you control the sodium and skip the preservatives found in boxed versions.
Dietary considerations: This recipe contains dairy and gluten. For a gluten-free version, use gluten-free pasta and panko. For a lower-fat version, use 2% milk and reduce the cheese by a third—but honestly, this is one of those recipes where the full-fat version is worth the indulgence. I’d rather eat a smaller portion of the real thing than a larger portion of something that doesn’t satisfy.
Conclusion
This Cozy One-Pot Witches’ Broom Green Chili Mac and Cheese is the kind of recipe that becomes a regular in your rotation because it delivers exactly what you need, when you need it. It’s warm, it’s filling, and it tastes like someone made it just for you—because you did.
I still think about Agnes whenever I make this. She moved to Arizona a few years ago, but her recipe lives on in my kitchen, tweaked and adapted and shared with anyone who needs a good meal on a cold night. That’s the thing about recipes—they’re not just instructions. They’re connections to people and places and moments that matter.
Try this recipe as written first, then make it your own. Add more chiles if you like heat. Skip the panko topping if you’re short on time. Stir in leftover chicken or roasted vegetables. The beauty of this dish is that it’s forgiving and adaptable, just like the best comfort food always is.
I’d love to hear how yours turns out. Drop a comment below and let me know what variations you tried, or tag me in your photos on social media. And if you make a double batch and freeze half—well, future you is going to be very, very grateful.
Until next time, happy cooking, and may your kitchen always smell like something good.
Frequently Asked Questions
Can I use pre-shredded cheese in this recipe?
You can, but I don’t recommend it. Pre-shredded cheese has anti-caking agents that prevent it from melting smoothly, resulting in a grainy sauce. Grating your own cheese takes five extra minutes and makes a noticeable difference in texture. If you’re in a pinch, at least look for bags labeled “shredded” rather than “finely shredded”—the smaller pieces have more coating relative to cheese.
Can I make this recipe dairy-free?
Yes, with some adjustments. Use full-fat oat milk or unsweetened cashew milk for the liquid, dairy-free cream cheese (Miyoko’s or Kite Hill work well), and dairy-free shredded cheddar-style cheese. The texture won’t be quite as creamy, and the melting behavior is different—dairy-free cheese tends to get stretchy rather than smooth—but the flavor will still be delicious. I’d skip the broiled topping if using dairy-free cheese, as it can dry out.
Why is it called “Witches’ Broom” chili mac?
The name comes from the idea of “sweeping” together whatever ingredients you have on hand—like a broom cleaning out the pantry. My neighbor Agnes’s family called it that because it was their Friday night tradition to use up leftover vegetables, meats, and cheese from the week. The green chiles give it a slightly “magical” green color, which fits the broom theme. It’s not actually related to witches or Halloween—it’s just a fun, quirky name for a practical dish.
Can I make this in an Instant Pot or slow cooker?
I’ve tested this in an Instant Pot and it works, but the texture is slightly different. For the Instant Pot, sauté the onions and garlic using the sauté function, then add the broth, milk, pasta, and chiles. Pressure cook on high for 4 minutes, then quick release. Stir in the cheese until melted. The pasta will be softer and the sauce slightly thinner. I don’t recommend the slow cooker for this recipe—the pasta tends to get mushy and the dairy can curdle with prolonged cooking.
How do I prevent the mac and cheese from becoming gummy?
Gummy mac and cheese usually happens from overcooking the pasta or stirring too aggressively after adding the cheese. Cook the pasta to al dente—it will continue cooking slightly from the residual heat after you remove the pot from the stove. When adding the cheese, stir gently and just until melted. Over-stirring can break the emulsion and make the sauce grainy or gummy. Also, make sure you’re using enough liquid; if the pasta absorbs too much before the cheese goes in, the final texture will be dense.
Pin This Recipe!

Cozy One-Pot Witches Broom Green Chili Mac and Cheese

A comforting, one-pot mac and cheese with roasted green chiles, smoky cumin, and a creamy cheese sauce. Perfect for cold-weather dinners and ready in under 40 minutes.
- Prep Time: 10 minutes
- Cook Time: 25 minutes
- Total Time: 35 minutes
- Yield: 6 servings 1x
- Category: Main Course
- Cuisine: American
Ingredients
- 1 pound elbow macaroni
- 4 cups chicken broth (low-sodium preferred)
- 2 cups whole milk
- 3 tablespoons unsalted butter
- 1 small yellow onion, diced (about 1 cup)
- 4 cloves garlic, minced
- 1 can (4 ounces) diced green chiles (mild or medium)
- 1 can (7 ounces) whole green chiles, chopped
- 1 teaspoon ground cumin
- 1/2 teaspoon smoked paprika
- 1/2 teaspoon salt
- 1/4 teaspoon black pepper
- 2 cups sharp cheddar cheese, shredded
- 1 cup Monterey Jack cheese, shredded
- 1/2 cup cream cheese, softened and cut into cubes
- 1/2 cup panko breadcrumbs (optional topping)
- 2 tablespoons melted butter (optional topping)
- 1/4 cup grated Parmesan cheese (optional topping)
- Fresh cilantro or green onion for garnish (optional)
Instructions
- Melt 3 tablespoons butter in a large Dutch oven over medium heat. Add diced onion and cook until soft and translucent, about 3-4 minutes. Add minced garlic and cook for 30 seconds until fragrant.
- Sprinkle cumin and smoked paprika over the onions and garlic. Stir constantly for about 30 seconds until the spices are toasted and aromatic.
- Pour in both cans of green chiles (diced and whole, chopped) and stir for about 1 minute. Add chicken broth and milk, scraping up any browned bits from the bottom of the pot.
- Add elbow macaroni, salt, and pepper. Bring to a gentle boil, then reduce heat to a steady simmer. Cook according to package directions, stirring every couple of minutes, until pasta is al dente and most liquid is absorbed.
- Remove pot from heat. Add shredded cheddar, Monterey Jack, and cubed cream cheese. Stir vigorously until melted and smooth. If needed, return to low heat for 30 seconds, but do not overheat.
- Optional broiled topping: Preheat broiler. Transfer mac and cheese to an oven-safe dish or use broiler-safe Dutch oven. Mix panko with melted butter and Parmesan, sprinkle over top, and broil 2-3 minutes until golden brown.
- Let mac and cheese rest for 5 minutes before serving. Garnish with fresh cilantro or green onion if desired.
Notes
For best results, grate your own cheese from a block to avoid grainy sauce. Toast the cumin in butter for deeper flavor. If sauce seems thin after adding cheese, let it rest—it will thicken. For a vegetarian version, use vegetable broth. Leftovers keep in the fridge for up to 5 days and freeze well for up to 3 months.
Nutrition
- Serving Size: 1/6 of recipe
- Calories: 485
- Sugar: 6
- Sodium: 720
- Fat: 24
- Saturated Fat: 14
- Carbohydrates: 47
- Fiber: 3
- Protein: 18
Keywords: green chili mac and cheese, one-pot mac and cheese, comfort food, easy dinner, witches broom chili mac, green chile pasta