My friend Jen asked why I couldn’t just toss the pumpkin seeds straight from the carving bowl onto a baking sheet with some oil and spices. I started to explain why that wouldn’t work—something about moisture content and uneven crisping. Then I stopped. Honestly, I had never actually tried it that way. I had been dutifully boiling them, drying them for hours, and fussing over low oven temperatures for years. Jen was over my shoulder, hungry and impatient, holding a bag of lime-flavored tortilla chips she planned to crush up as a topping. I almost laughed. But the power went out halfway through my third explanation of why her method would fail. We were stuck with a pile of wet seeds, a bag of chips, and a gas stove that still worked. So I shrugged and said, “Fine, we’re doing it your way.”
I rinsed the seeds, patted them with a towel until they were just damp, and tossed them with oil, chili powder, cumin, and the juice of two limes. Jen crushed the chips into a coarse powder and mixed it in. I spread everything on a sheet pan and slid it into the oven, fully expecting a chewy, sad mess. What came out fifteen minutes later was the crispiest, most flavorful batch of pumpkin seeds I had ever made. The lime had caramelized on the edges. The chili heat hit the back of my throat just after the crunch. Jen didn’t say “I told you so,” but she didn’t have to. I was too busy eating my words—and the entire pan of seeds.
That night, I learned something I still think about every time I make these crispy chili lime baked pumpkin seeds. Sometimes the shortcuts aren’t shortcuts at all. Sometimes they’re the actual path. Maybe you’ve been there, stuck in a cooking rut, convinced that more steps equal better results. Let me tell you—this recipe will change your mind. It became the party snack everyone asks for, the one I bring to every gathering, and the reason my friends now fight over who gets to carve the pumpkin at my house. I keep making it because it works every single time, and because watching someone take that first crunchy, spicy, citrusy bite never gets old.
Why You’ll Love This Recipe
Let’s be real for a second. I have tested more pumpkin seed recipes than I care to admit. I’ve soaked them in salt brine overnight. I’ve boiled them with garlic. I’ve tried every temperature from 250°F to 375°F. And this version—the one born from a power outage and a stubborn friend—is the one I keep coming back to. Here’s why it works:
- Quick & Easy: From pumpkin to plate in under 30 minutes. No boiling, no overnight drying. Just rinse, toss, and bake.
- Simple Ingredients: You probably have chili powder, cumin, and lime in your kitchen right now. The crushed tortilla chips are the secret weapon—and you can use any brand you like.
- Perfect for Parties: This is the snack that disappears before the main course. It’s salty, spicy, tangy, and ridiculously crunchy. Your guests will hover around the bowl.
- Crowd-Pleaser: I have brought these to potlucks, game nights, and holiday gatherings. They get devoured by kids, adults, and even people who claim they don’t like pumpkin seeds.
- Unbelievably Delicious: The combination of chili heat, bright lime, and the subtle corn flavor from the crushed chips is next-level. It’s not your grandma’s roasted pumpkin seeds.
What makes this recipe different from the rest? It’s the technique. By skipping the boiling step and using crushed tortilla chips as a coating, you get a texture that’s impossibly crunchy without being hard on your teeth. The lime juice caramelizes in the oven, creating little bursts of sour-sweet flavor that cut through the heat. And because you’re using a higher temperature than most recipes call for (375°F), the seeds crisp up in half the time. This isn’t just another version of roasted pumpkin seeds. It’s the best version.
I make these seeds for every fall gathering, but honestly, they work year-round. They’re the kind of snack that makes you close your eyes after the first bite. It’s comfort food reimagined—faster, spicier, and with the same soul-soothing satisfaction of a crunchy, salty snack. Perfect for impressing guests without stress, or turning a simple pumpkin carving afternoon into something memorable.
What Ingredients You Will Need
This recipe uses simple, everyday ingredients to deliver bold flavor and that addictive crunch. Most of these are pantry staples or easy to find at any grocery store. I’ve tested this with several brands and variations, so I’ll share what works best.
- Fresh pumpkin seeds (1 ½ cups, about 6 ounces): These should be straight from the pumpkin, rinsed well to remove the orange pulp. Pat them dry with a kitchen towel—they don’t need to be completely dry, just not dripping wet. I prefer seeds from sugar pumpkins or carving pumpkins; both work great.
- Olive oil (2 tablespoons): Use a good-quality extra virgin olive oil here. It helps the spices stick and promotes even browning. You can substitute avocado oil if you prefer a neutral flavor.
- Fresh lime juice (2 tablespoons, about 1 lime): Do not use bottled lime juice. The fresh zest and juice are what give these seeds their bright, tangy kick. Roll the lime on the counter before juicing to get the most out of it.
- Chili powder (1 ½ teaspoons): I recommend using a blend like McCormick or a store brand that includes cumin, oregano, and garlic. This adds warmth and depth without being overwhelmingly spicy.
- Ground cumin (1 teaspoon): Cumin adds an earthy, smoky note that pairs beautifully with the lime. Toast it in a dry pan for 30 seconds before adding if you want even more flavor.
- Garlic powder (½ teaspoon): Not garlic salt—powder. It distributes evenly and doesn’t make the seeds salty. If you only have garlic salt, reduce the added salt by half.
- Salt (½ teaspoon, plus more to taste): I use fine sea salt. You can adjust this based on your preference or dietary needs.
- Crushed tortilla chips (½ cup): This is the secret ingredient. Use plain salted tortilla chips or lime-flavored chips for extra citrus punch. Crush them in a zip-top bag with a rolling pin until they resemble coarse breadcrumbs. I’ve tried this with restaurant-style chips and thin rounds—both work, but the thinner chips create a finer coating.
- Optional: Cayenne pepper (¼ teaspoon): If you like more heat, add this. Otherwise, the chili powder provides a mild warmth that most people enjoy.
For the best texture, look for pumpkin seeds that are firm and plump. If you’re using seeds from a pumpkin you carved a few days ago, make sure they’re still fresh—seeds that have started to dry out won’t crisp up as well. I’ve also made this with store-bought raw pumpkin seeds (the green ones, also called pepitas), and while they work in a pinch, the texture is different. The white hull adds that satisfying crunch that makes these seeds so addictive.
If you’re hosting a party and want to double or triple the recipe, go for it. Just use multiple baking sheets and rotate them halfway through baking to ensure even crisping. And if you’re out of tortilla chips, crushed corn flakes or panko breadcrumbs can work as a substitute, though the flavor won’t be quite the same.
Equipment Needed
You don’t need fancy equipment for this recipe, which is part of its charm. Here’s what you’ll need:
- Baking sheet (rimmed, 13×18 inches): A rimmed sheet prevents seeds from rolling off. I use a Nordic Ware half-sheet pan for even heat distribution. If you only have a dark nonstick pan, reduce the oven temperature by 25°F to prevent burning.
- Parchment paper or silicone baking mat: This makes cleanup effortless and prevents sticking. If you don’t have either, you can grease the pan lightly with oil.
- Mixing bowl (medium-sized): Any bowl works. I use a stainless steel one because it doesn’t retain odors.
- Kitchen towel or paper towels: For drying the seeds after rinsing. A clean dish towel works better than paper towels because it doesn’t leave lint.
- Zip-top bag and rolling pin (or food processor): For crushing the tortilla chips. A rolling pin is more fun and gives you control over the texture. If you use a food processor, pulse just a few times—you want crumbs, not dust.
- Spatula or wooden spoon: For stirring the seeds halfway through baking. A thin metal spatula works best for scraping up any stuck bits.
- Cooling rack: Optional, but recommended. Spreading the hot seeds on a rack prevents them from steaming and staying soft.
I’ve made this recipe in a toaster oven when I didn’t want to heat up the whole kitchen. It works perfectly—just reduce the batch size and watch the time closely. And if you’re camping or tailgating, you can even make these on a portable gas grill with a cast iron skillet. The high heat and direct flame add a subtle smokiness that’s incredible.
Preparation Method
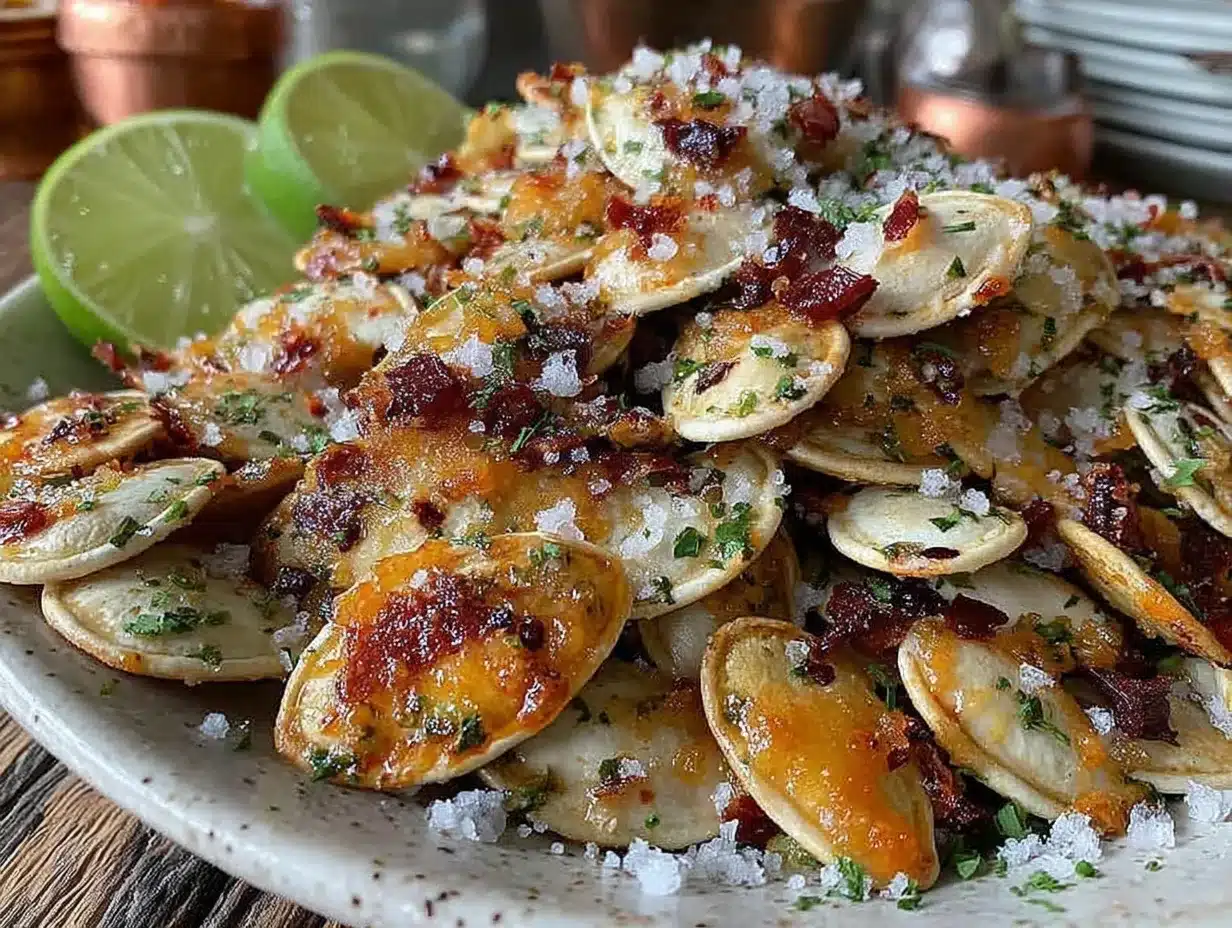
Follow these steps, and you’ll have the crispiest, most flavorful pumpkin seeds of your life. I’ve included time estimates and sensory cues so you know exactly what to look for at each stage.
- Preheat your oven to 375°F (190°C). Position the rack in the center of the oven. While it’s heating, line your baking sheet with parchment paper or a silicone mat. This step takes about 10 minutes, so use that time to prep the seeds.
- Rinse the pumpkin seeds thoroughly. Place the seeds in a colander and run cold water over them, using your fingers to separate the seeds from the stringy pulp. Don’t worry about getting every last bit of pulp off—a little bit adds flavor. This should take 2-3 minutes. The seeds will feel slippery at first, then clean as the pulp washes away.
- Pat the seeds dry. Dump the rinsed seeds onto a clean kitchen towel or a layer of paper towels. Fold the towel over and press gently to absorb excess moisture. You want the seeds to be damp, not wet. If they’re dripping, they’ll steam instead of crisp. This is the step where Jen’s method diverges from the old way—I used to dry them for hours, but damp seeds actually hold onto the coating better.
- Crush the tortilla chips. Place ½ cup of chips in a zip-top bag. Seal it, then use a rolling pin or the bottom of a heavy pan to crush them into coarse crumbs. You want pieces about the size of breadcrumbs—some smaller, some slightly larger. This takes about 1 minute. If you hear a loud crack, you’re doing it right.
- Mix the coating. In a medium mixing bowl, combine 2 tablespoons olive oil, 2 tablespoons fresh lime juice, 1 ½ teaspoons chili powder, 1 teaspoon ground cumin, ½ teaspoon garlic powder, ½ teaspoon salt, and the optional ¼ teaspoon cayenne pepper. Whisk with a fork until the spices are fully incorporated. The mixture should smell bright and warm—like a good chili-lime margarita.
- Toss the seeds. Add the damp pumpkin seeds to the bowl with the spice mixture. Use a spatula or your hands to toss until every seed is coated. The seeds should look glossy and speckled with spice. Then add the crushed tortilla chips and toss again. The chips will stick to the wet seeds—this is exactly what you want. Don’t overmix, or the coating will clump.
- Spread on the baking sheet. Pour the coated seeds onto the prepared baking sheet. Use the spatula to spread them into a single, even layer. Make sure no seeds are stacked on top of each other. If they’re crowded, they’ll steam and turn chewy. Leave a little space between clusters for air to circulate.
- Bake for 10 minutes. Place the sheet in the preheated oven and set a timer. After 10 minutes, the seeds should be starting to brown around the edges. The kitchen will smell amazing—like toasted corn and lime. Remove the sheet from the oven and use a spatula to stir the seeds, scraping up any that have stuck to the parchment.
- Bake for another 5-8 minutes. Return the sheet to the oven and bake until the seeds are golden brown and smell deeply toasty. Watch them carefully in the last 2 minutes—they can go from perfect to burnt very quickly. The total baking time should be 15-18 minutes. You’ll know they’re done when they look dry, feel firm to the touch, and make a hollow sound when you shake the pan.
- Cool completely. Remove the baking sheet from the oven and let the seeds cool on the pan for 5 minutes. Then transfer them to a cooling rack or a large plate. Do not skip this step—the seeds continue to crisp as they cool. If you taste one while it’s hot, it will seem softer than it actually is. Wait until they reach room temperature, about 15 minutes, and you’ll be rewarded with the perfect crunch.
One thing I learned the hard way: don’t walk away during the last few minutes of baking. I once got distracted by a phone call and ended up with a batch that tasted like burnt popcorn. Set a timer, and if you’re multitasking, check the seeds at the 15-minute mark. Your nose will tell you when they’re ready—the aroma shifts from “baking” to “toasting” right before they’re done.
Cooking Tips & Techniques
After making these seeds more times than I can count, I’ve picked up a few tricks that make a real difference. Here’s what I wish someone had told me from the start.
Don’t skip the rinsing step. I know it’s tempting to just pull the seeds straight from the pumpkin and toss them in oil. But that orange pulp contains sugars that will burn in the oven, leaving a bitter taste. A quick rinse removes the pulp without stripping the seeds of their natural moisture. I once skipped this step when I was in a hurry, and the seeds came out streaky and unevenly cooked. Learn from my mistake.
Use a rimmed baking sheet. Seeds have a way of bouncing and rolling. A rimmed sheet keeps them contained, and it makes stirring much easier. If you use a flat cookie sheet, you’ll be chasing seeds across the kitchen floor.
Crush the chips to the right consistency. You want a mix of fine crumbs and small pieces. If the chips are too fine, they’ll burn before the seeds are done. If they’re too large, they won’t stick. I aim for pieces about the size of a pea. The best tool for this is a rolling pin—it gives you control and lets you feel the texture as you go.
Watch the oven temperature. Every oven runs a little differently. If your oven runs hot, reduce the temperature to 350°F and add a few minutes to the baking time. If it runs cool, you might need 20 minutes total. The first time I made these in a friend’s apartment, her ancient oven took 25 minutes. Trust your senses over the timer.
Stir halfway through. This is non-negotiable. The seeds on the edges of the pan cook faster than the ones in the middle. Stirring ensures even browning and prevents the outer seeds from burning. I use a thin metal spatula that slides under the seeds without breaking them.
Let them cool completely before storing. I know it’s hard to wait, but warm seeds trap moisture. If you seal them in a container while they’re still warm, they’ll soften overnight. Spread them out on a cooling rack and resist the urge to bag them up until they’re room temperature. I usually make these the day before a party so they’re perfectly crisp when guests arrive.
Double the batch. Seriously. These seeds disappear faster than you’d expect. I’ve learned to make at least two pans at a time, especially if I’m serving a crowd. They store well for up to two weeks in an airtight container, assuming they last that long.
Variations & Adaptations
This recipe is incredibly flexible. I’ve experimented with several variations over the years, and here are my favorites.
Spicy Mango Version: Replace the lime juice with mango puree (from a ripe mango or frozen chunks blended smooth) and add ½ teaspoon of red pepper flakes. The sweetness of the mango balances the heat beautifully. I made this for a tropical-themed party, and it was the first thing to run out. The mango coating caramelizes into a shiny, slightly sticky glaze that’s irresistible.
Smoky Chipotle Version: Swap the chili powder for 1 tablespoon of chipotle powder (or 2 teaspoons adobo sauce from a can of chipotles). Add ½ teaspoon of smoked paprika for extra depth. This version has a deep, smoky heat that pairs perfectly with a cold beer. I like to serve it alongside a smoky guacamole for game day.
Garlic Herb Version: Omit the chili powder and cumin. Instead, use 1 teaspoon dried rosemary, 1 teaspoon dried thyme, ½ teaspoon garlic powder, and ½ teaspoon onion powder. Replace the lime juice with lemon juice. This version is more savory and less spicy—great for people who prefer a milder snack. I’ve brought it to brunch potlucks, and it works surprisingly well with mimosas.
Sweet and Spicy Version: Add 1 tablespoon of brown sugar to the spice mixture. The sugar caramelizes in the oven, creating a sweet crust that contrasts with the chili heat. Be careful with the baking time—sugar can burn quickly. I recommend checking the seeds at the 12-minute mark. This version is dangerously addictive.
Dairy-Free and Gluten-Free: This recipe is already dairy-free. For gluten-free, make sure your tortilla chips are certified gluten-free (most are, but check the label). You can also substitute crushed gluten-free crackers or corn flakes.
Air Fryer Method: If you have an air fryer, you can make these in half the time. Preheat the air fryer to 350°F. Spread the coated seeds in a single layer in the basket (you may need to work in batches). Cook for 8-10 minutes, shaking the basket halfway through. The seeds come out even crispier than oven-baked, with a more concentrated flavor. I use this method when I’m making a small batch for myself.
I once tried a version with coconut oil instead of olive oil, and it added a subtle tropical sweetness that worked surprisingly well. If you’re feeling adventurous, give it a try. The key is to use an oil with a high smoke point—coconut oil fits the bill.
Serving & Storage Suggestions
These seeds are best served at room temperature, straight from the cooling rack. The crunch is most pronounced when they’ve had time to cool completely, about 15-20 minutes after baking. I like to pile them into a wide, shallow bowl so everyone can grab handfuls easily. For parties, I set out multiple bowls around the room—this prevents crowding and ensures everyone gets their fill.
Presentation matters when you’re hosting. I often serve these seeds alongside a bowl of fresh salsa, a creamy cilantro lime dip, or a platter of sliced vegetables. The bright, spicy flavor of the seeds pairs beautifully with the coolness of a dip. For a full party spread, I’ll also put out bowls of olives, nuts, and cheese cubes. The seeds are the star, but they play well with others.
If you’re serving these at a sit-down dinner, consider sprinkling them over a salad for added crunch. They’re amazing on a simple arugula salad with shaved Parmesan and a lemon vinaigrette. Or use them as a topping for soups—they add texture to butternut squash soup or black bean soup.
Storage Instructions: Store the cooled seeds in an airtight container at room temperature. They’ll stay crisp for up to 2 weeks. I use a glass jar with a tight-fitting lid or a zip-top bag with the air pressed out. Do not refrigerate them—the moisture in the fridge will soften them. If they do lose their crunch, you can re-crisp them in a 300°F oven for 5 minutes. Let them cool again before serving.
Freezer Instructions: These seeds freeze beautifully. Place them in a freezer-safe bag or container and freeze for up to 3 months. Thaw at room temperature for about 30 minutes before serving. They don’t need reheating—just let them come to room temperature and they’ll be as crunchy as the day you made them. I often double or triple the batch and stash a bag in the freezer for unexpected guests.
One thing I’ve noticed: the flavors actually deepen after a day or two. The lime becomes more mellow, and the chili heat spreads evenly through the batch. If you can resist eating them all immediately, they’re even better the next day.
Nutritional Information & Benefits
Pumpkin seeds are a nutritional powerhouse, and this recipe keeps them relatively healthy despite the indulgent coating. Here’s a rough estimate per serving (about ¼ cup of finished seeds):
- Calories: 180-200
- Protein: 8-10 grams
- Fat: 14-16 grams (mostly healthy unsaturated fats from the seeds and olive oil)
- Carbohydrates: 8-10 grams
- Fiber: 3-4 grams
- Sugar: 1-2 grams (naturally occurring)
- Sodium: 200-250 mg (varies based on chip brand and added salt)
Pumpkin seeds are rich in magnesium, zinc, and iron. Magnesium supports muscle function and sleep quality, zinc is great for immune health, and iron helps transport oxygen through your body. The olive oil adds heart-healthy monounsaturated fats, and the lime juice provides a small dose of vitamin C. Even the tortilla chips contribute a little fiber and complex carbohydrates for sustained energy.
This snack is naturally gluten-free (check chip labels) and dairy-free. It’s also vegetarian and vegan-friendly. If you’re watching your sodium, use low-salt tortilla chips and reduce the added salt to ¼ teaspoon. For a lower-fat version, you can reduce the olive oil to 1 tablespoon, but the seeds won’t be quite as crispy. I’ve tried it both ways, and honestly, the full-fat version is worth the extra calories for the texture alone.
I personally love that this snack feels indulgent but is actually packed with nutrients. It’s the kind of thing you can feel good about serving to guests—or eating by the handful while you’re binge-watching your favorite show.
Conclusion
These crispy chili lime baked pumpkin seeds are proof that the best recipes often come from breaking the rules. I spent years overcomplicating a simple snack, and it took a power outage and a stubborn friend to show me a better way. Now, I make these seeds for every party, every holiday, and every time I carve a pumpkin. They’re quick, they’re addictive, and they always get the same reaction: “Can I have the recipe?”
I hope you’ll try them—and not just because they’re delicious. I hope you’ll remember that cooking doesn’t have to be complicated. Sometimes the shortcut is the path. Sometimes the friend who questions your method is actually a genius. And sometimes, the best party snack is the one you almost didn’t make.
If you give these a try, I’d love to hear how they turn out. Leave a comment below and let me know if you made any substitutions or additions. Did you go extra spicy? Did you try the mango version? Share your creation—I read every comment and I’m always looking for new ideas. And if you snap a photo, tag me on social media. Nothing makes my day like seeing someone else enjoying these seeds as much as I do.
Now go carve a pumpkin, save those seeds, and make something unforgettable. Your guests will thank you.
Frequently Asked Questions
Can I use store-bought pumpkin seeds instead of fresh?
Yes, you can use raw, hulled pumpkin seeds (pepitas). However, the texture will be different—they won’t have the same crunchy hull. If using pepitas, reduce the baking time to 10-12 minutes total, as they cook faster. The flavor will still be delicious, just less crunchy.
How do I prevent the seeds from burning?
Watch them closely in the last 5 minutes of baking. Every oven is different, so start checking at the 12-minute mark. The seeds should be golden brown, not dark brown. If they start smoking, remove them immediately. Also, make sure your spice mixture is evenly distributed—clumps of chili powder can burn faster than the seeds.
Can I make these seeds in advance for a party?
Absolutely. In fact, they’re better the next day. Make them up to 2 days ahead and store them in an airtight container at room temperature. If they lose some crunch, re-crisp them in a 300°F oven for 5 minutes before serving. I often make a double batch the night before a party so I have one less thing to worry about.
What if I don’t have tortilla chips?
You can substitute crushed corn flakes, panko breadcrumbs, or even crushed pretzels. Each will give a slightly different texture and flavor. Corn flakes are the closest substitute and will still give you that crunchy coating. If using panko, toast them lightly in a dry pan first to prevent them from absorbing too much oil.
How long do these seeds stay fresh?
Stored in an airtight container at room temperature, they’ll stay crisp for up to 2 weeks. Do not refrigerate them—the moisture will soften them. If you live in a humid climate, add a silica gel packet to the container to absorb excess moisture. I’ve also frozen them for up to 3 months with excellent results.
Pin This Recipe!
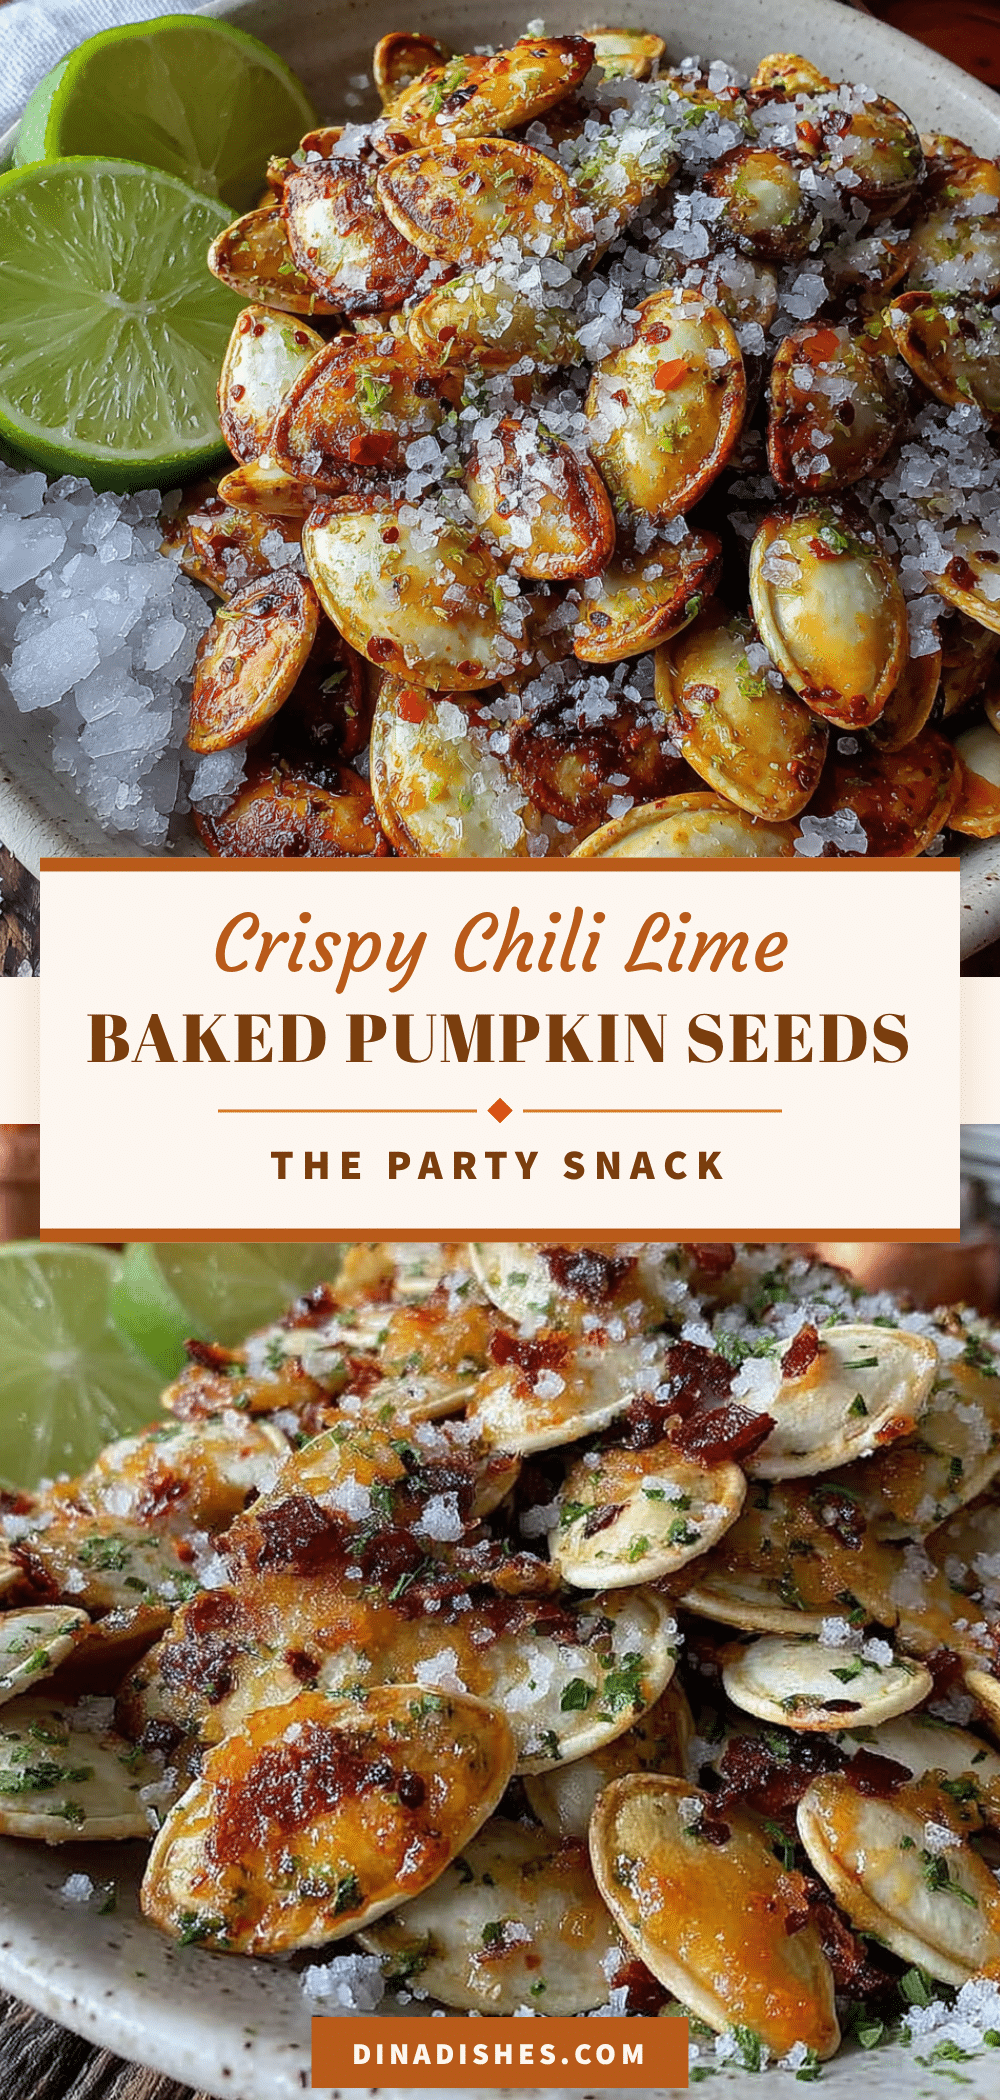
Crispy Chili Lime Baked Pumpkin Seeds – Best Easy Snack

The crispiest, most flavorful pumpkin seeds you’ll ever make, born from a power outage and a stubborn friend. This quick and easy recipe skips the boiling and delivers impossibly crunchy, spicy, tangy seeds in under 30 minutes.
- Prep Time: 10 minutes
- Cook Time: 15-18 minutes
- Total Time: 25-28 minutes
- Yield: 4 servings 1x
- Category: Snack
- Cuisine: Mexican-American
Ingredients
- 1 ½ cups fresh pumpkin seeds (about 6 ounces)
- 2 tablespoons olive oil
- 2 tablespoons fresh lime juice (about 1 lime)
- 1 ½ teaspoons chili powder
- 1 teaspoon ground cumin
- ½ teaspoon garlic powder
- ½ teaspoon fine sea salt, plus more to taste
- ½ cup crushed tortilla chips (plain salted or lime-flavored)
- ¼ teaspoon cayenne pepper (optional, for extra heat)
Instructions
- Preheat your oven to 375°F (190°C). Position the rack in the center of the oven. Line a rimmed baking sheet with parchment paper or a silicone mat.
- Rinse the pumpkin seeds thoroughly in a colander under cold water, using your fingers to separate the seeds from the stringy pulp. This should take 2-3 minutes.
- Pat the seeds dry with a clean kitchen towel or paper towels. They should be damp, not wet.
- Crush the tortilla chips in a zip-top bag using a rolling pin or the bottom of a heavy pan until they resemble coarse breadcrumbs. Set aside.
- In a medium mixing bowl, whisk together the olive oil, fresh lime juice, chili powder, ground cumin, garlic powder, salt, and optional cayenne pepper until well combined.
- Add the damp pumpkin seeds to the bowl with the spice mixture and toss until every seed is coated. Add the crushed tortilla chips and toss again until the chips stick to the seeds.
- Spread the coated seeds in a single, even layer on the prepared baking sheet. Make sure no seeds are stacked on top of each other.
- Bake for 10 minutes. Remove the sheet from the oven and stir the seeds with a spatula, scraping up any that have stuck to the parchment.
- Return to the oven and bake for another 5-8 minutes, until the seeds are golden brown and smell deeply toasty. Watch carefully in the last 2 minutes to prevent burning. Total baking time should be 15-18 minutes.
- Remove from the oven and let the seeds cool on the pan for 5 minutes. Then transfer to a cooling rack or large plate and cool completely, about 15 minutes, before serving.
Notes
Don’t skip the rinsing step—the orange pulp contains sugars that will burn and create a bitter taste. Use a rimmed baking sheet to keep seeds contained. Crush chips to a mix of fine crumbs and small pieces (about pea-sized). Watch the oven closely in the last 2 minutes as seeds can burn quickly. Let seeds cool completely before storing to maintain crunch. Flavors deepen after a day or two. For best results, make these a day ahead of serving.
Nutrition
- Serving Size: ¼ cup
- Calories: 180200
- Sugar: 12
- Sodium: 200250
- Fat: 1416
- Saturated Fat: 23
- Carbohydrates: 810
- Fiber: 34
- Protein: 810
Keywords: pumpkin seeds, chili lime, baked snack, easy snack, fall recipe, party snack, crispy seeds, healthy snack, gluten-free, dairy-free


