There used to be a tiny wine bar tucked behind a bookstore in Portland called The Gilded Grape that made the most incredible charcuterie board I have ever eaten. When they closed their doors in 2019—a victim of rising rent and a changing neighborhood—I genuinely mourned for weeks. Not just the loss of their incredible wine list, but specifically that board. After seventeen tries—seventeen, people, I kept a notebook—I finally got it.
The secret, I discovered, wasn’t just about piling expensive meats and cheeses on a slab of wood. It was about balance. The Gilded Grape’s board had this perfect rhythm of salty, sweet, tangy, and creamy that kept you reaching for just one more bite. And the fall version? That was their masterpiece. They’d load it up with honeycrisp apples, dried figs, and this spiced candied pecans that I swear had some kind of magic in them.
Honestly, the first few attempts were rough. I used the wrong kind of cheddar once—too sharp—and my husband looked at me like I’d committed a crime against cheese. Another time I forgot to bring the brie to room temperature, and it sat there like a sad, cold hockey puck. But let me tell you, when you get it right? When the prosciutto is paper-thin and the fig jam is dripping just a little over the edge of the cheese? That’s the moment. That’s the Gilded Grape moment I’d been chasing.
This Friendsgiving charcuterie board is that moment, captured for your own table. It’s designed for exactly what you need: a showstopper that looks like you spent hours but actually comes together in under thirty minutes. Maybe you’ve been there, standing in the grocery aisle, wondering how to feed a crowd without turning into a stressed-out mess. This board is your answer. Let’s build something beautiful together.
Why You’ll Love This Recipe
Look, I’ve tested a lot of charcuterie boards in my time. Some were disasters (don’t ask about the time I tried to make my own crackers). Others were perfectly fine but forgettable. This Friendsgiving charcuterie board? It’s the one I bring to every gathering, and here’s why it’ll be your new favorite too.
- Comes Together in Under 30 Minutes: No cooking required. No oven timers. Just slicing, arranging, and looking like a culinary genius. Perfect for when you’re hosting and your brain is already juggling twelve other things.
- Simple Ingredients, Big Impact: Everything on this board is easy to find at any grocery store. No special trips to a fancy deli or boutique cheese shop. Your regular supermarket has everything you need.
- Perfect for Friendsgiving: This board is the ultimate crowd-pleaser for a casual gathering with friends. It’s shareable, interactive, and absolutely Instagram-worthy. Your guests will hover around it like moths to a flame.
- Crowd-Pleaser Status: I’ve watched picky eaters, cheese snobs, and gluten-free friends all happily graze on this board. There’s something for everyone, and somehow it all disappears within the first hour.
- Unbelievably Delicious: The combination of creamy brie, salty prosciutto, sweet fall fruit, and crunchy candied pecans creates this flavor symphony that makes people close their eyes and sigh. I’m not exaggerating.
What makes this board different from the dozens of other charcuterie tutorials out there? It’s the intentional use of seasonal fall fruit. Most boards rely on grapes and berries year-round. This one embraces the best of autumn—crisp apples, juicy pears, and dried figs—to create a board that feels timely and special. It’s not just a cheese plate. It’s a celebration of the season.
And here’s the emotional connection: this recipe isn’t just good. It’s the kind that makes you feel like a host who has it all together. When you set this board down in the middle of a table surrounded by laughing friends, you’ll feel this warm glow of satisfaction. That’s the Friendsgiving magic right there.
What Ingredients You Will Need
This Friendsgiving charcuterie board uses simple, seasonal ingredients to deliver that wow factor without the stress. Most of these items are pantry staples or easy to find at your local grocery store. The key is choosing quality over quantity—a few good cheeses beat a dozen mediocre ones every time.
Cheeses (The Stars of the Board)
- 8 ounces Brie cheese (look for a ripe, creamy one from a brand like Président or Ile de France—it should give slightly when you press the center)
- 6 ounces Aged Cheddar (choose a sharp, crumbly variety; I love Cabot’s Seriously Sharp for its bold flavor that stands up to the fruit)
- 4 ounces Goat cheese log (a soft, spreadable chèvre works beautifully—Vermont Creamery is my go-to for consistent quality)
- 4 ounces Blue cheese (optional but highly recommended; a creamy Gorgonzola or a crumbly Roquefort adds that funky punch that contrasts with sweet fruit)
Cured Meats (The Savory Element)
- 4 ounces Prosciutto (ask the deli counter to slice it paper-thin—it’s easier to fold and looks more elegant)
- 4 ounces Salami (choose a genoa or soppressata; pre-sliced is fine, or buy a whole stick and slice it yourself for rustic charm)
- 3 ounces Capicola (this spicy, dry-cured ham adds a nice kick—substitute with more prosciutto if you can’t find it)
Fall Fruits (The Seasonal Magic)
- 2 medium Honeycrisp apples (their sweet-tart crunch is perfect; Fuji or Gala also work well)
- 2 medium Bosc pears (firm enough to slice without getting mushy; Anjou pears are a good substitute)
- 1 cup dried figs (Mission figs are my favorite—they’re chewy and intensely sweet; look for ones that are still soft)
- 1 cup seedless red grapes (small clusters add color and a burst of freshness)
Crunchy & Savory Additions
- 1 cup candied pecans (store-bought is fine, but homemade is incredible—see my tips below)
- 1 cup marcona almonds (these Spanish almonds are already roasted and salted; regular roasted almonds work too)
- 1 small baguette (sliced into thin rounds and lightly toasted)
- 1 box of crisp crackers (I prefer water crackers or rosemary flatbreads for their neutral flavor)
Sweet & Spreadable Accents
- 1/3 cup fig jam (Bonne Maman makes an excellent one—it’s thick and studded with fig pieces)
- 1/4 cup honey (a local wildflower honey adds a floral note; drizzle it over the brie for instant elegance)
- 1/4 cup whole grain mustard (this is my secret weapon—it cuts through the richness of the cheese and pairs beautifully with salami)
Ingredient Selection Tips: When choosing apples and pears for a charcuterie board, pick ones that are still firm to the touch. Soft fruit will bruise and get mushy on the board. For the cheese, take it out of the refrigerator about 30 minutes before serving. Cold cheese hides its flavor, and you want every bite to sing.
Substitution Guidance: If you’re feeding a crowd with dietary restrictions, swap the regular crackers for gluten-free options (I love Simple Mills almond flour crackers). For a dairy-free version, omit the cheeses and double up on the meats, nuts, and fruit. You can also use vegan cheese alternatives, but honestly, the board shines with the real thing.
Equipment Needed
Let’s talk tools. You don’t need fancy equipment to build a stunning charcuterie board, but a few key items make the process smoother. I’ve learned this the hard way—like the time I tried to slice a whole wheel of brie with a butter knife. Not my finest moment.
- Large wooden cutting board or slate board (at least 18 inches long; if you don’t have one, a large baking sheet lined with parchment paper works perfectly)
- Cheese knives (a set of three is ideal: one for soft cheeses, one for hard cheeses, and one for spreading; a good starter set costs around $20 on Amazon)
- Small ramekins or bowls (for the fig jam, honey, and mustard—I use 4-ounce glass dishes that cost $1 each at the dollar store)
- Sharp chef’s knife (for slicing apples and pears; a dull knife will bruise the fruit and make ugly cuts)
- Paring knife (for trimming cheese rinds or cutting small garnishes)
- Small tongs or toothpicks (for serving; guests appreciate not having to use their fingers for everything)
- Parchment paper (optional but helpful for lining the board and making cleanup a breeze)
Budget-Friendly Alternative: If you’re just starting out, a large dinner plate or a rectangular serving platter works fine. I built my first charcuterie board on an old cutting board I found at a thrift store for $3. The presentation matters, but the food is what people remember.
Maintenance Tip: If you’re using a wooden board, rub it with mineral oil (not vegetable oil) once a month to keep it from drying out and cracking. Never put a wooden board in the dishwasher—hand wash it with mild soap and dry it immediately.
Preparation Method
Alright, let’s build this Friendsgiving charcuterie board. The beauty of this recipe is that there’s no cooking involved—just thoughtful arranging. Follow these steps, and you’ll have a board that looks like it came straight from a professional caterer.
- Prep Your Cheeses (5 minutes): Take all cheeses out of the refrigerator 30 minutes before you start assembling. This is non-negotiable. Cold cheese tastes like rubber. While they’re coming to room temperature, unwrap them and place them on a clean plate. For the brie, leave the rind on—it’s edible and adds texture. For the aged cheddar, cut it into irregular 1-inch cubes or thin triangles. The goat cheese log can stay whole or be sliced into 1/2-inch rounds. If you’re using blue cheese, break it into crumbles or small wedges.
- Slice the Fruit (5 minutes): Core the apples and pears, then slice them into thin wedges—about 1/4 inch thick. Here’s a tip I learned from my third failed attempt: toss the apple slices in a little lemon juice to prevent browning. Just a squeeze from half a lemon will keep them looking fresh for hours. For the grapes, leave them in small clusters of 3-4 grapes each. They look more natural that way. Arrange the dried figs on a small plate—no prep needed, they’re perfect as is.
- Prepare the Meats (3 minutes): Lay out the prosciutto slices on a cutting board. Fold each slice in half lengthwise, then loosely roll it into a small rose shape. This sounds fancy but takes seconds. For the salami, either leave the slices flat or fold them into quarters. The capicola can be draped in loose ribbons. Pro tip: don’t stack the meats—they’ll stick together and tear when guests try to pick them up.
- Set Up Your Accents (2 minutes): Spoon the fig jam into one small ramekin. Pour the honey into another. Spoon the whole grain mustard into a third. Place these ramekins on the board first—they’ll act as anchors for your arrangement. Trust me, this makes everything else easier.
- Arrange the Cheeses (3 minutes): Place the cheeses around the board, spacing them evenly. I like to put the brie in the center because it’s the showstopper. The cheddar goes on one side, the goat cheese on another, and the blue cheese (if using) in a corner. Make sure there’s enough space between each cheese for guests to cut pieces without knocking into other items.
- Add the Meats (2 minutes): Tuck the meat roses and folds around the cheeses. Group them by type—all the prosciutto together, all the salami together. This makes it easier for guests to find what they want. Don’t scatter them randomly; it looks messy.
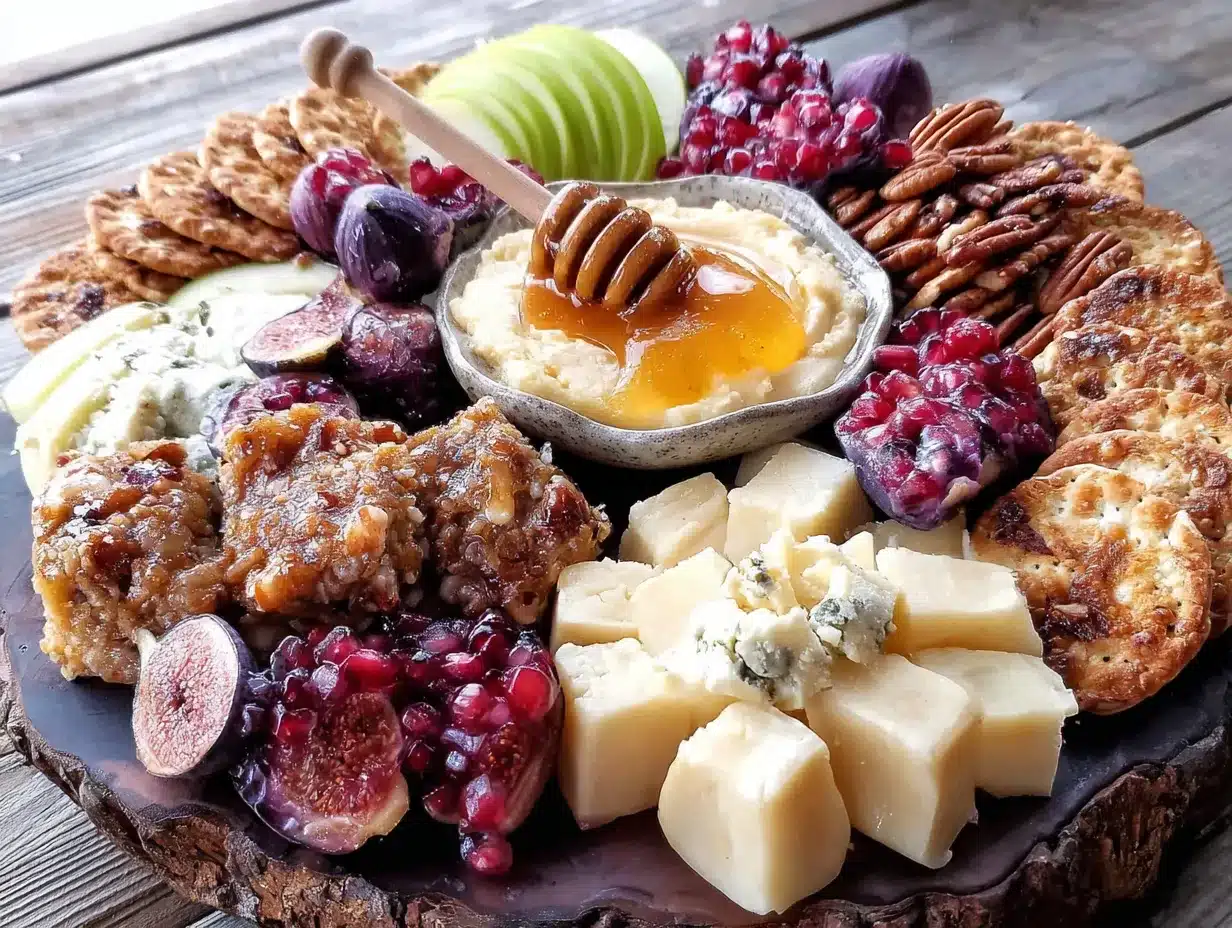
- Fill in with Fruit (3 minutes): Arrange the apple and pear slices in fan patterns around the board. Tuck the grape clusters into empty spaces. Scatter the dried figs here and there—they add beautiful dark color and a chewy texture that contrasts with the creamy cheese.
- Add Crunch (2 minutes): Sprinkle the candied pecans and marcona almonds in small piles around the board. Don’t mix them together—keep them separate so guests can choose. Place the sliced baguette and crackers in a basket or on a separate plate next to the board. If you put them directly on the board, they’ll get soggy from the fruit juices.
- Final Touches (1 minute): Drizzle a little honey over the brie—just a thin ribbon across the top. Sprinkle a few extra candied pecans around the board for visual interest. Add a small sprig of fresh rosemary or a few fresh thyme leaves for a pop of green. Step back and admire your work. Take a photo—you earned it.
Sensory Cue: At this point, your board should look like a work of art. The colors should be vibrant—deep reds from the grapes, golden yellows from the apples, creamy whites from the brie, and rich browns from the nuts. The smell should be intoxicating: the earthy funk of blue cheese, the sweet perfume of figs, and the floral notes of honey.
Troubleshooting Tip: If your board looks sparse, you can always add more crackers or fruit to fill gaps. If it looks overcrowded, remove a few items. The goal is to create a board that looks abundant but not chaotic. You want guests to feel like they’re discovering treasures as they graze.
Cooking Tips & Techniques
I’ve made more charcuterie boards than I can count, and I’ve definitely had my share of failures. Here are the lessons I learned the hard way so you don’t have to.
The Biggest Mistake: Overcrowding the Board. I once made a board so packed that guests couldn’t actually pick anything up without knocking over three other items. Less is more. Leave about 20% of the board surface visible. This creates visual breathing room and makes the board look intentional rather than chaotic.
The Temperature Trap. I cannot stress this enough: take your cheese out of the fridge at least 30 minutes before serving. I learned this after serving a board where the brie was so cold it cracked when I tried to cut it. Room temperature cheese has about 10 times more flavor. If you’re short on time, cut the cheese into smaller pieces so they warm up faster.
The Order of Assembly. Always place your ramekins and cheeses first, then meats, then fruit, then nuts and crackers last. This creates a natural flow and prevents you from having to rearrange everything halfway through. Think of it like building a landscape—start with the big rocks, then add the smaller stones, then fill in with pebbles.
Timing Strategy for Hosting. Here’s my foolproof timeline for Friendsgiving: Assemble the board completely about 1 hour before guests arrive. Cover it loosely with plastic wrap and leave it at room temperature. The cheese will be perfect by the time people start eating. When guests walk in, remove the plastic wrap and add any fresh herbs or garnishes. It takes 10 seconds and looks like you just finished it.
The Knife Trick. For perfectly thin apple and pear slices, use a mandoline slicer if you have one. If not, a sharp chef’s knife works fine—just make sure it’s sharp. A dull knife will crush the fruit and release too much juice, making everything on the board soggy.
Consistency Secret. Always have backup crackers and nuts on hand. These are the first things to disappear, and a board with only cheese and fruit left looks sad. I keep an extra box of crackers in the pantry and a bag of almonds in the freezer for emergencies.
Variations & Adaptations
One of the best things about a charcuterie board is how customizable it is. Here are some variations I’ve tried and loved, depending on who I’m serving and what’s available.
Dietary Variation: Gluten-Free Board. Simply swap the baguette and regular crackers for gluten-free options. I love using nut-based crackers and rice crackers. Add extra nuts and dried fruit to fill the volume. Everything else on the board—cheese, meat, fruit—is naturally gluten-free. I made this version for a friend with celiac disease, and she said it was the first charcuterie board she could fully enjoy without worry.
Seasonal Variation: Summer Berry Board. In the summer, replace the apples and pears with fresh berries—strawberries, blueberries, and raspberries. Swap the dried figs for fresh figs if you can find them. The candied pecans can be replaced with honey-roasted almonds. This version is lighter and brighter, perfect for a warm-weather gathering.
Flavor Variation: Spicy Southwest Board. For a bolder flavor profile, swap the prosciutto and salami for spicy chorizo and jalapeño cheddar. Replace the fig jam with a mango habanero jam. Add some pickled jalapeños and roasted red peppers. The sweet fall fruit balances the heat beautifully. I served this at a Friendsgiving with a Mexican-themed dinner, and it was a huge hit.
Budget-Friendly Variation. Charcuterie can get expensive fast. To cut costs, stick with just two cheeses (brie and cheddar) and two meats (prosciutto and salami). Use regular roasted almonds instead of marcona almonds. Skip the blue cheese and the capicola. You’ll still have a beautiful board that feeds a crowd for under $30.
Personal Variation: The “I Forgot the Honey” Board. One time I completely forgot to buy honey for a board I was bringing to a friend’s house. In a panic, I drizzled maple syrup over the brie instead. It was honestly better than the honey version. The maple syrup has a deeper, more complex sweetness that pairs perfectly with the fall fruit. Now I use maple syrup intentionally. Sometimes the best discoveries come from mistakes.
Serving & Storage Suggestions
Serving Temperature: Serve this charcuterie board at room temperature. The cheese should be soft and spreadable, the fruit should be crisp but not cold, and the meats should be pliable. If the board has been sitting out for more than 2 hours, it’s time to pack it up. Food safety matters, especially with dairy and meats.
Presentation Tips: Place the board in the center of your table so guests can gather around it from all sides. Put small plates and napkins nearby, along with a few small knives for spreading. If you’re serving this as an appetizer before a main meal, expect about 4-6 ounces of cheese and 2-3 ounces of meat per person. If it’s the main event (like a grazing dinner), double those amounts.
Complementary Dishes: This board pairs beautifully with a crisp white wine like Sauvignon Blanc or a light red like Pinot Noir. For non-alcoholic options, sparkling apple cider or a cranberry spritzer works wonderfully. If you’re serving this as part of a larger Friendsgiving spread, it goes great with roasted turkey, stuffing, and a simple green salad.
Storage Instructions: If you have leftovers (unlikely, but possible), separate the components before storing. Wrap each cheese individually in wax paper or cheese paper—plastic wrap makes cheese sweat and lose flavor. Store meats in an airtight container. Keep fruit in a separate container in the refrigerator. Nuts and crackers can be stored in sealed bags or containers at room temperature.
Reheating Tips: This board is served cold or at room temperature, so no reheating is needed. However, if you want to serve the brie warm and melty, you can pop it in a 350°F oven for 10 minutes before adding it to the board. Just be careful—it will be very soft and might spread everywhere. I’ve done this for a winter gathering, and it was divine.
How Flavors Develop: Interestingly, some flavors on this board get better over time. The fig jam and honey will absorb subtle flavors from the cheese if left to sit together. The apple slices will release a little juice that mingles with the cheese. I’ve found that a board assembled 2-3 hours before serving actually tastes better than one assembled right before guests arrive. Just keep it covered and at room temperature.
Nutritional Information & Benefits
Let’s be real—this charcuterie board is not a health food. But it does offer some surprising nutritional benefits, especially from the fall fruit and nuts.
| Nutrient | Per Serving (approx. 4 oz cheese + 2 oz meat + fruit & nuts) |
|---|---|
| Calories | 450-550 |
| Protein | 20-25g |
| Fat | 35-40g |
| Carbohydrates | 20-30g |
| Fiber | 4-6g |
| Sugar | 15-20g (mostly from fruit) |
| Sodium | 800-1000mg |
Health Benefits: The apples and pears provide fiber and vitamin C, which supports your immune system (especially important during cold and flu season). The nuts offer healthy fats and vitamin E, which is great for your skin and heart. Cheese is a good source of calcium and protein, though it’s also high in saturated fat and sodium. The prosciutto and salami add protein but are high in sodium, so enjoy in moderation.
Dietary Considerations: This board contains dairy (cheese), gluten (crackers and baguette), and nuts (pecans and almonds). It is not suitable for vegans or those with dairy allergies, though substitutions are possible. For a lower-sodium option, choose low-sodium cheeses and skip the cured meats in favor of more fruit and nuts.
Personal Wellness Perspective: I believe in balance. This board is meant for celebration and connection, not everyday eating. When I serve it at Friendsgiving, I don’t worry about the numbers. I focus on the joy of sharing food with people I love. That’s a kind of nourishment that doesn’t show up on a nutrition label.
Conclusion
This Friendsgiving charcuterie board is more than just a recipe—it’s a centerpiece for connection. It’s the thing that draws people into the kitchen, makes them linger by the table, and sparks conversations about which cheese is the best and whether figs count as fruit or candy. It’s the dish that says, “I’m glad you’re here,” without you having to say a word.
I’ve made this board for Friendsgivings, birthday parties, and quiet nights when it’s just me and a glass of wine. It never fails to bring a little joy. The combination of creamy brie, salty prosciutto, sweet honey, and crisp apple is just… right. It’s the taste of fall, captured on a wooden board.
Here’s my challenge to you: make this board your own. Swap in your favorite cheese. Use whatever fruit looks best at the market. Add a jar of hot honey if you like spice. The beauty of a charcuterie board is that there are no rules—only delicious possibilities. Start with this recipe, then let your creativity run wild.
I’d love to hear how it turns out. Leave a comment below and tell me about your Friendsgiving spread. What cheese was the crowd favorite? Did anyone fight over the last candied pecan? Share your photos and tag me—I want to see your masterpiece. Now go build that board and make some memories. You’ve got this!
Frequently Asked Questions
How far in advance can I assemble a charcuterie board?
You can assemble the board up to 2-3 hours before serving. Just cover it loosely with plastic wrap and keep it at room temperature. Add any fresh herbs or garnishes right before serving for the best presentation.
How much cheese and meat should I buy per person?
For an appetizer board before a meal, plan on 4-6 ounces of cheese and 2-3 ounces of meat per person. If the board is the main event, double those amounts. It’s always better to have leftovers than to run out!
Can I make this board dairy-free or vegan?
Yes! For a dairy-free version, skip the cheese and double up on meats, fruit, and nuts. For a vegan board, use vegan cheese alternatives, hummus, and roasted vegetables instead of meat. Just keep the fruit and nuts as the stars.
What’s the best way to prevent apple slices from browning?
Toss the apple slices in a little lemon juice—about half a lemon for two apples. This will keep them looking fresh for hours. You can also use a commercial product like Fruit-Fresh, but lemon juice works perfectly and adds a nice tang.
Can I use this board as a main course for dinner?
Absolutely! If you’re serving this as a main course, increase the portions to about 8-10 ounces of cheese and 4-6 ounces of meat per person. Add more bread, crackers, and fruit to make it a filling meal. It’s perfect for a casual dinner party where everyone grazes at their own pace.
Pin This Recipe!
Crowd-Pleasing Friendsgiving Charcuterie Board with Fall Fruit
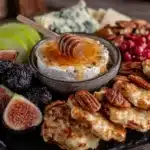
A stunning charcuterie board featuring seasonal fall fruits, creamy cheeses, and savory cured meats that comes together in under 30 minutes. Perfect for Friendsgiving gatherings, this board offers a perfect balance of salty, sweet, tangy, and creamy flavors.
- Prep Time: 25 minutes
- Cook Time: 0 minutes
- Total Time: 25 minutes
- Yield: 8-10 servings 1x
- Category: Appetizer
- Cuisine: American
Ingredients
- 8 ounces Brie cheese
- 6 ounces Aged Cheddar cheese
- 4 ounces Goat cheese log
- 4 ounces Blue cheese (optional)
- 4 ounces Prosciutto, paper-thin sliced
- 4 ounces Salami (genoa or soppressata)
- 3 ounces Capicola
- 2 medium Honeycrisp apples
- 2 medium Bosc pears
- 1 cup dried figs (Mission figs preferred)
- 1 cup seedless red grapes
- 1 cup candied pecans
- 1 cup marcona almonds
- 1 small baguette, sliced into thin rounds and lightly toasted
- 1 box crisp crackers (water crackers or rosemary flatbreads)
- 1/3 cup fig jam
- 1/4 cup honey
- 1/4 cup whole grain mustard
Instructions
- Prep Your Cheeses (5 minutes): Take all cheeses out of the refrigerator 30 minutes before assembling. Unwrap them and place on a clean plate. Leave brie rind on. Cut aged cheddar into irregular 1-inch cubes or thin triangles. Goat cheese log can stay whole or be sliced into 1/2-inch rounds. Break blue cheese into crumbles or small wedges.
- Slice the Fruit (5 minutes): Core apples and pears, slice into thin wedges about 1/4 inch thick. Toss apple slices in a little lemon juice to prevent browning. Leave grapes in small clusters of 3-4 grapes each. Arrange dried figs on a small plate.
- Prepare the Meats (3 minutes): Fold each prosciutto slice in half lengthwise, then loosely roll into a small rose shape. Leave salami slices flat or fold into quarters. Drape capicola in loose ribbons.
- Set Up Your Accents (2 minutes): Spoon fig jam into one small ramekin, honey into another, and whole grain mustard into a third. Place these ramekins on the board first as anchors.
- Arrange the Cheeses (3 minutes): Place cheeses around the board, spacing evenly. Put brie in the center, cheddar on one side, goat cheese on another, and blue cheese in a corner.
- Add the Meats (2 minutes): Tuck meat roses and folds around the cheeses, grouping each type together.
- Fill in with Fruit (3 minutes): Arrange apple and pear slices in fan patterns around the board. Tuck grape clusters into empty spaces. Scatter dried figs.
- Add Crunch (2 minutes): Sprinkle candied pecans and marcona almonds in small piles around the board, keeping them separate. Place sliced baguette and crackers in a basket or on a separate plate next to the board.
- Final Touches (1 minute): Drizzle a little honey over the brie. Sprinkle extra candied pecans around the board. Add a small sprig of fresh rosemary or fresh thyme leaves for garnish.
Notes
Take cheese out of refrigerator 30 minutes before serving for best flavor. Toss apple slices in lemon juice to prevent browning. Assemble board up to 2-3 hours before serving, cover loosely with plastic wrap, and keep at room temperature. Add fresh herbs right before serving. For a gluten-free version, swap baguette and crackers for gluten-free options. For a dairy-free version, omit cheeses and double up on meats, nuts, and fruit.
Nutrition
- Serving Size: 4 ounces cheese + 2
- Calories: 450550
- Sugar: 1520
- Sodium: 8001000
- Fat: 3540
- Saturated Fat: 1520
- Carbohydrates: 2030
- Fiber: 46
- Protein: 2025
Keywords: charcuterie board, Friendsgiving, fall fruit, appetizer, cheese board, prosciutto, brie, seasonal, entertaining