I was standing in the checkout line at Target last Tuesday—just grabbing wrapping paper and a last-minute gift—when the woman ahead of me turned around and said, “You look like someone who bakes.” I had flour on my jeans, which was honestly a dead giveaway. But what hit me wasn’t the compliment. It was the smell coming from the Starbucks kiosk next to us. That buttery, sugary, vanilla-heavy scent that reminds you of something you can’t quite name. And suddenly I was seven years old, standing on a step stool in my Aunt Lou’s kitchen, watching her press a sticky mass of marshmallow and cereal into a buttered pan while Christmas music played from a tiny radio on the windowsill.
Aunt Lou wasn’t the type to fuss over complicated cookies or spend hours rolling out dough. She believed in shortcuts that still felt special—and her rice krispie treats were the proof. She’d add a splash more vanilla than the recipe called for, and she always, always stirred in a bag of red and green M&Ms until the whole thing looked like a holiday explosion. I remember sneaking pieces off the edge while they were still warm, the chocolate just barely starting to melt against the marshmallow. She’d pretend not to notice, which was the best part.
I haven’t seen Aunt Lou in almost four years now. She moved to Florida, and our Christmases look different these days. But every December, when I make these Easy Christmas Rice Krispie Treats with M&Ms, I get that same feeling—that warm, slightly impatient, butter-fingered joy of being in her kitchen. And honestly? It’s the easiest way I know to bring a little of that magic back. Maybe you’ve got your own version of that memory, the one tied to a certain smell or a certain person. This recipe is for that.
Why You’ll Love This Recipe
Let me tell you why this recipe has earned a permanent spot in my December rotation—and why I think it’ll become your go-to, too.
- Quick & Easy: We’re talking 15 minutes from start to finish. No oven required, no complicated techniques. Perfect for those nights when you realize you need something festive for tomorrow’s school party or office potluck.
- Simple Ingredients: Butter, marshmallows, rice krispie cereal, vanilla, and a bag of Christmas M&Ms. That’s it. You probably already have most of this in your pantry.
- Perfect for the Holidays: These treats are ideal for cookie exchanges, classroom celebrations, holiday movie nights, or just snacking while you wrap presents. They bring instant color and cheer to any table.
- Crowd-Pleaser: Kids go absolutely crazy for them. Adults do too, even if they pretend they’re too sophisticated. There’s something about that crunchy, chewy, chocolate-studded bite that makes everyone happy.
- Unbelievably Delicious: The texture is spot-on—crispy on the outside, soft and gooey on the inside. The M&Ms add little pockets of melted chocolate that take these way beyond basic rice krispie treats.
What makes this version different from all the others? It’s the extra vanilla, honestly. Most recipes skimp on it, but Aunt Lou taught me that a full teaspoon makes the marshmallow mixture taste almost like frosting. And the way I fold in the M&Ms at just the right moment—when the marshmallow is still hot but not boiling—keeps them from completely melting into a brown mess. You get distinct red and green pieces that stay bright and beautiful.
This isn’t just another rice krispie treat recipe. It’s the one that makes you close your eyes after the first bite. It’s comfort food reimagined for the holidays—faster, simpler, but with the same soul-soothing satisfaction. Perfect for impressing guests without any stress, or turning an ordinary Tuesday into something a little more magical.
What Ingredients You Will Need
This recipe uses simple, honest ingredients to create something genuinely festive. No fancy shopping required—just holiday-colored fun and pantry staples.
For the Base
- 6 tablespoons unsalted butter (I use Land O’Lakes—it has a consistent butterfat content that gives better results)
- 1 package (10 oz) mini marshmallows (Jet-Puffed works great; avoid stale marshmallows as they won’t melt smoothly)
- 6 cups rice krispie cereal (the original brand gives the best crunch, but generic works fine too)
- 1 teaspoon pure vanilla extract (don’t use imitation vanilla here—the flavor difference is noticeable)
- ¼ teaspoon salt (this balances the sweetness and makes the chocolate pop)
For the Festive Touch
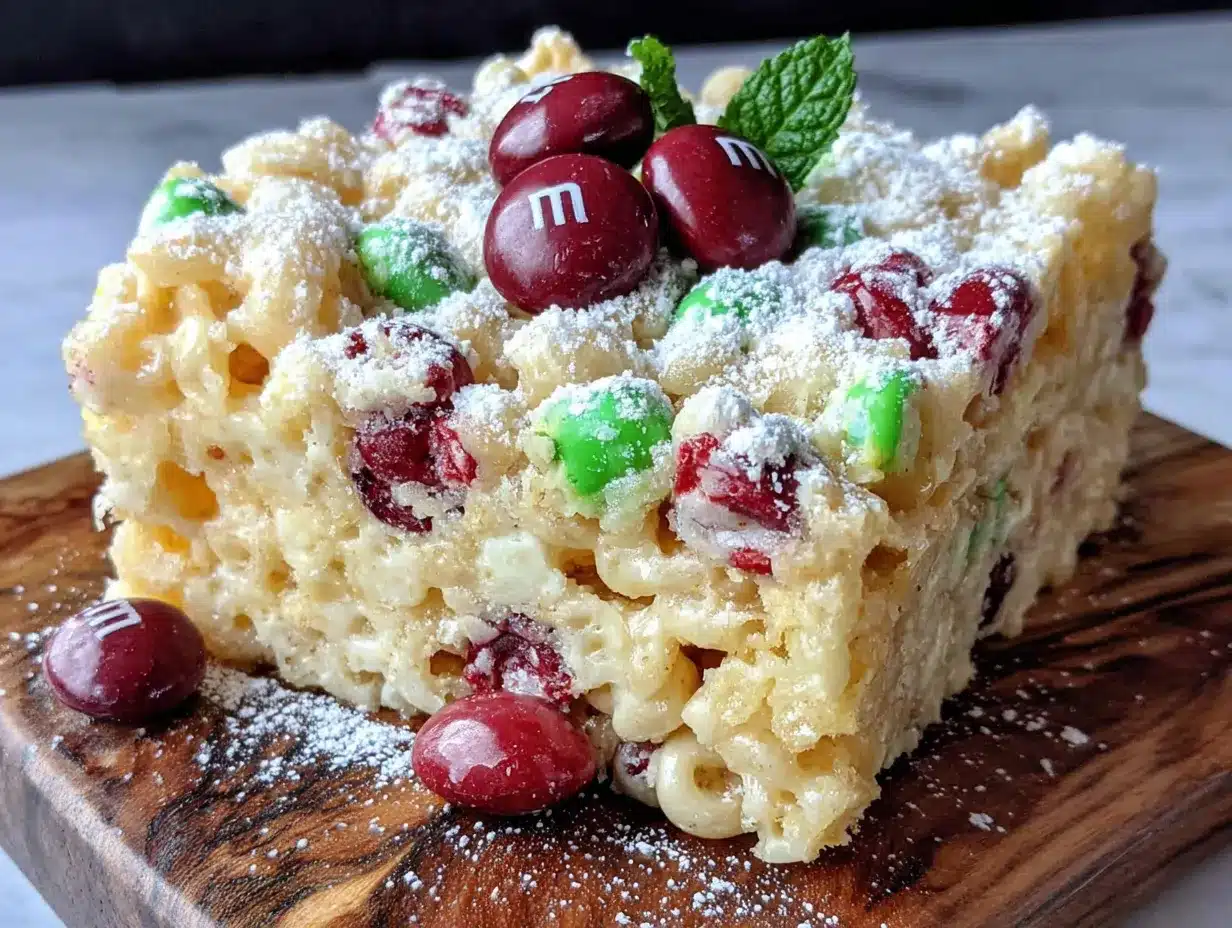
- 1 cup Christmas M&Ms (red and green ones, obviously—you can also use the holiday blend with white chocolate chips mixed in)
- Optional: ¼ cup holiday sprinkles (for pressing on top if you want extra sparkle)
Ingredient Tips & Substitutions
If you’re dairy-free, use a plant-based butter like Miyoko’s or Country Crock Plant Butter. The texture will be slightly softer, but still delicious. For a gluten-free version, make sure your rice krispie cereal is certified gluten-free—most standard brands are, but check the label if you’re serving someone with celiac.
You can swap the M&Ms for chopped chocolate bars, peanut butter chips, or even crushed candy canes if you want a minty twist. Just keep the total volume around 1 cup so the ratio stays right. And if you’re feeling extra festive, toss in some mini marshmallows on top before the mixture sets—they’ll stay puffy and add a fun texture contrast.
One more thing: buy your M&Ms fresh. Stale ones get chalky and don’t have that satisfying snap when you bite into them. I learned this the hard way after using a bag I’d found in the back of my pantry from last Christmas. Not my finest moment.
Equipment Needed
You don’t need much for this recipe, which is part of the beauty of it. Here’s what you’ll want to have handy:
- Large pot or Dutch oven (at least 5-quart—you need room to stir everything without spilling over)
- Rubber spatula (silicone is best—it won’t scratch your pot and it handles sticky mixtures like a dream)
- 9×13-inch baking dish (glass or metal both work; I prefer glass because I can see if the butter is evenly coating the bottom)
- Parchment paper or wax paper (for lining the pan and pressing the mixture—trust me, you don’t want to use your bare hands)
- Measuring cups and spoons (the standard set will do)
- Sharp knife (for cutting clean squares—a dull knife will squish the treats)
If you don’t have a 9×13 dish, you can use a 10-inch cast iron skillet or even a rimmed baking sheet. The treats will be thinner, so adjust your cutting size accordingly. And if you’re really in a pinch, a 9×9 square pan will give you thicker, chunkier pieces—just increase the pressing time by a few minutes so they set properly.
I’ve been using the same rubber spatula for about seven years now. It’s got a small crack in the handle, but I refuse to replace it. It’s my good luck charm for sticky recipes.
Preparation Method
This is where the magic happens. Follow these steps carefully, and you’ll have perfect treats every time.
- Prep your pan. Line your 9×13-inch baking dish with parchment paper, leaving about 2 inches of overhang on two opposite sides. This creates “handles” that make lifting the whole block out later super easy. Lightly grease the parchment with a thin layer of butter or nonstick spray.
- Melt the butter. Place your large pot over medium-low heat and add the 6 tablespoons of butter. Let it melt slowly, swirling the pan occasionally. You want it fully melted but not bubbling aggressively—if it starts to brown, your heat is too high. This takes about 2-3 minutes.
- Add the marshmallows. Pour in the entire 10-ounce bag of mini marshmallows. Stir constantly with your rubber spatula, scraping the bottom and sides to prevent scorching. The marshmallows will start to puff up and then collapse into a smooth, sticky liquid. This takes about 4-5 minutes. Be patient—rushing this step leads to lumpy treats.
- Remove from heat and add vanilla and salt. Once the marshmallows are completely melted and smooth, take the pot off the burner immediately. Stir in the 1 teaspoon of vanilla and ¼ teaspoon of salt. The mixture will smell incredible at this point—like a cross between a bakery and a candle shop.
- Fold in the cereal. Add the 6 cups of rice krispie cereal all at once. Use a folding motion—cut through the middle with your spatula, then bring the bottom up and over. Rotate the bowl as you go. Don’t stir vigorously or you’ll crush the cereal into dust. You want the marshmallow to coat every piece evenly without breaking them. This takes about 1-2 minutes of gentle folding.
- Add the M&Ms. While the mixture is still warm (but not piping hot), fold in ¾ cup of the Christmas M&Ms. Reserve the remaining ¼ cup for the top. Fold just until the M&Ms are distributed—about 4-5 turns of the spatula. If you overmix, the candy coatings will start to streak and bleed color into the marshmallow.
- Press into the pan. Scrape the mixture into your prepared pan. Here’s the trick: lightly grease your hands with butter or nonstick spray, then use your palms to press the mixture evenly into the pan. Don’t use the spatula for pressing—it sticks and pulls the treats apart. Press firmly but gently; you want them compact enough to hold together but not so dense that they become hard. This takes about 2 minutes.
- Add the topping. While the treats are still warm, press the remaining ¼ cup of M&Ms into the top surface. Space them evenly so every square gets some color. If you’re using sprinkles, add them now too.
- Cool and set. Let the treats cool at room temperature for at least 1 hour. Don’t rush this by putting them in the fridge—the condensation will make them soggy. They should be firm to the touch but still slightly soft when you press down.
- Cut and serve. Lift the whole block out using the parchment handles. Place it on a cutting board and use a sharp knife to cut into 24 squares (6 rows by 4 rows). Wipe the knife clean between cuts for neat edges. If the treats resist, run the knife under hot water first.
Cooking Tips & Techniques
I’ve made these treats more times than I can count, and I’ve definitely learned a few things the hard way. Here’s what I wish someone had told me sooner.
The low-and-slow rule. Keep your heat on medium-low when melting the marshmallows. I know it’s tempting to crank it up and speed things along, but high heat makes the sugar seize up and turn grainy. You’ll end up with a mixture that’s stiff and impossible to stir. Low heat, constant stirring—that’s the secret.
Fresh marshmallows matter. Stale marshmallows get hard and won’t melt into that silky consistency you’re after. Check the date on the bag before you start. If they feel stiff in the bag, they’re too old. I once used a bag that had been sitting in my cupboard for six months, and the treats turned out lumpy and weird. Learn from my mistake.
The butter-greased hands trick. This is non-negotiable. If you try to press the mixture with a dry spatula, it will stick and pull apart. If you use bare hands without butter, you’ll be picking marshmallow off your fingers for the next hour. Butter your hands generously before pressing—it creates a barrier that lets you work the mixture without the sticky nightmare.
Don’t over-press. I know it feels like you should compact them as much as possible to get clean squares, but over-pressing makes the treats rock-hard. You want them firm enough to hold their shape but light enough that they still have that airy crunch. Press until the surface is even, then stop.
Timing is everything. Work quickly once the marshmallows are melted. The mixture starts to set as it cools, so you want to get the cereal folded in and the treats pressed within about 5-7 minutes. If you dawdle, you’ll be wrestling with a stiff, uncooperative block.
Variations & Adaptations
This recipe is incredibly forgiving, so feel free to make it your own. Here are some variations I’ve tried and loved.
Peppermint Crunch
Swap the M&Ms for 1 cup of crushed candy canes and ½ cup of white chocolate chips. The minty crunch pairs beautifully with the marshmallow. Just be warned—your kitchen will smell like a candy shop.
Chocolate Lover’s Version
Melt ½ cup of dark chocolate chips with the butter before adding the marshmallows. Then fold in 1 cup of mini chocolate chips along with the M&Ms. It’s almost too rich, but in the best way possible.
Vegan-Friendly Treats
Use vegan butter and vegan marshmallows (Dandies brand works perfectly). The texture is slightly softer, but the taste is spot-on. Just be careful not to overcook the vegan marshmallows—they can get stringy if overheated.
Nutty Holiday Twist
Add ½ cup of toasted pecans or almonds along with the M&Ms. The crunch adds a lovely contrast, and it makes the treats feel a little more grown-up. My neighbor Sarah swears by this version.
White Chocolate Dream
Replace half the M&Ms with white chocolate chips. The white chocolate melts into little creamy pockets that contrast with the colorful candy shells. It’s my personal favorite for Christmas morning.
Serving & Storage Suggestions
These treats are best served at room temperature—the marshmallow stays soft and the M&Ms keep their satisfying snap. Arrange them on a festive platter or stack them in a clear jar tied with a ribbon for a simple gift.
They pair beautifully with a cup of hot cocoa, a mug of spiced tea, or even a glass of cold milk. If you’re serving them at a party, consider adding a bowl of extra M&Ms on the side for people who want more chocolate.
Storage: Keep the treats in an airtight container at room temperature for up to 5 days. Layer them between sheets of parchment paper to prevent sticking. Do not refrigerate—the cold makes the marshmallow hard and the cereal stale. If you need to store them longer, freeze them.
Freezing: Wrap each square individually in plastic wrap, then place them in a freezer-safe bag. They’ll keep for up to 3 months. Thaw at room temperature for about 30 minutes before serving. The texture stays surprisingly good—I’ve done this many times for holiday prep.
One thing I’ve noticed: these treats actually taste better on day two. The flavors meld together, and the marshmallow softens just a touch. So don’t stress if you make them a day ahead—they’ll be even more delicious.
Nutritional Information & Benefits
Let’s be real—these are a treat, not a health food. But here’s the estimated breakdown per square (based on 24 servings):
- Calories: 185
- Total Fat: 7g
- Saturated Fat: 4g
- Carbohydrates: 30g
- Sugar: 20g
- Protein: 2g
- Sodium: 95mg
The good news? Rice krispie treats are naturally low in cholesterol and contain no trans fats. The M&Ms add a small amount of antioxidants from the cocoa, and the butter provides a little vitamin A. Mostly, though, this is about joy—and sometimes that’s exactly what you need.
If you’re watching your sugar intake, you can use sugar-free marshmallows and dark chocolate M&Ms (which have slightly less sugar). The texture will be a bit different, but it’s a decent compromise.
Conclusion
These Easy Christmas Rice Krispie Treats with M&Ms are more than just a recipe—they’re a little piece of holiday magic you can make in under 20 minutes. They’re the kind of treat that brings people together, that makes kids’ eyes light up, that turns an ordinary kitchen into a place of warmth and memory.
I love this recipe because it’s forgiving. It doesn’t demand perfection. If you press too hard or add too many M&Ms or forget the salt, it still turns out delicious. It’s the kind of recipe that lets you relax and enjoy the process—which, honestly, is what the holidays should be about.
So go ahead and make a batch. Use red and green M&Ms, or mix in some white chocolate, or throw in some sprinkles. Make it your own. And when you take that first bite and feel that rush of sweet, buttery, chocolatey happiness, I hope it brings you back to whatever holiday memory makes you smile the most.
I’d love to hear how yours turn out! Leave a comment below and tell me about your favorite holiday treat memory—or tag me in your photos on social media. Happy holidays, and happy snacking!
Frequently Asked Questions
Can I use large marshmallows instead of mini marshmallows?
Yes, but they take longer to melt and can be harder to stir evenly. If you use large marshmallows, increase the melting time by about 2-3 minutes and watch carefully to avoid scorching. I recommend sticking with mini marshmallows for the smoothest results.
Why did my treats turn out hard?
You likely over-pressed them into the pan or overcooked the marshmallow mixture. Press gently and remove the pot from heat as soon as the marshmallows are fully melted. Hard treats can also result from using stale marshmallows or cooking on too high heat.
Can I make these treats ahead of time?
Absolutely! They actually taste better on day two. Make them up to 2 days in advance and store them in an airtight container at room temperature. For longer storage, freeze them for up to 3 months.
How do I cut clean squares without the treats falling apart?
Use a sharp knife and wipe it clean between each cut. For extra clean edges, run the knife under hot water and dry it before cutting. Let the treats cool completely—at least 1 hour—before attempting to cut them.
Can I use other candies instead of M&Ms?
Definitely! Try peanut butter cups, chopped chocolate bars, Reese’s Pieces, or even crushed Oreos. Just keep the total volume around 1 cup so the marshmallow-to-candy ratio stays balanced. Avoid anything with a soft center, as it can make the treats too gooey.
Pin This Recipe!
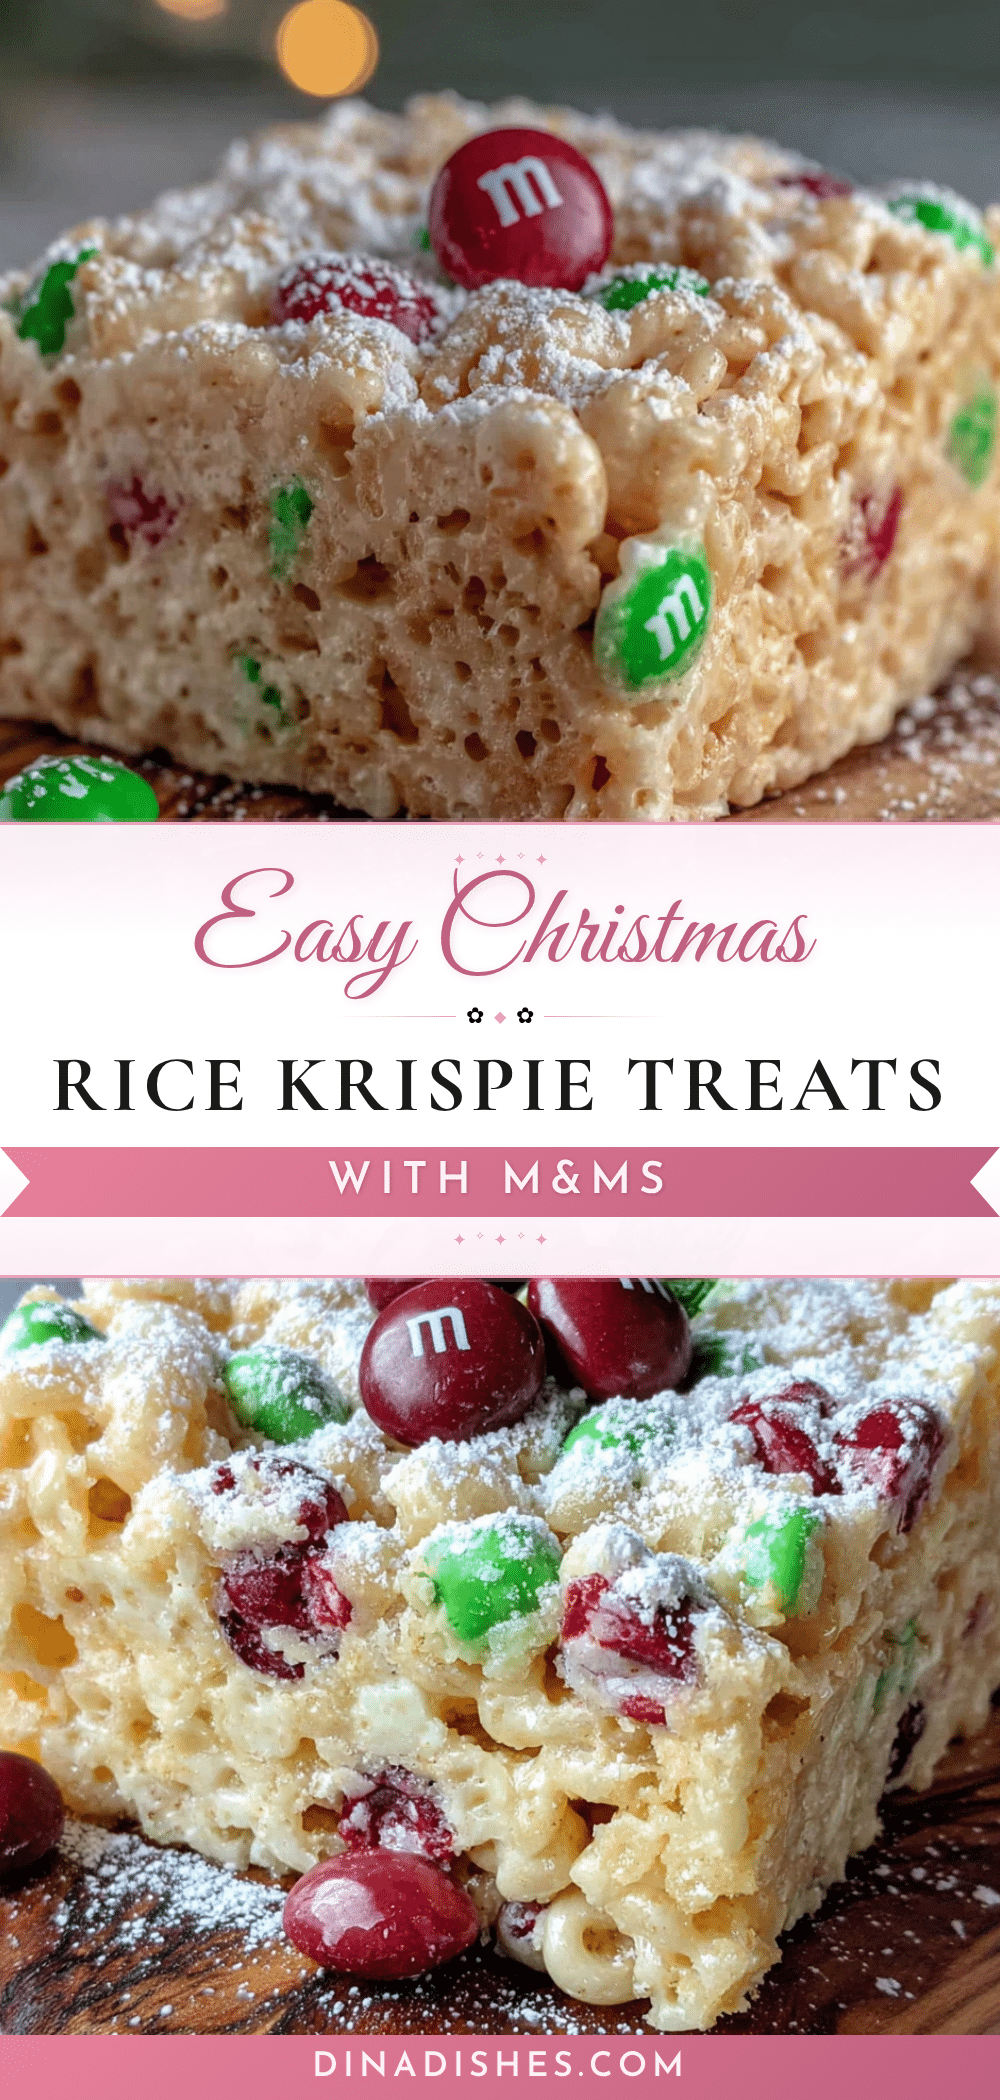
Easy Christmas Rice Krispie Treats Recipe
These Easy Christmas Rice Krispie Treats with M&Ms are a quick, no-bake holiday treat that brings festive color and nostalgic joy. Made with butter, marshmallows, vanilla, and red and green M&Ms, they’re perfect for cookie exchanges, classroom parties, or cozy nights in.
- Prep Time: 10 minutes
- Cook Time: 5 minutes
- Total Time: 15 minutes
- Yield: 24 servings 1x
- Category: Dessert
- Cuisine: American
Ingredients
- 6 tablespoons unsalted butter
- 1 package (10 oz) mini marshmallows
- 6 cups rice krispie cereal
- 1 teaspoon pure vanilla extract
- ¼ teaspoon salt
- 1 cup Christmas M&Ms (red and green)
- Optional: ¼ cup holiday sprinkles
Instructions
- Prep your pan. Line your 9×13-inch baking dish with parchment paper, leaving about 2 inches of overhang on two opposite sides. Lightly grease the parchment with a thin layer of butter or nonstick spray.
- Melt the butter. Place your large pot over medium-low heat and add the 6 tablespoons of butter. Let it melt slowly, swirling the pan occasionally. This takes about 2-3 minutes.
- Add the marshmallows. Pour in the entire 10-ounce bag of mini marshmallows. Stir constantly with your rubber spatula, scraping the bottom and sides to prevent scorching. The marshmallows will start to puff up and then collapse into a smooth, sticky liquid. This takes about 4-5 minutes.
- Remove from heat and add vanilla and salt. Once the marshmallows are completely melted and smooth, take the pot off the burner immediately. Stir in the 1 teaspoon of vanilla and ¼ teaspoon of salt.
- Fold in the cereal. Add the 6 cups of rice krispie cereal all at once. Use a folding motion—cut through the middle with your spatula, then bring the bottom up and over. Rotate the bowl as you go. This takes about 1-2 minutes of gentle folding.
- Add the M&Ms. While the mixture is still warm (but not piping hot), fold in ¾ cup of the Christmas M&Ms. Reserve the remaining ¼ cup for the top. Fold just until the M&Ms are distributed—about 4-5 turns of the spatula.
- Press into the pan. Scrape the mixture into your prepared pan. Lightly grease your hands with butter or nonstick spray, then use your palms to press the mixture evenly into the pan. Press firmly but gently. This takes about 2 minutes.
- Add the topping. While the treats are still warm, press the remaining ¼ cup of M&Ms into the top surface. If you’re using sprinkles, add them now too.
- Cool and set. Let the treats cool at room temperature for at least 1 hour. They should be firm to the touch but still slightly soft when you press down.
- Cut and serve. Lift the whole block out using the parchment handles. Place it on a cutting board and use a sharp knife to cut into 24 squares (6 rows by 4 rows). Wipe the knife clean between cuts for neat edges.
Notes
Use fresh marshmallows for best results. Keep heat on medium-low to prevent sugar from seizing. Butter your hands before pressing the mixture to avoid sticking. Do not over-press or treats will become hard. Let cool at room temperature; do not refrigerate as condensation will make them soggy. Treats taste even better on day two.
Nutrition
- Serving Size: 1 square
- Calories: 185
- Sugar: 20
- Sodium: 95
- Fat: 7
- Saturated Fat: 4
- Carbohydrates: 30
- Protein: 2
Keywords: Christmas rice krispie treats, holiday rice krispie treats, easy Christmas treats, no-bake Christmas dessert, M&M rice krispie treats, festive rice krispie treats