There used to be this tiny wine bar tucked away on a side street in downtown Charleston called The Cork & Canvas. It wasn’t fancy—scratched wooden tables, mismatched chairs, and a chalkboard menu that changed daily. But they made these individual charcuterie cups that were absolute magic. Little mason jars layered with prosciutto roses, marinated olives, goat cheese, and these candied pecans that I still dream about. When they closed their doors three summers ago, I actually felt a little pang of loss. I mean, I know that sounds dramatic for a place that served meat and cheese in a cup, but honestly? It was an experience.
After about six attempts—some that ended up looking like a toddler assembled them—I finally cracked the code. The key is layering with intention, not just tossing things in and hoping for the best. My first try was a disaster. I put the wet ingredients on the bottom and by the time I served them, everything was a soggy mess. My second attempt? I used too many sticky ingredients and nobody could get anything out without a fork. But the third time, I remembered how The Cork & Canvas did it, and it clicked.
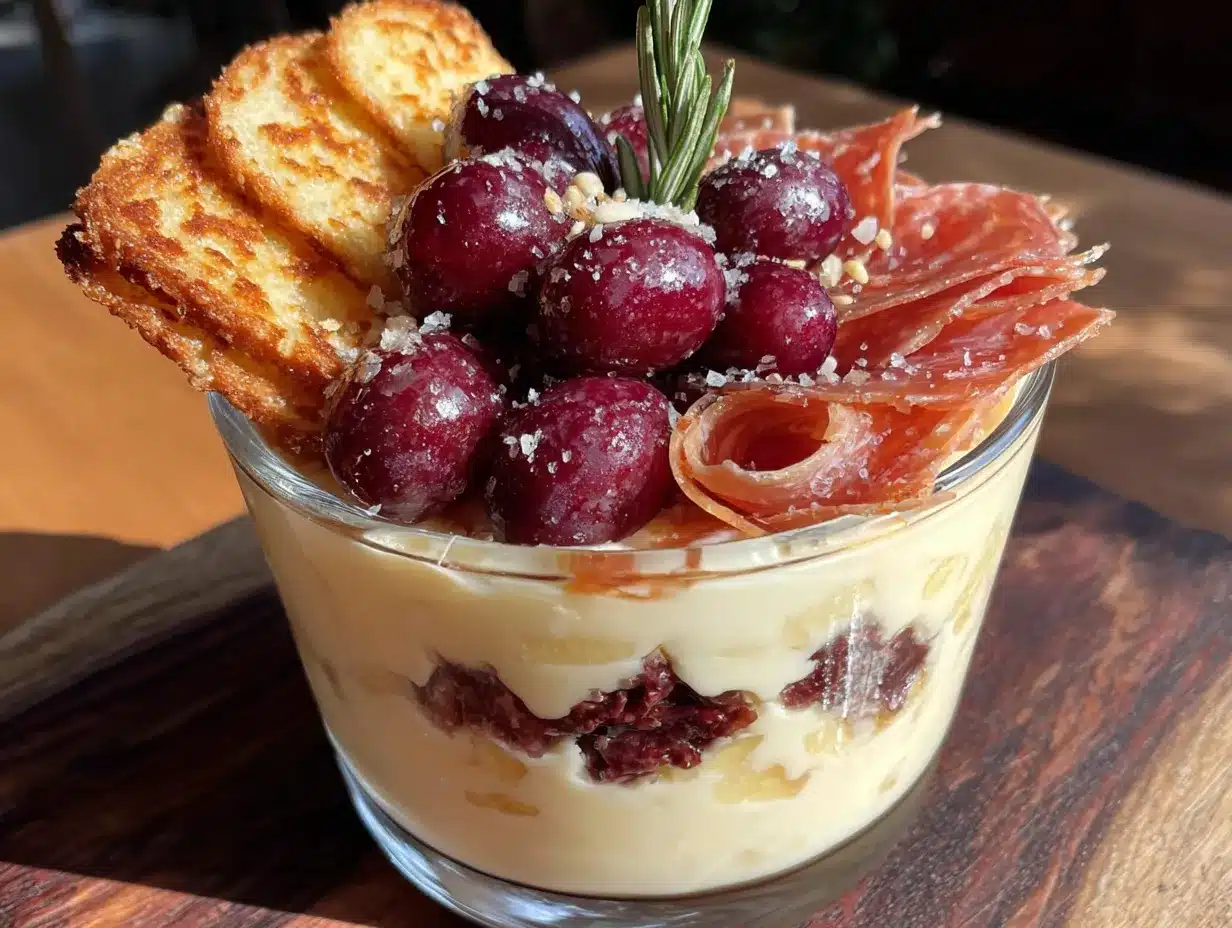
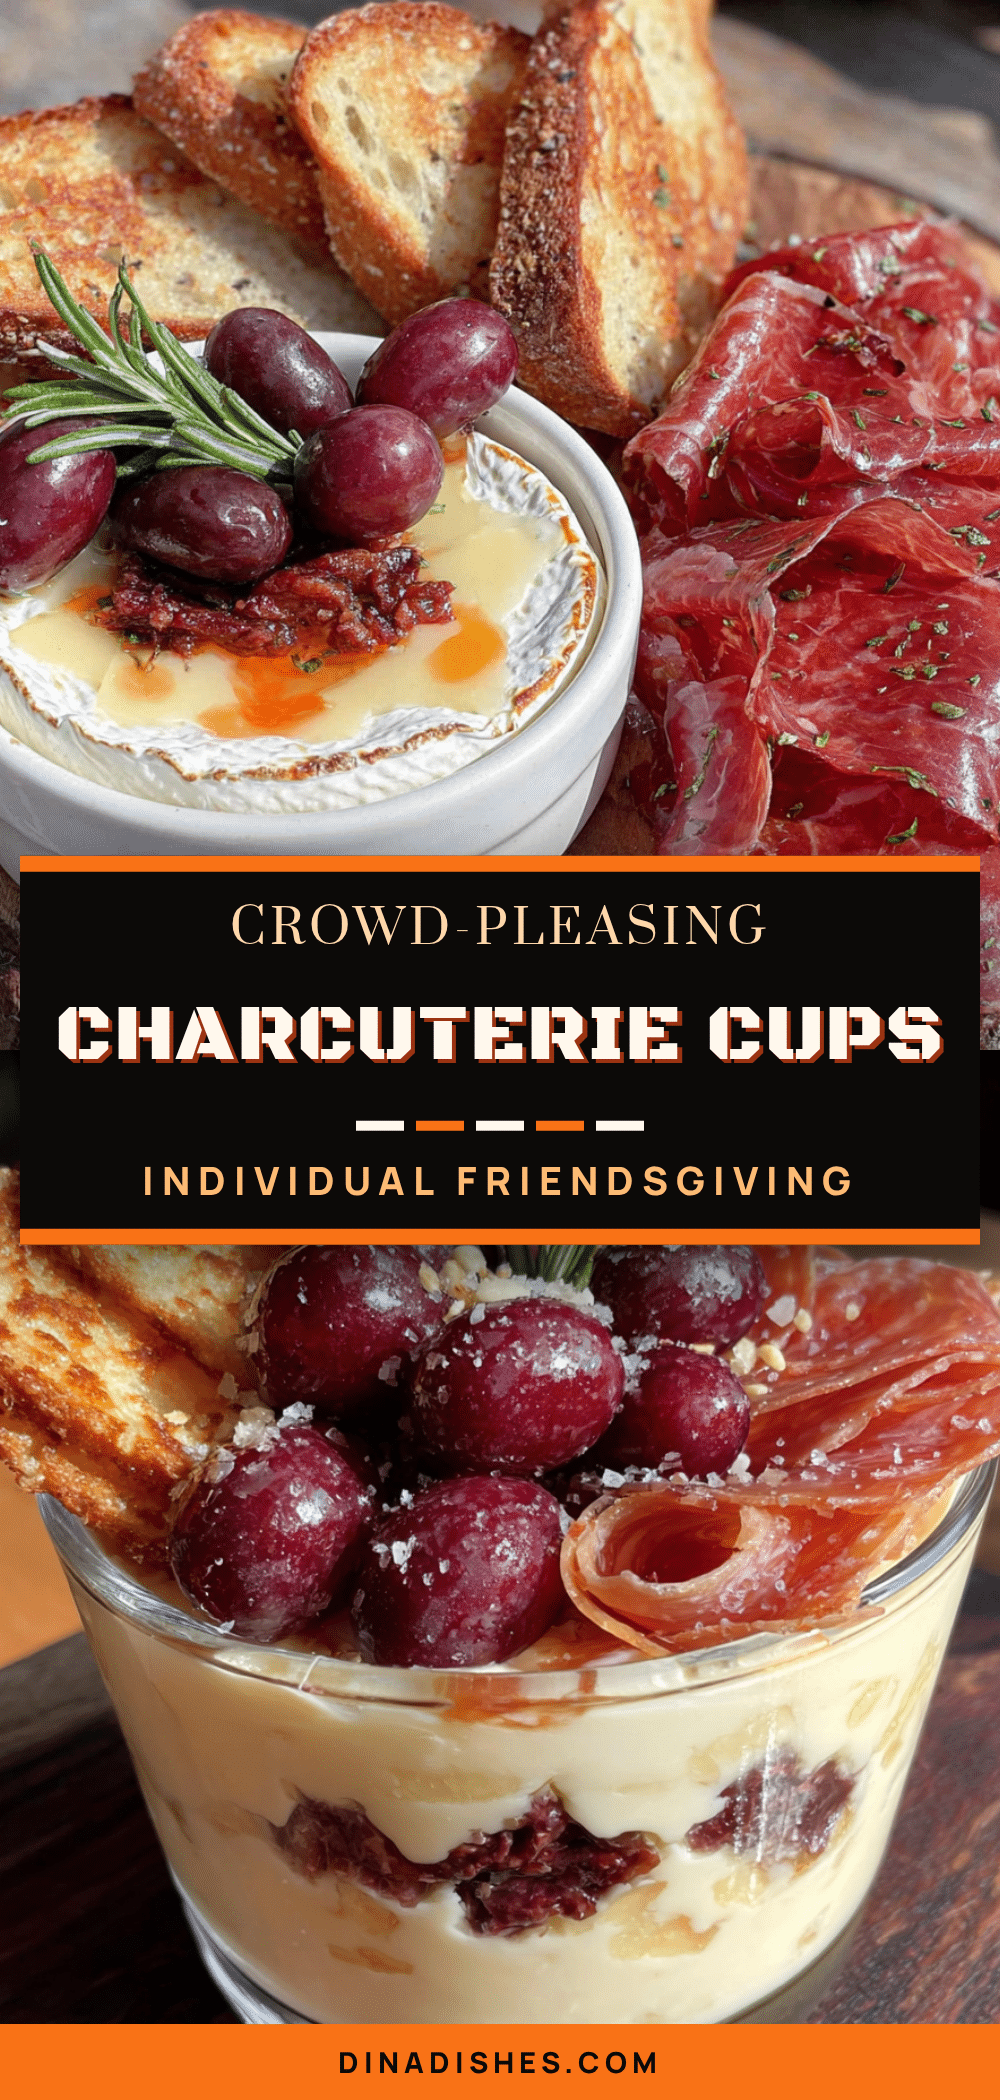
These individual Friendsgiving charcuterie cups are my tribute to that little wine bar. They’re perfect for hosting because you can prep everything the night before, and when your guests arrive, you just pull them out of the fridge and watch everyone’s faces light up. No platters to assemble, no worrying about who’s double-dipping, no chaos. Each person gets their own perfectly curated cup of deliciousness. Maybe you’ve been there—standing over a giant board, trying to arrange salami fans while people are waiting to eat. These cups solve that problem completely. And honestly? They’re way cuter than any board I’ve ever made.
Why You’ll Love This Recipe
Let me tell you why these individual charcuterie cups are going to be the star of your Friendsgiving table. I’ve tested this concept at three different gatherings now, and they disappear every single time.
- Prep-Ahead Friendly: Assemble these up to 24 hours in advance. When guests arrive, you’re not stuck in the kitchen arranging things. You’re actually enjoying your own party.
- No Cross-Contamination Worries: Everyone gets their own cup. No shared utensils, no reaching across the table, nobody accidentally grabbing the last olive you were eyeing.
- Portion Control That Works: Each cup is perfectly balanced. Enough to satisfy without being overwhelming. Great for grazing throughout the meal.
- Visually Stunning: The layered effect in clear cups looks professional and intentional. Your guests will think you spent hours on these.
- Customizable Per Person: Know someone doesn’t like blue cheese? Leave it out of theirs. Got a vegetarian coming? Load theirs up with extra veggies and cheese.
- Zero Cleanup: No cutting boards covered in cheese crumbs, no sticky countertops. Each cup is self-contained and disposable.
What makes these different from every other charcuterie board out there is the layering technique. Most people just throw ingredients into a cup and call it done. But I’ve figured out the exact order that keeps everything fresh, prevents sogginess, and makes each bite as good as the last. It’s not just another appetizer—it’s the appetizer that lets you be a guest at your own party.
What Ingredients You Will Need
This recipe uses simple, crowd-pleasing ingredients that you can find at any grocery store. The beauty of charcuterie cups is how flexible they are, but I’ve tested specific combinations that work best for layering.
For the Protein Layer
- 8 ounces prosciutto, thinly sliced (I prefer Columbus or Boar’s Head for consistent quality)
- 8 ounces salami, preferably Genoa or soppressata, sliced thin
- 6 ounces pepperoni, sliced (adds a nice spicy kick)
For the Cheese Layer
- 4 ounces sharp cheddar, cut into small cubes (about 1/2-inch)
- 4 ounces gouda, cut into small cubes (smoked gouda adds incredible depth)
- 4 ounces fresh mozzarella pearls (these are perfect because they’re already bite-sized)
- 2 ounces goat cheese, crumbled (adds creaminess to the cup)
For the Fruits and Vegetables
- 1 cup red seedless grapes, washed and dried completely (moisture is the enemy here)
- 1/2 cup dried apricots, halved
- 1/2 cup marinated olives, drained (I like kalamata and castelvetrano mixed)
- 1/4 cup cornichons or small pickles
For the Crunch and Garnish
- 1/2 cup candied pecans (store-bought or homemade—I’ll share my quick version below)
- 1/4 cup honey, for drizzling
- Fresh rosemary sprigs, for garnish (optional but pretty)
- Small crackers or crostini, 4-5 per cup (I use rosemary and olive oil crackers)
Substitution notes: If you’re feeding a crowd with dietary restrictions, swap the meats for roasted vegetables or marinated artichoke hearts. Use vegan cheese alternatives if needed—just make sure they’re firm enough to cube. For a nut-free version, replace candied pecans with roasted chickpeas or pretzel sticks. And honestly, don’t stress about exact amounts. Charcuterie is forgiving. If you want more cheese and less meat, go for it. This is your cup.
Equipment Needed
You don’t need much for this recipe, which is part of why I love it. Here’s what you’ll want on hand:
- 12 clear plastic cups (8-ounce size works perfectly—I get mine at Party City or Amazon)
- Sharp knife for cutting cheese and fruit
- Small cutting board (dedicated one for cheese is ideal)
- Tongs for handling meats without getting your hands greasy
- Measuring cups and spoons for consistent portions
- Small bowl for honey (makes drizzling easier)
Pro tip: If you don’t have clear cups, use small mason jars or even tumblers. The key is being able to see the layers. I’ve also used these cute little bamboo cups that worked great, but you lose the visual effect. Honestly, the clear plastic cups from the dollar store work just as well as anything fancy. Don’t overthink the vessel.
Preparation Method
Making these individual charcuterie cups is straightforward, but the order matters. Follow these steps and you’ll have beautiful, crowd-pleasing cups every time.
- Prep your ingredients first. Before you touch a single cup, have everything ready. Cube your cheddar and gouda into 1/2-inch pieces. Halve the dried apricots. Wash and thoroughly dry the grapes—I cannot stress this enough, wet grapes will make everything soggy. Drain the olives and pat them dry with paper towels. Crumble the goat cheese if it isn’t pre-crumbled.
- Create your meat roses. This is the trickiest part but it gets easier with practice. Take 2-3 slices of prosciutto and lay them slightly overlapping. Fold them in half lengthwise, then roll them up loosely. Pinch the bottom to create a rose shape. For the salami, fold each slice in half, then in half again, and fan them out in the cup. You want about 2-3 salami fans per cup. The pepperoni can just be layered flat—it’s sturdy enough to hold its shape.
- Start layering from the bottom up. Place a few crackers or crostini at the bottom of each cup. This creates a base that absorbs any moisture and prevents sogginess. Then add a layer of the firmer cheeses—cheddar and gouda cubes. About 4-5 cubes per cup.
- Add the middle layers. Next goes the fruit and pickled items. Drop in 3-4 grapes, 2 apricot halves, a few olives, and 1-2 cornichons per cup. Spread them out so every cup has a nice variety. Then add the mozzarella pearls—about 3 per cup.
- Place the meat. Gently nestle your prosciutto roses and salami fans into the cups, arranging them so they’re visible from the outside. The pepperoni slices can go flat against the side of the cup. This is where the visual magic happens—take an extra minute to make each cup look intentional.
- Top with the finishing touches. Sprinkle crumbled goat cheese over the top—about a tablespoon per cup. Add a small cluster of candied pecans. Drizzle about a teaspoon of honey over everything. If you’re using rosemary sprigs, tuck one into each cup for color.
- Chill until serving. Cover the cups with plastic wrap or a lid and refrigerate for at least 30 minutes before serving. This lets the flavors meld together. They’ll keep beautifully for up to 24 hours.
One thing I learned the hard way: don’t overfill the cups. Leave about an inch of space at the top so people can actually grab things without everything spilling out. My first batch was so full that the first person to pick one up lost half the contents on the floor. Learn from my mistakes.
Cooking Tips & Techniques
After making these cups more times than I care to count, I’ve picked up some tricks that make a real difference.
The moisture problem is real. Wet ingredients will ruin your cups faster than anything. Pat everything dry—grapes, olives, even the cheese if it seems damp. I once skipped drying the olives and by the next morning, the bottom of every cup was swimming in brine. Not cute.
Temperature matters. Take the cups out of the fridge about 15 minutes before serving. Cheese and meat taste better at room temperature. But don’t leave them out longer than an hour if you’re worried about food safety, especially with the mozzarella and goat cheese.
Make your own candied pecans. It takes 10 minutes and tastes infinitely better. Toss 1 cup of pecans with 2 tablespoons of maple syrup, a pinch of salt, and a dash of cinnamon. Spread on a parchment-lined baking sheet and bake at 350°F for 8-10 minutes. Let them cool completely before using. I’ve burned these more times than I want to admit—set a timer.
Double the meat roses. They look impressive but they’re time-consuming. If you’re making 12 cups, that’s 24-36 prosciutto roses. Give yourself 20 minutes just for that step. Put on a podcast and zone out.
Use a muffin tin for assembly. This was a game-changer for me. Place the cups in a muffin tin to keep them stable while you’re layering. Otherwise, they tip over constantly and you’ll want to throw things. Trust me on this one.
Variations & Adaptations
These cups are endlessly customizable. Here are some variations I’ve tried and loved:
Mediterranean Twist: Swap the cheddar and gouda for feta and halloumi. Use kalamata olives only, add sun-dried tomatoes, and drizzle with balsamic glaze instead of honey. This version is incredible with grilled lamb or chicken.
Sweet and Spicy: Add sliced jalapeños, use pepper jack cheese instead of cheddar, and swap the honey for hot honey. The contrast between spicy and sweet is addictive. I made these for a football party and they were gone in 20 minutes.
Breakfast Charcuterie Cups: Use breakfast sausage links (cut in half), cheddar cubes, apple slices, and mini pancakes or waffle pieces. Drizzle with maple syrup. These are perfect for a brunch Friendsgiving and kids absolutely love them.
Vegetarian Version: Skip the meat entirely and double up on cheese, add marinated artichoke hearts, roasted red peppers, and extra nuts. Roasted chickpeas add great crunch. I’ve served these to vegetarians who said they didn’t miss the meat at all.
Gluten-Free Adaptation: Use gluten-free crackers or replace crackers with cucumber rounds and bell pepper strips. Most meats and cheeses are naturally gluten-free, just check labels on the marinades and nuts.
My personal favorite variation is the Mediterranean one. I made it for a small dinner party last fall and everyone asked for the recipe. The balsamic glaze with the feta and sun-dried tomatoes is just perfection.
Serving & Storage Suggestions
These cups are designed to be served cold or at room temperature. Here’s how to make them shine at your Friendsgiving:
Presentation matters. Arrange the cups on a large wooden board or tray. I like to scatter a few extra grapes and crackers around the base for visual interest. If you’re feeling fancy, add some fresh herbs like rosemary or thyme around the edges.
What to serve alongside. These cups pair beautifully with a simple salad, roasted vegetables, or even as a starter before a heavier main course like turkey or roast chicken. For drinks, a crisp white wine or a light red works perfectly. Sparkling water with lemon is a great non-alcoholic option.
Storage instructions. Assemble the cups up to 24 hours in advance and keep them covered in the refrigerator. Do not add the honey or nuts until just before serving—they’ll get soggy. If you’re prepping further ahead, keep the components separate and assemble the morning of your event.
Reheating? Don’t. These are meant to be served cold. If you want a warm element, serve a small bowl of warm marinated olives on the side that guests can add to their cups.
Flavor development. Honestly, these cups taste better after sitting for a few hours. The flavors meld together, the cheese softens slightly, and everything becomes more cohesive. Just don’t let them sit longer than 24 hours or the crackers will get soft.
Nutritional Information & Benefits
While I’m not a nutritionist, here’s a rough estimate for one cup (based on the standard recipe):
- Calories: approximately 350-400
- Protein: 18-22 grams
- Fat: 25-30 grams
- Carbohydrates: 15-20 grams
- Fiber: 2-3 grams
- Sugar: 10-12 grams (mostly from honey and grapes)
Health benefits to note: Charcuterie cups actually offer a surprising amount of nutritional variety. The cheese provides calcium and protein. Grapes and dried apricots offer antioxidants and fiber. Nuts contribute healthy fats and vitamin E. And the fermented elements like olives and pickles support gut health.
Dietary considerations: This recipe contains dairy, gluten (from crackers), and nuts. For a dairy-free version, use vegan cheese and skip the mozzarella. For gluten-free, swap the crackers. For nut-free, replace pecans with roasted chickpeas or seeds. Always check labels on cured meats—some contain added sugars or preservatives.
I personally love that these cups let me enjoy a treat without going overboard. Because they’re portioned individually, I don’t find myself mindlessly eating half a cheese wheel like I might with a big board. It’s indulgence with built-in boundaries.
Conclusion
These individual Friendsgiving charcuterie cups are everything I loved about that little wine bar in Charleston—intentional, beautiful, and made for sharing. They solve the biggest problem with hosting: how to be present with your guests instead of stuck in the kitchen. You prep them ahead, you pull them out, and you get to enjoy the party.
The best part? You can make them your own. Swap in your favorite cheeses, use whatever meats your grocery store has, add seasonal fruits. There’s no wrong way to build a charcuterie cup. Just remember the golden rules: dry your ingredients, layer from bottom to top, and don’t overfill. Everything else is fair game.
I’d love to hear how yours turn out. Did you try a variation I haven’t thought of? Did your guests fight over the prosciutto roses? Drop a comment below and let me know. And if you’re looking for more crowd-pleasing appetizer ideas, you might also enjoy my baked brie with honey and rosemary or these cranberry brie bites—both perfect for Friendsgiving.
Now go make some magic in those little cups. Your guests are going to be so impressed.
Frequently Asked Questions
Can I make these charcuterie cups a day ahead?
Absolutely. Assemble them up to 24 hours in advance, but leave off the honey drizzle and nuts until just before serving to keep everything fresh and crunchy.
How many cups does this recipe make?
This recipe makes 12 individual cups using 8-ounce cups. Scale up or down depending on your guest count—each cup is a generous appetizer portion.
What if I don’t have clear plastic cups?
Use small mason jars, glass tumblers, or even disposable wine glasses. The key is being able to see the layers, so clear vessels work best for presentation.
Can I freeze these cups?
I don’t recommend freezing them. The cheese texture changes, the grapes get mushy, and the crackers become soft. These are best made fresh and enjoyed within 24 hours.
How do I keep the crackers from getting soggy?
Place the crackers at the very bottom of the cup as a base layer. They’ll absorb minimal moisture from the ingredients above. Also, make sure all your fruits and olives are thoroughly dried before assembling.
Pin This Recipe!
Easy Individual Friendsgiving Charcuterie Cups
Individual charcuterie cups layered with prosciutto roses, salami fans, cheeses, fruits, and candied pecans. Perfect for hosting because you can prep everything the night before, and when your guests arrive, you just pull them out of the fridge.
- Prep Time: 30 minutes
- Cook Time: 0 minutes
- Total Time: 30 minutes
- Yield: 12 servings 1x
- Category: Appetizer
- Cuisine: American
Ingredients
- 8 ounces prosciutto, thinly sliced
- 8 ounces salami (Genoa or soppressata), sliced thin
- 6 ounces pepperoni, sliced
- 4 ounces sharp cheddar, cut into 1/2-inch cubes
- 4 ounces gouda (smoked gouda recommended), cut into 1/2-inch cubes
- 4 ounces fresh mozzarella pearls
- 2 ounces goat cheese, crumbled
- 1 cup red seedless grapes, washed and dried
- 1/2 cup dried apricots, halved
- 1/2 cup marinated olives (kalamata and castelvetrano mixed), drained
- 1/4 cup cornichons or small pickles
- 1/2 cup candied pecans (store-bought or homemade)
- 1/4 cup honey, for drizzling
- Fresh rosemary sprigs for garnish (optional)
- Small crackers or crostini (4-5 per cup)
Instructions
- Prep your ingredients first. Cube cheddar and gouda into 1/2-inch pieces. Halve dried apricots. Wash and thoroughly dry grapes. Drain olives and pat dry with paper towels. Crumble goat cheese if not pre-crumbled.
- Create meat roses: Take 2-3 slices of prosciutto, lay them slightly overlapping, fold in half lengthwise, then roll loosely. Pinch bottom to create a rose shape. For salami, fold each slice in half, then in half again, and fan them out. Pepperoni can be layered flat.
- Start layering from bottom up: Place a few crackers or crostini at the bottom of each cup. Add a layer of firmer cheeses (cheddar and gouda cubes), about 4-5 cubes per cup.
- Add middle layers: Drop in 3-4 grapes, 2 apricot halves, a few olives, and 1-2 cornichons per cup. Add mozzarella pearls, about 3 per cup.
- Place the meat: Gently nestle prosciutto roses and salami fans into cups, arranging them to be visible from outside. Pepperoni slices can go flat against the side.
- Top with finishing touches: Sprinkle crumbled goat cheese over top (about 1 tablespoon per cup). Add a small cluster of candied pecans. Drizzle about 1 teaspoon of honey over everything. Tuck a rosemary sprig into each cup if using.
- Chill until serving: Cover cups with plastic wrap or lid and refrigerate for at least 30 minutes before serving. They’ll keep beautifully for up to 24 hours.
Notes
Dry all ingredients thoroughly to prevent sogginess. Leave off honey and nuts until just before serving if prepping ahead. Place cups in a muffin tin for easier assembly. Take cups out of fridge 15 minutes before serving for best flavor. Do not overfill cups—leave about an inch of space at the top.
Nutrition
- Serving Size: 1 cup
- Calories: 375
- Sugar: 11
- Sodium: 800
- Fat: 28
- Saturated Fat: 10
- Carbohydrates: 18
- Fiber: 2
- Protein: 20
Keywords: charcuterie cups, Friendsgiving appetizer, individual charcuterie, prosciutto roses, party appetizer, no-cook appetizer, make-ahead appetizer