There used to be a little bakery on the corner of Elm and 3rd that made a pumpkin dirt cup that I still dream about. When they closed their doors two years ago—just a sign in the window saying “Thanks for the memories”—I honestly felt a little lost. That first autumn without them, I walked past the shuttered storefront every week, trying to remember exactly how that creamy pumpkin layer tasted against the crunchy chocolate “dirt” on top.
After twelve tries—and one spectacular failure involving way too much gelatin—I finally got it. And you know what? I think my version is actually better. It’s easier, for one thing. No-bake means no standing over a hot stove when the weather’s finally cooling down. And the best part? You can make these in ten minutes flat, which is perfect for those weeknights when the kids are asking for something fun and you’re running on fumes.
I’m not gonna lie—there were some messy batches along the way. One time I forgot to chill the pudding long enough and ended up with pumpkin soup in a cup. Not my finest moment. But that’s the thing about recipes, right? You mess up, you learn, and eventually you end up with something worth sharing.
Maybe you’ve had that feeling—craving a dessert that reminds you of fall but not wanting to spend hours in the kitchen. These little cups are your answer. They’re cute enough for a Halloween party, simple enough for a Tuesday night, and honestly? They taste like autumn in a cup.
Why You’ll Love This Recipe
Let me tell you why these Pumpkin Patch Dirt Pudding Cups have become my go-to fall dessert. I’ve tested this recipe on my neighbor Sarah’s kids, my picky nephew, and even my book club—and every single time, the cups come back empty.
- Quick & Easy : Comes together in under 15 minutes of active prep time. No oven, no mixer, no fuss. Just stir, layer, and chill.
- Simple Ingredients : You probably have most of these in your pantry right now. Pumpkin puree, cream cheese, pudding mix, and some cookies. That’s it.
- Perfect for Fall Gatherings : Great for Halloween parties, Thanksgiving dessert tables, or just a fun weeknight treat when the leaves start changing.
- Crowd-Pleaser : Kids love digging through the “dirt” to find the gummy worms, and adults love the creamy pumpkin cheesecake flavor. Everyone wins.
- Unbelievably Delicious : The texture is what gets me every time—silky smooth pumpkin mousse meets crunchy chocolate crumble. It’s comfort food in a cup.
What makes this version different from all the other dirt cup recipes out there? I swapped out the instant pudding mix for a cream cheese base that gives you that rich, cheesecake-like texture without any of the fuss. And instead of just crushing cookies, I add a pinch of cinnamon to the “dirt” layer—trust me, it makes a difference.
This recipe isn’t just good—it’s the kind that makes you close your eyes after the first bite. It’s fall reimagined: quicker, simpler, but with the same soul-soothing satisfaction. Perfect for impressing guests without stress, or turning a simple Tuesday into something memorable.
What Ingredients You Will Need
This recipe uses simple, wholesome ingredients to deliver that creamy pumpkin flavor and crunchy chocolate texture. Most of these are pantry staples, especially if you do any fall baking.
- For the Pumpkin Mousse Layer:
- 1 package (8 oz) cream cheese, softened (I use Philadelphia—it gives the smoothest texture)
- 1 cup pumpkin puree (not pumpkin pie filling—make sure it’s 100% pure pumpkin)
- 1/2 cup powdered sugar
- 1 teaspoon vanilla extract
- 1 teaspoon pumpkin pie spice (or make your own with cinnamon, nutmeg, and ginger)
- 1/2 teaspoon ground cinnamon
- 1 cup heavy whipping cream, cold (you can use Cool Whip in a pinch, but fresh whipped cream is better)
- For the “Dirt” Layer:
- 1 1/2 cups chocolate sandwich cookies (like Oreos—about 15 cookies)
- 2 tablespoons unsalted butter, melted
- 1/4 teaspoon ground cinnamon (this is my secret ingredient!)
- For the Topping & Decoration:
- 1/2 cup gummy worms (the classic Halloween candy)
- Optional: small pumpkin candies, candy corn, or chocolate leaves for decoration
- Fresh mint leaves (for a pop of green—makes it look like a real pumpkin patch)
Ingredient Tips: For the best texture, make sure your cream cheese is truly softened—leave it on the counter for about 30 minutes. I’ve learned the hard way that cold cream cheese makes lumpy mousse. Also, look for pumpkin puree that’s firm and bright orange. Libby’s is my go-to brand because it’s consistently thick and not watery.
Substitution Guidance: Need a dairy-free option? Use dairy-free cream cheese and coconut cream instead of heavy cream. For a gluten-free version, use gluten-free chocolate sandwich cookies—they work just as well. And if you’re short on time, you can use store-bought whipped topping instead of making your own.
Equipment Needed
You don’t need anything fancy for this recipe, which is part of what makes it so great for busy weeknights.
- Electric mixer (handheld or stand mixer—either works fine)
- Mixing bowls (one large, one medium)
- Food processor or zip-top bag (for crushing cookies)
- Small clear cups or glasses (I use 8-ounce plastic cups for parties, but mason jars look adorable too)
- Spatula (for scraping every last bit of mousse—don’t waste any!)
- Measuring cups and spoons
If you don’t have a food processor, don’t sweat it. Just put the cookies in a zip-top bag and crush them with a rolling pin. It’s actually kind of satisfying—great stress relief after a long day. I’ve done it both ways, and honestly, the bag method gives you more control over the texture.
Preparation Method
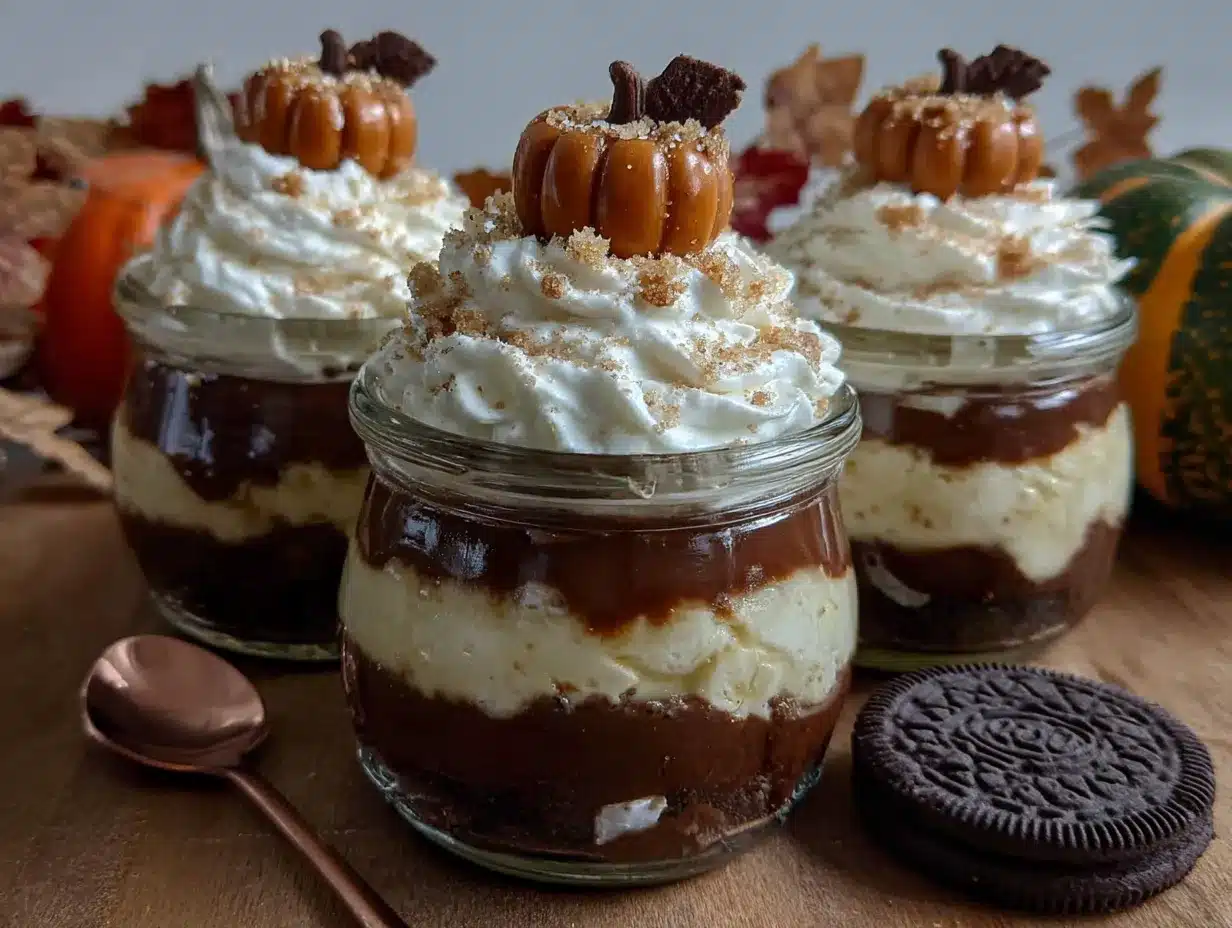
- Make the pumpkin mousse base. In a large mixing bowl, beat the softened cream cheese with an electric mixer until it’s smooth and fluffy—about 2 minutes. Add the pumpkin puree, powdered sugar, vanilla extract, pumpkin pie spice, and cinnamon. Beat until everything is well combined and silky. Scrape down the sides of the bowl with your spatula.
- Whip the cream. In a separate medium bowl, pour the cold heavy whipping cream. Beat on medium-high speed until stiff peaks form—this takes about 3-4 minutes. You’ll know it’s ready when you lift the beaters and the cream holds its shape without drooping. (Pro tip: chill your bowl and beaters in the freezer for 10 minutes before whipping—it makes a huge difference.)
- Fold it together. Gently fold the whipped cream into the pumpkin mixture. Use a spatula and cut through the center, then around the sides. Don’t stir—you want to keep as much air as possible. Fold until no white streaks remain. The mixture should be light, fluffy, and a beautiful pale orange color.
- Crush the cookies. Put the chocolate sandwich cookies in your food processor and pulse until they’re finely crushed. Or, put them in a zip-top bag and go to town with a rolling pin. Transfer the crumbs to a small bowl and stir in the melted butter and cinnamon. Mix with a fork until the crumbs look like damp dirt. Set aside.
- Layer the cups. Grab your cups or glasses. Start with a layer of cookie crumbs—about 2 tablespoons per cup. Then add a generous layer of pumpkin mousse—about 1/3 cup. Repeat: another layer of crumbs, another layer of mousse. End with a final sprinkle of crumbs on top. You want the “dirt” to cover the mousse completely.
- Chill. Place the cups in the refrigerator for at least 2 hours. This is the hard part—waiting. But trust me, the flavors need time to meld together. The mousse sets up beautifully and the cookie crumbs soften just a bit, creating that perfect dirt-like texture.
- Decorate and serve. Right before serving, press a few gummy worms into the top of each cup so they look like they’re crawling out of the dirt. Add a mint leaf or a small pumpkin candy if you’re feeling fancy. Serve cold.
Cooking Tips & Techniques
After making these cups more times than I can count, I’ve picked up a few tricks that make a real difference.
Don’t skip the cream cheese softening step. I know, I know—you’re busy and impatient. But cold cream cheese will leave you with lumpy mousse, and nobody wants that. Set it out while you’re making dinner, and by the time you’re ready to bake (or not-bake, in this case), it’ll be perfect.
Watch your whipping cream. One time I got distracted by my phone and over-whipped the cream until it started looking like butter. Not great. Stop as soon as you see stiff peaks—the cream should be smooth and glossy, not grainy.
Make ahead for better flavor. These actually taste better the next day. The pumpkin spice flavors have time to develop, and the cookie crumbs soften into something almost cake-like. So if you’re planning for a party, make them the night before.
Keep it cold. These cups need to stay refrigerated until you’re ready to serve. If they sit out too long, the mousse gets soft and the “dirt” gets mushy. On a warm day, I even set the cups on a tray of ice if they’re sitting out for a while.
My biggest failure? The time I used pumpkin pie filling instead of pure pumpkin. The mousse was way too sweet and oddly spiced. Learn from my mistake—always check the label!
Variations & Adaptations
One of the best things about this recipe is how easy it is to change up. Here are some of my favorite variations:
- Vegan Version: Use dairy-free cream cheese and coconut cream (the solid part from a can of full-fat coconut milk). The coconut adds a subtle tropical note that actually pairs beautifully with pumpkin. Use vegan chocolate cookies and skip the butter—just use a little coconut oil to bind the crumbs.
- Gluten-Free Option: Gluten-free chocolate sandwich cookies work perfectly here. I’ve tried a few brands, and they all crush up nicely. Just make sure your pumpkin puree and other ingredients are certified gluten-free if that’s a concern.
- Pumpkin Cheesecake Style: Add a thin layer of graham cracker crumbs at the very bottom of each cup before adding the cookie “dirt.” It gives you that classic cheesecake crust experience. I do this when I’m serving adults and want something a little more sophisticated.
- Spice It Up: Add a pinch of cayenne pepper or a dash of ginger to the mousse for a little kick. The heat plays really nicely with the sweet pumpkin and chocolate. My husband loves this version—he says it tastes like fall with attitude.
- Kid-Friendly Twist: Let the kids help crush the cookies and layer the cups. It’s a great way to get them involved in the kitchen. Plus, they love sticking the gummy worms in at the end. I’ve made these with my niece and nephew, and the mess was totally worth it.
Serving & Storage Suggestions
These Pumpkin Patch Dirt Pudding Cups are best served cold, straight from the fridge. The contrast between the creamy mousse and the crunchy (but slightly softened) cookie crumbs is just perfect.
Presentation Ideas: For a Halloween party, I like to serve these in clear plastic cups so you can see all the layers. Add a little paper flag with a pumpkin sticker on a toothpick—it’s cute and helps guests know which cup is theirs. For Thanksgiving, use small mason jars with a sprig of rosemary tucked into the side. It looks rustic and elegant.
What to Serve With: These cups are rich enough to stand alone, but they pair beautifully with a cup of hot apple cider or a warm chai latte. If you’re serving them as part of a dessert table, they go great with spiced pumpkin scones or a slice of classic apple crisp.
Storage: Keep the cups covered in the refrigerator for up to 4 days. I recommend covering each cup with plastic wrap or popping them in a container with a lid. The cookie crumbs will continue to soften over time, so they’re best within the first 2-3 days. I don’t recommend freezing these—the texture gets weird when thawed.
Reheating? Nope—these are strictly a cold dessert. But if you want to take the chill off, let them sit at room temperature for about 10 minutes before serving. The flavors open up a bit.
Nutritional Information & Benefits
Let’s be real—this is a dessert, so it’s not health food. But there are some redeeming qualities! Here’s the approximate nutritional breakdown per serving (based on 6 servings):
- Calories: 380
- Total Fat: 24g
- Saturated Fat: 14g
- Carbohydrates: 38g
- Sugar: 28g
- Protein: 5g
- Fiber: 2g
- Vitamin A: 180% DV (hello, pumpkin!)
Health Highlights: Pumpkin is packed with vitamin A, which is great for your eyes and immune system. The cream cheese adds a little protein and calcium. And honestly? Sometimes you just need a treat that makes you happy—and that counts for something too.
Dietary Considerations: This recipe contains dairy and gluten. For dairy-free or gluten-free options, check the variations section above. It’s also vegetarian-friendly and can be made vegan with the right substitutions.
Conclusion
These Easy No-Bake Pumpkin Patch Dirt Pudding Cups are everything I loved about that little bakery on Elm and 3rd—but better. They’re faster, simpler, and honestly, they taste even more like fall than I remembered. The creamy pumpkin mousse, the crunchy chocolate “dirt,” the playful gummy worms poking out—it’s a dessert that brings a smile to everyone’s face.
I hope you give these a try, whether it’s for a Halloween party, a Thanksgiving gathering, or just a random Tuesday when you need a little seasonal cheer. Don’t be afraid to make them your own—swap in different cookies, try different decorations, or let the kids go wild with the gummy worms. That’s the beauty of a no-bake recipe: there’s no wrong way to do it.
I’d love to hear how yours turn out! Drop a comment below and let me know if you tried any fun variations. And if you’re looking for more easy fall desserts, check out my no-bake pumpkin cheesecake bars—they’re another weeknight winner. Happy fall, friends!
FAQs
Can I make these dirt pudding cups ahead of time?
Absolutely! In fact, they taste even better the next day. Just assemble the cups, cover them, and refrigerate for up to 4 days. Add the gummy worms right before serving so they stay firm and don’t get soggy.
Can I use canned pumpkin pie filling instead of pumpkin puree?
I don’t recommend it. Pumpkin pie filling is already sweetened and spiced, which will throw off the balance of this recipe. Stick with 100% pure pumpkin puree for the best results. Your mousse will be perfectly creamy and not overly sweet.
What if I don’t have an electric mixer?
No problem! You can whip the cream by hand with a whisk—it’ll just take a little elbow grease. About 5-7 minutes of vigorous whisking should get you stiff peaks. Or, use store-bought whipped topping (like Cool Whip) to save time.
Can I make these in a large dish instead of individual cups?
Yes! Use a 9×9 inch baking dish or a trifle bowl. Layer the cookie crumbs and mousse the same way, then chill and serve with a spoon. It’s perfect for potlucks or family gatherings. Just double the recipe if you’re feeding a crowd.
How do I keep the gummy worms from getting soggy?
Add the gummy worms right before you serve the cups. If you add them too early, they’ll absorb moisture from the mousse and lose their chewy texture. I usually stick them in about 5 minutes before bringing the cups to the table.
PrintEasy No-Bake Pumpkin Patch Dirt Pudding Cups: Best Fall Dessert

These no-bake pumpkin dirt pudding cups feature a creamy pumpkin mousse layered with chocolate cookie ‘dirt’ and topped with gummy worms. They come together in under 15 minutes and are perfect for fall gatherings or a quick weeknight treat.
- Prep Time: 15 minutes
- Cook Time: 0 minutes
- Total Time: 2 hours 15 minutes (includes chilling)
- Yield: 6 servings 1x
- Category: Dessert
- Cuisine: American
Ingredients
- 1 package (8 oz) cream cheese, softened
- 1 cup pumpkin puree (not pumpkin pie filling)
- 1/2 cup powdered sugar
- 1 teaspoon vanilla extract
- 1 teaspoon pumpkin pie spice
- 1/2 teaspoon ground cinnamon
- 1 cup heavy whipping cream, cold
- 1 1/2 cups chocolate sandwich cookies (about 15 cookies, like Oreos)
- 2 tablespoons unsalted butter, melted
- 1/4 teaspoon ground cinnamon
- 1/2 cup gummy worms
- Optional: small pumpkin candies, candy corn, or chocolate leaves for decoration
- Fresh mint leaves (for garnish)
Instructions
- Make the pumpkin mousse base: In a large mixing bowl, beat the softened cream cheese with an electric mixer until smooth and fluffy, about 2 minutes. Add the pumpkin puree, powdered sugar, vanilla extract, pumpkin pie spice, and cinnamon. Beat until well combined and silky. Scrape down the sides of the bowl.
- Whip the cream: In a separate medium bowl, pour the cold heavy whipping cream. Beat on medium-high speed until stiff peaks form, about 3-4 minutes. (Chill the bowl and beaters in the freezer for 10 minutes before whipping for best results.)
- Fold it together: Gently fold the whipped cream into the pumpkin mixture using a spatula. Cut through the center and around the sides until no white streaks remain. The mixture should be light, fluffy, and pale orange.
- Crush the cookies: Pulse the chocolate sandwich cookies in a food processor until finely crushed. Alternatively, place them in a zip-top bag and crush with a rolling pin. Transfer crumbs to a small bowl and stir in melted butter and 1/4 teaspoon cinnamon until the crumbs look like damp dirt.
- Layer the cups: In small clear cups or glasses, start with a layer of cookie crumbs (about 2 tablespoons). Add a generous layer of pumpkin mousse (about 1/3 cup). Repeat with another layer of crumbs and mousse, ending with a final sprinkle of crumbs on top.
- Chill: Refrigerate the cups for at least 2 hours to allow the flavors to meld and the mousse to set.
- Decorate and serve: Just before serving, press a few gummy worms into the top of each cup so they look like they’re crawling out of the dirt. Add a mint leaf or small pumpkin candy if desired. Serve cold.
Notes
For best texture, ensure cream cheese is truly softened (leave out for 30 minutes). Do not use pumpkin pie filling—use 100% pure pumpkin puree. These cups taste even better the next day. Keep refrigerated until serving. Add gummy worms just before serving to prevent sogginess.
Nutrition
- Serving Size: 1 cup
- Calories: 380
- Sugar: 28
- Fat: 24
- Saturated Fat: 14
- Carbohydrates: 38
- Fiber: 2
- Protein: 5
Keywords: no-bake pumpkin dessert, dirt pudding cups, fall dessert, Halloween dessert, pumpkin mousse, easy dessert, kid-friendly


