My neighbor wasn’t trying to impress anyone. I’d stopped by to borrow a whisk—mine had mysteriously vanished into the abyss of my kitchen drawers—and the smell hit me before I even got past her front door. Chocolate, warm and deep, wrapped around me like a hug I didn’t know I needed. I followed it to her kitchen, expecting some elaborate layer cake or maybe those fancy French pastries you see on cooking shows.
Instead, I found her standing at the counter, a piping bag in one hand and what looked like a small mountain of chocolate-frosted cupcakes in front of her. But they weren’t regular cupcakes. Each one had a little face made of candy eyes and a beak, with little pretzel stick legs poking out the side. “Turkey cupcakes,” she said, shrugging like it was nothing. “For the kids’ class party tomorrow.” She didn’t even look up, just kept piping these perfect little swirls of frosting, completely nonchalant about creating something that had stopped me cold in my tracks.
I stood there for a solid minute, maybe longer, just watching her work. She’d grab a cupcake, add a quick swirl, stick on the candy eyes, and move to the next one without a second thought. “You want one?” she finally asked, nodding toward a plate of rejects—the ones where the beak fell off or the eyes went crooked. I grabbed one, and honestly, it was the best thing I’d eaten all week. The chocolate frosting was rich and smooth, the cake underneath was perfectly moist, and the little crunch from the pretzel legs? Pure genius.
She never did find my whisk, by the way. I ended up buying a new one the next day. But I left her house with something better—the recipe for these Easy No-Bake Turkey Cupcakes with Chocolate Frosting. And let me tell you, I’ve been making them every Thanksgiving since. Maybe you’ve been there, staring at a Pinterest board full of complicated holiday desserts that look like they take a culinary degree to pull off. These aren’t those. They’re the kind of recipe that makes you look like a hero with almost zero effort. And honestly, that’s exactly why I keep coming back to them.
Why You’ll Love This Recipe
Look, I’m not saying these are the most sophisticated dessert you’ll ever make. But I am saying they’ll be the most talked-about thing on your Thanksgiving dessert table. And after testing this recipe about six times (my family was very patient), I can tell you exactly why they work so well.
- No Baking Required: I’m serious. You don’t even need to turn on your oven. These come together with store-bought cupcakes or a simple box mix. Perfect for when your oven is already stuffed with a turkey and three casseroles.
- Kid-Friendly Fun: My niece helped me make these last year, and she didn’t mess up a single one. Okay, maybe she ate more candy corn than she used, but that’s part of the charm. Kids love decorating them, and adults love eating them.
- Simple Ingredients: You probably already have most of what you need. Chocolate frosting, candy corn, pretzel sticks, and some candy eyes. No fancy baking supplies required.
- Perfect for Thanksgiving: These are the ultimate holiday party dessert. They look festive, they’re easy to transport, and they disappear faster than the actual turkey sometimes.
- Unbelievably Cute: Let’s be real—the visual factor here is off the charts. These little turkey faces are so adorable that people actually hesitate before taking a bite. For about two seconds. Then they grab two.
What makes these different from other turkey cupcake recipes? It’s the chocolate frosting, honestly. Most versions use vanilla or cream cheese frosting, but the rich chocolate pairs perfectly with the salty pretzel sticks and sweet candy corn. It’s a flavor combination that just works. Plus, using store-bought frosting means you’re done in under 20 minutes. No waiting for butter to soften, no messing with powdered sugar clouds. Just open, spread, and decorate.
This is the kind of recipe that makes you feel like a holiday rockstar without the stress. You get all the “wow” factor of a homemade dessert with about 10% of the effort. And if that’s not a Thanksgiving miracle, I don’t know what is.
What Ingredients You Will Need
This recipe uses simple, everyday ingredients to create something that looks way more complicated than it actually is. Most of these are pantry staples or easy to find at any grocery store. Here’s what you’ll need:
For the Cupcakes
- 12 pre-made chocolate cupcakes (store-bought or from a box mix) — Look for ones with a flat top for easier decorating. I usually grab a pack from the bakery section at my local grocery store.
- 1 can (16 oz) chocolate frosting — I prefer Duncan Hines Creamy Home-Style or Betty Crocker Rich & Creamy. The texture is perfect for piping and it holds its shape well.
- 24 candy eyes (found in the baking aisle) — These little guys are what bring your turkeys to life. You can also use mini chocolate chips if you can’t find candy eyes.
- 24 candy corn pieces — These become the turkey’s beak. Look for fresh, soft candy corn. Stale ones are harder to work with.
- 24 pretzel sticks — These are the turkey legs. Break them in half so you have 48 pieces total. I like using Snyder’s of Hanover because they’re sturdy and don’t break easily.
- Red candy melts or red frosting (optional) — For the turkey’s wattle (that little red dangly bit under the beak). Not strictly necessary, but it adds a nice touch.
- Orange and red sprinkles or sanding sugar (optional) — For extra color on the feathers if you want to get fancy.
For the Feathers (the fun part)
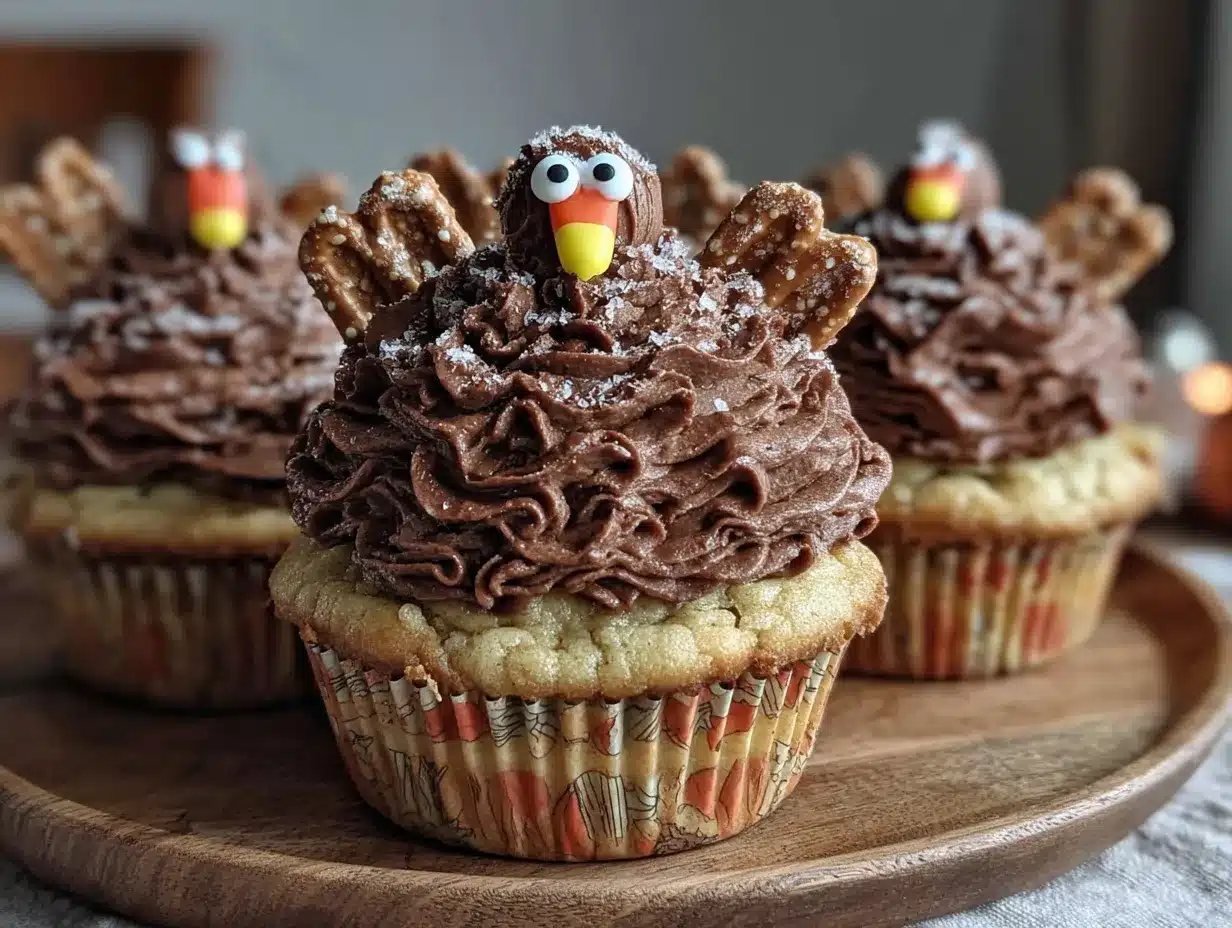
- 24-36 candy corn pieces — These form the colorful feathers on the back of the turkey. You can use regular candy corn or the autumn mix with the brown tips.
- 24-36 candy pumpkins or harvest candy — These add nice orange and yellow tones to the feathers. I found a bag of autumn mix at Target that had perfect colors.
- 24-36 fall-colored M&M’s — Red, orange, yellow, and brown ones work great. Pick them out of a regular bag or grab a seasonal mix.
- Pretzel sticks (extra) — For breaking into smaller pieces to use as feather accents if desired.
Substitution Notes
If you’re gluten-free, use gluten-free cupcakes and check that your candy corn and candy eyes are gluten-free (most are). For a dairy-free version, use dairy-free chocolate cupcakes and frosting. I’ve tried both, and honestly, they work just as well. The candy decorations are naturally dairy-free in most cases. If you can’t find candy eyes, you can use mini chocolate chips or even draw eyes with black frosting. And if pretzel sticks aren’t your thing, you can use thin breadsticks or even broken wafer cookies for the legs.
Equipment Needed
You don’t need a fancy kitchen setup for these. Here’s what I use:
- Piping bag with a round tip (or a zip-top bag with the corner snipped off) — I’ve used both, and honestly, the zip-top bag works just fine. Just don’t overfill it or you’ll end up with frosting everywhere.
- Small offset spatula — Great for spreading frosting evenly if you don’t want to pipe. I got mine at a dollar store and it’s still going strong.
- Toothpicks — For placing the candy eyes and beaks. It sounds fussy, but it keeps your fingers clean and gives you more control.
- Small bowls — For sorting your candy decorations. Trust me, having everything organized makes the process way smoother.
- Baking sheet or tray — To hold the finished cupcakes while you work. A sheet pan lined with parchment paper works perfectly.
- Parchment paper — For easy cleanup and to keep the cupcakes from sticking to your tray.
I tried using a fancy piping set once with all those different tips, but honestly, a simple round tip is all you need. The frosting swirl is what gives the turkey’s feathers that nice textured look. If you’re using a zip-top bag, just snip about a quarter-inch off the corner and you’re good to go. Oh, and here’s a tip I learned the hard way—don’t use a bag that’s too thin. Those cheap sandwich bags will split right open when you squeeze. Go for the freezer-grade zip-top bags. They’re thicker and won’t explode on you mid-pipe.
Preparation Method
Alright, let’s make some turkey cupcakes. This is the fun part. I’ve broken it down into steps so you don’t miss anything.
Step 1: Prepare Your Workspace
Before you do anything else, get your cupcakes out of the fridge and let them come to room temperature. Cold cupcakes are harder to frost—the frosting doesn’t spread as smoothly. While they’re warming up, sort your candy decorations into small bowls. Put your candy corn in one, candy eyes in another, and pretzel sticks in a third. This might seem like overkill, but when you’re in the middle of decorating, you don’t want to be digging through a bag looking for a specific piece. Trust me on this one.
Step 2: Make the Frosting
If you’re using store-bought frosting, give it a good stir in the can. Sometimes it separates a little in storage. If you want to get fancy, you can transfer it to a bowl and whip it with a hand mixer for about 30 seconds. This makes it fluffier and easier to pipe. I usually skip this step because I’m impatient, but it does make a difference if you have the time. Spoon the frosting into your piping bag or zip-top bag. Don’t overfill—about halfway is perfect. You don’t want frosting squeezing out the top while you’re trying to pipe.
Step 3: Pipe the Feathers
Hold your piping bag at a 45-degree angle over the top of a cupcake. Starting from the back edge, pipe a swirl of frosting that goes around and around, getting wider as you go. You want it to look like a soft-serve ice cream cone. The swirl should cover most of the cupcake top, leaving a small space at the front for the turkey’s face. If you mess up, don’t worry. Just scrape it off and try again. I’ve done this dozens of times and I still get the occasional lumpy swirl.
Step 4: Add the Feather Decorations
While the frosting is still soft, gently press your candy decorations into the back part of the swirl. Start with the candy corn—place them in a fan pattern, pointing outward. Then add the candy pumpkins and M&M’s, spacing them out so you can see the frosting between them. Don’t press too hard or they’ll sink into the frosting. You just want them to stick. This is where your kids can really help. My nephew loves this part. He calls it “making the turkey fancy.”
Step 5: Create the Face
Now for the front part of the cupcake. Take two candy eyes and press them gently into the frosting where the face will be. They should be about an inch apart. Then take a piece of candy corn and place it point-down between the eyes to form the beak. If you’re using red candy melts for the wattle, attach a small piece just below the beak. Use a toothpick to position everything precisely. This is the part that really brings your turkey to life, so take your time.
Step 6: Add the Legs
Take two pretzel stick halves and gently push them into the side of the cupcake, right at the base where the cupcake meets the wrapper. Angle them slightly downward so they look like little turkey legs. Don’t push them in too far or they’ll break. I learned this the hard way when I snapped three pretzel sticks in a row. Just a gentle push is all you need. If the pretzels seem loose, you can add a tiny dab of frosting to hold them in place.
Step 7: Final Touches
Take a step back and look at your turkey. Does it need more feathers? Are the eyes straight? Make any small adjustments now while the frosting is still soft. If you want, you can add a few small pretzel stick pieces to the feather area for extra texture. Once you’re happy, carefully transfer the cupcake to your serving tray. Repeat with the remaining cupcakes. You’ll get faster as you go—I can do a dozen in about 15 minutes now.
Step 8: Chill and Serve
Once all your turkeys are assembled, pop the tray in the refrigerator for about 15-20 minutes. This sets the frosting and makes the decorations stick better. Plus, cold cupcakes are easier to transport if you’re taking them to a party. When you’re ready to serve, let them sit at room temperature for about 10 minutes so the frosting softens slightly. This makes them easier to bite into and brings out the flavor of the chocolate.
Cooking Tips & Techniques
After making these about a dozen times (my coworkers have become very enthusiastic taste-testers), I’ve picked up a few tricks that make the process smoother.
Don’t overthink the piping. I used to stress about getting the perfect swirl, but honestly, these are turkeys. They’re supposed to look a little messy and rustic. The imperfections are what make them charming. If your frosting swirl looks more like a blob than a soft-serve cone, just stick some extra candy on it and call it a “feather explosion.” No one will know the difference.
Work with room-temperature frosting. Cold frosting is stiff and hard to pipe. If your frosting has been in the fridge, let it sit out for about 30 minutes before you start. If you’re in a hurry, you can microwave it for 5-10 seconds, but be careful not to melt it. Warm frosting will just run off the cupcake and make a mess. I learned this the hard way when I ended up with a puddle of chocolate on my counter.
Use a damp paper towel under your tray. This keeps the tray from sliding around while you’re working on the cupcakes. It’s a small thing, but it makes a big difference when you’re trying to place tiny candy eyes without everything moving.
Prep your candy decorations ahead of time. Sort them by color and type into small bowls or muffin tins. This saves so much time during the decorating process. I keep a little tray with compartments that I use specifically for holiday decorating. It was like five dollars at a craft store and it’s one of my most-used kitchen tools during the holidays.
Double up on the frosting if needed. Some store-bought cupcakes are a little dry. If you’re using box mix cupcakes, add an extra tablespoon of sour cream or mayonnaise to the batter. It sounds weird, but it makes them incredibly moist. My mom taught me that trick, and I swear by it now.
Don’t skip the chilling step. I know you’re excited to serve them, but letting the cupcakes chill for at least 15 minutes makes a huge difference. The frosting sets, the decorations stay put, and everything looks neater. Plus, they’re easier to transport without the candy sliding off.
Variations & Adaptations
One of the best things about this recipe is how easy it is to adapt. Here are some variations I’ve tried and loved:
Gluten-Free Version
Use gluten-free chocolate cupcakes and double-check that your candy corn and candy eyes are gluten-free. Most major brands are, but it’s worth checking the label. For the pretzel sticks, look for gluten-free pretzels or use thin breadsticks instead. I’ve made these for a friend with celiac disease and they were a huge hit.
Dairy-Free Version
Swap the chocolate cupcakes for dairy-free ones and use a dairy-free chocolate frosting. I like the Simple Mills brand for cupcakes and Miss Jones Baking Co. for frosting. The candy decorations are naturally dairy-free, so you’re good there. Just check the labels to be safe.
Mini Turkey Cupcakes
Use mini cupcakes instead of regular-sized ones. You’ll need to adjust the amount of frosting and decorations, but they’re perfect for parties where people want to try multiple desserts. I made these for a friend’s baby shower and they were gone in minutes. The mini size also makes them easier for little hands to hold.
Pumpkin Spice Version
Use pumpkin spice cupcakes with cream cheese frosting instead of chocolate. The orange and brown color scheme actually works really well for turkeys. Top with cinnamon-sugar for extra fall flavor. I tried this last year and it was a nice change from the chocolate version.
Healthy-ish Version
Use whole wheat cupcakes or zucchini chocolate cupcakes for a slightly healthier option. You can also use Greek yogurt in the frosting to cut down on the sugar. The candy decorations are still candy, but at least the base is a little better for you. I made these for a “healthy Thanksgiving” potluck and they were well-received.
Serving & Storage Suggestions
These turkey cupcakes are best served at room temperature. If you’ve chilled them, let them sit out for about 15-20 minutes before serving. The frosting softens and the flavors come through better. I like to arrange them on a large platter in a fan pattern, with the turkey faces all facing outward. It makes a really cute presentation.
For a Thanksgiving dessert table, pair them with other easy desserts like pumpkin pie bars or apple crisp. They also go great with hot apple cider or a warm cup of coffee. If you’re serving them to kids, set up a decorating station and let them make their own. It’s a fun activity that doubles as dessert.
Storage: Store leftover cupcakes in an airtight container in the refrigerator for up to 3 days. The frosting will firm up, but they’ll still taste great. If you need to store them longer, you can freeze them for up to a month. Just place them in a single layer in a freezer-safe container with parchment paper between layers. To thaw, transfer them to the refrigerator overnight and then let them come to room temperature before serving.
Transportation Tips: If you’re taking these to a party, assemble them on a flat tray and cover loosely with plastic wrap. Don’t stack them or the decorations will get smushed. I use a cupcake carrier with individual slots, which works perfectly. If you don’t have one, a baking sheet with a rim works fine. Just drive carefully and avoid sharp turns.
Flavor Development: These actually taste better the next day. The flavors meld together and the frosting sets perfectly. I’ve made them the night before Thanksgiving and they were even better the next day. Just keep them covered in the fridge and add the pretzel legs right before serving so they stay crunchy.
Nutritional Information & Benefits
Let’s be honest—these are a treat. But here’s the breakdown so you know what you’re working with. Per cupcake (based on standard store-bought ingredients):
- Calories: Approximately 280-320
- Total Fat: 12-15g
- Saturated Fat: 4-6g
- Carbohydrates: 42-48g
- Sugar: 32-38g
- Protein: 2-3g
- Sodium: 180-220mg
Now, the good news. Dark chocolate frosting (if you use it) contains antioxidants and can help with heart health. The pretzel sticks provide a small amount of iron and fiber. And the candy corn? Well, it makes you smile, and that’s good for your mental health. Everything in moderation, right?
If you’re watching your sugar intake, you can use a sugar-free chocolate cake mix and sugar-free frosting. The taste is slightly different, but the texture holds up well. I’ve also used a keto-friendly chocolate frosting recipe that worked surprisingly well with these decorations.
Allergen Note: These cupcakes contain wheat, dairy, and soy (from the chocolate). They may also contain traces of nuts depending on the brands you use. Always check labels if you’re serving to someone with allergies. The candy decorations are typically free of major allergens, but it’s worth double-checking.
Conclusion
These Easy No-Bake Turkey Cupcakes with Chocolate Frosting have become a staple in my Thanksgiving rotation. They’re fun, they’re easy, and they always get a reaction. Whether you’re making them for a classroom party, a Friendsgiving gathering, or just because you want to eat something cute, they deliver every time.
What I love most about this recipe is how forgiving it is. You don’t need to be a pastry chef to pull these off. You just need some cupcakes, frosting, and a handful of candy. The imperfections are part of the charm. I’ve made turkeys with crooked eyes, lopsided beaks, and feathers that looked more like a hot mess than a fan. And you know what? People still loved them. They still grabbed two.
So go ahead and give these a try. Customize them however you want—use vanilla cupcakes, try different candy combinations, or even make them into different animals. The possibilities are endless. And when you make them, I’d love to hear about it. Drop a comment below and tell me how your turkeys turned out. Share a photo if you’re brave. And if you have your own twist on these, I’m all ears.
Happy Thanksgiving, friends. May your frosting be smooth, your candy corn be fresh, and your turkey cupcakes be the hit of the dessert table.
Frequently Asked Questions
Can I use homemade cupcakes instead of store-bought?
Absolutely! Homemade cupcakes work great. Just make sure they’re completely cooled before you start decorating. Warm cupcakes will melt the frosting and make a mess. I’ve used both box mix and scratch recipes, and they both work perfectly.
How far in advance can I make these?
You can make the cupcakes and frosting up to two days ahead. Store them separately in the fridge. Assemble the turkeys the day you plan to serve them for the best presentation. If you need to make them a day ahead, add the pretzel legs just before serving so they stay crunchy.
Can I use different candy for the feathers?
Definitely! Get creative with it. Use autumn-colored M&M’s, candy pumpkins, candy corn, or even small cookies. I’ve used broken pieces of wafer cookies for a different texture. Just make sure whatever you use is small enough to fit on the cupcake and sturdy enough to hold its shape.
My frosting is too runny. What do I do?
If your frosting is too soft, pop it in the fridge for 10-15 minutes to firm up. If it’s still runny after chilling, you can add a tablespoon of powdered sugar at a time until it reaches the right consistency. Just be careful not to add too much or it’ll become too sweet.
Can I make these vegan?
Yes! Use vegan chocolate cupcakes and vegan chocolate frosting. Most candy corn and candy eyes are vegan, but check the labels to be sure. For the pretzel sticks, most are vegan-friendly. I’ve made a vegan version for a friend and they turned out great. Just give yourself a little extra time to find the right ingredients.
Pin This Recipe!
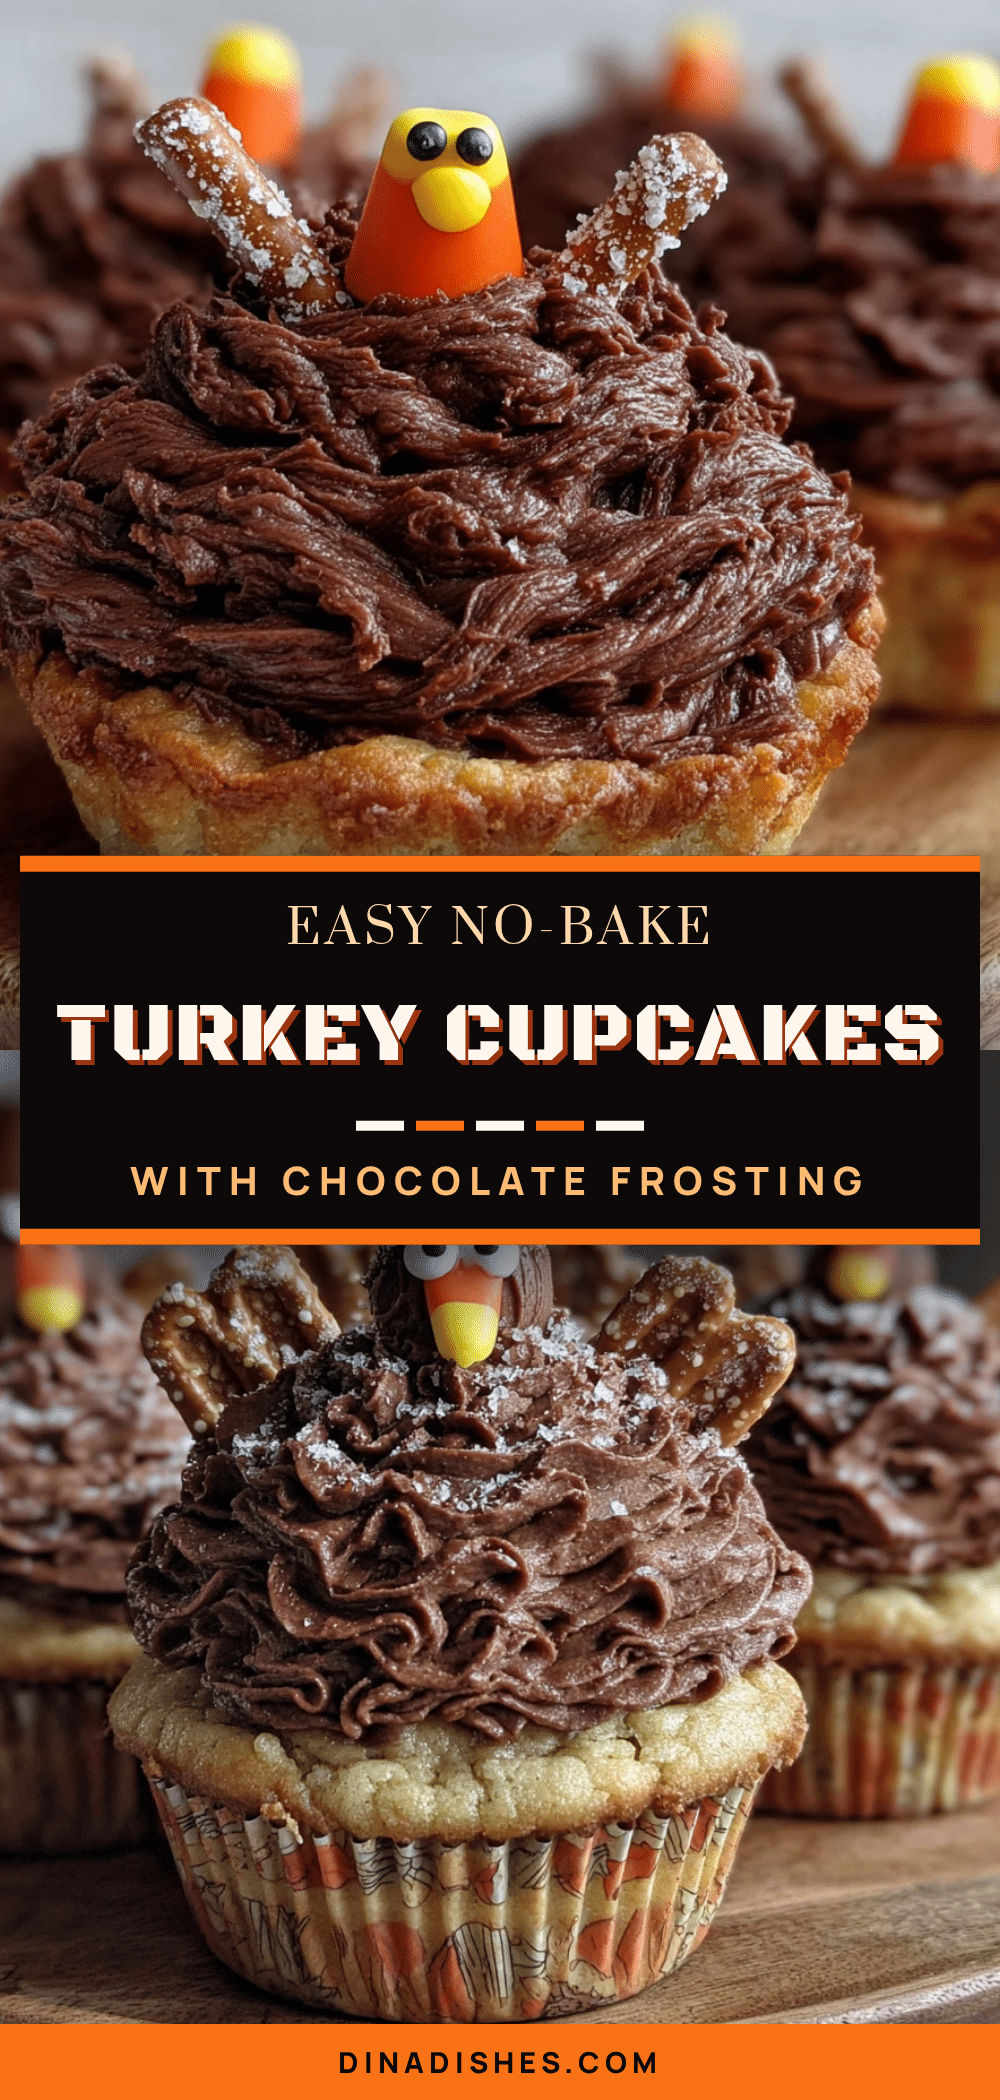
Easy No-Bake Turkey Cupcakes with Chocolate Frosting
These adorable no-bake turkey cupcakes are made with store-bought chocolate cupcakes, rich chocolate frosting, and candy decorations. Perfect for Thanksgiving, they come together in under 20 minutes and are a hit with kids and adults alike.
- Prep Time: 15 minutes
- Cook Time: 0 minutes
- Total Time: 20 minutes
- Yield: 12 servings 1x
- Category: Dessert
- Cuisine: American
Ingredients
- 12 pre-made chocolate cupcakes (store-bought or from a box mix)
- 1 can (16 oz) chocolate frosting (e.g., Duncan Hines Creamy Home-Style or Betty Crocker Rich & Creamy)
- 24 candy eyes
- 24 candy corn pieces
- 24 pretzel sticks, broken in half (48 pieces total)
- Red candy melts or red frosting (optional, for wattle)
- Orange and red sprinkles or sanding sugar (optional, for feathers)
- 24–36 additional candy corn pieces (for feathers)
- 24–36 candy pumpkins or harvest candy (for feathers)
- 24–36 fall-colored M&M’s (red, orange, yellow, brown; for feathers)
- Extra pretzel sticks (for feather accents, optional)
Instructions
- Prepare your workspace: Let cupcakes come to room temperature. Sort candy decorations into small bowls.
- Make the frosting: Stir store-bought frosting until smooth. Optionally, whip with a hand mixer for 30 seconds. Spoon into a piping bag or zip-top bag (snip off a quarter-inch corner).
- Pipe the feathers: Hold piping bag at a 45-degree angle over a cupcake. Starting from the back edge, pipe a swirl of frosting covering most of the top, leaving space at the front for the face.
- Add feather decorations: While frosting is soft, gently press candy corn, candy pumpkins, and M&M’s into the back part of the swirl in a fan pattern. Don’t press too hard.
- Create the face: Press two candy eyes about an inch apart into the front frosting. Place a candy corn piece point-down between them for the beak. Optionally, attach a small red candy melt below the beak for the wattle.
- Add the legs: Gently push two pretzel stick halves into the side of the cupcake at the base, angling slightly downward. Use a dab of frosting if needed to secure.
- Final touches: Adjust decorations as needed. Optionally, add small pretzel stick pieces to the feather area. Transfer to serving tray.
- Chill and serve: Refrigerate assembled cupcakes for 15-20 minutes to set frosting. Let sit at room temperature for 10 minutes before serving.
Notes
Use room-temperature frosting for easier piping. Work with a damp paper towel under the tray to prevent sliding. Double up on frosting if cupcakes are dry. Don’t skip the chilling step for best results. For gluten-free, use gluten-free cupcakes and check candy labels. For dairy-free, use dairy-free cupcakes and frosting.
Nutrition
- Serving Size: 1 cupcake
- Calories: 300
- Sugar: 35
- Sodium: 200
- Fat: 13.5
- Saturated Fat: 5
- Carbohydrates: 45
- Fiber: 1
- Protein: 2.5
Keywords: turkey cupcakes, no-bake, Thanksgiving dessert, chocolate cupcakes, easy holiday dessert, kid-friendly


