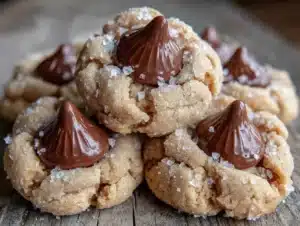
My husband claimed to hate peanut butter cookies for fifteen years. Fifteen years. He’d make a face every time I mentioned them, launching into this whole speech about how they’re always too dry or too crumbly or just plain boring. I believed him, honestly. I mean, who was I to argue with a man who’d spent his whole life avoiding a classic cookie?
Then last Tuesday happened. I was testing a batch of these peanut butter blossom cookies for a holiday baking guide I was putting together, mostly just for myself. I had the Hershey kisses all unwrapped, the dough chilling in the fridge, the whole kitchen smelling like a Reese’s factory. I stepped away for maybe two minutes to answer the door for a package, and when I came back, there he was. Standing at the counter. Popping a warm cookie into his mouth like he’d been caught with his hand in the cookie jar. Literally.
“These are different,” he said, chewing slowly, trying to play it cool. “These are actually good.”
That’s the moment I knew I had something special. These peanut butter blossom cookies aren’t just another cookie recipe—they’re the ones that convert the skeptics, win over the picky eaters, and disappear from the cooling rack before you can even count them. And for parents feeding a family on a sensible budget, let me tell you, a recipe this simple that delivers this much joy is pure gold. The ingredients are pantry staples, the kids can help press the kisses in, and somehow, they always taste like you spent way more effort than you actually did.
Maybe you’ve been there too—wondering if there’s a peanut butter cookie out there that’s actually soft, actually flavorful, actually worth the butter and sugar. This is it. This is the one.
Why You’ll Love This Recipe
Let me be real with you for a second. I’ve tested peanut butter blossom cookies more times than I care to count. Some came out too dry. Some spread into flat, sad pancakes. Some just tasted like sugar with no real peanut butter punch. But this version? This is the one I keep coming back to, and here’s why it works for families like ours.
- Budget-Friendly Ingredients: You probably already have peanut butter, flour, sugar, butter, and eggs in your kitchen right now. The only special purchase is a bag of Hershey kisses, and those go on sale constantly during the holidays. No fancy extracts, no specialty flours, no trips to three different stores.
- Kid-Approved and Tested: My own kids have declared these “the best cookies ever made,” and they’ve eaten a lot of cookies. The process of unwrapping the kisses and pressing them into the warm cookies is practically a family tradition now. Plus, they reheat beautifully for lunchboxes the next day.
- Comes Together Quickly: From start to finish, you’re looking at about 30 minutes of active time. The dough doesn’t even need to chill, which is rare for a peanut butter cookie that actually holds its shape. That’s huge for busy weeknights or last-minute bake sale emergencies.
- Perfect for Picky Eaters: The combination of soft, peanut buttery cookie and that little square of chocolate on top? It’s practically engineered to please even the most stubborn taste buds. I’ve seen kids who “don’t like peanut butter” eat three of these in one sitting.
- Freezes Like a Dream: These cookies freeze beautifully, both baked and unbaked. That means you can make a double batch on a Sunday afternoon and have cookies ready for school lunches, after-school snacks, or unexpected guests for weeks.
What makes these different from every other peanut butter blossom recipe out there? It’s the ratio. I spent months tweaking the butter-to-peanut-butter balance, the sugar amount, the baking time. Most recipes use too much flour, which gives you that dry, crumbly texture my husband always complained about. This one uses just enough flour to hold the cookie together while keeping the inside soft and almost fudgy. The Hershey kiss on top isn’t just decoration—it adds that little burst of chocolate that makes every bite feel complete. Honestly, it’s the kind of cookie that makes you close your eyes after the first bite and just… sigh.
What Ingredients You Will Need
This recipe uses simple, honest ingredients that come together to create something genuinely special. No weird additives, no hard-to-find items—just pantry staples that work together beautifully. Here’s what you’ll need and why each one matters.
- 1/2 cup unsalted butter, softened to room temperature — I use Land O’Lakes because it’s what I grew up with, but any good-quality unsalted butter works. The unsalted part is important because it lets you control the salt level yourself. If all you have is salted butter, just reduce the added salt to 1/4 teaspoon.
- 1/2 cup creamy peanut butter — This is where the magic happens. I recommend Jif or Skippy for the best texture. Natural peanut butters that separate can make the cookies greasy and cause them to spread too much. You want the kind that’s already emulsified and stable. If you’re using natural, stir it really well and expect a slightly different texture.
- 1/2 cup granulated sugar, plus extra for rolling — The sugar does double duty here. Some goes into the dough for sweetness and structure, and the rest gets used for rolling the dough balls before baking. That extra coating of sugar gives the cookies that beautiful crackled look and a tiny bit of crunch on the outside.
- 1/2 cup packed light brown sugar — Brown sugar adds moisture and a subtle molasses flavor that deepens the peanut butter taste. Don’t skip it or substitute all white sugar, or your cookies will be drier and less flavorful. Pack it firmly into the measuring cup for accuracy.
- 1 large egg, room temperature — Room temperature eggs incorporate more easily into the creamed butter and sugar, giving you a smoother dough. If you forget to take it out of the fridge, just place it in a bowl of warm water for five minutes.
- 1 teaspoon vanilla extract — Pure vanilla extract is worth the extra cost here. It rounds out the flavors and makes the cookies taste more complex. Imitation vanilla works in a pinch, but you’ll notice the difference.
- 1 1/2 cups all-purpose flour — Spoon and level your flour for the most accurate measurement. Scooping directly from the bag can pack in too much flour and make your cookies dry. I use Gold Medal or King Arthur Flour, both of which give consistent results.
- 1 teaspoon baking soda — This helps the cookies spread just enough and gives them a tender texture. Make sure your baking soda is fresh—if it’s been sitting in your cabinet for over a year, it might not work as well.
- 1/2 teaspoon salt — Salt enhances the peanut butter flavor and balances the sweetness. Don’t skip it, even if your peanut butter is salted. The amount here is carefully calculated for the whole recipe.
- About 36 Hershey’s Kisses, unwrapped — This is the star of the show. You can use milk chocolate, dark chocolate, or even the special holiday flavors like peppermint or caramel filled. Just make sure they’re completely unwrapped before you start baking, because you’ll need to press them in while the cookies are still hot.
Equipment Needed
You don’t need a fancy kitchen to make these cookies, which is exactly how I like it. Here’s what you’ll need:
- Electric hand mixer or stand mixer — Creaming the butter and sugar by hand is possible but exhausting. An electric mixer makes it quick and easy. I use my KitchenAid stand mixer for the job, but a $20 hand mixer works just as well.
- Large mixing bowl — Any medium-to-large bowl will do. I have a set of nesting glass bowls that I’ve been using for years.
- Measuring cups and spoons — For dry and wet ingredients separately. I recommend a set of metal measuring cups that won’t warp over time.
- Baking sheets — Two standard 13×18 inch baking sheets work perfectly. If you only have one, let it cool completely between batches.
- Parchment paper or silicone baking mats — These prevent sticking and make cleanup a breeze. I prefer parchment paper because it’s cheap and disposable.
- Cooling rack — Essential for letting the cookies cool properly after baking. A wire rack allows air to circulate so the bottoms don’t get soggy.
- Small bowl for rolling sugar — Just a shallow bowl or plate to hold the extra granulated sugar for coating the dough balls.
- Cookie scoop (optional but helpful) — A 1.5-tablespoon cookie scoop gives you uniform cookies that bake evenly. If you don’t have one, just use a regular spoon and try to make them the same size.
I’ve made these cookies in my mom’s tiny kitchen with a hand mixer that was older than me, and they turned out perfect. Don’t stress about having the best equipment. The recipe is forgiving.
Preparation Method
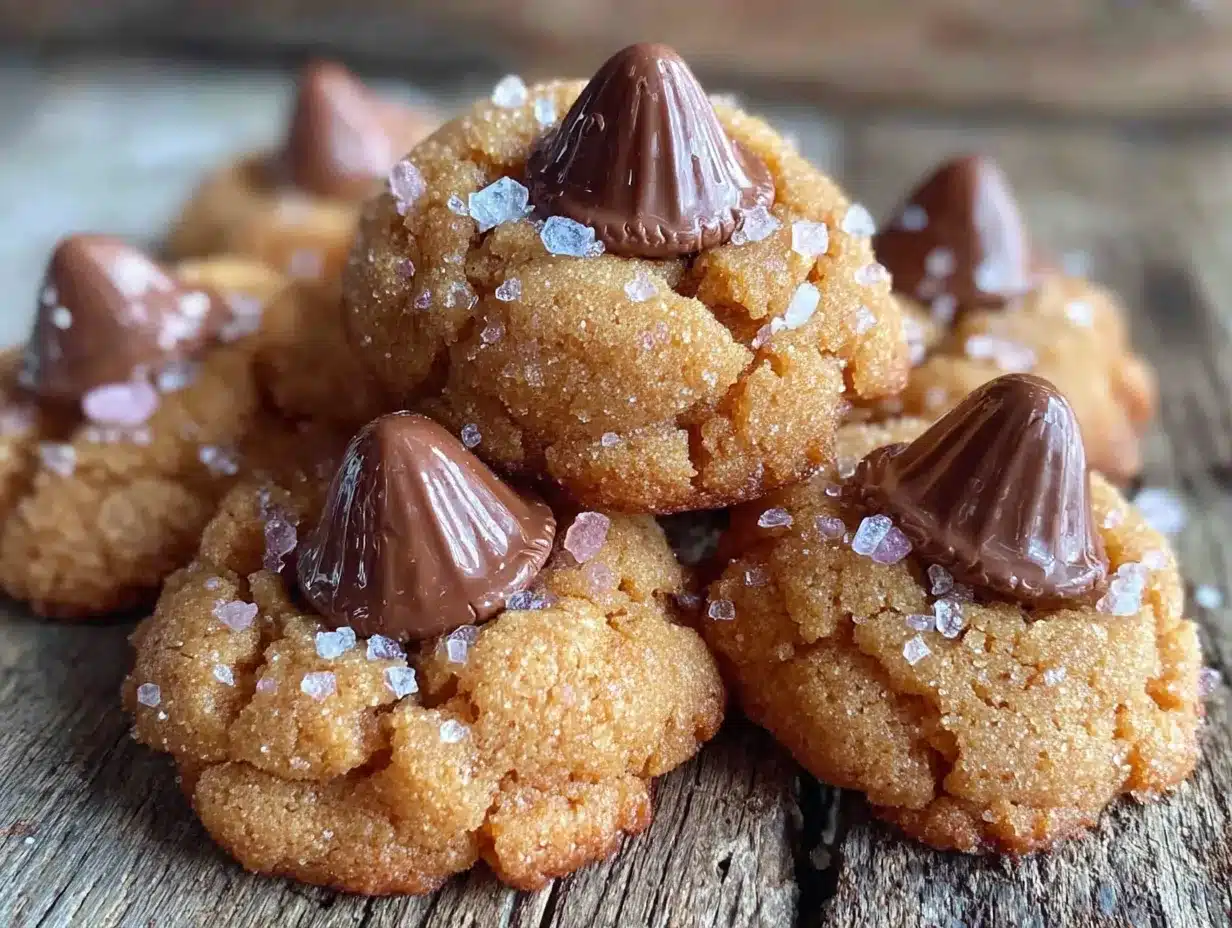
Alright, let’s get to the good part. Here’s how to make these peanut butter blossom cookies step by step, with all the little details I’ve learned from making them dozens of times.
- Preheat your oven to 375°F (190°C). Line two baking sheets with parchment paper or silicone mats. Getting the oven to the right temperature before you start mixing ensures even baking. I always set a timer to remind myself the oven is preheating, because I’ve definitely forgotten before.
- Cream the butter and sugars together. In your large mixing bowl, beat the softened butter, granulated sugar, and brown sugar together until light and fluffy. This takes about 2-3 minutes with an electric mixer on medium speed. You’re looking for a color change—the mixture should look pale and almost doubled in volume. Scrape down the sides of the bowl halfway through. This step is crucial because it incorporates air into the dough, which gives the cookies a tender texture.
- Add the peanut butter, egg, and vanilla. Beat in the creamy peanut butter until fully combined. Then add the egg and vanilla extract, mixing until everything is smooth and uniform. The dough will look a little wet at this point, and that’s exactly right. Don’t overmix—just until it comes together.
- Mix the dry ingredients separately. In a small bowl, whisk together the flour, baking soda, and salt. This ensures the baking soda and salt are evenly distributed throughout the flour, so you don’t get a pocket of baking soda in one cookie.
- Combine wet and dry ingredients. Gradually add the flour mixture to the wet ingredients, mixing on low speed just until the flour disappears. Stop as soon as you don’t see any more white streaks. Overmixing at this stage develops gluten and makes the cookies tough. The dough will be soft and slightly sticky, but it should hold together when pressed.
- Prepare the rolling sugar. Pour about 1/4 cup of granulated sugar into a small bowl. You’ll use this to coat each dough ball before baking.
- Shape the dough balls. Using a cookie scoop or your hands, form the dough into 1-inch balls (about 1.5 tablespoons each). Roll each ball between your palms until smooth, then roll it in the sugar until completely coated. Place the sugared balls on the prepared baking sheets, spacing them about 2 inches apart. You should get about 36 cookies total.
- Bake for 10-12 minutes. Bake one sheet at a time in the center of the oven. The cookies are done when they look puffed and slightly cracked on top, and the edges are just starting to turn golden brown. The centers will still look soft and slightly underdone—that’s what you want. They’ll continue to set as they cool. For softer cookies, bake for 10 minutes. For slightly crispier edges, go for 11 or 12.
- Press in the Hershey kisses immediately. This is the most important step and you need to work fast. As soon as the cookies come out of the oven, gently press one unwrapped Hershey kiss into the center of each cookie. Press down until the cookie cracks slightly around the edges of the kiss, but don’t push all the way through. The heat from the cookie will soften the chocolate just enough to hold it in place. If you wait too long, the cookies will cool and the kisses won’t stick.
- Cool on the baking sheet for 5 minutes. Let the cookies rest on the hot baking sheet for about 5 minutes. This allows the chocolate to set slightly and the cookies to firm up enough to transfer. Then carefully move them to a wire rack to cool completely.
A quick note: if some of your cookies spread too much, your butter might have been too soft or your baking soda might be old. If they’re too round and puffy, you might have used too much flour. But honestly, even the imperfect ones taste amazing.
Cooking Tips & Techniques
I’ve learned a few things the hard way so you don’t have to. Here are my best tips for perfect peanut butter blossom cookies every time.
Don’t overbake them. This is the number one mistake I see people make. Peanut butter cookies can go from perfectly soft to dry and crumbly in about 60 seconds. Pull them out when the edges are set but the centers still look soft and slightly underdone. They’ll continue to bake on the hot baking sheet as they cool. Trust me on this—I’ve ruined more batches than I want to admit by leaving them in “just one more minute.”
Use room temperature ingredients. Cold butter doesn’t cream properly with sugar, which means less air in the dough and denser cookies. Cold egg can cause the batter to seize up. Take everything out of the fridge about 30 minutes before you start baking. If you’re in a hurry, you can microwave the butter for 10 seconds at a time until it’s soft but not melted.
Unwrap the kisses before you start baking. I cannot stress this enough. You will not have time to unwrap 36 Hershey kisses while the cookies are hot and waiting. I learned this lesson the hard way when my first batch cooled completely while I was still struggling with foil wrappers. Now I sit my kids down with a bowl of kisses and let them unwrap while I mix the dough. It keeps them busy and saves me time.
Chill the dough if needed. This recipe doesn’t require chilling, but if your kitchen is really warm or your dough feels too soft and sticky, pop it in the fridge for 15-20 minutes. Chilled dough spreads less and gives you taller, thicker cookies. Just don’t chill it for too long or it’ll be hard to roll.
Use a cookie scoop for uniform size. Uniform cookies bake evenly. If some are bigger than others, the small ones will burn while the big ones are still underdone. A 1.5-tablespoon scoop is my go-to for this recipe. It costs about $10 and is one of the most useful tools in my kitchen.
Let the cookies cool completely before storing. If you stack warm cookies, the kisses will smear and the cookies will stick together. Give them at least 30 minutes on a wire rack before moving them to an airtight container. If you’re in a hurry, you can pop them in the fridge for 10 minutes to speed things up.
Variations & Adaptations
One of the best things about this recipe is how easy it is to change up. Here are some of my favorite variations.
Chocolate Peanut Butter Blossoms: Swap 1/4 cup of the all-purpose flour for 1/4 cup of unsweetened cocoa powder. This gives you a chocolate peanut butter cookie base that’s absolutely divine with the milk chocolate kiss on top. My kids call these “double chocolate peanut butter cookies” and they disappear even faster than the original.
Gluten-Free Version: Substitute the all-purpose flour with a 1:1 gluten-free baking flour blend. I’ve had great results with King Arthur Flour’s Measure for Measure blend. Just make sure your blend contains xanthan gum, which helps with structure. The cookies might spread slightly more, so chill the dough for 20 minutes before baking.
Holiday Twist: Use seasonal Hershey kisses flavors. During Christmas, the candy cane kisses add a peppermint crunch that’s fantastic. For Valentine’s Day, try the cherry cordial kisses. And for Halloween, the pumpkin spice kisses are surprisingly good. Just be aware that flavored kisses sometimes have a different texture and might not soften as much in the center.
Nut-Free Option: If you’re baking for a school or event with nut allergies, substitute the peanut butter with sunflower seed butter. The cookies will have a slightly different flavor and might turn greenish from a natural reaction between sunflower seeds and baking soda, but they taste great and are completely nut-free. SunButter brand works well for this.
Extra Peanut Butter Flavor: For true peanut butter lovers, add 1/4 cup of finely chopped salted peanuts to the dough along with the flour. This gives the cookies a little crunch and an extra burst of peanut flavor in every bite. I did this once when I was out of chocolate kisses and just wanted a peanut butter cookie, and it was a happy accident.
Serving & Storage Suggestions
These cookies are perfect at room temperature, served with a cold glass of milk or a hot cup of coffee. The combination of soft peanut butter cookie and slightly firm chocolate is pure comfort. I like to arrange them on a simple white platter for holiday gatherings—they look festive without any extra decoration.
For storage, keep the cookies in an airtight container at room temperature for up to 5 days. Layer them between sheets of wax paper to prevent the kisses from sticking to each other. If your kitchen is warm, you might want to store them in a cooler spot, because the chocolate can soften and smear.
These cookies freeze beautifully. Place the completely cooled cookies in a single layer in a freezer-safe container, separating layers with wax paper. They’ll keep for up to 3 months. To thaw, just leave them at room temperature for about 30 minutes. The chocolate might develop a slight white bloom from condensation, but that’s just cosmetic and doesn’t affect the taste.
You can also freeze the unbaked dough balls. Roll them in sugar, place them on a baking sheet, and freeze until solid. Then transfer them to a freezer bag. When you’re ready to bake, just place the frozen dough balls on a lined baking sheet and add 2-3 minutes to the baking time. This is perfect for when you need fresh cookies in a hurry.
The flavors actually develop and deepen after a day or two. The peanut butter becomes more pronounced, and the cookies get even softer. I honestly think they taste better on day two than day one, though they rarely last that long in my house.
Nutritional Information & Benefits
Let’s be honest—these are cookies, not health food. But they do have some redeeming qualities. One cookie (based on 36 cookies per batch) contains approximately:
- Calories: 145
- Fat: 8g
- Carbohydrates: 17g
- Protein: 3g
- Sugar: 11g
- Sodium: 95mg
Peanut butter is actually a decent source of protein and healthy fats, and it contains vitamin E, magnesium, and potassium. The Hershey kiss adds a small amount of antioxidants from the cocoa. Obviously, these are still a treat and should be enjoyed in moderation, but compared to some store-bought cookies that are loaded with preservatives and artificial flavors, these are a much better choice.
For families managing sugar intake, you can reduce the sugar by 1/4 cup without significantly affecting the texture. The cookies won’t be as sweet, but they’ll still be delicious. And if you’re watching portions, one cookie is usually enough to satisfy a sweet craving without going overboard.
Conclusion
These peanut butter blossom cookies have become a staple in our home for a reason. They’re simple enough for a Tuesday afternoon baking project with the kids, special enough for holiday cookie exchanges, and budget-friendly enough that you don’t feel guilty making a double batch. The recipe is forgiving, the ingredients are basic, and the result is genuinely delicious.
I love that this recipe brings people together. My kids fight over who gets to press the kisses in. My husband who “hates peanut butter cookies” now asks me when I’m making them again. And every time I bring them to a gathering, someone asks for the recipe. That’s the kind of recipe worth holding onto.
If you try these, I’d love to hear how they turn out. Did you use a fun kiss flavor? Did your kids help with the rolling? Did you convert a peanut butter cookie skeptic in your own life? Drop a comment below and let me know. And if you have a variation that worked especially well, share that too—I’m always looking for new ideas to try.
Happy baking, friends. May your cookies be soft, your chocolate perfectly melted, and your kitchen full of the smell of peanut butter and sugar.
Frequently Asked Questions
Can I use natural peanut butter for these cookies?
You can, but the texture will be different. Natural peanut butter that separates tends to make the cookies greasier and causes them to spread more. If you only have natural, stir it really well and consider chilling the dough for 20 minutes before baking. The cookies might not be as perfectly round, but they’ll still taste great.
Why did my cookies spread too much?
This usually happens for one of three reasons: your butter was too soft or melted, your dough wasn’t chilled, or your baking soda is old. Try using butter that’s soft but still cool to the touch, and make sure your baking soda is less than a year old. If your kitchen is warm, pop the dough in the fridge for 15 minutes before baking.
Can I make the dough ahead of time?
Absolutely. You can refrigerate the dough for up to 3 days or freeze the shaped dough balls for up to 3 months. If refrigerating, let the dough sit at room temperature for 10 minutes before rolling, as it will be quite firm straight from the fridge.
How do I keep the Hershey kisses from falling off?
Press the kisses in while the cookies are still hot, straight out of the oven. The heat softens the chocolate slightly and helps it adhere to the cookie. Let the cookies cool on the baking sheet for 5 minutes before moving them, which gives the chocolate time to set. If kisses still fall off, you might be pressing too hard or not pressing firmly enough—aim for a gentle but firm push until the cookie cracks slightly around the kiss.
Can I use a different chocolate instead of Hershey kisses?
You can, but the size and shape matter. Hershey kisses are the perfect size for these cookies. If you use chocolate chips, they’ll sink into the cookie. If you use a larger chocolate piece, it might overwhelm the cookie. Dark chocolate or milk chocolate mini drops work in a pinch, but the classic kiss shape is part of what makes these cookies so iconic.
Pin This Recipe!
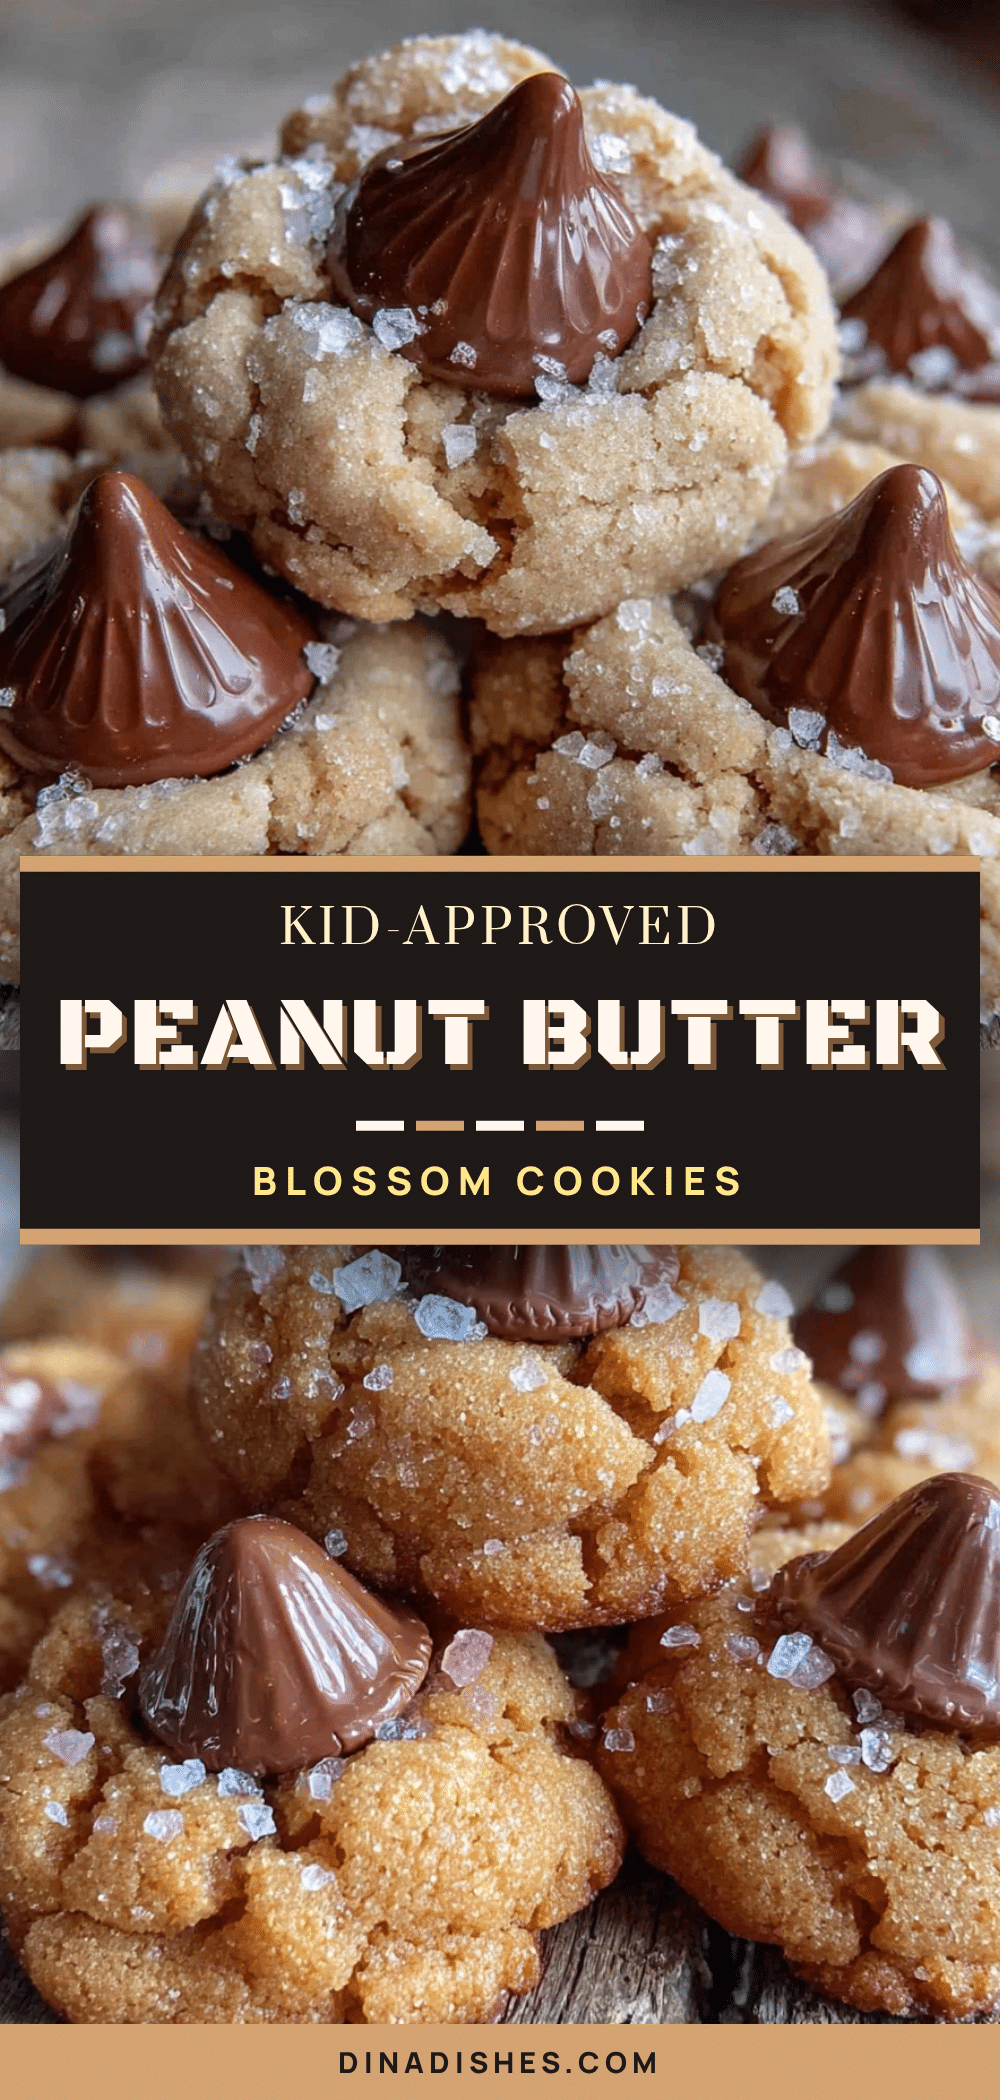
Easy Peanut Butter Blossom Cookies with Hershey Kisses
These soft and flavorful peanut butter blossom cookies are topped with a Hershey kiss, making them a family favorite that converts even the biggest skeptics. Budget-friendly and kid-approved, they come together quickly and freeze beautifully.
- Prep Time: 15 minutes
- Cook Time: 10-12 minutes per batch
- Total Time: 30 minutes
- Yield: 36 cookies 1x
- Category: Dessert
- Cuisine: American
Ingredients
- 1/2 cup unsalted butter, softened to room temperature
- 1/2 cup creamy peanut butter (e.g., Jif or Skippy)
- 1/2 cup granulated sugar, plus extra for rolling
- 1/2 cup packed light brown sugar
- 1 large egg, room temperature
- 1 teaspoon vanilla extract
- 1 1/2 cups all-purpose flour, spooned and leveled
- 1 teaspoon baking soda
- 1/2 teaspoon salt
- About 36 Hershey’s Kisses, unwrapped
Instructions
- Preheat your oven to 375°F (190°C). Line two baking sheets with parchment paper or silicone mats.
- In a large mixing bowl, beat the softened butter, granulated sugar, and brown sugar together until light and fluffy, about 2-3 minutes on medium speed. Scrape down the sides halfway through.
- Beat in the creamy peanut butter until fully combined. Then add the egg and vanilla extract, mixing until smooth and uniform.
- In a small bowl, whisk together the flour, baking soda, and salt.
- Gradually add the flour mixture to the wet ingredients, mixing on low speed just until the flour disappears. Do not overmix.
- Pour about 1/4 cup of granulated sugar into a small bowl for rolling.
- Using a cookie scoop or your hands, form the dough into 1-inch balls (about 1.5 tablespoons each). Roll each ball between your palms until smooth, then roll it in the sugar until completely coated. Place the sugared balls on the prepared baking sheets, spacing them about 2 inches apart. You should get about 36 cookies total.
- Bake one sheet at a time in the center of the oven for 10-12 minutes. The cookies are done when they look puffed and slightly cracked on top, and the edges are just starting to turn golden brown. The centers will still look soft.
- As soon as the cookies come out of the oven, gently press one unwrapped Hershey kiss into the center of each cookie. Press down until the cookie cracks slightly around the edges of the kiss, but don’t push all the way through.
- Let the cookies rest on the hot baking sheet for about 5 minutes. Then carefully move them to a wire rack to cool completely.
Notes
Don’t overbake the cookies; pull them out when edges are set but centers still look soft. Use room temperature ingredients for best results. Unwrap the Hershey kisses before you start baking. If the dough feels too soft, chill it for 15-20 minutes. Use a cookie scoop for uniform size. Let cookies cool completely before storing. For gluten-free, substitute all-purpose flour with a 1:1 gluten-free baking flour blend. For nut-free, substitute peanut butter with sunflower seed butter.
Nutrition
- Serving Size: 1 cookie
- Calories: 145
- Sugar: 11
- Sodium: 95
- Fat: 8
- Saturated Fat: 3.5
- Carbohydrates: 17
- Fiber: 1
- Protein: 3
Keywords: peanut butter blossom cookies, Hershey kisses, easy cookie recipe, soft peanut butter cookies, holiday cookies, kid-friendly cookies, budget-friendly dessert