Laura wasn’t trying to be clever. I’d swung by her place on a drizzly Tuesday afternoon to return a casserole dish she’d loaned me weeks ago, and the sight of it hit me before I even sat down. A huge black platter on her kitchen counter, covered in what looked like a spider web made of… ranch dressing? And perched right in the middle, a big, round bell pepper carved into a spider body with legs made of snap peas. It was the most ridiculous, wonderful thing I’d seen all year.
Her kids were clustered around the table, happily munching on carrot sticks and cucumber rounds that were arranged in concentric circles around the spider. They weren’t just eating vegetables—they were hunting for them. “I’ve got the web leg!” one of them yelled, grabbing a strip of yellow bell pepper. Laura just shrugged at me from the sink. “It was nothing,” she said. “I had ten minutes before school pickup.”
And honestly? That’s exactly why this recipe has stayed with me. It wasn’t a Pinterest-perfect project. It was a mom, a Tuesday, and a desperate need to get some greens into her kids before the Halloween candy started flowing. The casualness of it was the whole point. She made it look like nothing, but I knew—I just knew—I was looking at a game-changer. Maybe you’ve been there, staring into the fridge, wondering how to make broccoli exciting. Let me tell you, this is it.
Why You’ll Love This Recipe
This isn’t just another veggie tray. This is the veggie tray that wins Halloween. I’ve tested it at three different parties now, and every single time, the kids go for the vegetables before the candy. I’m not kidding. There’s something about the spider web design that just flips a switch in their brains—it becomes a game, not a chore.
- Quick & Easy: You can throw this together in under 15 minutes. No cooking, no baking, no stress. It’s perfect for those chaotic Halloween afternoons when you’re juggling costumes and last-minute decorations.
- Simple Ingredients: Everything comes from the produce section and your pantry. No fancy dips, no exotic vegetables. You probably already have most of this stuff in your fridge.
- Perfect for Halloween Parties: Whether it’s a school party, a neighborhood gathering, or just a spooky snack before trick-or-treating, this tray steals the show. It’s also great for Thanksgiving or harvest-themed events.
- Crowd-Pleaser: I’ve watched picky eaters go back for thirds. The ranch spider web is the secret weapon—it’s familiar and creamy, and the kids feel like they’re eating something special.
- Unbelievably Delicious: The combination of crunchy fresh vegetables with cool, herby ranch is just classic comfort food. But when it’s shaped like a spider web? It becomes unforgettable.
What makes this different from every other veggie tray out there is the presentation. It’s not just about arranging vegetables—it’s about creating a moment. The spider web design draws people in, makes them curious, and then they’re already eating before they realize they’re being healthy. It’s comfort food reimagined as a fun, spooky activity. Perfect for impressing other parents without any stress, or turning a simple snack into something memorable for your kids.
What Ingredients You Will Need
This recipe uses simple, everyday ingredients to create something that feels special. The key is in the presentation, not the complexity. Here’s what you’ll need to gather:
- For the Veggie Spider Web Base:
- 1 large round platter or cutting board (black or dark colored works best for the spooky effect)
- 1 cup ranch dressing (I prefer Hidden Valley for its classic flavor, but any thick ranch works)
- 1 medium red bell pepper (for the spider body—look for a round, symmetrical one)
- 8-10 snap peas or green beans (for the spider legs—snap peas are easier to shape)
- 2 cups broccoli florets (small, bite-sized pieces work best)
- 2 cups cauliflower florets (similar size to the broccoli)
- 1 cup cherry tomatoes (halved if large, whole if small)
- 1 cup cucumber rounds (sliced about 1/4 inch thick)
- 1 cup carrot sticks (or baby carrots, halved lengthwise)
- 1 cup yellow bell pepper strips (for contrast and sweetness)
- For the Spider Web Design:
- 1/4 cup ranch dressing (extra for the web lines)
- 1 small squeeze bottle or a zip-top bag with a tiny corner snipped off (for piping the web)
- Optional: black olives (sliced into rounds for spider eyes)
I recommend using fresh, crisp vegetables for the best crunch. If you’re short on time, pre-cut veggie trays from the store work perfectly—just arrange them as directed. For a dairy-free option, use your favorite vegan ranch dressing. I’ve tested this with Primal Kitchen ranch, and it works beautifully.
For the spider, look for a bell pepper that sits flat on the platter. The rounder and redder, the better—it looks more like a real spider body. Snap peas make excellent legs because they’re naturally curved and stay crisp even after a few hours. If you can’t find snap peas, green beans work too, but they’re a bit stiffer to position.
Equipment Needed
You don’t need much to make this work. Here’s what I use every time:
- Large round platter or cutting board: A black platter gives the best spooky effect, but any large, flat surface works. I found mine at a thrift store for three dollars—it’s perfect.
- Small squeeze bottle or zip-top bag: For piping the ranch dressing into spider web lines. A squeeze bottle gives you more control, but a zip-top bag with a tiny corner snipped off works just as well.
- Sharp knife and cutting board: For slicing vegetables. A good chef’s knife makes quick work of bell peppers and cucumbers.
- Vegetable peeler: Optional, but useful if you’re peeling carrot sticks for a cleaner look.
- Small bowl: For the extra ranch dressing if you’re serving it on the side.
If you don’t have a squeeze bottle, don’t worry. I’ve used a sandwich bag more times than I can count. Just be careful not to snip too big a hole—start tiny and test it on a plate first. You can always make the hole bigger, but you can’t undo a gush of ranch.
Preparation Method
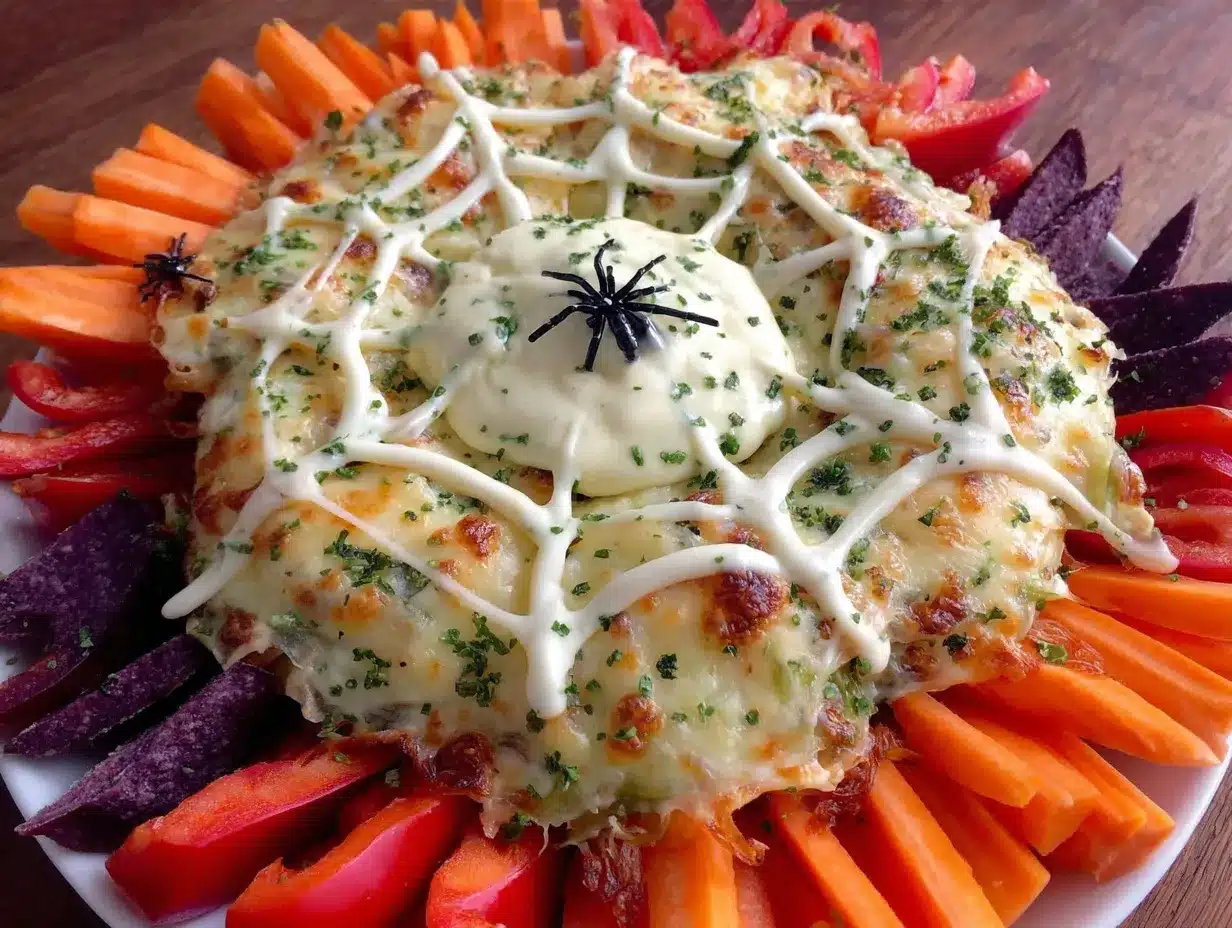
Let’s build this spider web tray step by step. Take your time with the design—it’s the fun part!
- Prepare the platter: Start with a clean, dry platter. If you’re using a wooden cutting board, make sure it’s food-safe and dry. Place it on a flat surface where you can work comfortably.
- Make the ranch spider web base: Pour 1 cup of ranch dressing into the center of the platter. Use the back of a spoon to spread it into a rough circle, about 8-10 inches in diameter. Don’t worry about perfection—the vegetables will cover most of it. The ranch acts as both a dip and a glue for the vegetables.
- Create the first ring of vegetables: Starting from the outer edge of the ranch circle, arrange your first ring of vegetables. I like to use carrot sticks for the outer ring because they’re long and create a nice border. Place them end to end, forming a circle around the ranch. Press them gently into the dressing so they stay put.
- Add the second ring: Inside the carrot ring, add a ring of cucumber rounds. These should be smaller and closer to the center. Overlap them slightly if needed. The contrast between orange carrots and green cucumbers looks great.
- Continue with more rings: Now add a ring of broccoli florets, then cauliflower, then cherry tomatoes. Each ring should be slightly smaller than the last, creating a bullseye effect. Leave a clear space in the center for the spider. The rings don’t have to be perfect—just close enough to look intentional.
- Pipe the spider web lines: Fill your squeeze bottle or zip-top bag with the extra 1/4 cup of ranch dressing. Starting from the center of the platter (where the spider will go), pipe a straight line of ranch outward to the edge of the vegetable rings. Repeat this 6-8 times, like spokes on a wheel. Then, pipe curved lines connecting the spokes, creating a web effect. Start from the center and work outward, making the curves wider as you go. This takes a little practice, but it’s very forgiving.
- Assemble the spider: Take your red bell pepper and place it in the center of the platter, right on top of the ranch web. It should sit flat. For the spider legs, cut the snap peas in half lengthwise (if they’re large) or use whole ones. Arrange 4 legs on each side of the bell pepper, curving them outward slightly. Press them gently into the ranch to hold them in place. For eyes, add two small black olive slices on top of the bell pepper. You can secure them with a tiny dab of ranch.
- Fill in gaps: Look over your tray and fill any obvious gaps with extra vegetables. The goal is to see the spider web design clearly, but you don’t want big empty spaces. I usually add a few extra broccoli florets or cherry tomatoes where needed.
- Serve immediately or refrigerate: This tray is best served within an hour of assembly. If you need to make it ahead, prepare all the vegetables and the ranch base separately, then assemble just before serving. The vegetables will stay crisp for about 2 hours at room temperature.
Cooking Tips & Techniques
I’ve made this tray about a dozen times now, and I’ve learned a few things the hard way. Here’s what I wish someone had told me:
Don’t overthink the web. The first time I tried this, I spent twenty minutes piping perfect ranch lines. My kids ate it in five minutes. The web doesn’t have to be symmetrical—it just has to look like a web. A little imperfection actually makes it look more organic and spooky.
Keep your vegetables dry. Wet vegetables make the ranch slide off and get watery. After washing your veggies, pat them dry with a clean kitchen towel or paper towels. This is especially important for cucumbers and tomatoes, which hold a lot of water.
Use thick ranch dressing. Thin ranch won’t hold its shape when you pipe it. If your ranch is runny, you can thicken it by stirring in a teaspoon of sour cream or Greek yogurt. I’ve also used a store-brand ranch that was too thin, and the web just melted into a puddle. Learn from my mistake.
Prep everything before you start. This is one of those recipes where mise en place really matters. Slice all your vegetables, fill your squeeze bottle, and have everything within reach before you start arranging. Once you start building the web, you don’t want to stop and wash a knife.
Make it a family activity. My kids love helping with this tray. I let them arrange the vegetable rings and pipe the ranch web. It’s messy, but it’s also a great way to get them excited about eating vegetables. Plus, they feel proud when they see their creation on the table.
Variations & Adaptations
This recipe is incredibly flexible. Here are some ways I’ve adapted it for different needs:
- Dairy-Free Version: Use a dairy-free ranch dressing. I’ve tested this with Primal Kitchen and Follow Your Heart brands—both work well. The web might be slightly thinner, but it still holds its shape.
- Low-Carb/Keto Version: Skip the carrots (which are higher in carbs) and use more cucumber, celery, and bell pepper. You can also add radishes for a peppery crunch. The ranch dressing is already keto-friendly.
- Spider Variations: Instead of a bell pepper spider, try using a large black olive for the body, or a small round cheese ball rolled in black sesame seeds. I once made a spider out of a hard-boiled egg with olive eyes—it was adorable.
- Dip Variations: Not a fan of ranch? Use hummus, guacamole, or a creamy cilantro-lime dressing. The spider web design works with any thick dip. I’ve done a green goddess version that was a huge hit.
- Seasonal Adaptations: In summer, add fresh snap peas and cherry tomatoes from the garden. In fall, use roasted pumpkin seeds as a garnish around the edges. For Christmas, you can make a snowflake pattern instead of a spider web.
Serving & Storage Suggestions
This tray is best served at room temperature, right after assembly. The vegetables are at their crispiest, and the ranch web looks its best. If you’re serving it at a party, assemble it no more than an hour before guests arrive.
For storage, this tray doesn’t keep well once assembled. The vegetables start to release water, and the ranch web can get messy. If you have leftovers, store the vegetables separately in an airtight container in the fridge for up to 2 days. The ranch dressing can be refrigerated in a sealed container for up to a week.
To re-crisp leftover vegetables, soak them in ice water for 10 minutes, then pat dry. They’ll be almost as good as fresh. The ranch web, unfortunately, won’t survive the fridge—just make a fresh one when you’re ready to serve again.
I’ve found that the flavors actually develop nicely if you let the vegetables sit in the ranch for about 30 minutes before serving. The ranch seeps into the edges of the broccoli and cauliflower, making them even more flavorful. Just don’t leave them longer than an hour, or they’ll get soggy.
For a party, I like to set the tray on a large black napkin or piece of black craft paper to enhance the spooky effect. Add some fake spider rings around the edges for extra fun—the kids love them.
Nutritional Information & Benefits
This veggie tray is a nutritional powerhouse disguised as a Halloween decoration. Here’s what you’re getting:
- Broccoli and Cauliflower: Packed with fiber, vitamin C, and antioxidants. They support immune health and digestion—perfect for the cold season.
- Carrots: Rich in beta-carotene, which supports eye health. Plus, they add natural sweetness that kids love.
- Bell Peppers: Loaded with vitamin C—more than an orange! Red peppers are especially high in antioxidants.
- Cucumbers: Hydrating and low in calories. Great for keeping kids full without weighing them down before trick-or-treating.
- Ranch Dressing: While not a health food, ranch provides calcium and protein from the dairy base. Use a light version to reduce calories.
Per serving (about 1 cup of vegetables with 2 tablespoons of ranch): approximately 120-150 calories, 8g fat, 10g carbs, 3g protein. This is a great option for kids who need a filling snack before a long night of walking and candy collecting.
For dietary considerations: this recipe contains dairy (ranch dressing) and can be made gluten-free by checking your ranch label. It’s naturally nut-free and egg-free.
Conclusion
Look, I know Halloween is all about the candy. But let me tell you—this veggie spider web tray has become a non-negotiable tradition in my house. It’s the first thing the kids reach for when they come home from school, and it’s the last thing to get eaten at parties because everyone’s too busy admiring it. It’s silly, it’s fun, and it actually works.
I love this recipe because it proves that you don’t need fancy ingredients or hours of prep to make something memorable. All you need is a little creativity and a willingness to have fun with your food. The spider web design is forgiving, the vegetables are flexible, and the kids are genuinely excited to eat it. That’s a win in my book.
So go ahead—grab a bell pepper, some ranch, and whatever vegetables you have in the fridge. Make a spider web. Let your kids help. And when they’re munching on broccoli without a single complaint, send me a message. I’d love to hear about your spider web creations! Drop a comment below or tag me on social media. Happy Halloween, and happy snacking!
Frequently Asked Questions
Can I make this veggie spider web tray ahead of time?
You can prep all the vegetables up to a day in advance. Store them in separate bags or containers in the fridge. Assemble the tray no more than an hour before serving to keep the vegetables crisp and the ranch web looking its best.
What can I use instead of ranch dressing?
Any thick dip works well—hummus, guacamole, tzatziki, or a creamy herb dip. Just make sure it’s thick enough to hold its shape when piped. If it’s too thin, the web lines will melt into a puddle.
How do I make the spider web design look good?
Start with a thick ranch dressing and pipe the spokes first, then connect them with curved lines. Don’t worry about perfection—a slightly messy web looks more natural and spooky. Practice on a plate first if you’re nervous.
Can I use frozen vegetables?
Fresh vegetables work best because they’re crisp and hold their shape. Frozen vegetables will release water as they thaw, making the ranch watery and the tray soggy. Stick with fresh for the best results.
How long will this tray last at a party?
It will look great for about 2 hours at room temperature. After that, the vegetables may start to wilt and the ranch web may soften. If you’re serving it outdoors on a warm day, keep it in the shade or on ice to extend its life.
Pin This Recipe!
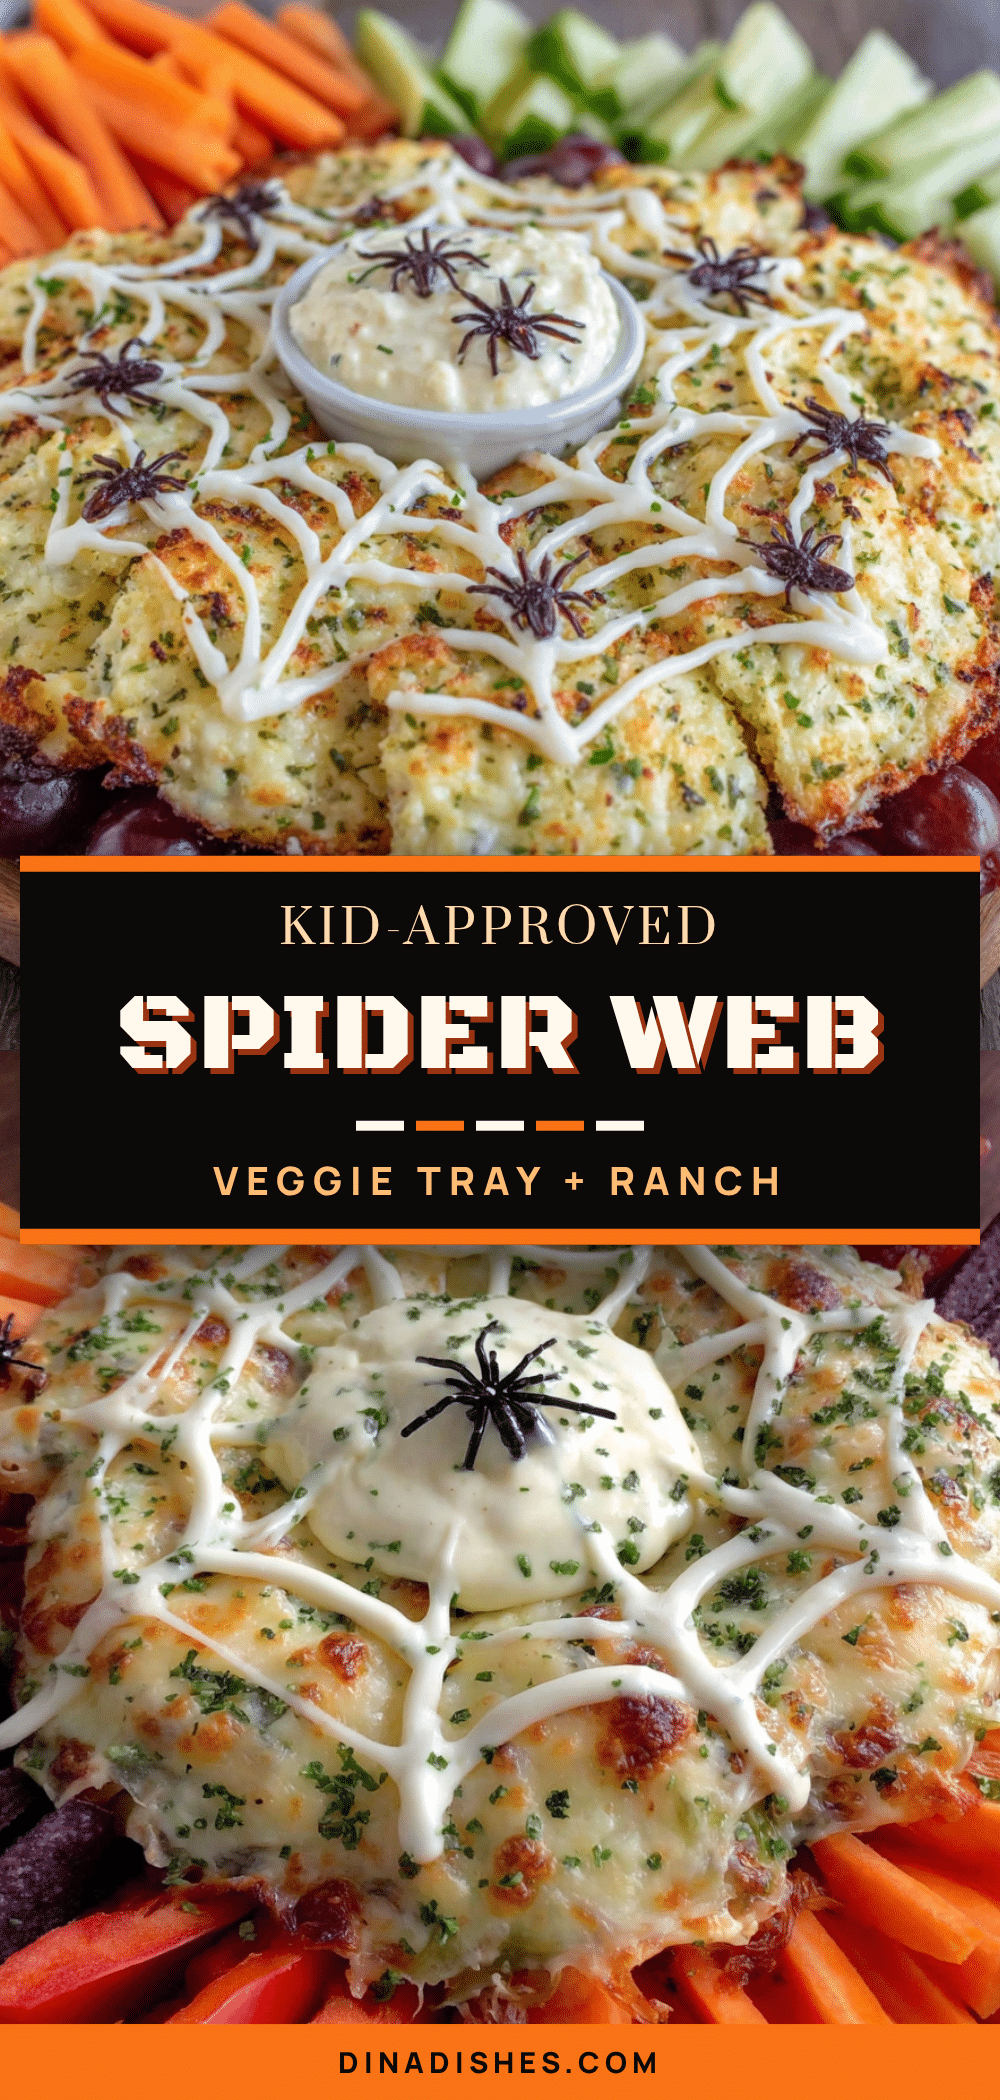
Kid-Approved Halloween Veggie Spider Web Tray: Best Easy Snack
A fun and spooky Halloween veggie tray featuring a ranch spider web and a bell pepper spider, perfect for getting kids to eat their vegetables before the candy rush.
- Prep Time: 15 minutes
- Cook Time: 0 minutes
- Total Time: 15 minutes
- Yield: 8 servings 1x
- Category: Appetizer
- Cuisine: American
Ingredients
- 1 large round platter or cutting board (black or dark colored works best)
- 1 cup ranch dressing (preferably Hidden Valley)
- 1 medium red bell pepper (round and symmetrical)
- 8–10 snap peas or green beans
- 2 cups broccoli florets (small, bite-sized)
- 2 cups cauliflower florets (similar size to broccoli)
- 1 cup cherry tomatoes (halved if large, whole if small)
- 1 cup cucumber rounds (sliced about 1/4 inch thick)
- 1 cup carrot sticks (or baby carrots, halved lengthwise)
- 1 cup yellow bell pepper strips
- 1/4 cup ranch dressing (extra for web lines)
- 1 small squeeze bottle or zip-top bag with tiny corner snipped off
- Optional: black olives (sliced into rounds for spider eyes)
Instructions
- Prepare the platter: Start with a clean, dry platter. Place it on a flat surface.
- Make the ranch spider web base: Pour 1 cup of ranch dressing into the center of the platter. Use the back of a spoon to spread it into a rough circle, about 8-10 inches in diameter.
- Create the first ring of vegetables: Starting from the outer edge of the ranch circle, arrange carrot sticks end to end, forming a circle around the ranch. Press them gently into the dressing.
- Add the second ring: Inside the carrot ring, add a ring of cucumber rounds, overlapping slightly if needed.
- Continue with more rings: Add rings of broccoli florets, cauliflower, then cherry tomatoes, each slightly smaller than the last, leaving a clear space in the center for the spider.
- Pipe the spider web lines: Fill a squeeze bottle or zip-top bag with the extra 1/4 cup of ranch dressing. Starting from the center, pipe a straight line of ranch outward to the edge of the vegetable rings. Repeat 6-8 times like spokes. Then pipe curved lines connecting the spokes, creating a web effect.
- Assemble the spider: Place the red bell pepper in the center of the platter. For legs, cut snap peas in half lengthwise (or use whole) and arrange 4 on each side of the bell pepper, curving outward. Add two black olive slices on top for eyes, secured with a dab of ranch.
- Fill in gaps: Add extra vegetables to fill any obvious gaps, ensuring the spider web design is visible.
- Serve immediately or refrigerate: Best served within an hour of assembly. If making ahead, prepare vegetables and ranch base separately, then assemble just before serving.
Notes
Use thick ranch dressing for best results. Keep vegetables dry to prevent watery ranch. Prep all ingredients before assembling. The web doesn’t need to be perfect—imperfections add to the spooky effect. For dairy-free, use vegan ranch. For low-carb, skip carrots and add more cucumber, celery, and bell pepper.
Nutrition
- Serving Size: 1 cup vegetables wit
- Calories: 135
- Sugar: 4
- Sodium: 320
- Fat: 8
- Saturated Fat: 1.5
- Carbohydrates: 10
- Fiber: 3
- Protein: 3
Keywords: Halloween, veggie tray, spider web, ranch, kid-friendly, snack, party


