I wasn’t expecting cooking advice from my son’s kindergarten teacher, but there I was, standing in the hallway during parent-teacher night, watching her describe exactly how to make the most ridiculous-looking hot dogs I’d ever seen. She was telling me about these “mummy” things she made for her own kids every Halloween, and honestly, I was half-listening at first. I mean, it was parent-teacher night. I was worried about letter recognition and social skills, not appetizers.
But then she mentioned something that made me stop. She said, “My kids fight over them, and they’re the pickiest eaters you’ll ever meet.” That got my attention. You know that feeling when someone describes a recipe that just clicks in your brain? That was this moment. She scribbled the basic idea on a sticky note shaped like an apple, and I shoved it in my purse next to a half-eaten granola bar. I forgot about it for three weeks.
Then Halloween crept up, and I found that crumpled sticky note while looking for loose change. I had some hot dogs in the fridge, a tube of crescent rolls that was about to expire, and a kid who refused to eat anything that wasn’t shaped like a dinosaur. So I gave it a shot. The first batch came out a little wonky—some mummies had too many “bandages,” and a few looked more like sad caterpillars than wrapped-up mummies. But my son? He laughed so hard he snorted, and then he ate four of them. Four! That never happens.
These Kid-Approved Mummy Pigs in a Blanket with Honey Mustard Dip have become our go-to for every spooky season since. They’re silly, they’re simple, and they turn a regular weeknight dinner into something that feels like a party. Maybe you’ve been there too—staring at a package of hot dogs, wondering how to make them exciting without spending an hour in the kitchen. Well, this is your answer.
Why You’ll Love This Recipe
Let me tell you why this recipe has earned a permanent spot in our family rotation. I’ve tested this about a dozen times over the past few years, tweaking little things here and there, and I can honestly say this version is the one that works every single time.
- Quick & Easy: These come together in under 25 minutes from start to finish. Perfect for those after-school moments when the kids are hungry and you need something fast that isn’t a bowl of cereal.
- Simple Ingredients: You only need five things for the mummies themselves, and you probably already have three of them in your kitchen right now. No special trips to the store for fancy stuff.
- Perfect for Halloween: These are the star of any spooky gathering, classroom party, or just a fun Tuesday night dinner. They bring instant smiles without any complicated decorating.
- Crowd-Pleaser: I’ve served these to kids ranging from age three to twelve, and every single one of them cleaned their plate. The adults sneak them too—I won’t name names, but I’ve caught more than one parent grabbing a handful.
- Unbelievably Delicious: The combination of flaky, buttery crescent roll wrapping with savory hot dogs, dipped into that tangy-sweet honey mustard, is pure comfort food magic. It’s simple, but it hits every note.
What makes this recipe different from every other pigs-in-a-blanket recipe out there? It’s the presentation, honestly. The mummy look is so simple to achieve—just a few strips of dough wrapped around each hot dog—but it transforms a basic snack into something memorable. Kids don’t just eat these; they talk about them. My son asked if we could make them for his birthday party in February, which is definitely not Halloween. That’s when I knew this recipe had staying power.
This isn’t just good food. It’s the kind of recipe that makes you feel like a fun parent without breaking a sweat. It’s comfort food with a silly twist, and honestly, isn’t that what feeding a family is all about?
What Ingredients You Will Need
This recipe uses simple, everyday ingredients that come together to create something way more fun than the sum of their parts. Here’s what you’ll need to grab:
For the Mummy Pigs in a Blanket
- 1 can (8 ounces) refrigerated crescent roll dough — I prefer Pillsbury for the flakiest texture, but any brand works fine. Look for the sheets of dough if you can find them, as they make cutting strips easier.
- 8 bun-length hot dogs — I use Oscar Mayer beef hot dogs because they hold their shape well and have a nice snap. You can use turkey, chicken, or plant-based hot dogs too—just make sure they’re bun-length so they fit nicely.
- 1 large egg — For the egg wash that gives the mummies that golden, shiny finish. You can skip this if you’re in a hurry, but it really does make them look prettier.
- 1 tablespoon water — To mix with the egg for the wash. Simple enough.
- Candy eyes — These are optional but highly recommended. I get the Wilton brand from the baking aisle. They add that extra “mummy” touch that kids absolutely lose their minds over.
For the Honey Mustard Dip
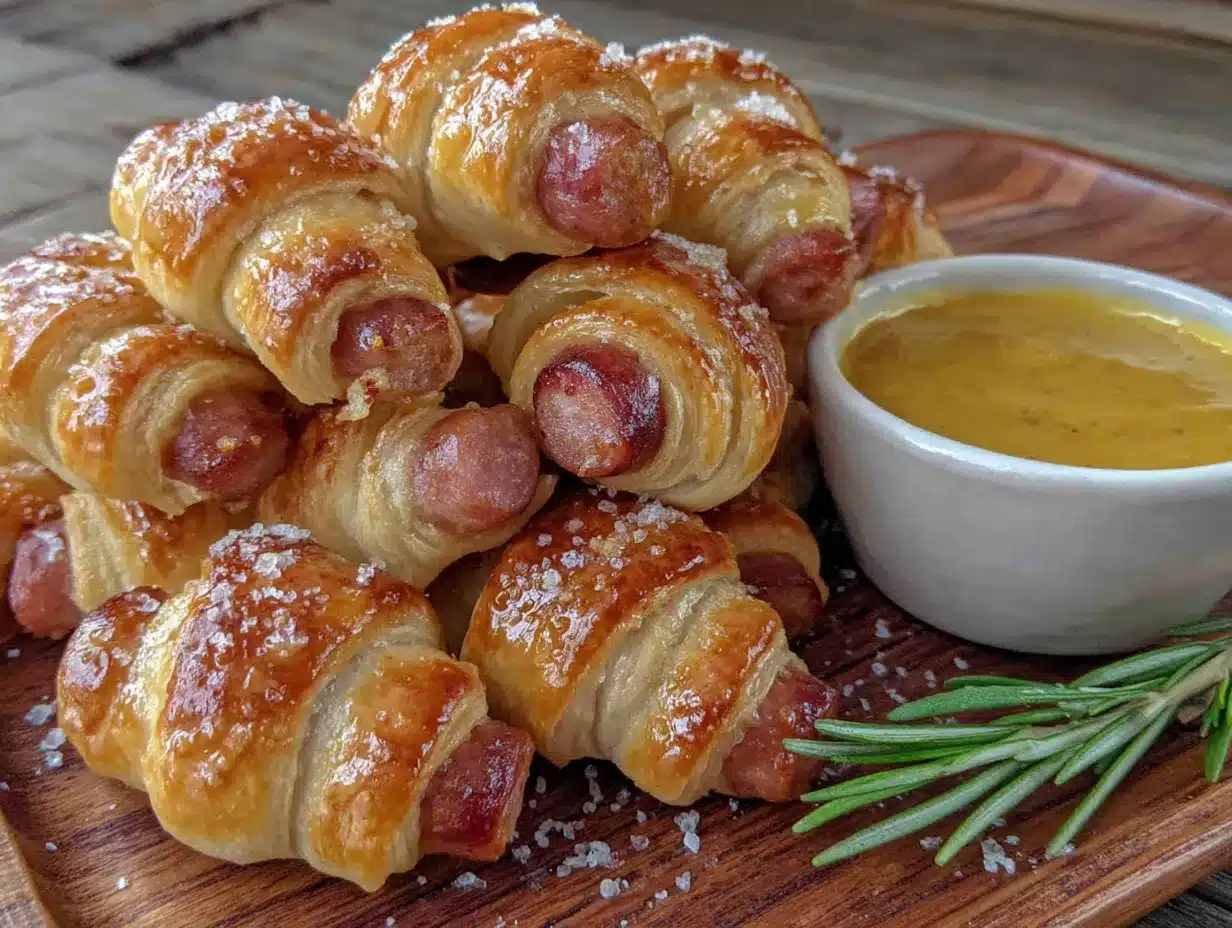
- 1/2 cup mayonnaise — I use Hellmann’s for its creamy texture. You can use vegan mayo if needed.
- 2 tablespoons yellow mustard — The classic ballpark kind works best here. It’s mild and tangy without being overpowering.
- 2 tablespoons honey — Local honey adds a nice floral note, but any honey works. You can substitute agave syrup if you’re vegan.
- 1 teaspoon apple cider vinegar — This brightens up the dip and balances the sweetness. You can use white vinegar in a pinch.
- Pinch of paprika — For a little color and a subtle smoky flavor. Smoked paprika works beautifully here.
That’s it. Five ingredients for the mummies, five for the dip. Nothing fancy, nothing hard to find. I love recipes that don’t require a scavenger hunt at the grocery store.
Equipment Needed
You don’t need a fully stocked professional kitchen for this one. Here’s what you’ll want to have on hand:
- Baking sheet — A standard half-sheet pan works perfectly. Line it with parchment paper for easy cleanup. I’ve forgotten the parchment before, and let me tell you, scrubbing baked-on cheese off a pan is not fun.
- Parchment paper — Keeps the mummies from sticking and makes cleanup a breeze. You can use a silicone baking mat instead if you have one.
- Sharp knife or pizza cutter — For cutting the crescent roll dough into strips. A pizza cutter is faster and gives you cleaner edges. I’ve used kitchen scissors in a pinch, and they work too.
- Small bowl — For whisking together the egg wash. Any small bowl works.
- Pastry brush — For applying the egg wash. If you don’t have one, you can use a paper towel or even your fingers—it’s not fancy, but it works.
- Small mixing bowl — For stirring together the honey mustard dip. I use a cereal bowl most of the time.
- Measuring spoons — For the dip ingredients. Eyeballing works for some things, but this dip benefits from balanced proportions.
If you’re on a budget, don’t worry about buying specialty equipment. A butter knife works for cutting dough, and a fork works for mixing the dip. I started making these in my tiny apartment kitchen with exactly zero fancy tools, and they turned out great.
Preparation Method
Alright, let’s get to the fun part. Here’s how to make these little mummies come to life. I’ll walk you through every step so you don’t miss anything.
- Preheat your oven to 375°F (190°C). Give it a good 10 minutes to come to temperature. While it’s heating up, line your baking sheet with parchment paper. This is one of those steps that saves you from a sticky mess later—trust me on this.
- Prepare the crescent roll dough. Open the can carefully—I always jump when it pops, and I’ve been doing this for years. Unroll the dough on a clean cutting board. If you have the perforated kind, press the seams together gently with your fingers. You want a solid sheet of dough. If you have the sheet version, even better—you’re already ahead of the game.
- Cut the dough into strips. Using a sharp knife or pizza cutter, slice the dough lengthwise into 8 strips, each about 1/2-inch wide. Don’t stress about making them perfectly even. Some of my strips are wider than others, and the mummies just end up looking more “rustic” that way. You’ll have 8 strips total, one for each hot dog.
- Prepare the hot dogs. Take your 8 bun-length hot dogs and pat them dry with a paper towel. This helps the dough stick better. If your hot dogs are standard size (not bun-length), you can cut them in half crosswise to make 16 mini mummies—just adjust your strip count accordingly.
- Wrap the mummies. Take one strip of dough and wrap it around a hot dog, starting at one end and working your way to the other. Leave a small gap about 1/2-inch wide near the top of the hot dog where the “face” will go. This is where you’ll place the candy eyes later. Don’t wrap too tightly—the dough needs a little room to expand as it bakes. I learned this the hard way when my first batch burst open and looked more like exploding mummies than wrapped-up ones.
- Place on the baking sheet. Arrange the wrapped mummies on the prepared baking sheet, leaving about 2 inches between each one. They’ll puff up a bit as they bake, so give them some breathing room.
- Make the egg wash. In a small bowl, whisk together the egg and 1 tablespoon of water until well combined. This gives the mummies that gorgeous golden-brown color. If you’re feeling fancy, you can add a pinch of salt to the egg wash—it helps break down the egg and makes it easier to brush on.
- Brush the mummies. Using a pastry brush, gently brush the egg wash over each mummy. Be careful not to dislodge the dough strips. I usually brush from the center outward to keep everything in place. Don’t skip this step—it makes a huge difference in how they look coming out of the oven.
- Bake for 12-15 minutes. Pop the baking sheet into the preheated oven and bake until the dough is golden brown and puffed. The hot dogs should be heated through. I start checking at 12 minutes, but every oven is different. You’re looking for a deep golden color, not pale and doughy.
- Add the eyes. While the mummies are still warm, press two candy eyes into the gap you left near the top of each hot dog. The heat from the mummies helps the eyes stick. If you’re not using candy eyes, you can pipe on little dots with mustard or just leave them plain—they still look cute.
- Make the honey mustard dip. While the mummies bake, stir together the mayonnaise, yellow mustard, honey, apple cider vinegar, and paprika in a small bowl. Taste it and adjust if needed—I sometimes add an extra splash of honey if I want it sweeter. Cover and refrigerate until serving.
- Serve warm. Arrange the mummy pigs on a platter with the honey mustard dip in the center. They’re best served warm, when the dough is still flaky and the hot dogs are juicy. Watch them disappear.
One thing I always tell people: don’t overthink the wrapping. The mummies are supposed to look a little messy. That’s part of their charm. Some of mine look like they just crawled out of a sarcophagus, and my kids love them even more for it.
Cooking Tips & Techniques
After making these more times than I can count, I’ve picked up a few tricks that make the process smoother and the results better. Here’s what I’ve learned:
Don’t overwork the dough. Crescent roll dough is delicate, and handling it too much makes it tough. When you’re cutting strips and wrapping the hot dogs, work quickly and gently. If the dough gets too warm and sticky, pop it in the fridge for 5 minutes to firm up.
Space the mummies properly. I made the mistake of crowding them on the baking sheet once, and they baked into one giant mummy blob. Leave at least 2 inches between each one. Your future self will thank you.
Check your oven temperature. I have an oven thermometer because my oven runs hot, and it’s saved me more times than I can count. If your mummies are browning too fast on the outside but still doughy inside, reduce the temperature by 25 degrees and bake a few minutes longer.
Make the dip ahead of time. The honey mustard dip actually gets better after sitting in the fridge for an hour or two. The flavors meld together and mellow out. I usually make it while the oven is preheating, but you can make it a day in advance if you’re planning ahead.
Watch the candy eyes. If you’re using candy eyes, don’t put them in before baking—they’ll melt into weird puddles. Always add them after the mummies come out of the oven, while they’re still warm. The residual heat is enough to make them stick without melting them.
One of my biggest failures? I once forgot to leave the gap for the face, and my mummies looked like dough-covered hot dogs with no personality. My son asked where their faces were, and I had to explain that some mummies are shy. He didn’t buy it. So remember: leave that little window for the eyes!
Variations & Adaptations
This recipe is incredibly flexible, and I’ve tried several variations over the years. Here are some of my favorites:
Cheesy Mummies: Before wrapping the hot dog in dough, slice it lengthwise almost all the way through (like a hot dog bun) and stuff a strip of cheddar cheese inside. Wrap and bake as directed. The cheese gets all melty and oozes out a little—it’s amazing. My son calls these “cheesy zombie mummies.”
Spicy Adult Version: Swap the regular hot dogs for spicy chorizo links or andouille sausage. Add a dash of cayenne pepper to the honey mustard dip. These are great for game day parties when the kids have their own plate and the adults want something with a kick.
Veggie Mummies: Use vegan hot dogs or even carrot sticks (blanched first) for a lighter version. The dough wrapping works the same way. I’ve also used cheese sticks wrapped in dough for a vegetarian option—they look like little mummy cheese sticks, and they’re surprisingly good.
Breakfast Mummies: Replace hot dogs with breakfast sausage links. Serve with maple syrup instead of honey mustard. I made these for a Halloween morning breakfast, and they were a huge hit. The sweet and savory combo is hard to beat.
Gluten-Free Option: Use gluten-free crescent roll dough or puff pastry. I’ve found that Schär brand works well, though the texture is slightly different. Just follow the package directions for baking time adjustments.
Air Fryer Method: If you have an air fryer, these cook beautifully in it. Preheat to 350°F (175°C) and cook for 8-10 minutes, flipping halfway through. They come out extra crispy and golden. Just don’t crowd the basket—work in batches if needed.
I once tried making these with puff pastry instead of crescent rolls, and honestly, they were even flakier and more buttery. The only downside is that puff pastry takes longer to thaw and is a little harder to work with. But if you have the time, it’s worth trying.
Serving & Storage Suggestions
These mummy pigs are best served warm, right out of the oven. The dough is at its flakiest, the hot dogs are perfectly juicy, and the dip is cool and creamy. Here’s how I like to serve them:
Arrange the mummies on a large platter with the honey mustard dip in a small bowl in the center. I sometimes scatter a few extra candy eyes around the platter for decoration—it adds to the spooky vibe. If you’re serving these at a Halloween party, you can label them with a little sign that says “Mummy Snacks” or “Wrapped Up and Ready to Eat.”
For a complete meal, pair these with a simple side salad or some carrot sticks and cucumber slices. The crunch of fresh veggies balances out the richness of the dough and hot dogs. I also love serving them with sweet potato fries or apple slices for a fun, kid-friendly spread.
Storage: Leftover mummy pigs (if you have any—they go fast!) can be stored in an airtight container in the refrigerator for up to 3 days. The dough will soften a bit, but they’re still tasty. I don’t recommend freezing them, as the texture of the hot dogs changes when thawed.
Reheating: The best way to reheat these is in the oven or air fryer. Pop them in a 350°F (175°C) oven for 5-7 minutes, or until heated through and the dough crisps back up. The microwave works in a pinch, but the dough will be soft and a little chewy. If you’re reheating in the microwave, only do 20-30 seconds to avoid rubbery hot dogs.
The honey mustard dip keeps well in the refrigerator for up to a week. I always make a double batch because we end up using it on everything—sandwiches, chicken tenders, even as a salad dressing. The flavors actually deepen after a day or two, so don’t be afraid to make it ahead.
One thing I’ve noticed: these mummies taste even better the next day, cold, straight from the fridge. I know that sounds weird, but there’s something about the chilled dough and cold hot dog that hits different. My husband thinks I’m crazy, but I stand by it.
Nutritional Information & Benefits
Let’s be honest—these are a treat, not a health food. But here’s a rough breakdown of what you’re looking at per serving (one mummy pig with about 1 tablespoon of dip):
- Calories: Approximately 220-250 calories per serving
- Protein: 8-10 grams
- Carbohydrates: 18-22 grams
- Fat: 14-16 grams
- Saturated Fat: 4-5 grams
- Sodium: 500-600 mg
- Sugar: 5-7 grams
These numbers will vary depending on the specific brands you use and whether you add cheese or other extras. The hot dogs provide a decent amount of protein, and the crescent roll dough gives you energy from carbohydrates. The honey mustard dip adds a small amount of healthy fats from the mayonnaise.
If you’re watching your sodium intake, look for low-sodium hot dogs or turkey dogs, which typically have less salt. You can also use reduced-fat crescent roll dough to cut down on saturated fat. The dip can be made with Greek yogurt instead of mayonnaise for a lighter option—just keep in mind that the texture will be a bit tangier and less creamy.
For families with dietary restrictions, these can easily be adapted. Use gluten-free crescent rolls for celiac-friendly mummies, or swap in vegan hot dogs and plant-based mayo for a dairy-free, egg-free version. The candy eyes are usually made from sugar and starch, so they’re generally safe for most diets, but always check the label.
I personally see these as a fun occasional treat—something to make for Halloween parties, movie nights, or when the kids need a little extra joy in their day. They’re not an everyday dinner, but they don’t need to be. Sometimes food is about more than nutrition; it’s about connection and fun and making memories.
Conclusion
These Kid-Approved Mummy Pigs in a Blanket with Honey Mustard Dip are proof that the simplest ideas are often the best ones. They came from a sticky note scribbled by a kindergarten teacher, and now they’re a tradition in my house. That’s the thing about good recipes—they have a way of sticking around.
I love that these mummies are so forgiving. They don’t have to be perfect to be adorable, and they don’t require any special skills to pull off. Whether you’re a seasoned cook or someone who burns toast on the regular, you can make these. And the look on your kids’ faces when they see them? That’s the real payoff. It’s pure, unfiltered delight.
I encourage you to make these your own. Add cheese, change the dip, use different sausages—whatever makes your family happy. That’s what cooking is all about, isn’t it? Taking a simple idea and making it yours.
So go ahead, grab that can of crescent rolls and those hot dogs sitting in your fridge. Wrap them up, bake them golden, and watch the magic happen. And when your kids ask for them again next week (they will), just smile and say, “Of course, mummy.”
I’d love to hear how yours turn out! Drop a comment below and let me know if your family loved them as much as mine does. Happy Halloween cooking!
Frequently Asked Questions
Can I make these ahead of time for a party?
Absolutely! You can assemble the mummies up to 24 hours in advance and keep them covered in the refrigerator. Just brush with egg wash right before baking. If you’re really short on time, you can bake them fully, then reheat in a 350°F oven for 5-7 minutes before serving.
Can I use puff pastry instead of crescent rolls?
Yes, puff pastry works great! Thaw it according to package directions, then cut it into strips the same way you would crescent roll dough. The baking time might be slightly longer—about 15-18 minutes—and the texture will be even flakier and more buttery.
What can I use instead of candy eyes?
If you don’t have candy eyes, you can use small dots of mustard, ketchup, or even black gel icing. I’ve also used sliced black olives cut into tiny circles, and they worked surprisingly well. Or just leave the mummies without eyes—they still look cute and wrapped up.
How do I keep the dough from unraveling while baking?
Make sure you’re tucking the end of the dough strip underneath the hot dog when you finish wrapping. The egg wash also helps seal the edges. If you’re really worried about it, you can press the end gently against the hot dog to help it stick.
Can I freeze the honey mustard dip?
I wouldn’t recommend freezing the dip, as the mayonnaise can separate and become grainy when thawed. It’s so quick to make that you’re better off preparing it fresh or up to a few days ahead. The dip keeps beautifully in the refrigerator for up to a week.
Pin This Recipe!
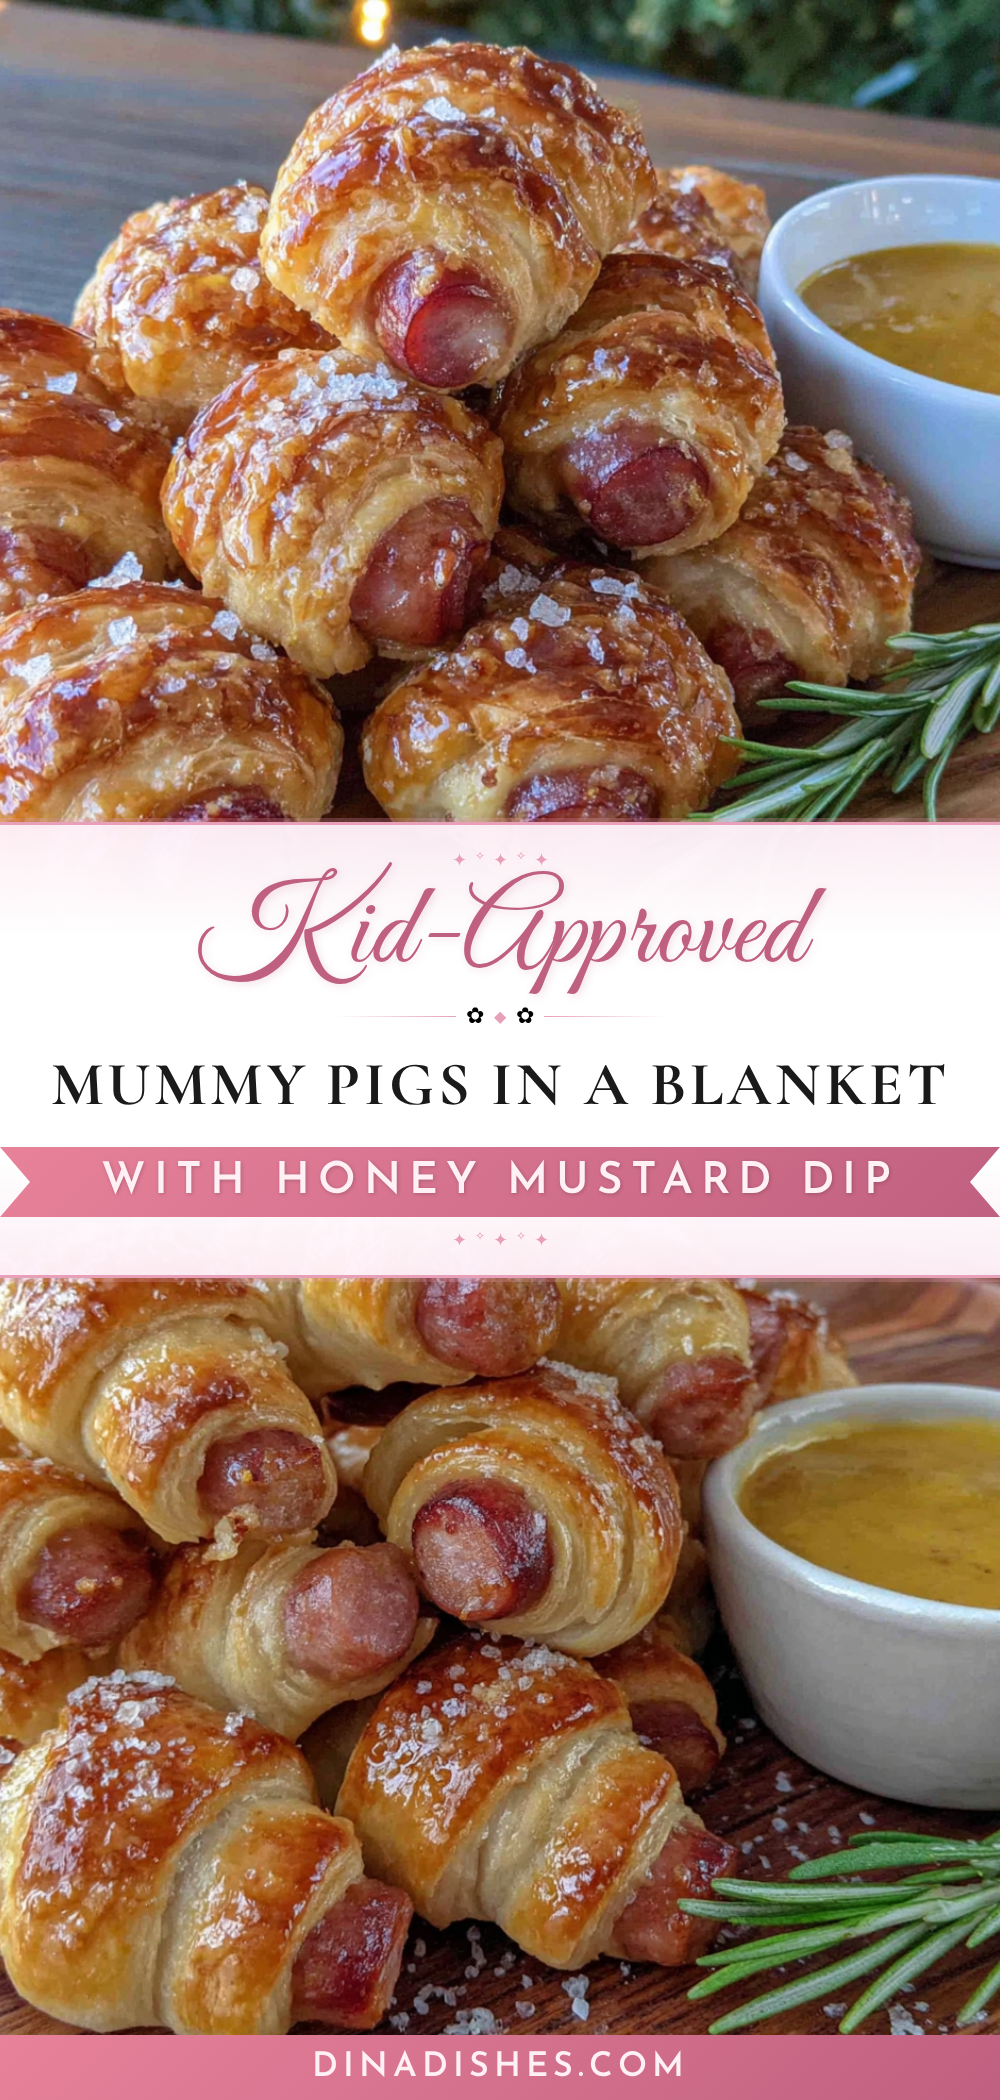
Kid-Approved Mummy Pigs in a Blanket with Easy Honey Mustard Dip

These fun and spooky mummy pigs in a blanket are wrapped in flaky crescent roll dough and served with a tangy-sweet honey mustard dip. Perfect for Halloween parties, weeknight dinners, or any time you want to turn a simple snack into a memorable treat.
- Prep Time: 10 minutes
- Cook Time: 15 minutes
- Total Time: 25 minutes
- Yield: 8 servings 1x
- Category: Appetizer
- Cuisine: American
Ingredients
- 1 can (8 ounces) refrigerated crescent roll dough
- 8 bun-length hot dogs
- 1 large egg
- 1 tablespoon water
- Candy eyes (optional)
- 1/2 cup mayonnaise
- 2 tablespoons yellow mustard
- 2 tablespoons honey
- 1 teaspoon apple cider vinegar
- Pinch of paprika
Instructions
- Preheat your oven to 375°F (190°C). Line a baking sheet with parchment paper.
- Open the crescent roll dough and unroll it on a clean cutting board. Press the seams together if using perforated dough to form a solid sheet.
- Using a sharp knife or pizza cutter, slice the dough lengthwise into 8 strips, each about 1/2-inch wide.
- Pat the hot dogs dry with a paper towel.
- Take one strip of dough and wrap it around a hot dog, starting at one end and working to the other. Leave a small gap about 1/2-inch wide near the top for the face. Do not wrap too tightly.
- Place the wrapped mummies on the prepared baking sheet, leaving about 2 inches between each one.
- In a small bowl, whisk together the egg and 1 tablespoon of water to make an egg wash.
- Brush the egg wash over each mummy, being careful not to dislodge the dough strips.
- Bake for 12-15 minutes, until the dough is golden brown and puffed, and the hot dogs are heated through.
- While still warm, press two candy eyes into the gap near the top of each hot dog (if using).
- While the mummies bake, stir together the mayonnaise, yellow mustard, honey, apple cider vinegar, and paprika in a small bowl. Cover and refrigerate until serving.
- Serve the mummy pigs warm with the honey mustard dip.
Notes
Don’t overthink the wrapping—mummies are supposed to look a little messy. Leave a gap for the eyes. Add candy eyes after baking to prevent melting. The dip can be made ahead and keeps for up to a week in the refrigerator.
Nutrition
- Serving Size: 1 mummy pig with abo
- Calories: 235
- Sugar: 6
- Sodium: 550
- Fat: 15
- Saturated Fat: 4.5
- Carbohydrates: 20
- Protein: 9
Keywords: mummy pigs in a blanket, Halloween appetizer, hot dog recipe, crescent roll recipe, honey mustard dip, kid-friendly snack