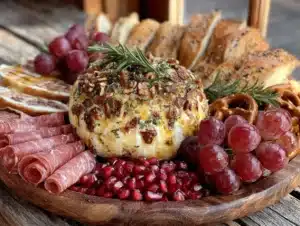
I was standing in the grocery store checkout line last November, the cart overflowing with canned pumpkin and a frozen turkey I was way too optimistic about, when the kid behind me started whining. Not a loud, tantrum kind of whine—more of a low, exhausted grumble that I recognized from my own living room. And then I caught a whiff of it: that weird, unmistakable smell of a brand-new plastic toy, the kind you get in a fast-food kids’ meal. And just like that, I was seven years old, sitting cross-legged on my Aunt Rita’s shag carpet, staring at a paper plate heaped with cubed cheese, salami roses, and those little goldfish crackers that always tasted faintly of the cardboard box they came in.
Aunt Rita wasn’t a fancy cook. She was the aunt who showed up with a store-bought pie and called it a day. But her Thanksgiving snack board? That was legendary. She’d arrange everything in concentric circles, like a holiday crop circle made of pepperoni and cheddar. I never got the recipe because there wasn’t one. It was just a feeling—a table full of little hands grabbing, laughing, and sneaking extra pickles when the adults weren’t looking. I tried to recreate it a few years ago, and honestly, it was a disaster. The cheese was too dry, the crackers were stale, and the turkey-shaped cheese ball I attempted looked more like a sad, lumpy potato.
But I kept trying. Because that board wasn’t just food—it was the one thing at Thanksgiving that was actually for the kids. The grown-ups had their turkey and their fancy stuffing, but the snack board? That was ours. And now, with my own little ones, I wanted to give them that same feeling. Maybe you’ve been there, too—standing in the kitchen, wondering how to make a holiday meal feel special for the tiny humans who’d rather eat cheese and crackers than a full plate of mashed potatoes. This Kid-Approved Thanksgiving Charcuterie Board with Turkey Cheese Ball is my love letter to that moment. It’s messy, it’s fun, and it tastes like childhood.
Why You’ll Love This Recipe
Let me tell you, this board is a game-changer for family gatherings. I’ve tested it through three Thanksgivings, two picky-eater standoffs, and one memorable occasion where my nephew tried to eat the cheese ball before I even finished shaping it. It passed every test with flying colors.
- Quick & Easy: You can put this together in under 30 minutes. Seriously. While the turkey is resting and the rolls are warming, you’re done. No oven required, no last-minute stress.
- Simple Ingredients: No fancy grocery trips needed. Everything on this board is stuff you probably already have in your fridge or can grab at any basic supermarket. Cream cheese, cheddar, crackers, fruit—that’s it.
- Perfect for Thanksgiving Day: This keeps the kids happy and occupied while the adults finish up the main meal. It’s the ultimate pre-dinner snack that won’t spoil anyone’s appetite (okay, maybe a little, but it’s worth it).
- Crowd-Pleaser: My kids, their cousins, and even my notoriously picky father-in-law all went back for seconds. The turkey cheese ball is the star—it’s creamy, savory, and shaped like a turkey. What’s not to love?
- Unbelievably Delicious: The combination of the herby, creamy cheese ball with salty crackers and sweet apple slices is pure comfort. It’s the kind of snack that makes you close your eyes after the first bite.
What makes this recipe different from every other charcuterie board out there? It’s built for kids. The shapes are fun, the flavors are familiar, and everything is easy to grab with little hands. No fussy arrangements, no weird ingredients. Just a board that says, “Hey, this holiday is for you, too.”
What Ingredients You Will Need
This recipe uses simple, wholesome ingredients to deliver that perfect balance of creamy, salty, and sweet. Everything here is a pantry staple or easy to find, and I’ve included notes on substitutions so you can make it work for your family.
For the Turkey Cheese Ball
- 16 oz cream cheese, softened (I use Philadelphia—it’s the creamiest and holds its shape best)
- 1 cup shredded sharp cheddar cheese (adds richness and that classic orange color)
- 1/2 cup finely chopped pecans (for texture; toast them lightly for extra flavor)
- 1 tablespoon Worcestershire sauce (adds a savory depth you won’t even notice is there)
- 1 teaspoon garlic powder
- 1/2 teaspoon onion powder
- 1/4 teaspoon smoked paprika (optional, but gives a lovely smoky note)
- Salt and black pepper to taste
- For decoration: 1 candy corn for the beak, 2 black olives or raisins for eyes, and a small piece of red bell pepper or a cherry tomato for the wattle. You’ll also need a few pretzel sticks or large tortilla chips for the tail feathers.
For the Charcuterie Board
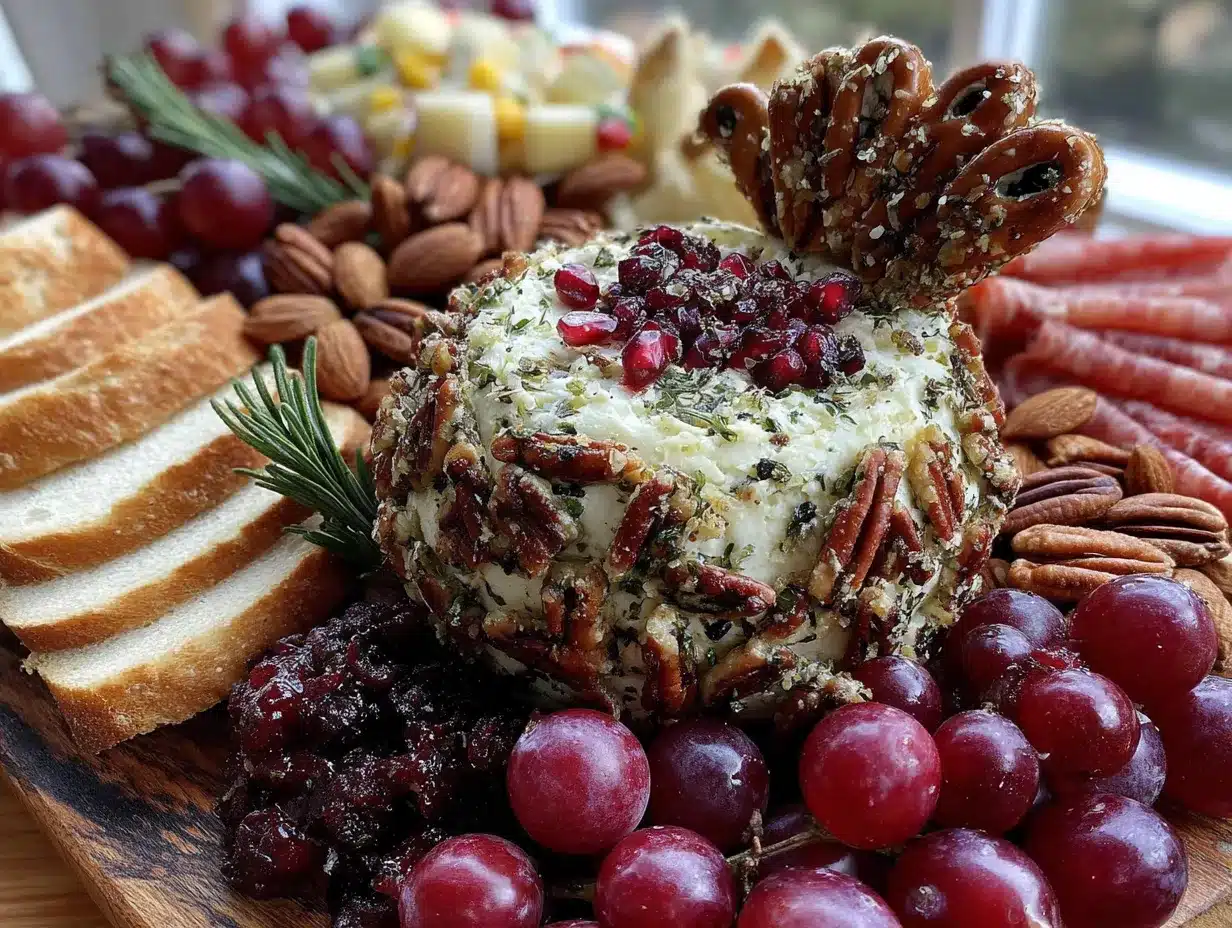
Pick and choose based on what your kids love. This is a guideline, not a rigid list.
- Cheeses: Cubed cheddar, Colby jack, or mozzarella string cheese (cut into bite-sized pieces)
- Meats: Salami slices, pepperoni, or turkey roll-ups (kids love the fun shapes you can make)
- Crackers: Butter crackers, whole wheat rounds, or mini pretzels
- Fruits: Red and green apple slices (toss with a little lemon juice to prevent browning), red seedless grapes, and dried cranberries
- Veggies: Baby carrots, cucumber rounds, and cherry tomatoes (if your kids eat them)
- Extras: A small bowl of hummus or ranch dip, a handful of goldfish crackers, and some dark chocolate chips for a sweet touch
Ingredient Tips: For the best texture, make sure your cream cheese is truly at room temperature—leave it out for at least an hour. I recommend Cabot or Tillamook for the shredded cheddar; they melt beautifully into the cheese ball. If pecans aren’t your thing, you can substitute finely chopped walnuts or even leave them out entirely for a nut-free version.
Equipment Needed
You don’t need anything fancy to pull this off, which is part of the beauty. Here’s what I use:
- Large mixing bowl (for combining the cheese ball ingredients)
- Hand mixer or sturdy wooden spoon (the mixer makes it faster, but a spoon works if you’ve got some arm strength)
- Plastic wrap (to shape and chill the cheese ball)
- Large serving board or platter (a wooden cutting board or a large baking sheet lined with parchment works great)
- Small cookie cutters (optional, but fun for cutting cheese or fruit into Thanksgiving shapes like leaves or turkeys)
- Piping bag or small zip-top bag (for any decorative touches, like filling olives with cream cheese)
If you don’t have a hand mixer, don’t stress. I’ve made this cheese ball with just a fork and a lot of determination. It works—just takes a little longer. For the board, I use an old wooden cutting board my mom gave me. It’s scratched and stained, and it adds character. A large white platter also looks gorgeous and makes the colors pop.
Preparation Method
Alright, let’s get to the fun part. Here’s how to make this board step by step. I’ve included all the little tricks I’ve learned from my own kitchen disasters.
- Make the cheese ball base: In a large mixing bowl, combine the softened cream cheese, shredded cheddar, chopped pecans, Worcestershire sauce, garlic powder, onion powder, smoked paprika, and a pinch of salt and pepper. Use your hand mixer on medium speed until everything is well combined. Taste it—yes, taste it. You want a good balance of savory and creamy. If it needs more salt, add it now.
- Shape the turkey body: Lay out a large sheet of plastic wrap. Scoop the cheese mixture onto the center and use your hands to form it into a rounded, oval shape—think of a turkey body, plump and slightly elongated. Wrap the plastic tightly around it and twist the ends to secure. Refrigerate for at least 2 hours, or up to overnight. This step is crucial; a warm cheese ball won’t hold its shape.
- Prepare the board components: While the cheese ball chills, prep your other ingredients. Wash and slice the apples (toss them in a little lemon juice), cut the cheese into cubes, and arrange the meats and crackers in small piles on your serving board. I like to leave the center empty for the cheese ball. This is also a great time to get the kids involved—my four-year-old loves arranging the crackers into patterns.
- Decorate the turkey cheese ball: Once the cheese ball is firm, unwrap it and place it in the center of your board. Now for the fun part: make the turkey face. Press two black olives or raisins into the front for eyes. Insert a candy corn, pointy side out, for the beak. Use a small sliver of red bell pepper for the wattle (that dangly red part under the beak). For the tail feathers, arrange pretzel sticks or large tortilla chips in a fan shape behind the cheese ball. You can also use slices of bell pepper or cucumber for a healthier option.
- Fill in the board: Now, arrange the rest of your ingredients around the turkey cheese ball. I like to create little “zones”—a pile of grapes here, a cluster of salami roses there. Don’t overthink it. Kids aren’t judging your arrangement skills; they’re judging how fast they can grab a piece of cheese. Leave a little space for dipping bowls if you’re using hummus or ranch.
- Final touches: Sprinkle a few dried cranberries around the board for a pop of holiday color. Add a small bowl of goldfish crackers or dark chocolate chips for the sweet-and-salty crowd. Step back and admire your work. You just made a Thanksgiving centerpiece that’s actually fun.
Pro tip from my own mistake: Don’t try to shape the cheese ball while it’s still warm. I did that once, and it ended up looking like a blob that had melted in the sun. Patience is key. Also, if the cheese ball sticks to the plastic wrap, run a butter knife under hot water and use it to loosen the wrap.
Cooking Tips & Techniques
I’ve made this board enough times to have a few tricks up my sleeve. Here’s what I’ve learned the hard way.
Don’t skip the chilling step. I know, I know—you’re in a rush. But a warm cheese ball is a sad, shapeless mess. Give it those two hours in the fridge. Your kids will thank you when the turkey doesn’t collapse into a puddle of cream cheese.
Use room-temperature cream cheese. This is non-negotiable. Cold cream cheese creates lumps, and nobody wants a lumpy turkey. Leave it out on the counter for an hour before you start. If you forget (I have, many times), you can microwave it in 10-second bursts, but be careful not to melt it.
Toast the pecans. This is a small step that makes a huge difference. Spread the chopped pecans on a baking sheet and toast at 350°F for 5-7 minutes, until they smell nutty and wonderful. Let them cool completely before mixing them into the cheese. It adds a depth of flavor that takes the cheese ball from good to “can I have another piece?”
Let the kids help. I learned this one from necessity. If I try to arrange everything perfectly, my kids get bored and start grabbing things. Instead, I let them help with the simple tasks—washing grapes, placing crackers, arranging the goldfish. They’re more likely to eat something they helped create. Plus, it keeps them occupied while you’re finishing up the main meal.
Make it ahead of time. This board is perfect for make-ahead prep. The cheese ball can be made and refrigerated up to two days in advance. The fruits and veggies can be washed and cut the night before. On Thanksgiving day, all you have to do is assemble. It’s a lifesaver when you’ve got a million other things to do.
Variations & Adaptations
One of the best things about this board is how flexible it is. Here are some ways to make it your own.
- Nut-Free Version: Skip the pecans in the cheese ball entirely. You can replace them with finely chopped roasted red peppers or sun-dried tomatoes for a pop of color and flavor. Or just leave them out—the cheese ball will still be delicious.
- Gluten-Free Option: Use gluten-free crackers and pretzels. Most cheese and meat are naturally gluten-free, so this is an easy swap. Just double-check your Worcestershire sauce label; some brands contain gluten.
- Vegetarian Twist: Skip the salami and pepperoni, and load up on extra veggies and cheeses. You can add roasted chickpeas, marinated artichoke hearts, or even small pickles for a tangy crunch.
- Seasonal Variations: In the fall, swap the apple slices for pear slices and add a handful of pomegranate seeds. In the summer, use fresh berries and melon balls. The turkey cheese ball stays the same; the board around it changes with the seasons.
- Spicy Kick: Add a pinch of cayenne pepper or a dash of hot sauce to the cheese ball mixture. My brother-in-law loves this version—he says it gives the board a little grown-up edge without being too much for the kids.
I once made a Mediterranean-inspired version with feta and sun-dried tomatoes in the cheese ball, and it was a hit. The kids were skeptical at first, but they ended up loving the tangy flavor. Don’t be afraid to experiment!
Serving & Storage Suggestions
This board is best served at room temperature. Take it out of the fridge about 20-30 minutes before you plan to serve it. The cheese ball softens slightly, making it easier to spread on crackers, and the flavors really come alive.
Presentation tip: Place the board at kid height if possible. A low coffee table or a separate kids’ table works wonders. It gives the little ones their own space to graze without bumping into adults. I also like to use small, colorful bowls for dips and extras—it makes the board feel more playful.
Storage: Leftovers? Yes, that’s a thing. Store any remaining cheese ball tightly wrapped in plastic wrap in the refrigerator for up to 5 days. The crackers and fruits should be stored separately. The cheese ball actually gets better after a day or two—the flavors meld together beautifully.
Reheating: You don’t really reheat a cheese ball, but if you want to soften it for spreading, let it sit at room temperature for 15 minutes. Leftover apple slices can be tossed into a salad or eaten as a snack. The salami and cheese cubes are great for lunchboxes the next day.
Flavor development: I honestly think this board tastes even better the next day. The cheese ball absorbs all those savory flavors, and the crackers soften just a little. It’s perfect for post-Thanksgiving snacking while you’re watching football or recovering from the big meal.
Nutritional Information & Benefits
I’m not a nutritionist, but I can tell you this board has some redeeming qualities. Here’s a rough estimate per serving (based on a 12-serving board):
- Calories: Approximately 280-350 per serving (depends on how many crackers you grab)
- Protein: 10-12g (thanks to the cheese, meat, and nuts)
- Fat: 20-25g (mostly from the cheese and nuts—the good kind)
- Carbohydrates: 15-20g (from the fruit and crackers)
- Fiber: 2-3g (from the apples and veggies)
Health benefits: The cream cheese provides calcium and vitamin A, while the nuts offer healthy fats and a little protein. The fruits and veggies add fiber and antioxidants. It’s not a health food, but it’s a balanced snack that satisfies all those cravings.
Dietary considerations: This board can be made gluten-free (use GF crackers), nut-free (skip the pecans), or vegetarian (skip the meat). It’s not dairy-free, but you could try a dairy-free cream cheese alternative—just know the texture will be a bit different.
Potential allergens: Dairy, nuts, and gluten (depending on your cracker choice). Make sure to label the board if you’re serving guests with allergies.
My personal take? This board is about balance. It’s a treat, but it’s not junk. And on Thanksgiving, a little treat is exactly what the kids—and the grown-ups—need.
Conclusion
This Kid-Approved Thanksgiving Charcuterie Board with Turkey Cheese Ball is more than just a snack. It’s a way to make the littlest members of your family feel seen and celebrated during a holiday that often revolves around adult tastes. The turkey cheese ball is the centerpiece, sure, but the real magic is in the way it brings everyone together—little hands reaching, giggling, and finding their favorite bite.
I love this recipe because it’s forgiving. You can swap ingredients, change the shapes, and it still turns out wonderful. It’s the kind of dish that doesn’t need to be perfect to be loved. And honestly, that’s the best kind of recipe to share with your family.
So go ahead—give it a try. Set out the board, watch the kids’ faces light up, and maybe sneak a piece of that cheese ball for yourself. You’ve earned it. And when you do, come back and tell me about it. I’d love to hear how your family made it their own. Drop a comment below, share a photo, or tag me on social media. Let’s keep this Thanksgiving tradition going, one cheese ball at a time.
Frequently Asked Questions
Can I make the cheese ball ahead of time?
Absolutely! You can make the cheese ball up to two days in advance. Just keep it wrapped tightly in plastic wrap in the refrigerator. Let it sit at room temperature for 20 minutes before serving so it’s soft enough to spread.
My kids are picky eaters. Will they like this?
I designed this board with picky eaters in mind. The turkey cheese ball is mild and creamy, and the crackers and fruits are familiar favorites. Let your kids help arrange the board—they’re more likely to try something they helped create.
Can I use a different shape for the cheese ball?
Of course! The turkey shape is fun for Thanksgiving, but you can shape the cheese ball into a pumpkin, a leaf, or even a simple round ball. Use cookie cutters to guide your shape if needed.
What if I don’t have all the ingredients for the board?
Don’t worry about it. This board is incredibly flexible. Use whatever cheese, crackers, and fruit you have on hand. The turkey cheese ball is the star; everything else is just a supporting actor.
How do I keep the apple slices from turning brown?
Toss them in a little lemon juice or lime juice right after slicing. You can also use a commercial produce preserver like Fruit-Fresh, but lemon juice works just fine and adds a nice tang.
Pin This Recipe!
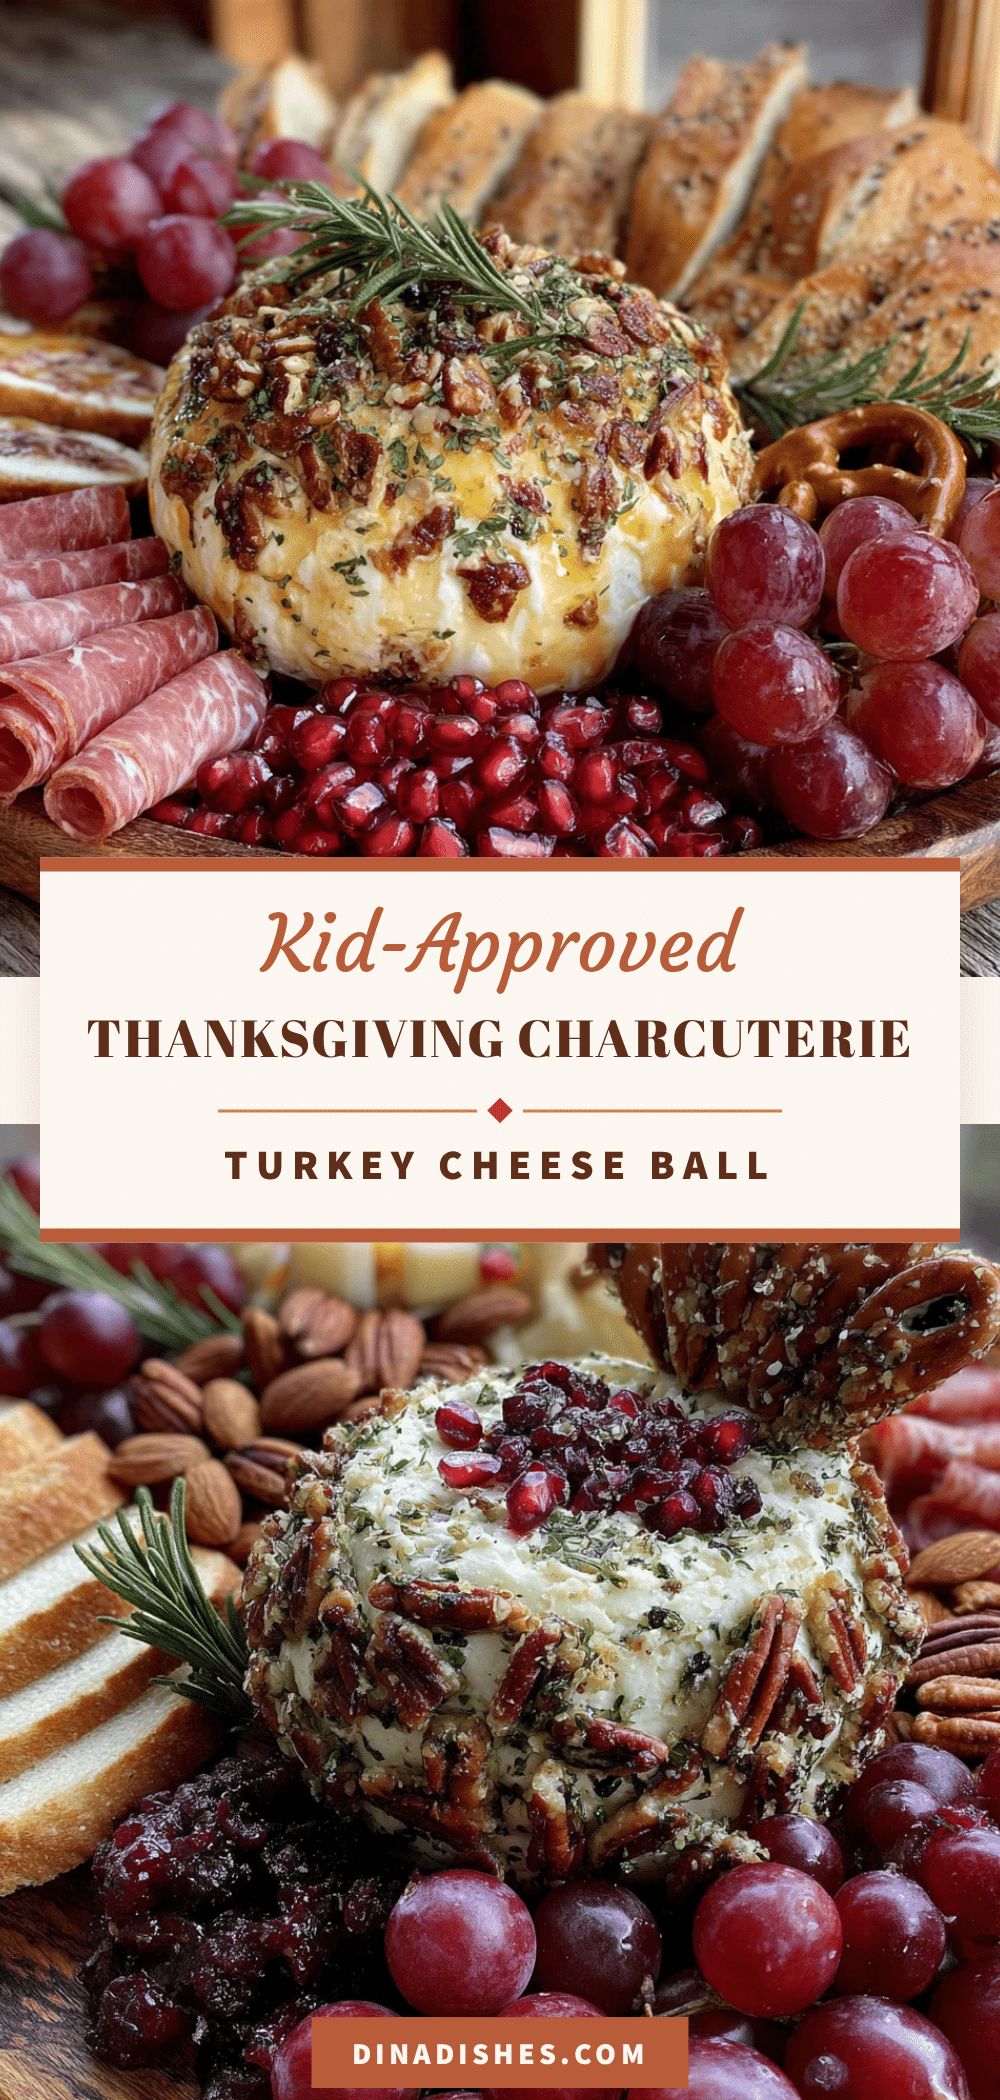
Kid-Approved Thanksgiving Charcuterie Board with Turkey Cheese Ball

A fun and easy Thanksgiving snack board featuring a creamy turkey-shaped cheese ball, kid-friendly cheeses, meats, fruits, and crackers. Perfect for keeping little hands happy while the adults finish the main meal.
- Prep Time: 20 minutes
- Cook Time: 0 minutes
- Total Time: 2 hours 20 minutes (includes chilling)
- Yield: 12 servings 1x
- Category: Appetizer
- Cuisine: American
Ingredients
- 16 oz cream cheese, softened
- 1 cup shredded sharp cheddar cheese
- 1/2 cup finely chopped pecans
- 1 tablespoon Worcestershire sauce
- 1 teaspoon garlic powder
- 1/2 teaspoon onion powder
- 1/4 teaspoon smoked paprika (optional)
- Salt and black pepper to taste
- 1 candy corn (for beak)
- 2 black olives or raisins (for eyes)
- 1 small piece red bell pepper or cherry tomato (for wattle)
- Pretzel sticks or large tortilla chips (for tail feathers)
- Cubed cheddar, Colby jack, or mozzarella string cheese
- Salami slices, pepperoni, or turkey roll-ups
- Butter crackers, whole wheat rounds, or mini pretzels
- Red and green apple slices (tossed with lemon juice)
- Red seedless grapes
- Dried cranberries
- Baby carrots, cucumber rounds, cherry tomatoes
- Hummus or ranch dip (optional)
- Goldfish crackers (optional)
- Dark chocolate chips (optional)
Instructions
- Make the cheese ball base: In a large mixing bowl, combine softened cream cheese, shredded cheddar, chopped pecans, Worcestershire sauce, garlic powder, onion powder, smoked paprika, and a pinch of salt and pepper. Use a hand mixer on medium speed until well combined. Taste and adjust seasoning.
- Shape the turkey body: Lay out a large sheet of plastic wrap. Scoop the cheese mixture onto the center and form into a rounded, oval shape (like a turkey body). Wrap tightly and twist ends to secure. Refrigerate for at least 2 hours or up to overnight.
- Prepare the board components: While the cheese ball chills, wash and slice apples (toss with lemon juice), cut cheese into cubes, and arrange meats and crackers in small piles on the serving board, leaving the center empty for the cheese ball.
- Decorate the turkey cheese ball: Once firm, unwrap and place in the center of the board. Press two black olives or raisins into the front for eyes. Insert a candy corn, pointy side out, for the beak. Use a small sliver of red bell pepper for the wattle. Arrange pretzel sticks or tortilla chips in a fan shape behind the cheese ball for tail feathers.
- Fill in the board: Arrange remaining ingredients around the turkey cheese ball in little ‘zones’—grapes, salami roses, etc. Leave space for dipping bowls if using hummus or ranch.
- Final touches: Sprinkle dried cranberries around the board. Add small bowls of goldfish crackers or dark chocolate chips if desired. Serve at room temperature.
Notes
Make the cheese ball up to 2 days in advance. Let it sit at room temperature for 20 minutes before serving. For a nut-free version, omit pecans or substitute with finely chopped roasted red peppers. For gluten-free, use gluten-free crackers and pretzels. Toast pecans at 350°F for 5-7 minutes for extra flavor.
Nutrition
- Serving Size: 1 serving (based on
- Calories: 315
- Sugar: 8
- Sodium: 450
- Fat: 22
- Saturated Fat: 10
- Carbohydrates: 18
- Fiber: 2
- Protein: 11
Keywords: Thanksgiving, charcuterie board, turkey cheese ball, kid-friendly, holiday snack, easy appetizer