My neighbor Gina watched me wrestling a screaming toddler into a too-tight costume and didn’t say anything at first. Then she handed me a cup of something dark and bubbling over the fence. “Drink this,” she said. “It’s for the grown-ups too.” That was the first time I tasted her Witches Brew Halloween Punch, and honestly, it changed how I thought about Halloween parties forever.
Gina is from a big Italian family where every gathering revolves around food, and she has this way of making even the simplest thing feel like a celebration. She didn’t give me a formal recipe that day—she just told me what she threw in the pot while I sipped. I scribbled it on a napkin later, between handing out candy and untangling a lightsaber from the curtain rod. The original version had sherbet floating in it, and the kids went absolutely wild for the fog effect from the dry ice.
I’ve tweaked her punch over the years to make it even easier for busy parents. Maybe you’ve been there—trying to pull off a Halloween party without spending a fortune or losing your mind. This punch is the answer. It uses affordable ingredients you can grab at any grocery store, it comes together in about ten minutes, and the dry ice fog is pure magic for kids and adults alike. The best part? You don’t need any fancy bartending skills. I mean, if I can do it while simultaneously wrestling a vampire costume onto a wiggly six-year-old, you can definitely do it.
That first Halloween with Gina’s punch, my son asked for three refills and my husband got more compliments on the “spooky drink” than on his homemade graveyard cake. The recipe stayed with me because it solved a problem I didn’t even know I had: how to make a holiday special without spending hours in the kitchen. Now it’s our family’s Halloween tradition, and I’m pretty sure the neighbors look forward to it as much as the kids do.
Why You’ll Love This Recipe
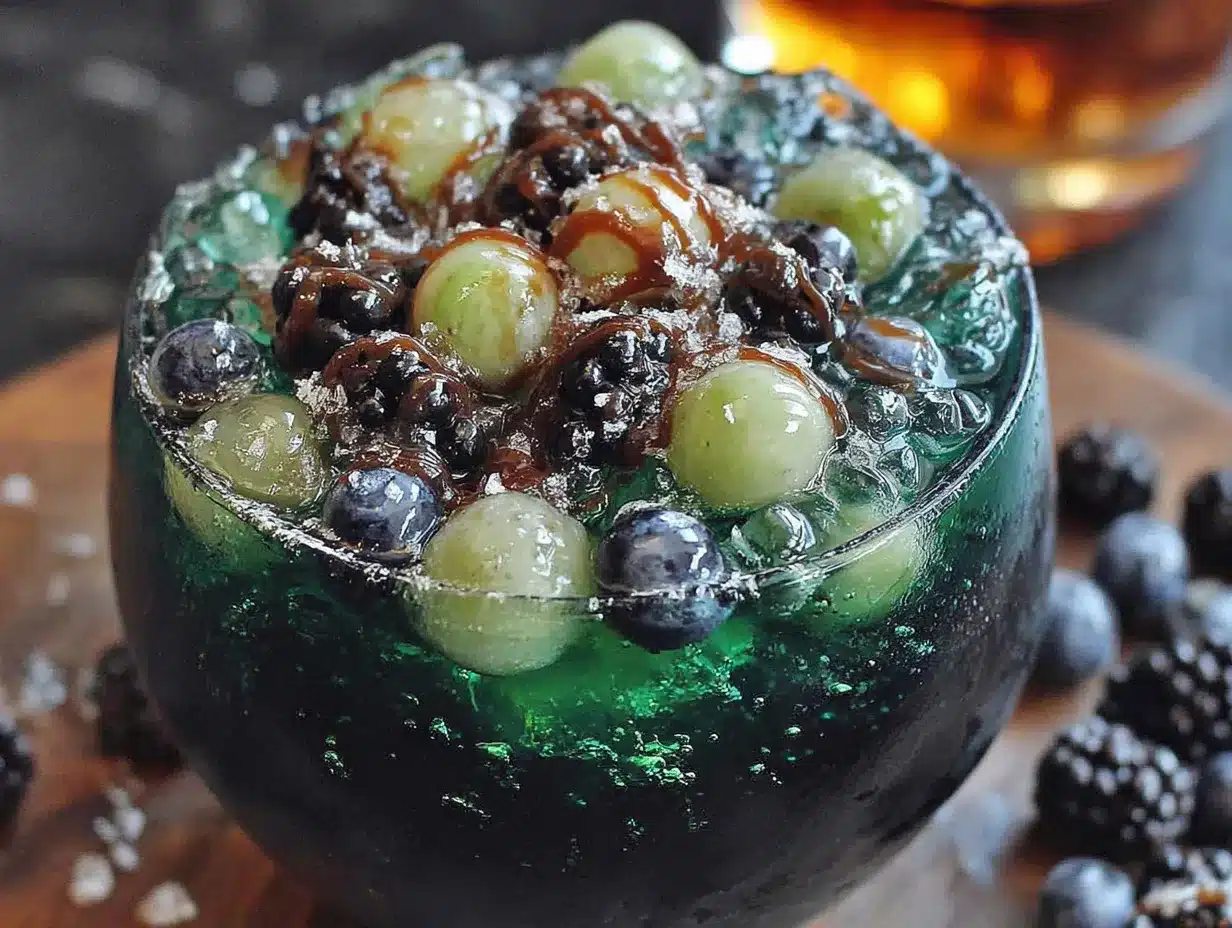
Let me tell you why this Kid-Friendly Witches Brew Halloween Punch has become our go-to for every Halloween gathering. I’ve tested this recipe at three different parties now, and it never fails to get that delighted gasp when the dry ice fog rolls across the table.
- Quick & Easy: This punch comes together in under ten minutes. No simmering, no complicated mixing, no stress. You just combine the ingredients in a punch bowl and add the dry ice right before serving. Perfect for busy parents who are already juggling costumes and candy.
- Simple Ingredients: Every ingredient is something you can find at your regular grocery store. No special syrups, no exotic fruits, nothing that requires a trip to a specialty shop. You probably already have most of these in your pantry or fridge.
- Perfect for Halloween Parties: Whether you’re hosting a classroom celebration, a neighborhood gathering, or just a small family movie night, this punch fits right in. The spooky green color and bubbling fog make it the star of any Halloween spread.
- Crowd-Pleaser: I’ve served this to kids as young as three and adults well into their sixties, and everyone loves it. The flavor is sweet and fruity without being overwhelming, and the visual effect is just plain fun.
- Unbelievably Delicious: The combination of pineapple juice, limeade, and lemon-lime soda creates this bright, refreshing flavor that’s not too sugary. The sherbet adds a creamy tang that makes it feel like a treat without being heavy.
What makes this recipe different from other Halloween punches is the dry ice technique. Most recipes either skip the dry ice entirely or use it in a way that’s not safe for kids. I’ve figured out the safest way to create that spooky fog effect so even the littlest guests can enjoy it without worry. Plus, the flavor balance is spot-on—not too sour, not too sweet, just right for little taste buds.
This is the kind of recipe that makes you feel like a Halloween hero without any of the stress. It’s comfort in a cup, spooky style.
What Ingredients You Will Need
This Kid-Friendly Witches Brew Halloween Punch uses simple, everyday ingredients to create something truly magical. The combination of fruit juices and soda gives it that vibrant green color and refreshing taste that kids absolutely love. Here’s everything you need:
For the Punch Base
- 1 can (46 ounces) pineapple juice (I prefer Dole for consistent sweetness, but any brand works fine)
- 1 can (12 ounces) frozen limeade concentrate, thawed (Minute Maid is my go-to—it dissolves easily and has a bright, clean flavor)
- 2 liters lemon-lime soda (Sprite or 7UP both work great; store brand is perfectly fine too)
- 1 quart lime sherbet (Blue Bell or Häagen-Dazs gives the creamiest texture, but any brand will do)
- Green food coloring (optional, for extra spooky color—about 5-8 drops)
For the Spooky Effect
- 2-3 pounds food-grade dry ice (available at most grocery stores or ice suppliers—call ahead to check availability)
- Large punch bowl or cauldron (glass or plastic works best; avoid metal as dry ice can react with it)
- Tongs or heavy-duty gloves (for handling dry ice safely—never touch it with bare hands)
Optional Garnishes
- Gummy worms (for crawling up the sides of the bowl or floating in the punch)
- Plastic spiders or eyeballs (for a creepy visual touch—make sure they’re food-safe or warn guests)
- Ice ring with frozen fruit (freeze berries or lime slices in a ring mold for a decorative touch that won’t dilute the punch)
A quick note on ingredient selection: For the best flavor, use full-sugar soda and regular limeade. Diet versions can leave a weird aftertaste, and kids usually prefer the real thing anyway. If you want to cut down on sugar, you can use a half-and-half mix of regular and diet soda, but I’ve found the full-sugar version gets more refill requests.
The dry ice is the star of the show here, so don’t skip it if you can help it. I usually buy mine the morning of the party and store it in a cooler with the lid slightly open—never in a sealed container or the freezer. Most grocery stores that carry dry ice will have it in a special freezer near the checkout, and it costs around $1-2 per pound.
Equipment Needed
You don’t need any fancy equipment for this Kid-Friendly Witches Brew Halloween Punch, which is part of what makes it so great for busy families. Here’s what you’ll need:
- Large punch bowl or plastic cauldron: A 2-3 gallon capacity works best. I found a plastic cauldron at a party supply store for under $10, and it’s become our Halloween staple. Glass punch bowls work beautifully too, just make sure they’re heat-safe if you’re adding warm punch.
- Long-handled ladle: Preferably plastic or stainless steel. I use a plastic one to avoid any reaction with the dry ice, but metal is fine as long as you don’t leave it sitting in the punch.
- Tongs or heavy-duty gloves: Essential for handling dry ice safely. I keep a pair of thick oven mitts dedicated just for this purpose.
- Small hammer or mallet: For breaking the dry ice into smaller pieces if needed. Wrap the dry ice in a clean kitchen towel before tapping it gently.
- Measuring cups and spoons: Standard kitchen set will do.
- Pitcher for mixing: A large pitcher helps combine the juices before pouring them into the punch bowl.
- Small bowls for garnishes: For holding gummy worms, plastic spiders, or other decorations.
If you don’t have a punch bowl, a large stockpot or even a clean plastic storage tub works in a pinch. I’ve used a big stainless steel mixing bowl before, and it looked perfectly fine. The key is having enough capacity to hold all the liquid plus the dry ice without overflowing when people start ladling.
One tip: if you’re using a plastic cauldron, check that it’s food-safe. Some decorative items aren’t meant for food contact. I learned that the hard way when my first cauldron started smelling weird after an hour. Now I only buy ones labeled for food use.
Preparation Method
Making this Kid-Friendly Witches Brew Halloween Punch is so simple, you’ll wonder why you ever bought pre-made punch. Follow these steps, and you’ll have a spooky, delicious drink ready in no time.
- Chill your ingredients ahead of time. About 2-3 hours before your party, put the pineapple juice, limeade concentrate, and lemon-lime soda in the refrigerator. The lime sherbet should stay in the freezer until you’re ready to use it. Cold ingredients mean less melting and better fog effects from the dry ice.
- Set up your serving area. Place your punch bowl or cauldron on a sturdy table where kids can reach it safely. Make sure there’s enough space around it for people to gather without knocking anything over. I like to put a tablecloth underneath in case of spills—Halloween colors work great here.
- Mix the juice base. In a large pitcher, combine the chilled pineapple juice and thawed limeade concentrate. Stir gently until the concentrate is fully dissolved. This takes about 30 seconds. The mixture should be a pale yellow at this point.
- Add the green color. If you’re using food coloring, add 5-8 drops to the juice mixture and stir well. The color should be a vibrant, slightly eerie green. You can adjust the amount based on how spooky you want it to look. I usually go for about 6 drops for a nice witchy green.
- Pour into the punch bowl. Transfer the green juice mixture into your punch bowl. Then slowly pour in the entire 2-liter bottle of lemon-lime soda. Stir gently with your ladle to combine. The soda will create some fizz, which is perfectly fine.
- Add the sherbet. Scoop the lime sherbet into the punch bowl. You can add it in big scoops or small dollops—either way works. The sherbet will start to melt and create a creamy, frothy top layer. This is where the punch starts looking really magical.
- Prepare the dry ice. Put on your heavy-duty gloves or use tongs to handle the dry ice. If the pieces are too large, wrap the dry ice in a clean kitchen towel and gently tap it with a small hammer to break it into smaller chunks. Aim for pieces about the size of a golf ball or slightly smaller.
- Add the dry ice right before serving. Using your tongs or gloved hands, carefully drop the dry ice pieces into the punch bowl. Do this just as your guests are arriving or right when you’re ready to serve. The dry ice will immediately start creating thick, foggy bubbles that roll over the sides of the bowl.
- Stir occasionally. Give the punch a gentle stir every 10-15 minutes to keep the dry ice reacting and producing fog. The fog effect will last about 30-45 minutes with the dry ice, so you may need to add more pieces if your party runs longer.
- Serve and enjoy. Ladle the punch into cups, being careful not to scoop up any dry ice pieces. The dry ice should stay in the bottom of the bowl. Warn kids (and adults) not to touch or eat the dry ice. The punch itself is perfectly safe to drink.
A few important notes: The dry ice will be completely dissolved after about 45 minutes to an hour, depending on the size of the pieces. At that point, the punch is still delicious, just without the fog effect. You can add more dry ice if you want to keep the show going. Also, don’t add the dry ice too early—it’s most impressive when guests see it bubbling right away.
I’ve found that the punch tastes even better after it’s been sitting for about 15-20 minutes, as the sherbet fully incorporates and the flavors meld together. So don’t worry if you make it a little before guests arrive—just wait to add the dry ice until serving time.
Cooking Tips & Techniques
After making this Kid-Friendly Witches Brew Halloween Punch for several years, I’ve picked up some tricks that make the whole process smoother and more impressive. Let me share what I’ve learned through trial and error.
The dry ice safety rule is non-negotiable. I cannot stress this enough—never let anyone put dry ice in their mouth or touch it with bare hands. It can cause serious burns. I always tell my kids that the dry ice is “magic rocks” that only grown-ups can handle, and I keep a pair of tongs right next to the bowl so no one is tempted to grab a piece. When I first made this punch, I accidentally touched a small piece of dry ice while cleaning up, and let me tell you, that burn hurts. Learn from my mistake.
Temperature matters more than you think. The colder your ingredients are, the better the fog effect will be. Warm punch makes the dry ice dissolve too quickly, and you lose that spooky bubbling action. I actually put my punch bowl in the freezer for 30 minutes before the party to get it nice and cold. It makes a huge difference in how long the fog lasts.
Don’t overdo the food coloring. I once added too much green food coloring trying to make the punch extra spooky, and it ended up looking like radioactive sludge. Kids loved it, but it stained cups and napkins. Start with 5 drops and add more if needed. You’re aiming for a swampy green, not nuclear waste.
Multitask like a pro. While the punch is chilling and the dry ice is doing its thing, set out your cups and garnishes. I put gummy worms in a small bowl and let kids add their own. This keeps them busy and adds to the Halloween fun. I also prep a backup batch of juice mixture in the fridge so I can refresh the punch easily.
The sherbet trick. If you want the punch to stay creamy and frothy for longer, add the sherbet in two batches. Put half in when you first make the punch, then add the other half about 30 minutes later. This keeps that beautiful frothy top layer throughout the party.
Variations & Adaptations
One of the best things about this Kid-Friendly Witches Brew Halloween Punch is how easy it is to customize. Here are some variations I’ve tried and loved:
Dairy-Free Version
Skip the lime sherbet and use a dairy-free lime sorbet instead. I’ve tried this with sorbet from a few different brands, and it works beautifully. The texture is slightly less creamy, but the flavor is still bright and refreshing. You can also add a can of coconut cream for extra richness if you want.
Extra Spooky Color
For a deeper, more dramatic green, use 10-12 drops of green food coloring. You can also add a drop of blue food coloring to create a darker, more mysterious shade. I did this for a “poison punch” themed party once, and the kids thought it was hilarious.
Berry Witch’s Brew
Swap the limeade for raspberry lemonade concentrate and use berry-flavored sherbet instead of lime. The color turns a deep purple-red, which looks amazing with the dry ice fog. This version is a little sweeter and less tart, which some kids prefer.
Sparkling Water Option
For a less sugary version, replace half the lemon-lime soda with plain sparkling water. The flavor is still good, and the bubbles are still there. I’ve done this for daytime parties where parents were more concerned about sugar, and it was a hit.
Frozen Fruit Ice Ring
Instead of using dry ice (if you can’t find it), freeze a ring of juice with berries and lime slices. The frozen ring keeps the punch cold and looks beautiful as it melts. The effect isn’t as dramatic as dry ice, but it’s still festive and fun for younger kids.
My personal favorite variation is the berry version—I made it for a Halloween brunch once, and the deep purple color against the white fog was absolutely stunning. Plus, the berry flavor pairs surprisingly well with the lime soda.
Serving & Storage Suggestions
This Kid-Friendly Witches Brew Halloween Punch is best served cold and fresh, right when the dry ice is bubbling away. Here’s how to make the most of it:
Serving temperature: Serve the punch ice-cold. The colder it is, the better the dry ice effect and the more refreshing it tastes. I keep a bowl of ice cubes nearby for anyone who wants their drink extra cold, though the sherbet helps keep things chilled.
Presentation tips: Use clear plastic cups so guests can see the green color and any floating gummy worms. I like to set out a tray of cups with plastic spiders glued to the outside—just make sure they’re decorative and not meant to be eaten. A cauldron-shaped punch bowl is always a hit, but any large bowl works.
Complementary dishes: This punch pairs beautifully with salty snacks like popcorn, pretzels, or chips. The sweetness of the punch balances the saltiness perfectly. For a full Halloween spread, I serve it alongside mini hot dogs wrapped in crescent rolls (they look like mummies!) and pumpkin-shaped cheese crackers.
Storage instructions: The punch base (without the dry ice and sherbet) can be made up to 24 hours ahead and stored in the refrigerator. Just mix the pineapple juice, limeade, and food coloring, then add the soda and sherbet right before serving. Leftover punch without dry ice can be refrigerated for up to 2 days, though the carbonation will fade.
Reheating (not that you need it): If the punch gets too warm, you can add a few ice cubes or an ice ring. Don’t microwave it or anything—that would ruin the texture and flavor.
One thing I’ve noticed: the flavors actually get better after sitting for an hour or two. The lime and pineapple meld together beautifully, and the sherbet creates a creamy consistency that’s even more delicious. So don’t stress if you make it a bit early—just hold the dry ice until serving time.
Nutritional Information & Benefits
While this Kid-Friendly Witches Brew Halloween Punch is definitely a treat, it’s good to know what you’re serving. Here’s a rough breakdown per 8-ounce serving:
| Nutrient | Amount per Serving |
|---|---|
| Calories | 180-220 |
| Total Fat | 2-3g |
| Saturated Fat | 1-2g |
| Sodium | 30-50mg |
| Total Carbohydrates | 40-50g |
| Sugars | 35-45g |
| Protein | 1-2g |
Health benefits of key ingredients: Pineapple juice is a good source of vitamin C and manganese, which support immune health. Limeade provides additional vitamin C, and the citrus flavor can help with digestion. The lime sherbet adds a small amount of calcium from the dairy content.
Dietary considerations: This recipe is vegetarian and can be made dairy-free by using sorbet instead of sherbet. It contains dairy in the sherbet, so if you have lactose-intolerant guests, the sorbet version is a great alternative. The punch is also nut-free, egg-free, and soy-free, making it suitable for many common allergies.
Potential allergens: The main allergen to watch for is dairy (in the sherbet). Some commercial limeades may contain traces of other allergens, so check labels if you’re serving guests with severe allergies.
From a wellness perspective, I see this punch as a fun occasional treat—not something you’d drink every day, but perfect for a holiday celebration. The fruit juice provides some real nutritional value, and the portion size is manageable. I find that kids are satisfied with one or two cups, especially if there’s other food available.
Conclusion
This Kid-Friendly Witches Brew Halloween Punch is more than just a drink—it’s the centerpiece of a Halloween celebration that brings people together. It’s the kind of recipe that makes you look like a party-planning genius without any of the stress, and it creates those magical moments that kids remember for years.
I love this recipe because it solves so many problems at once. It’s affordable, it’s quick, it’s safe for kids, and it looks absolutely spectacular. Every time I make it, I think of Gina handing me that first cup over the fence, and I feel grateful for those small moments of generosity that turn into family traditions.
Don’t be afraid to make this punch your own. Add extra gummy worms, experiment with different sherbet flavors, or let the kids help with the garnishes. The beauty of this recipe is that it’s forgiving and fun—exactly what Halloween should be.
I’d love to hear how your Witches Brew turns out! Drop a comment below and tell me about your Halloween party, or share a photo of your punch bowl in action. And if you have your own twist on this recipe, please share it—I’m always looking for new ideas to try. Here’s to a spooky, delicious, and wonderfully messy Halloween!
Frequently Asked Questions
Is dry ice safe for kids to be around?
Yes, as long as you follow safety precautions. Keep the dry ice in the punch bowl and use tongs to handle it. Warn children not to touch or eat the dry ice. Once it’s dissolved in the punch, the liquid is perfectly safe to drink.
Where can I buy dry ice for this punch?
Most major grocery stores carry dry ice, usually near the checkout in a special freezer. You can also find it at ice supply companies or some big-box stores. Call ahead to make sure they have it in stock—it’s often kept behind the counter.
Can I make this punch without dry ice?
Absolutely! The punch tastes just as delicious without it. You can use a frozen ice ring with berries and lime slices to keep it cold and add visual interest. The flavor won’t change, just the spooky fog effect.
How far in advance can I make this punch?
You can mix the juice base (pineapple juice, limeade, and food coloring) up to 24 hours ahead and store it in the refrigerator. Add the soda and sherbet right before serving, and add the dry ice only when guests are ready to drink.
Can I use a different flavor of sherbet?
Yes! Rainbow sherbet, orange sherbet, or even raspberry sherbet all work beautifully. The color will change depending on what you use, but the creamy texture and sweet-tangy flavor will still be delicious. Green sherbet is the most Halloween-appropriate, but feel free to experiment.
Pin This Recipe!
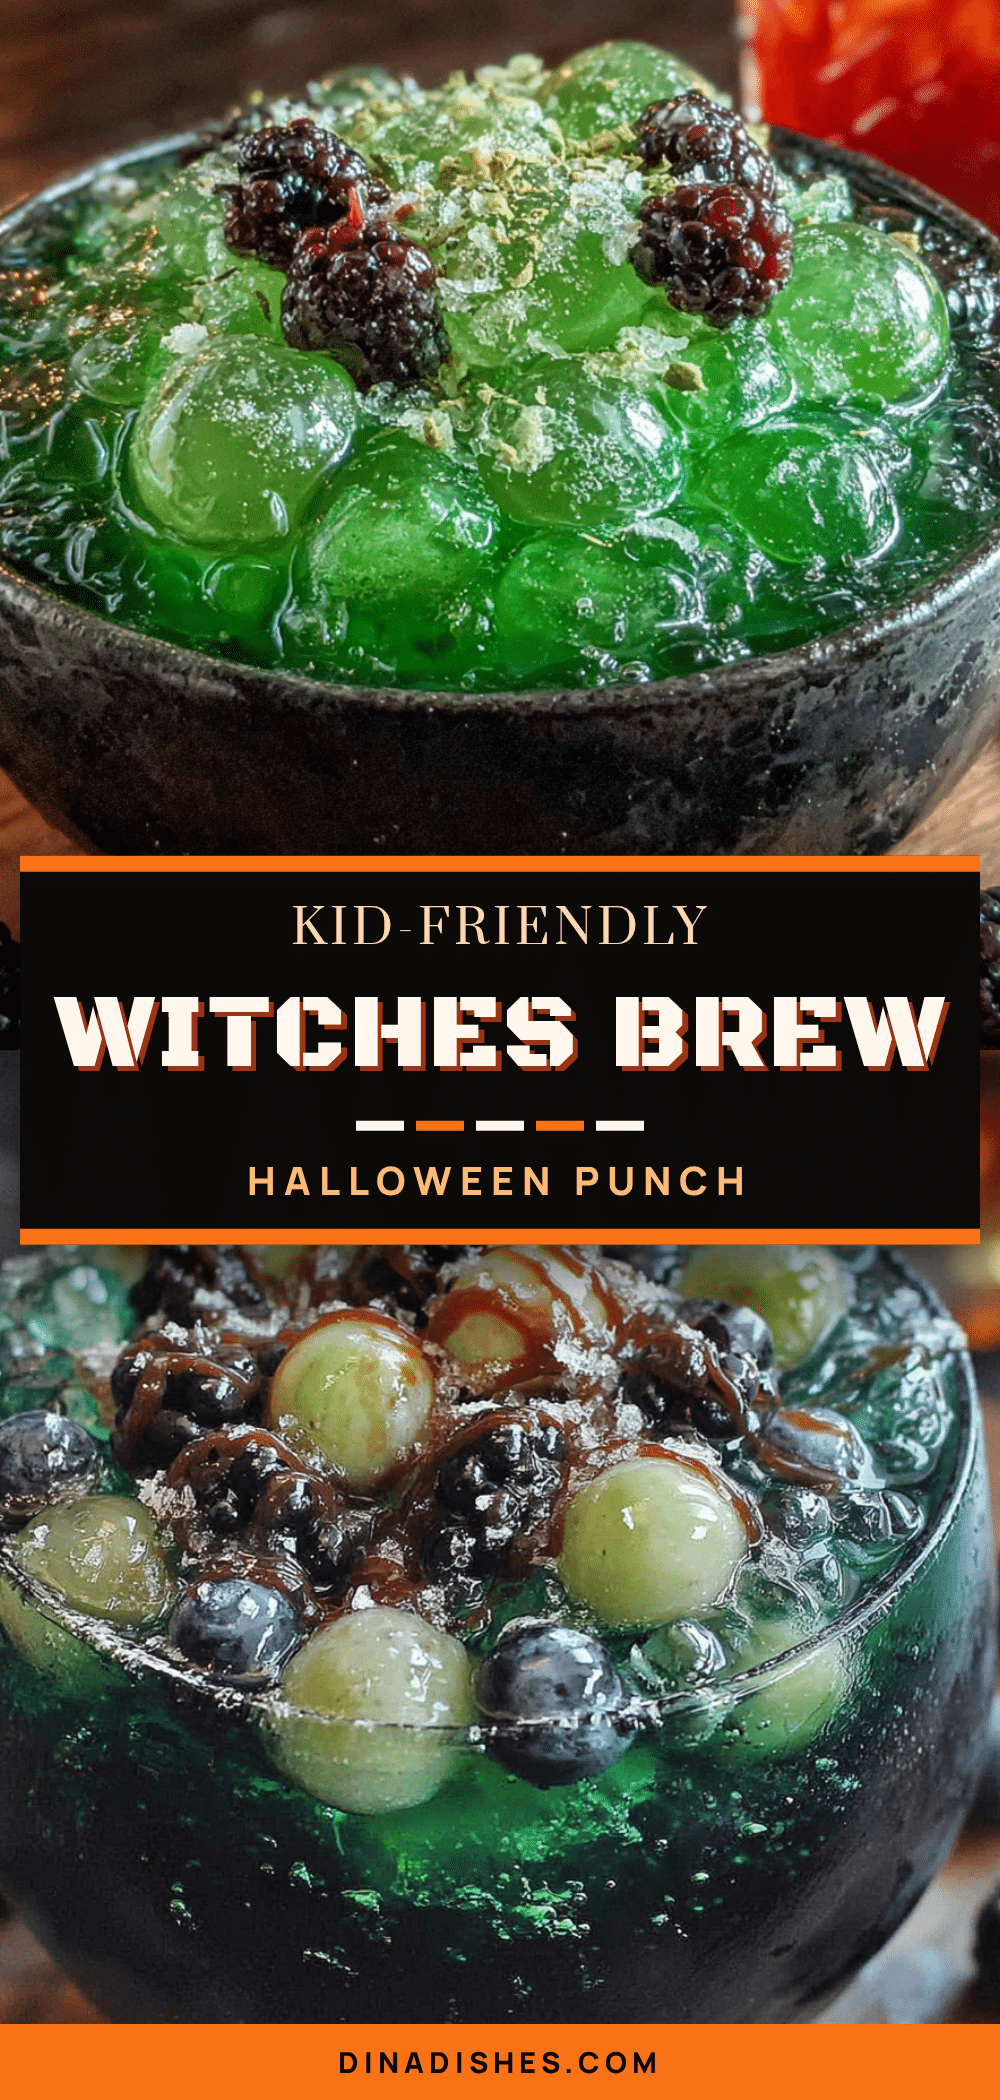
Kid-Friendly Witches Brew Halloween Punch with Dry Ice
A spooky, kid-friendly Halloween punch with a magical dry ice fog effect. Made with simple ingredients like pineapple juice, limeade, and lime sherbet, it’s quick to prepare and perfect for parties.
- Prep Time: 10 minutes
- Cook Time: 0 minutes
- Total Time: 10 minutes
- Yield: 16 servings 1x
- Category: Beverage
- Cuisine: American
Ingredients
- 1 can (46 ounces) pineapple juice
- 1 can (12 ounces) frozen limeade concentrate, thawed
- 2 liters lemon-lime soda (e.g., Sprite or 7UP)
- 1 quart lime sherbet
- 5–8 drops green food coloring (optional)
- 2–3 pounds food-grade dry ice
- Gummy worms (optional garnish)
- Plastic spiders or eyeballs (optional garnish)
- Ice ring with frozen fruit (optional garnish)
Instructions
- Chill the pineapple juice, limeade concentrate, and lemon-lime soda in the refrigerator for 2-3 hours before the party. Keep the lime sherbet in the freezer until ready to use.
- Set up your serving area with a large punch bowl or cauldron on a sturdy table.
- In a large pitcher, combine the chilled pineapple juice and thawed limeade concentrate. Stir until the concentrate is fully dissolved.
- If using food coloring, add 5-8 drops to the juice mixture and stir well to achieve a vibrant green color.
- Pour the green juice mixture into the punch bowl. Slowly add the entire 2-liter bottle of lemon-lime soda and stir gently.
- Scoop the lime sherbet into the punch bowl. It will start to melt and create a creamy, frothy top layer.
- Put on heavy-duty gloves or use tongs to handle the dry ice. If pieces are too large, wrap the dry ice in a clean kitchen towel and gently tap with a small hammer to break into golf ball-sized chunks.
- Just before serving, carefully drop the dry ice pieces into the punch bowl using tongs or gloved hands. The dry ice will create thick, foggy bubbles that roll over the sides.
- Stir the punch gently every 10-15 minutes to keep the dry ice reacting and producing fog. The fog effect will last about 30-45 minutes.
- Ladle the punch into cups, being careful not to scoop up any dry ice pieces. Warn guests not to touch or eat the dry ice.
Notes
Never let anyone put dry ice in their mouth or touch it with bare hands—it can cause burns. Keep the dry ice in the punch bowl and use tongs to handle it. The punch base (without dry ice and sherbet) can be made up to 24 hours ahead and stored in the refrigerator. Add the dry ice only when guests are ready to serve. For a dairy-free version, use lime sorbet instead of sherbet.
Nutrition
- Serving Size: 8 ounces
- Calories: 200
- Sugar: 40
- Sodium: 40
- Fat: 2.5
- Saturated Fat: 1.5
- Carbohydrates: 45
- Protein: 1.5
Keywords: Halloween punch, witches brew, kid-friendly, dry ice, spooky drink, party punch, lime sherbet, pineapple juice


