I was digging through my purse for my car keys last Tuesday in the parking lot of the hardware store—don’t ask, it was one of those days—when a gust of wind carried the faintest smell of vanilla and sugar from somewhere. And just like that, I was eight years old again, standing on a step stool in my Aunt Margie’s kitchen in Biloxi, watching her beat egg whites into a cloud so stiff it could hold a spoon upright. She called them Forgotten Cookies because you popped them in the oven, turned it off, and then literally forgot about them overnight. The name always made me giggle. She passed away six years ago, and I swear I haven’t smelled that exact combination of toasted meringue and warm vanilla since. Until that parking lot moment, which sent me straight home to dig out her recipe card—the one with the grease stain in the corner and her loopy handwriting that says “don’t peek!” in red ink. Honestly, I’d tried making them a few times before and ended up with chewy, sticky disasters that stuck to the baking sheet like glue. But this time? This time I paid attention to every single detail. And let me tell you, when I cracked open the oven the next morning and saw those perfect, pillowy rounds of sweetness, I actually teared up a little. Maybe you’ve been there—chasing a taste from your childhood that feels just out of reach. These cookies? They brought it back.
Why You’ll Love This Recipe
Let me be real with you—I tested this recipe seven times before I got it right. Seven. My kitchen counter looked like a meringue laboratory, and my neighbors probably thought I was running a bakery out of my apartment. But every failure taught me something, and what I’m sharing with you today is the foolproof version that works every single time.
- No Oven Required: These cookies “bake” in the residual heat of your oven after you turn it off. No babysitting, no checking every five minutes—just set it and forget it.
- Simple Ingredients: You need exactly four ingredients, and chances are you already have three of them in your pantry right now.
- Perfect for Healthy-ish Snacking: Each cookie has about 15 calories and zero fat. I’m not saying they’re health food, but they’re a whole lot better than reaching for a bag of chips when that 3 PM craving hits.
- Crowd-Pleaser: Kids love the melt-in-your-mouth texture, and adults appreciate that they’re not overly sweet. I brought a batch to my book club last month and they disappeared in ten minutes.
- Gluten-Free & Dairy-Free Naturally: No special flours or substitutes needed. These cookies are naturally free of the most common allergens, which makes them perfect for sharing.
What makes this recipe different from all the other meringue recipes out there? It’s the temperature control. Most recipes tell you to bake meringues at a low temperature for hours, but that often leads to browning or cracking. My aunt’s method—heating the oven, then turning it off and leaving them overnight—creates a gentle, even drying process that gives you that perfect crisp exterior with a soft, marshmallowy center. It’s not just another version; it’s the version that actually works.
These cookies have become my go-to when I want something sweet that doesn’t leave me feeling heavy or guilty. They’re the kind of treat that makes you close your eyes after the first bite—light as air, sweet as a memory, and somehow exactly what you needed.
What Ingredients You Will Need
This recipe uses four simple ingredients that work together to create something almost magical. The key is using them at the right temperature and in the right proportions—trust me, I learned that the hard way.
- 3 large egg whites, at room temperature (cold eggs won’t whip up as high, so let them sit on the counter for at least 30 minutes before starting)
- ¾ cup (150g) granulated white sugar (don’t use powdered sugar—it contains cornstarch and will affect the texture. I prefer C&H or Domino for consistent results)
- 1 teaspoon vanilla extract (pure vanilla extract, not imitation, if you can swing it. The flavor difference is noticeable, especially since there are so few ingredients)
- ⅛ teaspoon salt (just a pinch—it balances the sweetness and helps stabilize the egg whites)
Optional add-ins (choose one, don’t go overboard):
- ½ cup mini chocolate chips (fold in gently at the end)
- ½ cup chopped pecans or walnuts (toast them first for more flavor)
- ¼ cup crushed peppermint candies (for a holiday twist)
- 1 tablespoon cocoa powder (sift it over the whipped egg whites before folding)
I know the ingredient list looks almost too simple, and that’s exactly why this recipe works. There’s nowhere to hide—every flavor matters, and every ingredient needs to be treated with respect. The egg whites are the star here, so splurge on good-quality eggs if you can. I’ve noticed that farm-fresh eggs actually produce stiffer, more stable meringues than the standard grocery store carton. Something about the protein content, I think.
One thing I wish someone had told me earlier: older eggs whip up better than fresh ones. If your eggs are a week or two old, they’ll actually give you a more stable meringue because the whites have thinned out slightly and whip more easily. So don’t feel bad about using eggs that have been sitting in your fridge for a while—they’re perfect for this recipe.
Equipment Needed
You don’t need fancy equipment for these cookies, but a few specific tools make the process much smoother.
- Electric mixer (stand mixer or hand mixer—I’ve used both, and they both work fine. A stand mixer is easier because you can walk away, but a hand mixer gets the job done in about the same amount of time)
- Large mixing bowl (glass or metal—avoid plastic bowls because they can retain grease residue that will ruin your meringue)
- Baking sheet (rimmed or rimless, just make sure it’s completely clean and dry)
- Parchment paper (don’t skip this—even well-greased baking sheets can cause sticking with meringues)
- Rubber spatula (for folding in any add-ins and for scooping the meringue onto the baking sheet)
- Cooling rack (for cooling the cookies after they come out of the oven)
If you don’t have a stand mixer, don’t worry. I made these cookies for years with a $20 hand mixer from Target, and they turned out perfectly. The only thing to keep in mind is that hand mixing takes a bit longer—about 10-12 minutes versus 7-8 minutes with a stand mixer. Also, your arm will get a workout, so consider that a bonus.
One tip I learned from ruining a batch: make sure your bowl and beaters are completely clean and dry. Even a tiny speck of grease or egg yolk can prevent your egg whites from whipping up properly. I wipe my bowl down with a little lemon juice and a paper towel before I start, just to be safe.
Preparation Method
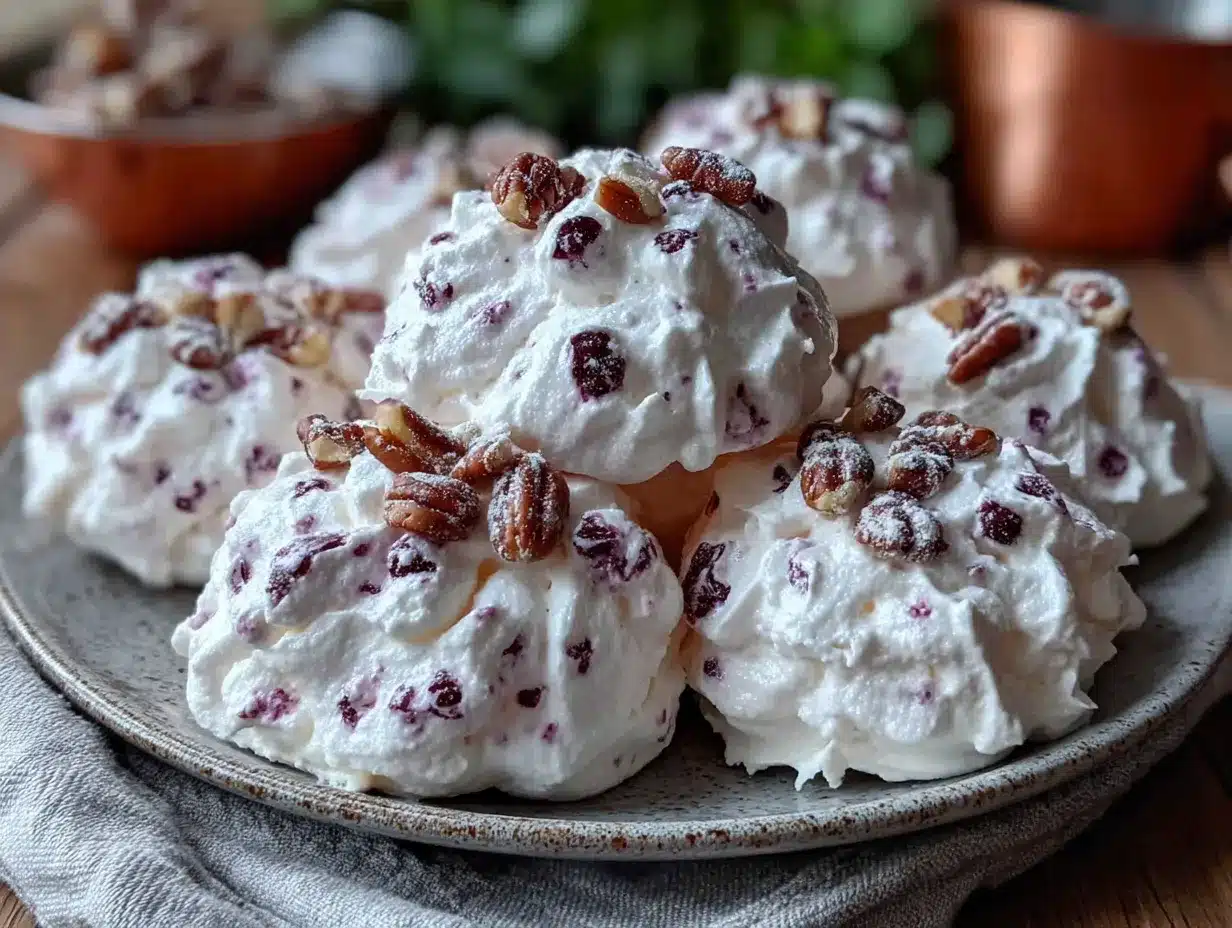
Alright, let’s get into the nitty-gritty. I’m going to walk you through every single step, including the mistakes I made so you don’t have to make them yourself.
- Preheat your oven to 350°F (175°C). Line a large baking sheet with parchment paper and set it aside. I know it seems weird to preheat the oven when we’re not actually baking anything, but trust me—the residual heat is what does the work.
- Separate your eggs carefully. Crack each egg into a small bowl first, then transfer the white to your mixing bowl. This way, if you accidentally get yolk in one, you haven’t ruined the whole batch. I learned this one the hard way—a single drop of yolk can keep your egg whites from whipping up properly. And I mean a single drop. Ask me how I know.
- Start whipping the egg whites on medium speed. After about 2 minutes, they’ll start to get frothy and bubbly—this is normal. Keep going until they turn white and foamy, about 3-4 minutes total.
- Add the salt and continue whipping for another 30 seconds. The salt helps stabilize the foam and brings out the sweetness of the sugar.
- Start adding the sugar, one tablespoon at a time. This is the most important part of the whole process. If you dump all the sugar in at once, your meringue will collapse and you’ll end up with a flat, weepy mess. I speak from experience. Add each tablespoon slowly, letting it incorporate for about 15 seconds before adding the next. Set a timer if you have to—I do.
- Once all the sugar is added, increase the speed to high. Whip for another 5-7 minutes (or 8-10 minutes with a hand mixer). You’re looking for stiff, glossy peaks that hold their shape when you lift the beater. The mixture should look like marshmallow fluff and feel smooth, not grainy, when you rub a little between your fingers.
- Add the vanilla extract and whip for another 30 seconds, just until it’s incorporated. Don’t overmix at this stage or you’ll deflate all that beautiful air you just whipped in.
- If you’re adding any mix-ins, gently fold them in now. Use a rubber spatula and make slow, sweeping motions from the bottom of the bowl to the top. About 10-12 folds should do it—you want them distributed evenly, not smashed into submission.
- Scoop spoonfuls of meringue onto your prepared baking sheet. I use a medium cookie scoop for uniform cookies, but two spoons work just fine. Drop them about 2 inches apart—they don’t spread much, but they need a little breathing room. You should get about 24-30 cookies, depending on size.
- Place the baking sheet in the preheated oven, then immediately turn the oven OFF. Close the door and walk away. Do not open the oven door. Not even to peek. I know it’s tempting, but every time you open that door, heat escapes and your cookies will end up chewy instead of crisp. Leave them in the oven for at least 6 hours, but overnight is ideal.
- The next morning, remove the cookies from the oven. They should be dry to the touch and lift easily off the parchment paper. If they’re still sticky or soft, pop them back in the turned-off oven for another 2-3 hours.
- Let them cool completely on a wire rack before storing. This takes about 15 minutes and helps them set up fully.
Here’s a sensory cue that took me forever to figure out: when you lift the beater after whipping, the meringue should form a peak that stands straight up without drooping. If the tip curls over, you need to keep whipping. If the mixture looks grainy or separates, you’ve overwhipped and need to start over. It’s a fine line, but once you see it, you’ll never forget it.
Cooking Tips & Techniques
Let me share some hard-won wisdom from my many, many meringue failures.
Humidity is your enemy. I cannot stress this enough. Meringue is basically sugar and protein foam, and moisture destroys it. Don’t make these cookies on a rainy day. Don’t make them when you’re boiling pasta on the stove. The steam from your kitchen can sabotage your meringue faster than you can say “what just happened?” I ruined three batches before I figured out that my kitchen was too humid. Now I check the weather forecast before I make these.
Room temperature egg whites are non-negotiable. Cold egg whites don’t whip as high or as stable. If you forgot to take your eggs out of the fridge, put them in a bowl of warm water for 10 minutes before separating. It’s not quite as good as leaving them out for an hour, but it works in a pinch.
The sugar needs to dissolve completely. If you can feel sugar granules when you rub the meringue between your fingers, keep whipping. Undissolved sugar will cause your cookies to “weep”—little drops of syrup will bead up on the surface and make them sticky. I’ve found that superfine sugar dissolves faster than regular granulated sugar, so if you have it on hand, use it.
Don’t overcomplicate the flavors. I once tried to make lavender-vanilla forgotten cookies and ended up with something that tasted like soap. The beauty of this recipe is its simplicity. If you want to experiment, stick to one extra ingredient at a time and keep the quantities moderate.
Timing is everything. I’ve found that making these cookies right before bed is the perfect strategy. I whip them up in about 15 minutes, pop them in the oven, turn it off, and go to sleep. By morning, they’re perfect. It’s like magic that happens while you’re dreaming.
Variations & Adaptations
One of the things I love most about this recipe is how versatile it is. Here are some variations I’ve tried and loved:
Chocolate Chip Forgotten Cookies: Fold in ½ cup of mini chocolate chips before scooping. The mini chips distribute more evenly than regular-sized ones and don’t sink to the bottom. I made these for a Super Bowl party and they were gone before halftime.
Lemon Forgotten Cookies: Replace the vanilla extract with 1 teaspoon of lemon extract and add 1 tablespoon of finely grated lemon zest. The citrus cuts through the sweetness beautifully and makes these taste almost like lemon meringue pie without the crust.
Peppermint Holiday Cookies: Crush ¼ cup of peppermint candies and fold them in along with a drop of peppermint extract. These are perfect for Christmas cookie exchanges and look gorgeous with their pink and white speckles.
Coffee Forgotten Cookies: Dissolve 1 teaspoon of instant espresso powder in the vanilla extract before adding it to the meringue. The coffee flavor deepens the sweetness without making them taste like coffee. I’m not even a coffee drinker and I love these.
Vegan Adaptation: You can use aquafaba (the liquid from a can of chickpeas) instead of egg whites. Use 3 tablespoons of aquafaba per egg white and whip it exactly the same way. I tried this once for a vegan friend and was shocked at how well it worked. The texture is slightly different—a bit more chewy—but the flavor is spot on.
Serving & Storage Suggestions
These cookies are best served at room temperature, straight from the oven (well, after they’ve cooled). They have a delicate, melt-in-your-mouth texture that’s absolutely divine on its own, but here are some serving ideas if you want to get fancy:
- Serve alongside fresh berries and a dollop of whipped cream for an elegant dessert
- Crumble them over ice cream for a crunchy topping
- Dip them in melted dark chocolate for an extra-indulgent treat
- Stack them with whipped cream and berries for a light, no-bake “cake”
For storage, these cookies need to be kept in an airtight container at room temperature. Don’t refrigerate them—the moisture in the fridge will make them sticky. They’ll keep for about 2 weeks in a cool, dry place, though I’ve never had a batch last that long because we eat them all first.
You can also freeze these cookies for up to 3 months. Layer them between sheets of wax paper in an airtight container and thaw at room temperature for about 30 minutes before serving. The texture holds up remarkably well—I actually prefer frozen forgotten cookies because they have a slightly chewier center.
One thing to note: these cookies are fragile. Like, really fragile. They’ll break if you toss them in a bag or stack them carelessly. I store mine in a single layer in a tin with parchment paper between layers, and I still lose a few to breakage every time. Consider it a cook’s tax.
Nutritional Information & Benefits
Here’s the breakdown per cookie (based on 30 cookies per batch):
- Calories: 25
- Fat: 0g
- Carbohydrates: 6g
- Sugar: 6g
- Protein: 1g
- Sodium: 10mg
These cookies are naturally fat-free and very low in calories, which makes them a great option for anyone watching their weight or trying to eat healthier without giving up sweets entirely. The egg whites provide a small amount of protein, and since there’s no flour or dairy, they’re suitable for gluten-free and lactose-free diets.
From a wellness perspective, I love that these cookies satisfy my sweet tooth without the heavy, greasy feeling that comes with traditional cookies. They’re light, airy, and somehow feel like a treat without being indulgent. Plus, the act of making them—the careful whipping, the patience required—feels almost meditative. There’s something calming about watching those egg whites transform into clouds.
Just keep in mind that they are mostly sugar, so moderation is key. I usually have two or three with my afternoon tea and feel perfectly satisfied.
Conclusion
These Light & Airy Forgotten Cookies are more than just a recipe—they’re a little piece of culinary magic that anyone can make. With just four ingredients and a bit of patience, you can create something that tastes like it came from a fancy bakery. They’re perfect for those days when you want something sweet but don’t want to spend hours in the kitchen, and they’re forgiving enough for beginners to master.
I encourage you to make these your own. Try different extracts, fold in your favorite mix-ins, or keep them plain and simple. However you make them, I promise they’ll become a staple in your recipe rotation. They certainly have in mine.
I’d love to hear how yours turn out! Drop a comment below and let me know what variations you tried, or tag me in your photos on social media. Happy baking—or should I say, happy forgetting!
Frequently Asked Questions
Can I make forgotten cookies in a humid climate?
It’s tricky, but possible. Try making them on a dry day, run a dehumidifier in your kitchen if you have one, and make sure your oven is completely cool before you put the cookies in. Some bakers in humid areas have success by leaving the cookies in the turned-off oven for a full 24 hours.
Why did my forgotten cookies turn out chewy instead of crisp?
This usually happens because the oven wasn’t hot enough when you turned it off, or you opened the door during the drying process. Make sure your oven is fully preheated to 350°F before you put the cookies in, and resist the urge to peek!
Can I use liquid egg whites from a carton?
I don’t recommend it. Carton egg whites often have stabilizers added that prevent them from whipping up properly. Fresh egg whites from whole eggs give you the best volume and stability.
How do I know when my meringue is whipped enough?
Lift the beater—the meringue should form a stiff peak that stands straight up without drooping. Also, rub a little between your fingers—it should feel smooth, not grainy. If it’s grainy, keep whipping.
Can I double this recipe?
Absolutely, but you’ll need to whip the egg whites longer to get them to stiff peaks. I also recommend baking them on two separate racks and rotating the baking sheets halfway through the drying time (but remember, don’t open the oven during the first 6 hours).
Pin This Recipe!
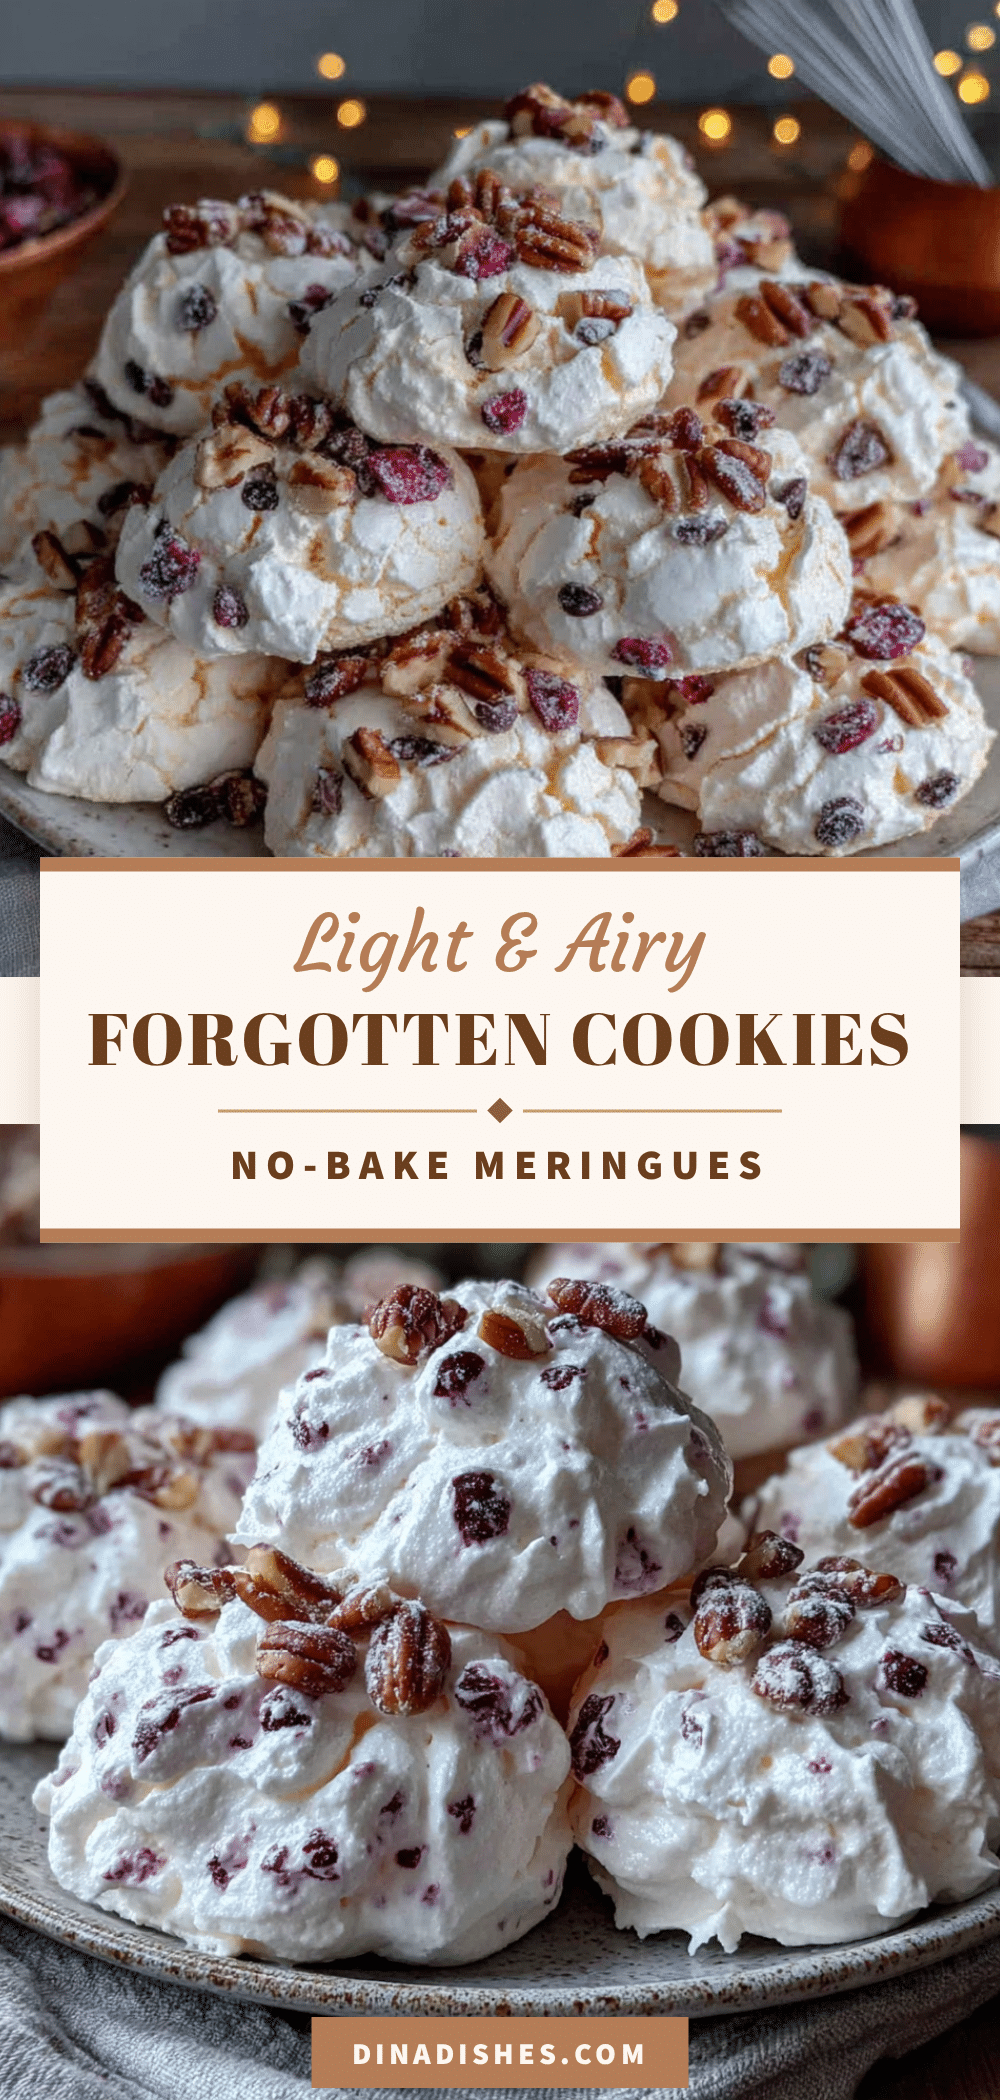
Light & Airy Forgotten Cookies: Easy No-Bake Meringue Recipe

These Light & Airy Forgotten Cookies are a nostalgic, melt-in-your-mouth meringue treat made with just four simple ingredients. They ‘bake’ in the residual heat of your oven overnight, creating a crisp exterior with a soft, marshmallowy center—perfect for a healthy-ish, gluten-free, and dairy-free dessert.
- Prep Time: 15 minutes
- Cook Time: 0 minutes (oven off, drying overnight)
- Total Time: 6 hours 15 minutes (or overnight)
- Yield: 24-30 cookies 1x
- Category: Dessert
- Cuisine: American
Ingredients
- 3 large egg whites, at room temperature
- ¾ cup (150g) granulated white sugar
- 1 teaspoon vanilla extract (pure, not imitation)
- ⅛ teaspoon salt
- Optional: ½ cup mini chocolate chips
- Optional: ½ cup chopped pecans or walnuts (toasted)
- Optional: ¼ cup crushed peppermint candies
- Optional: 1 tablespoon cocoa powder
Instructions
- Preheat your oven to 350°F (175°C). Line a large baking sheet with parchment paper and set aside.
- Separate your eggs carefully. Crack each egg into a small bowl first, then transfer the white to your mixing bowl to avoid any yolk contamination.
- Start whipping the egg whites on medium speed. After about 2 minutes, they’ll become frothy and bubbly. Continue until they turn white and foamy, about 3-4 minutes total.
- Add the salt and continue whipping for another 30 seconds.
- Start adding the sugar, one tablespoon at a time, letting each tablespoon incorporate for about 15 seconds before adding the next.
- Once all the sugar is added, increase the speed to high. Whip for another 5-7 minutes (or 8-10 minutes with a hand mixer) until stiff, glossy peaks form. The mixture should look like marshmallow fluff and feel smooth, not grainy, when rubbed between your fingers.
- Add the vanilla extract and whip for another 30 seconds, just until incorporated.
- If adding any mix-ins, gently fold them in with a rubber spatula using slow, sweeping motions from the bottom to the top. About 10-12 folds should do it.
- Scoop spoonfuls of meringue onto the prepared baking sheet, spacing them about 2 inches apart. You should get about 24-30 cookies.
- Place the baking sheet in the preheated oven, then immediately turn the oven OFF. Close the door and do not open it for at least 6 hours, but overnight is ideal.
- The next morning, remove the cookies from the oven. They should be dry to the touch and lift easily off the parchment paper. If still sticky, return to the turned-off oven for another 2-3 hours.
- Let them cool completely on a wire rack before storing.
Notes
Humidity is your enemy—avoid making these on rainy days. Ensure egg whites are at room temperature. Do not open the oven door during the drying process. Older eggs whip up better than fresh ones. Store in an airtight container at room temperature for up to 2 weeks, or freeze for up to 3 months.
Nutrition
- Serving Size: 1 cookie
- Calories: 25
- Sugar: 6
- Sodium: 10
- Carbohydrates: 6
- Protein: 1
Keywords: forgotten cookies, meringue cookies, no-bake cookies, gluten-free cookies, dairy-free cookies, easy meringue recipe, light cookies, airy cookies