Last Thursday, my neighbor Carrie wasn’t trying to impress anyone. I’d stopped by to borrow a lug wrench—don’t ask—and this warm, spicy-sweet smell hit me before I even knocked. She opened the door with flour on her cheek and said, “Oh, it’s just a pie.” Just a pie. She shrugged like she’d boiled water. But the kitchen smelled like autumn had moved in permanently, and there, cooling on her stovetop, was the most beautiful pumpkin pie I’d ever seen. Golden, set perfectly, with edges that looked like they’d been painted. And she’d made it with three ingredients. Three!
I stood there staring, completely forgetting about the wrench. Carrie wiped her hands on her jeans and cut me a slice right then, handing it over on a paper towel like it was nothing special. That first bite? Honestly, I almost got emotional. The texture was silky—like a cloud that tasted like Thanksgiving—and the flavor was pure, uncomplicated pumpkin spice heaven. No weird aftertaste, no complicated steps, no sink full of dishes. Just pure, cozy dessert magic. I asked her for the recipe, and she literally said, “Buy a can of pumpkin, a can of sweetened condensed milk, and a box of cake mix.” I thought she was joking.
She wasn’t. And that’s how this light & easy 3-ingredient pumpkin pie became my favorite fall secret. Maybe you’ve been there—staring at a complicated recipe with fourteen ingredients and thinking, “Who has time for this?” This pie is the answer. It’s the kind of recipe you make on a Tuesday night just because you’re craving something warm. It’s the kind that makes people think you spent hours in the kitchen when you really just opened three packages. And honestly? That’s my favorite kind of cooking. Let me show you how it’s done.
Why You’ll Love This Recipe
This isn’t just another pumpkin pie recipe. I’ve tested this version at least a dozen times—tweaking temperatures, trying different brands of cake mix, even experimenting with dairy-free condensed milk. What I’m sharing with you today is the absolute best version. It’s the one that made Carrie’s husband ask if she’d secretly taken a baking class. It’s the one that got me invited to three different Friendsgivings last year. Here’s why you’re going to love it too:
- Quick & Easy : From start to oven in under 10 minutes. No pie crust to roll out, no custard to temper, no stress. Just mix, pour, and bake.
- Simple Ingredients : You probably already have everything in your pantry. If you don’t, a quick trip to any grocery store will cost you less than $10 total.
- Perfect for Fall Gatherings : This pie is the star of Thanksgiving, Friendsgiving, potlucks, or just a random Tuesday when you need a little comfort. It travels beautifully, too.
- Crowd-Pleaser : Kids love the sweet, creamy texture. Adults love the nostalgic pumpkin spice flavor. Even people who “don’t like pumpkin” have asked me for seconds.
- Unbelievably Delicious : The texture is lighter than traditional pumpkin pie—almost like a pumpkin custard cake—with a tender, slightly crisp top from the cake mix. It’s next-level comfort food that feels indulgent but doesn’t weigh you down.
What makes this recipe different from every other pumpkin pie out there? It’s the technique. By using a boxed cake mix as the topping, you get a naturally sweet, slightly crumbly crust that forms as it bakes. No butter to cut in, no flour to measure, no rolling pin to wash. The pumpkin and condensed milk create a silky, rich custard underneath that’s perfectly balanced by the cakey top layer. It’s genius. And it’s so simple, you’ll wonder why you’ve been making pie the hard way all these years.
This recipe is for the nights when you want something special but don’t want to spend hours in the kitchen. It’s for the mornings when you wake up craving fall flavors but only have 15 minutes before the kids need to be at school. It’s comfort food reimagined—faster, easier, but with the same soul-soothing satisfaction. And honestly? It might just become your new favorite dessert.
What Ingredients You Will Need
This recipe uses three simple, wholesome ingredients to deliver bold flavor and satisfying texture without the fuss. No fancy grocery trips needed—you likely already have everything in your kitchen. Here’s what you’ll need:
- 1 can (15 oz) pumpkin puree (not pumpkin pie filling—make sure it’s 100% pure pumpkin. I prefer Libby’s for its consistent texture and rich color, but any brand works well.)
- 1 can (14 oz) sweetened condensed milk (This adds sweetness and creates that silky, creamy custard texture. I recommend Eagle Brand for its smooth consistency. If you’re dairy-free, you can use a coconut-based sweetened condensed milk—I’ve tried it and it works beautifully.)
- 1 box (15.25 oz) yellow cake mix (This is the magic ingredient. It creates a tender, slightly crisp topping that forms its own “crust” as it bakes. I’ve tested this with Betty Crocker and Duncan Hines—both work great. For a fun twist, try spice cake mix instead of yellow—it adds even more warm flavor. If you’re gluten-free, use a gluten-free yellow cake mix; just make sure it’s the standard 15.25 oz size.)
- Optional: 1/2 cup unsalted butter, melted (While the original three-ingredient version doesn’t call for butter, I’ve found that drizzling melted butter over the top of the cake mix before baking creates a richer, more golden crust. It’s optional but highly recommended. If you’re avoiding dairy, use melted coconut oil or vegan butter.)
- Optional: 1 teaspoon pumpkin pie spice or cinnamon (For extra warmth and depth. I add this when I’m using a yellow cake mix to boost the fall flavor. If you’re using a spice cake mix, you can skip this.)
Ingredient Selection Tips:
When choosing your pumpkin puree, look for cans that feel heavy and don’t have any dents or bulges. The color should be a deep, rich orange—paler puree can be watery and less flavorful. For the sweetened condensed milk, I always go for full-fat for the creamiest texture, but low-fat works in a pinch (the pie will be slightly less rich). And for the cake mix, any brand works, but I’ve noticed that brands with a higher sugar content (like Betty Crocker) create a slightly crispier top.
Substitution Guidance:
- Dairy-Free : Use coconut-based sweetened condensed milk and melted coconut oil instead of butter. The texture will be slightly different—a bit more tender—but still delicious.
- Gluten-Free : Use a 1:1 gluten-free yellow cake mix. I’ve tested this with King Arthur Measure for Measure and it works perfectly.
- Lower Sugar : Use a “reduced sugar” yellow cake mix and a can of low-fat sweetened condensed milk. The pie will still be sweet, but less intensely so.
- Vegan : Use dairy-free sweetened condensed milk, a vegan yellow cake mix, and melted coconut oil. This version is lighter but still incredibly satisfying.
Equipment Needed
One of the best things about this recipe? You barely need any equipment. Here’s what you’ll need:
- 9-inch pie dish (I prefer a glass or ceramic dish for even baking. A metal pie pan works too, but keep an eye on the baking time—metal heats up faster. If you don’t have a pie dish, an 8×8 square baking dish works perfectly; just adjust the baking time by 5-10 minutes.)
- Large mixing bowl (Any bowl will do, but a wide, shallow bowl makes mixing easier. I use my grandmother’s old Pyrex mixing bowl—it’s perfect for this.)
- Whisk or spatula (A whisk works best for smoothing out the pumpkin and condensed milk, but a sturdy rubber spatula does the job too. I’ve even used a fork in a pinch.)
- Measuring spoons (Only if you’re adding the optional spices or butter. If you’re sticking to the three ingredients, you don’t even need these.)
- Cooling rack (Essential for letting the pie cool evenly. If you don’t have one, you can use a trivet or even a folded kitchen towel. Just make sure air can circulate underneath.)
Budget-Friendly Tips: Don’t have a pie dish? No problem. You can use a cast-iron skillet, a cake pan, or even a disposable aluminum pie tin. I’ve made this in all of them, and each one works beautifully. The only thing I’d recommend avoiding is a dark, non-stick pan—it can cause the bottom to brown too quickly. If that’s all you have, just reduce the oven temperature by 25°F and check for doneness a few minutes early.
Preparation Method
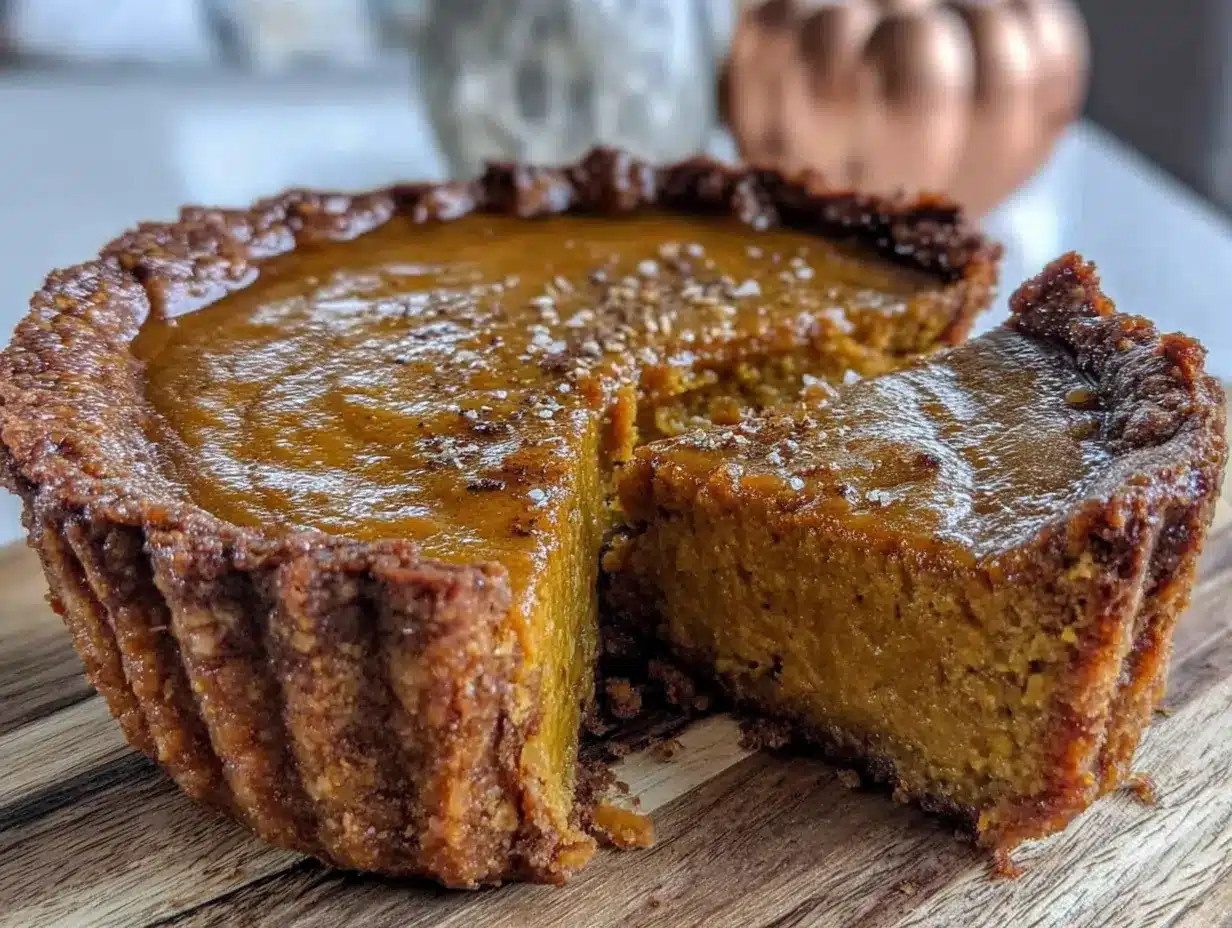
This is where the magic happens. Follow these steps, and you’ll have a beautiful, light & easy 3-ingredient pumpkin pie that tastes like you spent hours in the kitchen. Spoiler: you didn’t.
- Preheat your oven to 350°F (175°C). While it’s heating, lightly spray your 9-inch pie dish with non-stick cooking spray. I forgot to do this once, and let me tell you—scrubbing baked-on pumpkin off a glass dish is not fun. Trust me on this one. If you don’t have cooking spray, a thin layer of butter or oil works just fine.
- In your large mixing bowl, combine the pumpkin puree and sweetened condensed milk. Use your whisk or spatula to mix them together until completely smooth. You’re looking for a uniform, creamy orange mixture with no streaks of white or lumps of pumpkin. This should take about 30 seconds of gentle stirring. Don’t overmix—you don’t want to incorporate too much air, which can cause cracks later. I like to scrape the bottom and sides of the bowl once or twice to make sure everything is fully combined.
- Pour the pumpkin mixture into your prepared pie dish. Use your spatula to spread it evenly across the bottom. The mixture should be about 1/2 inch thick. Don’t worry if it looks a little thin—it will set beautifully as it bakes. Give the dish a gentle tap on the counter to release any air bubbles.
- Sprinkle the entire box of yellow cake mix evenly over the top of the pumpkin mixture. This is the fun part. Just dump it right on top and use your fingers or a spoon to spread it into an even layer. Don’t stir it in—just let it sit on top like a blanket. The cake mix will absorb moisture from the pumpkin mixture as it bakes, creating that magical custard-cake hybrid texture. If you’re adding the optional spices, whisk them into the cake mix before sprinkling it on.
- If using, drizzle the melted butter evenly over the top of the cake mix. Try to cover as much surface area as possible. The butter helps the cake mix brown and creates a slightly crisp, golden crust. Don’t skip this step if you can help it—it really takes the pie from good to amazing. If you’re not using butter, the pie will still be delicious, but the top will be softer and paler.
- Bake for 45-55 minutes, or until the top is golden brown and the center is just set. Here’s how to tell when it’s done: give the pie dish a gentle jiggle. The center should wobble slightly—like Jell-O—but not be liquid. The edges should look firm and slightly puffed. If the top is browning too quickly (after about 30 minutes), tent the pie loosely with aluminum foil. Every oven is different, so start checking at 40 minutes. My oven runs hot, so mine is usually perfect at 45 minutes.
- Remove the pie from the oven and place it on a cooling rack. Let it cool completely at room temperature—this takes about 2 hours. Don’t be tempted to put it in the fridge while it’s still warm, or condensation will form and make the top soggy. I learned this the hard way. The pie will continue to set as it cools, so don’t worry if it looks a little jiggly when it first comes out.
- Once completely cool, refrigerate for at least 2 hours before serving. This step is crucial. Chilling the pie allows the custard to fully set and makes slicing much easier. The flavor also deepens as it sits—the spices meld together and the sweetness becomes more balanced. If you can wait overnight, even better. I’ve found that day-old pumpkin pie is always better than fresh.
Troubleshooting Tips:
- If the top is browning too fast: Your oven might run hot. Cover loosely with foil after 30 minutes of baking.
- If the pie is still liquid after 55 minutes: Your oven might run cool. Increase the temperature to 375°F and bake for another 10 minutes, checking frequently.
- If the cake mix layer is dry: You might have used too much cake mix for your dish size. Next time, use a slightly smaller dish or use 3/4 of the box.
- If the pie cracks on top: This usually means it was overbaked. Next time, check for doneness 5 minutes earlier. Cracks are purely cosmetic—the pie will still taste amazing.
Cooking Tips & Techniques
After making this light & easy 3-ingredient pumpkin pie more times than I can count (and messing it up plenty along the way), I’ve gathered some tips that will help you get perfect results every time.
Don’t overmix the pumpkin and condensed milk. I know it’s tempting to whip it until it’s super fluffy, but gentle mixing is key. Overmixing incorporates too much air, which can cause the pie to puff up and then collapse, creating cracks on the surface. You want the mixture to be smooth and uniform, not frothy. I use a folding motion with my spatula—gentle, patient, just until combined.
Let the pie cool completely before refrigerating. This was my biggest mistake early on. I was impatient and would stick the warm pie in the fridge, only to find it covered in condensation the next morning. The moisture makes the cake mix top soggy and ruins that beautiful golden crust. Let it sit on the counter for at least 2 hours until it’s completely cool to the touch. If you’re in a hurry, you can speed this up by placing the pie dish in a shallow pan of cold water—just be careful not to splash any water onto the pie.
Use room temperature ingredients. This is a pro tip that makes a real difference. Cold pumpkin puree and cold condensed milk don’t mix as smoothly, and they take longer to bake evenly. I take my cans out of the pantry about 30 minutes before I start. If I forget, I run the cans under warm water for a minute or two—just enough to take the chill off.
Bake on the middle rack. The middle rack ensures even heat distribution. If you bake too low, the bottom might burn before the top is set. Too high, and the cake mix crust will brown too quickly while the custard underneath stays liquid. Middle rack, every time.
Let it rest overnight for best flavor. I know, waiting is hard. But trust me on this one. The flavors in this pie actually develop and deepen as it sits in the refrigerator. The pumpkin becomes more pronounced, the sweetness mellows, and the texture becomes even creamier. I always make this pie the day before I plan to serve it. It’s one of those rare recipes that actually gets better with time.
Common mistake to avoid: using pumpkin pie filling instead of pure pumpkin. This is a classic mix-up. Pumpkin pie filling is already sweetened and spiced, so using it in this recipe will result in an overly sweet, overly spiced pie that might not set properly. Always look for “100% pure pumpkin” on the label. If you accidentally bought pumpkin pie filling, don’t worry—you can still use it, just reduce the sweetened condensed milk by half and skip any optional spices.
Variations & Adaptations
One of the best things about this light & easy 3-ingredient pumpkin pie is how versatile it is. I’ve tried dozens of variations over the years, and here are my favorites:
Spice Cake Variation : Swap the yellow cake mix for a box of spice cake mix. This adds warm notes of cinnamon, nutmeg, and clove without any extra effort. I tried this on a whim last November and it’s been my go-to ever since. The spice cake mix creates a darker, richer top that looks beautiful with a dusting of powdered sugar. If you’re using spice cake mix, skip the optional pumpkin pie spice—it’s already in there.
Chocolate Pumpkin Pie : Use a chocolate cake mix instead of yellow. I know, it sounds weird, but chocolate and pumpkin are actually a fantastic combination. The chocolate adds a deep, almost mocha-like richness that balances the sweet pumpkin custard. My kids absolutely love this version. Top it with a dollop of whipped cream and a sprinkle of cinnamon for a truly decadent dessert.
Gluten-Free Version : As I mentioned earlier, use a 1:1 gluten-free yellow cake mix. I’ve tested this with King Arthur Measure for Measure and Bob’s Red Mill Gluten-Free All-Purpose Baking Mix. Both work beautifully. The texture is slightly more tender and less cakey on top, but the flavor is spot-on. This version has been a lifesaver for my gluten-intolerant friends during the holidays.
Dairy-Free Version : Use coconut-based sweetened condensed milk and melted coconut oil instead of butter. I was skeptical the first time I tried this, but the coconut flavor is subtle and actually complements the pumpkin beautifully. The texture is slightly less rich than the original, but still incredibly satisfying. This version is perfect for anyone avoiding dairy without sacrificing flavor.
Mini Pumpkin Pies : Spoon the mixture into a greased muffin tin instead of a pie dish. Bake at 350°F for 20-25 minutes, or until golden and set. These mini pies are perfect for parties—no slicing required, and everyone gets their own little portion. I made these for a Halloween party last year and they were gone in 10 minutes. Just make sure to grease the muffin tin well, or use paper liners.
Pumpkin Pie Bars : For an even easier version, bake the mixture in a greased 9×13-inch baking dish. The baking time will be slightly shorter—about 35-40 minutes. Cut into squares and serve. This is my go-to for potlucks and large gatherings. The bars are easier to transport and serve, and they’re just as delicious as the pie version.
Serving & Storage Suggestions
This light & easy 3-ingredient pumpkin pie is delicious on its own, but a few simple additions can take it to the next level. Here’s how I like to serve and store it:
Serving Temperature: I prefer this pie cold, straight from the refrigerator. The custard is firmer and the flavors are more pronounced. But if you’re a fan of warm pie, you can microwave individual slices for 15-20 seconds. Just be careful not to overheat it, or the cake mix top can become soggy. Room temperature is also lovely—the texture is softer and more pudding-like.
Presentation Ideas: A dollop of freshly whipped cream is the classic choice, and for good reason—the light, airy cream balances the rich, sweet pie beautifully. I also love a dusting of cinnamon or pumpkin pie spice on top for a pretty finish. For a more indulgent presentation, drizzle with caramel sauce and sprinkle with chopped pecans. My personal favorite? A scoop of vanilla ice cream melting over a warm slice. Pure heaven.
Complementary Dishes: This pie is the perfect ending to any fall meal. Serve it after a hearty bowl of creamy pumpkin soup or a plate of maple glazed roasted vegetables. It also pairs beautifully with a cup of hot apple cider or a spiced chai latte. For a full Thanksgiving spread, serve alongside classic green bean casserole and garlic herb roasted potatoes.
Storage Instructions: Store any leftover pie covered in the refrigerator for up to 5 days. I use a pie carrier or simply cover the dish tightly with plastic wrap or aluminum foil. The pie actually gets better after a day or two as the flavors continue to meld. If you’ve already sliced the pie, press a piece of plastic wrap directly onto the cut edges to prevent them from drying out.
Freezing Instructions: This pie freezes beautifully. Let it cool completely, then wrap it tightly in plastic wrap, followed by a layer of aluminum foil. Freeze for up to 3 months. To thaw, transfer the pie to the refrigerator and let it thaw overnight. The texture will be slightly softer than fresh, but the flavor remains excellent. I often make two pies at once—one for now, one for later.
Reheating Tips: If you prefer your pie warm, reheat individual slices in the microwave for 15-20 seconds. For a whole pie, place it in a 300°F oven for 10-15 minutes, or until just warmed through. Be careful not to overheat, as the cake mix topping can become soggy. I find that the microwave method works best for maintaining the texture.
Nutritional Information & Benefits
While this light & easy 3-ingredient pumpkin pie is certainly a treat, it also offers some surprising nutritional benefits. Here’s a breakdown of what you’re getting in each serving (based on 8 servings):
| Nutrient | Amount Per Serving |
|---|---|
| Calories | 320 |
| Total Fat | 10g |
| Saturated Fat | 5g |
| Cholesterol | 25mg |
| Sodium | 380mg |
| Total Carbohydrates | 55g |
| Dietary Fiber | 3g |
| Sugars | 38g |
| Protein | 6g |
| Vitamin A | 150% DV |
| Calcium | 15% DV |
| Iron | 10% DV |
Health Benefits of Key Ingredients:
- Pumpkin puree is packed with vitamin A (in the form of beta-carotene), which supports eye health and immune function. It’s also a good source of fiber, which aids digestion and helps you feel full longer. Plus, it’s naturally low in calories and fat.
- Sweetened condensed milk provides calcium for strong bones and teeth, as well as protein for muscle repair. While it’s high in sugar, it also adds a rich, creamy texture that makes this pie feel indulgent without needing additional fats.
- Yellow cake mix (in moderation) provides carbohydrates for energy. If you use a whole wheat or gluten-free version, you’ll also get additional fiber and nutrients.
Dietary Considerations: This recipe contains dairy and gluten. For a dairy-free version, use coconut-based sweetened condensed milk and melted coconut oil. For a gluten-free version, use a gluten-free yellow cake mix. This pie is naturally egg-free and nut-free, making it suitable for many common allergies.
My Personal Wellness Perspective: I believe in balance, not deprivation. This pie is a treat, and it should be enjoyed as such. But I also love that it’s made with real, recognizable ingredients—no artificial flavors, no preservatives, no weird chemicals. It’s a dessert you can feel good about serving to your family, knowing exactly what’s in it. And honestly? A slice of this pie with a cup of herbal tea is my favorite way to unwind after a long week. It’s comfort food that nourishes both body and soul.
FAQs
Can I use pumpkin pie filling instead of pumpkin puree?
I don’t recommend it. Pumpkin pie filling is already sweetened and spiced, so using it will make the pie overly sweet and throw off the texture. Stick with 100% pure pumpkin puree for the best results. If you only have pumpkin pie filling, reduce the sweetened condensed milk by half and skip any optional spices.
Can I make this pie without a pie dish?
Absolutely! You can use an 8×8 square baking dish, a cast-iron skillet, or even a disposable aluminum pie tin. Just adjust the baking time as needed—smaller dishes will bake faster, larger dishes will take a bit longer. I’ve made this in a muffin tin for mini pies, and it worked beautifully.
Why is my pie still liquid after baking?
This usually means it needs more time in the oven. Every oven is different, so start checking at 40 minutes. The pie is done when the center jiggles slightly—like Jell-O—but isn’t liquid. If the top is browning too quickly, tent it with foil and continue baking. You can also increase the oven temperature to 375°F for the last 10 minutes if needed.
Can I use a different flavor of cake mix?
Yes! Spice cake mix is my personal favorite, but chocolate cake mix also works surprisingly well. You can even try white cake mix or butter pecan cake mix for different flavor profiles. Just keep in mind that the sweetness level will vary depending on the mix you choose. If you’re using a very sweet mix, you might want to reduce the sweetened condensed milk slightly.
How long does this pie keep in the refrigerator?
Covered tightly, this pie will keep in the refrigerator for up to 5 days. The flavor actually improves after a day or two as the spices meld together. If you’ve already sliced the pie, press a piece of plastic wrap directly onto the cut edges to prevent them from drying out. You can also freeze the pie for up to 3 months—just wrap it well and thaw overnight in the refrigerator.
Conclusion
This light & easy 3-ingredient pumpkin pie has become my secret weapon for fall gatherings, last-minute dessert emergencies, and quiet Tuesday nights when I just need something warm and comforting. It’s the recipe I turn to when I want to impress people without actually trying. And honestly? That’s the best kind of recipe to have in your back pocket.
What I love most about this pie is how it proves that you don’t need fancy techniques or complicated ingredient lists to create something truly special. Three simple ingredients, a few minutes of prep, and you have a dessert that tastes like it took hours. It’s the kind of recipe that makes you look like a kitchen wizard when really, you just opened three packages and let the oven do the work.
I hope you give this pie a try—and more importantly, I hope you make it your own. Add a pinch of extra cinnamon, swap in a different cake mix, serve it with a scoop of ice cream. This recipe is forgiving and flexible, just like the best comfort food should be. And when you take that first bite—warm, spiced, creamy, perfect—I hope it makes you feel exactly the way Carrie’s pie made me feel that Thursday afternoon. Like autumn had moved into your kitchen and decided to stay.
Have you tried this recipe? I’d love to hear about your variations and serving suggestions! Drop a comment below and let me know how it turned out. And if you’re looking for more easy, comforting desserts, be sure to check out my no-bake chocolate peanut butter bars and easy apple crisp. Happy baking, friends!
Pin This Recipe!
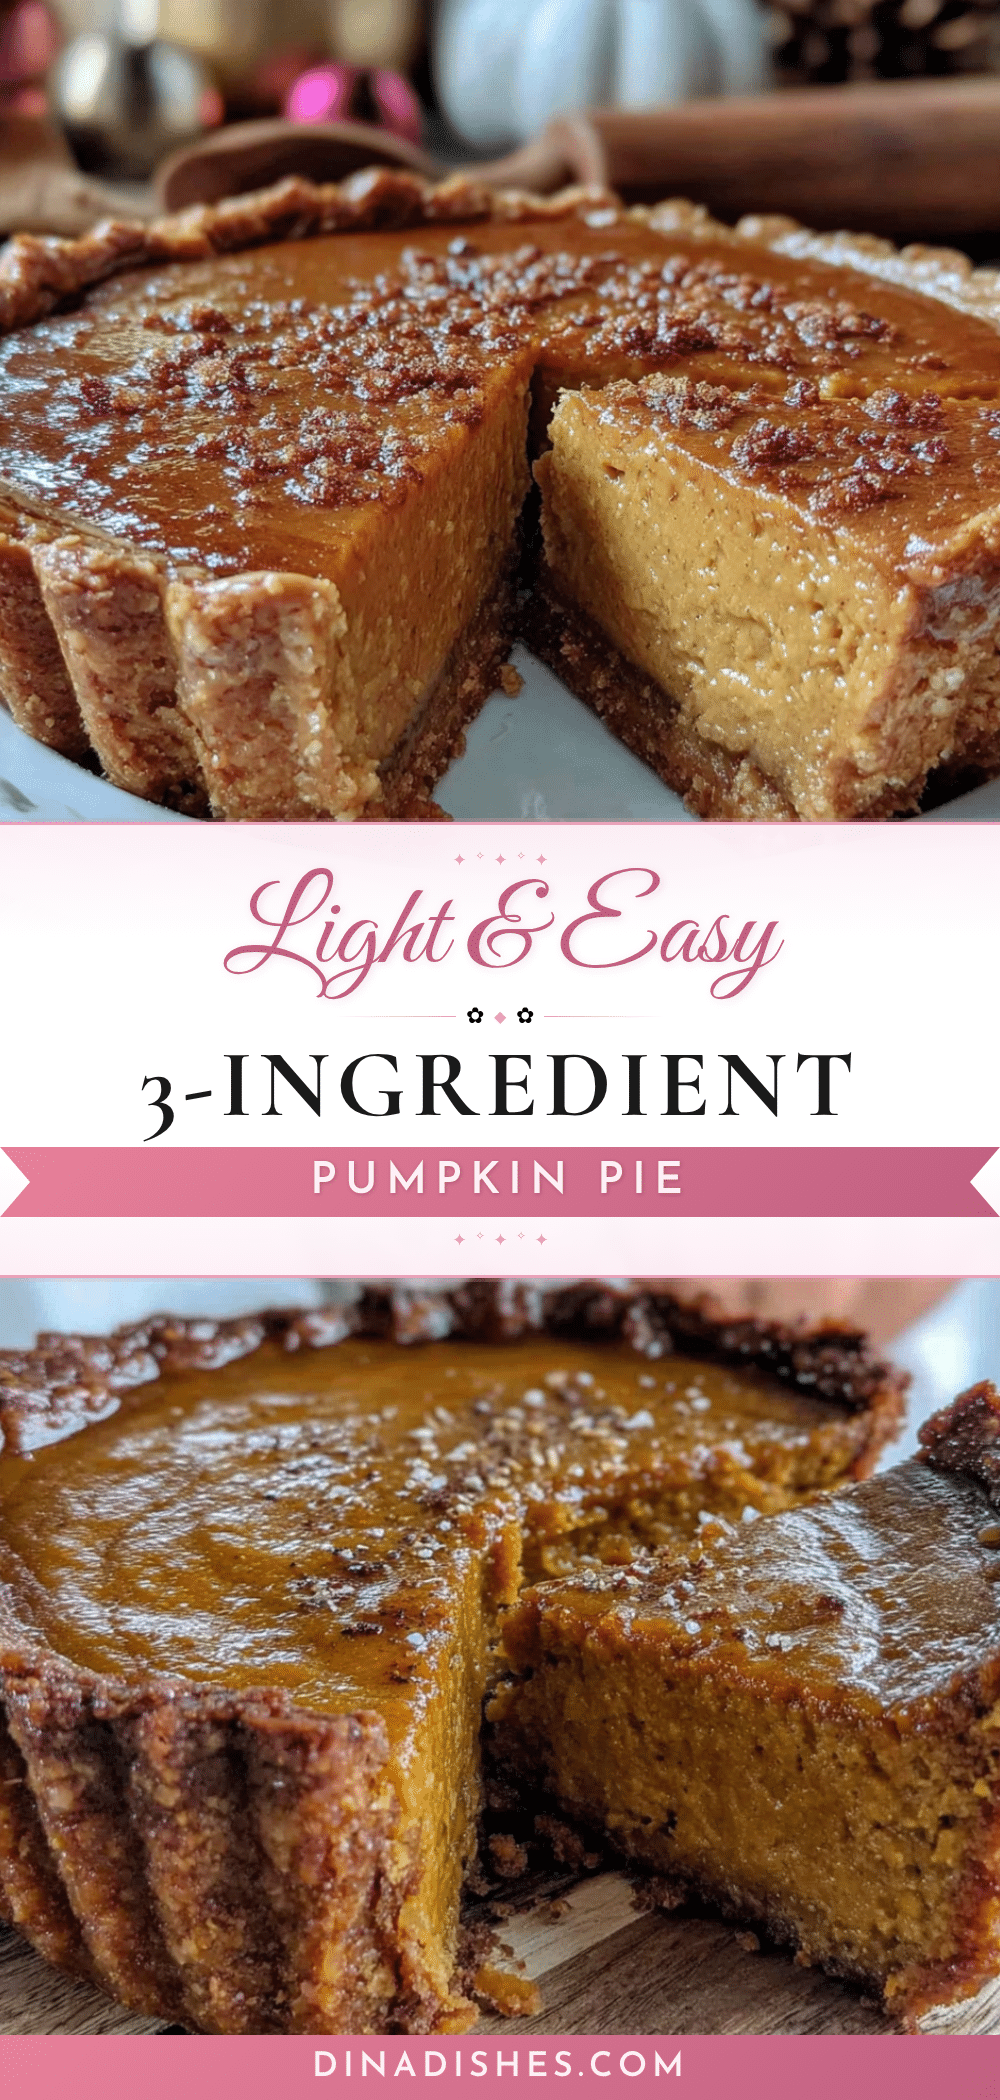
Light & Easy 3-Ingredient Pumpkin Pie
This incredibly easy pumpkin pie uses just three ingredients and comes together in minutes. It features a silky pumpkin custard with a tender, slightly crisp cake mix topping that forms its own crust as it bakes.
- Prep Time: 10 minutes
- Cook Time: 50 minutes
- Total Time: 2 hours 10 minutes (plus 2 hours chilling)
- Yield: 8 servings 1x
- Category: Dessert
- Cuisine: American
Ingredients
- 1 can (15 oz) pumpkin puree (not pumpkin pie filling)
- 1 can (14 oz) sweetened condensed milk
- 1 box (15.25 oz) yellow cake mix
- Optional: 1/2 cup unsalted butter, melted
- Optional: 1 teaspoon pumpkin pie spice or cinnamon
Instructions
- Preheat your oven to 350°F (175°C). Lightly spray a 9-inch pie dish with non-stick cooking spray.
- In a large mixing bowl, combine the pumpkin puree and sweetened condensed milk. Mix until completely smooth and uniform, about 30 seconds. Do not overmix.
- Pour the pumpkin mixture into the prepared pie dish and spread evenly. Tap the dish gently on the counter to release air bubbles.
- Sprinkle the entire box of yellow cake mix evenly over the top of the pumpkin mixture. Do not stir. If using optional spices, whisk them into the cake mix before sprinkling.
- If using, drizzle the melted butter evenly over the top of the cake mix.
- Bake for 45-55 minutes, until the top is golden brown and the center is just set (it should wobble slightly like Jell-O, not be liquid). If the top browns too quickly, tent loosely with foil after 30 minutes.
- Remove from the oven and place on a cooling rack. Cool completely at room temperature, about 2 hours.
- Once completely cool, refrigerate for at least 2 hours before serving. Overnight is best for flavor development.
Notes
For best results, use 100% pure pumpkin puree, not pumpkin pie filling. The pie actually improves after a day in the refrigerator as flavors meld. For a dairy-free version, use coconut-based sweetened condensed milk and melted coconut oil. For a gluten-free version, use a 1:1 gluten-free yellow cake mix. Spice cake mix can be substituted for yellow cake mix for extra warmth.
Nutrition
- Serving Size: 1 slice (1/8 of pie)
- Calories: 320
- Sugar: 38
- Sodium: 380
- Fat: 10
- Saturated Fat: 5
- Carbohydrates: 55
- Fiber: 3
- Protein: 6
Keywords: pumpkin pie, easy pumpkin pie, 3-ingredient pumpkin pie, quick dessert, fall dessert, Thanksgiving dessert, pumpkin dessert