My accountant, Mr. Henderson, is the last person you’d expect to be a dessert oracle. The man wears clip-on ties and alphabetizes his spice rack. So when I popped into his office last November to drop off some receipts, I was not prepared for him to look up from his calculator and say, “You know what would save Thanksgiving this year? A cookie cake. But light. No-bake. With an Oreo crust.”
I just stood there, holding a folder full of deductions, completely thrown. He went on to explain that his wife had been making this dessert for their family gatherings for years, and it was always the first thing to disappear. He described the layers so vividly—the crunchy chocolate crust, the creamy filling, the way it all came together without turning on the oven—that I actually wrote it down on the back of an envelope. I mean, honestly, I was skeptical. An accountant’s Thanksgiving recipe? But something about the way he talked about it, the little smile that crept across his usually serious face, told me this was worth trying.
That Thanksgiving, I made it. And let me tell you, it was the star of the table. Next to the turkey, the stuffing, the pies—this light, no-bake cookie cake with its Oreo crust was what everyone was talking about. It’s the kind of dessert that makes you wonder why you ever bothered with a complicated oven recipe. It’s simple, it’s stunning, and it leaves you feeling satisfied, not stuffed. Maybe you’ve been there, standing in a hot kitchen on Thanksgiving morning, wondering why you signed up for this. This cake is the answer. It’s the dessert that saves the day, and it all started with a tip from the most unlikely source.
Why You’ll Love This Recipe
After testing this recipe about four times (Mr. Henderson’s instructions were good, but I wanted them perfect), I can confidently say this is the Thanksgiving dessert you’ve been waiting for. It’s not just another recipe—it’s the one that solves your holiday dessert dilemma without any drama.
- No Oven Required: Your oven is busy with the turkey and sides anyway. This cake comes together on the counter and chills in the fridge, leaving you free to focus on the main event.
- Surprisingly Light: Most Thanksgiving desserts sit like a brick in your stomach. This one uses a clever combination of cream cheese and whipped topping to create a filling that’s rich and creamy, but not heavy. You can actually have a slice after dinner and still feel human.
- Make-Ahead Magic: You can assemble this cake the day before Thanksgiving. In fact, it tastes better after a full night in the fridge. One less thing to worry about on the big day.
- Crowd-Pleaser for All Ages: Kids love the Oreo crust, adults love the sophisticated creamy layer, and everyone loves that it’s not yet another pumpkin pie.
- Simple Ingredients: No weird specialty items. You probably already have most of these in your pantry or can grab them in one quick store run.
What makes this recipe different is the texture. I tested several versions, and the key is letting the cream cheese come to room temperature before mixing. It makes the filling impossibly smooth and fluffy. This isn’t just a no-bake cheesecake knockoff—it’s its own beautiful thing. It’s the kind of dessert that makes you close your eyes after the first bite, because it’s that unexpectedly perfect.
This recipe is for anyone who wants to enjoy a special Thanksgiving dessert without the stress. It’s for the host who’s already juggling too much, the health-minded eater who doesn’t want to feel terrible after dinner, and anyone who believes that the best holiday memories are made around the table, not in the kitchen sweating over a hot oven.
What Ingredients You Will Need
This recipe uses simple, wholesome ingredients to deliver a dessert that tastes indulgent but doesn’t weigh you down. Most of these are pantry staples or easy to find at any grocery store. The beauty of this cookie cake is in how these basic ingredients come together to create something truly special.
For the Oreo Crust
- 24 Oreo cookies (regular, not double-stuffed), crushed into fine crumbs. You can use a food processor or put them in a zip-top bag and crush them with a rolling pin. I prefer the food processor for a more even crumb.
- 5 tablespoons unsalted butter, melted. This binds the crumbs together. For a slightly less rich crust, you can use 4 tablespoons, but 5 gives a better hold.
- Pinch of salt (optional, but I find it balances the sweetness of the Oreos nicely).
For the Creamy Filling
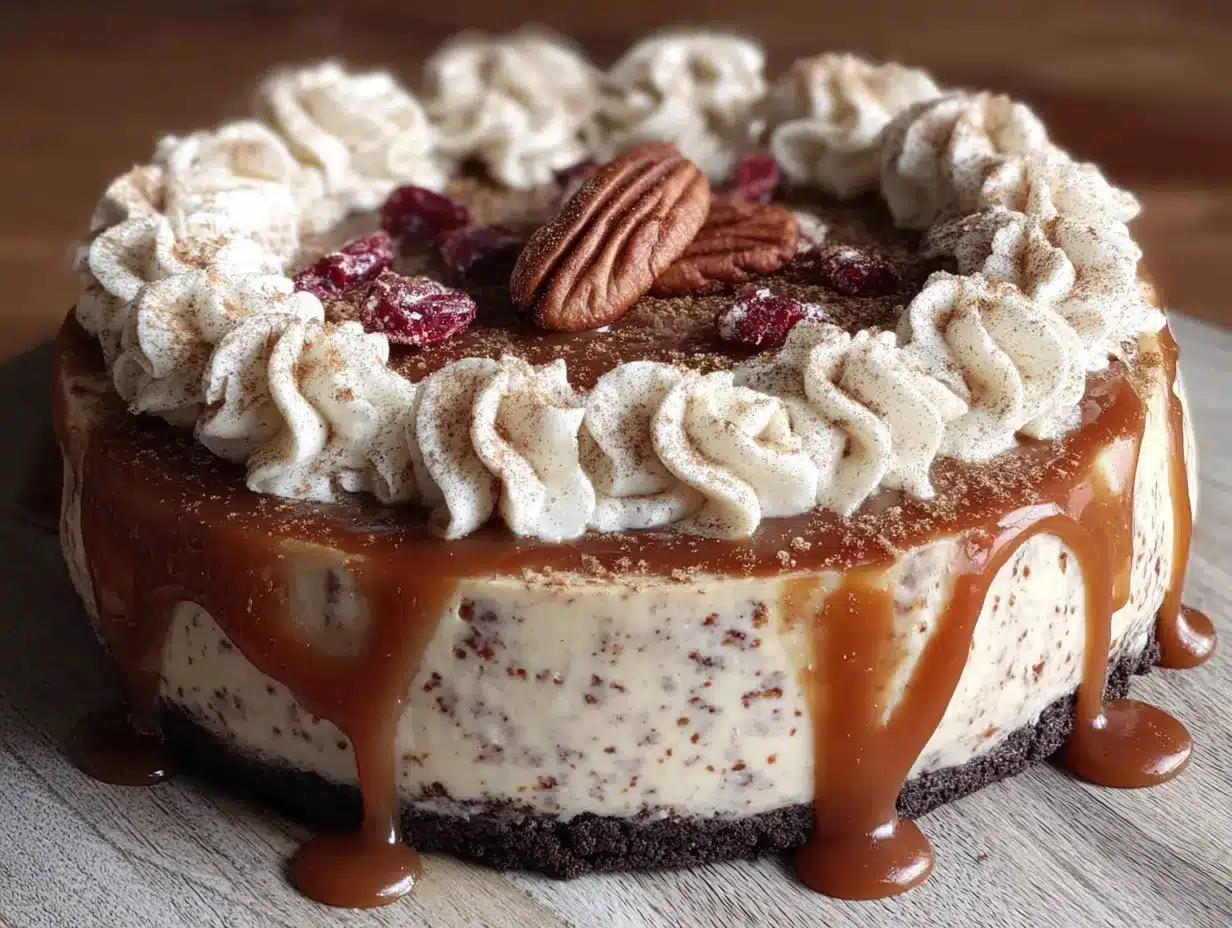
- 8 ounces cream cheese, softened to room temperature. This is non-negotiable. Cold cream cheese will leave you with lumps. I recommend Philadelphia brand for the smoothest texture.
- 1/2 cup granulated sugar. Regular white sugar dissolves best here. You can use a sugar substitute like monk fruit sweetener for a lower-sugar option, but the texture may be slightly different.
- 1 teaspoon vanilla extract. Pure vanilla extract makes a difference. Imitation will work, but the flavor won’t be as warm and rich.
- 1 1/2 cups heavy whipping cream, cold. This is what makes the filling light and airy. You’ll whip it into stiff peaks before folding it into the cream cheese mixture.
- 1/2 cup powdered sugar, for sweetening the whipped cream. It dissolves more easily than granulated sugar.
For the Topping (Optional but Recommended)
- 1/2 cup chocolate chips, melted, for drizzling. Semi-sweet or dark chocolate works best to contrast the sweetness of the filling.
- 1/4 cup chopped pecans or walnuts, for a little crunch. Toast them lightly in a dry pan for extra flavor.
- Optional: 1/4 cup caramel sauce, for drizzling. Store-bought is fine, or use your favorite homemade version.
Ingredient Selection Tip: For the best texture, look for full-fat cream cheese. Low-fat versions have more water and can make the filling runny. If you’re dairy-sensitive, you can use dairy-free cream cheese and coconut cream (chilled, whipped) instead of heavy cream, but the flavor will be slightly different.
Equipment Needed
You don’t need a professional kitchen to make this cake. Here’s what you’ll need:
- 9-inch springform pan. This is ideal because it makes removing the cake so easy. If you don’t have one, a 9-inch pie plate or a deep-dish tart pan with a removable bottom will work.
- Food processor or zip-top bag and rolling pin for crushing the Oreos. I prefer the food processor for a consistent crumb, but the bag method is great for releasing some frustration!
- Electric hand mixer or stand mixer. You’ll need this to whip the cream and beat the cream cheese. A whisk and some elbow grease will work for the cream cheese, but you really need a mixer for the whipped cream.
- Large mixing bowls. You’ll need at least two—one for the crust mixture and one for the filling.
- Rubber spatula for folding the whipped cream into the cream cheese mixture. A gentle hand here is key.
- Measuring cups and spoons. Accuracy matters, especially for the sugar and cream.
- Parchment paper (optional but helpful for lining the bottom of the springform pan for easy removal).
Budget-Friendly Tip: If you don’t have a springform pan, a disposable aluminum pie plate from the grocery store works perfectly. The cake is sturdy enough to slice and serve right from the plate. I’ve done it before when I forgot my springform pan at a friend’s house, and nobody noticed the difference.
Preparation Method
This recipe comes together in about 30 minutes of active time, plus at least 4 hours of chilling. Plan ahead so the cake has time to set properly. The steps are simple, but each one matters for the final texture.
Step 1: Make the Oreo Crust
Place the 24 Oreo cookies in your food processor and pulse until they become fine crumbs. You should have about 2 cups of crumbs. If you’re using the bag method, put the cookies in a sturdy zip-top bag, seal it, and crush them with a rolling pin until no large pieces remain. Pour the crumbs into a medium bowl. Add the melted butter and a pinch of salt if using. Stir with a fork until all the crumbs are evenly moistened. The mixture should look like wet sand.
Transfer the mixture to your 9-inch springform pan. Press it firmly into the bottom and about 1 inch up the sides. Use the bottom of a flat measuring cup or a glass to press it down evenly. This step is important—a well-packed crust won’t crumble when you slice the cake. Place the crust in the refrigerator to set while you make the filling. Tip: If the crust feels too crumbly, add another tablespoon of melted butter.
Step 2: Whip the Cream
In a large, chilled mixing bowl, pour the 1 1/2 cups of cold heavy whipping cream. Using an electric hand mixer or stand mixer with the whisk attachment, beat the cream on medium speed until it starts to thicken. Add the 1/2 cup of powdered sugar and continue beating until stiff peaks form. This means when you lift the beaters, the cream stands up in firm peaks that don’t flop over. Be careful not to overwhip—if it starts to look grainy, you’ve gone too far. Set the whipped cream aside in the refrigerator.
Step 3: Make the Cream Cheese Base
In another large bowl, beat the softened cream cheese with an electric mixer on medium speed until it’s smooth and creamy, about 2 minutes. Scrape down the sides of the bowl with a spatula. Add the 1/2 cup of granulated sugar and the 1 teaspoon of vanilla extract. Beat on medium speed until the mixture is completely smooth and the sugar has dissolved, about 2 more minutes. There should be no graininess when you rub a tiny bit between your fingers.
Step 4: Fold It All Together
Take the whipped cream out of the refrigerator. Add about one-third of it to the cream cheese mixture. Use a rubber spatula to gently fold it in—cut through the center, scrape along the bottom, and fold over. Repeat until it’s mostly combined. Add the remaining whipped cream and fold gently until no white streaks remain. The mixture should be light, airy, and uniform in color. Sensory cue: It should look like a fluffy cloud, with no dense spots.
Step 5: Assemble the Cake
Remove the springform pan with the crust from the refrigerator. Spoon the filling into the crust and spread it evenly with the spatula. Smooth the top as best you can. If you’re adding the chocolate drizzle and nuts, you can do that now or after the cake has chilled. I prefer to add the drizzle and nuts after chilling, so they stay on top of the filling rather than sinking in.
Step 6: Chill
Cover the cake loosely with plastic wrap or aluminum foil. Place it in the refrigerator for at least 4 hours, but overnight is best. The longer it chills, the cleaner your slices will be. The filling needs time to firm up and the flavors need time to meld. Warning: Don’t rush this step. A cake that hasn’t chilled long enough will be too soft to slice neatly.
Step 7: Serve
When you’re ready to serve, run a thin knife around the edge of the pan to loosen the cake. Release the springform latch and remove the ring. If you lined the bottom with parchment, slide the cake onto a serving plate. If not, you can serve it directly from the springform base. Add your toppings—drizzle melted chocolate, sprinkle chopped nuts, and add a drizzle of caramel sauce if you’re using it. Slice with a sharp knife, wiping the blade clean between cuts for the neatest slices.
Cooking Tips & Techniques
I’ve made this cake about six times now, and I’ve learned a few things the hard way. Here’s what I wish someone had told me the first time.
Don’t skip softening the cream cheese. This is the number one mistake people make. If your cream cheese is cold, you’ll end up with a lumpy filling. Take it out of the fridge at least 30 minutes before you start, or even an hour. If you’re in a rush, cut it into small cubes and let them sit on the counter for 15 minutes.
Chill your bowl and beaters for the whipped cream. Cold cream whips faster and holds its shape better. I pop my metal mixing bowl and beaters in the freezer for 10 minutes before I start. It makes a noticeable difference.
Fold, don’t stir. When you’re combining the whipped cream with the cream cheese mixture, use a gentle folding motion. Stirring vigorously will deflate the whipped cream and make your filling dense. I learned this the hard way on my second attempt—the cake was still delicious, but it wasn’t as light and airy as it should have been.
Press the crust firmly. I cannot stress this enough. A loosely packed crust will fall apart when you cut the cake. Use the bottom of a glass or a measuring cup to really press it down. Take your time with this step.
Let it chill overnight. I know 4 hours is the minimum, but if you can let it chill for 8 to 12 hours, the texture is noticeably better. The flavors meld, the filling sets perfectly, and you get those clean, beautiful slices. This is the perfect make-ahead dessert for Thanksgiving.
Variations & Adaptations
This recipe is wonderfully adaptable. Here are some variations I’ve tried and loved.
Gluten-Free Version
Use gluten-free chocolate sandwich cookies for the crust. Many brands make them now, and they work exactly the same way. The filling is naturally gluten-free, so this is an easy swap.
Pumpkin Spice Twist
Add 1/2 cup of pumpkin puree and 1 teaspoon of pumpkin pie spice to the cream cheese mixture before folding in the whipped cream. This gives you a beautiful fall flavor that’s perfect for Thanksgiving. The texture will be slightly softer, so plan for a full overnight chill.
Chocolate Lovers Version
Melt 4 ounces of semi-sweet chocolate and let it cool slightly. Fold it into the cream cheese mixture along with the whipped cream. This creates a chocolate cookie cake that’s even more decadent. Top with extra chocolate shavings.
Dairy-Free Adaptation
Use dairy-free cream cheese (I like the brand Kite Hill) and chilled coconut cream instead of heavy whipping cream. The coconut cream needs to be refrigerated overnight, then you scoop out the solid part and whip it. The flavor is slightly coconutty, which actually pairs beautifully with the Oreo crust.
Personal Favorite Variation: I made a version last year with a layer of raspberry jam spread on the crust before adding the filling. The tartness of the raspberries cuts through the sweetness perfectly. It was a huge hit at our Friendsgiving dinner.
Serving & Storage Suggestions
This cake is best served cold, straight from the refrigerator. The texture is firm and creamy, like a dreamy mousse. Let it sit at room temperature for no more than 10 minutes before slicing—any longer and it will start to soften too much.
Presentation: For a stunning Thanksgiving presentation, arrange the cake on a beautiful platter. Drizzle the melted chocolate in a zigzag pattern across the top, then sprinkle with toasted pecans and a light dusting of flaky sea salt. The salt brings out the sweetness and adds a professional touch. Add a few fresh cranberries or a sprig of rosemary for a festive look.
What to Serve With It: This cake is rich on its own, but it pairs beautifully with a dollop of lightly sweetened whipped cream or a scoop of vanilla bean ice cream. For a lighter option, serve it with a side of fresh berries. A cup of hot coffee or spiced apple cider is the perfect beverage pairing.
Storage: Leftover cake keeps beautifully in the refrigerator for up to 5 days. Cover it tightly with plastic wrap or store it in an airtight container. The crust will stay crisp and the filling will remain creamy. I actually think the cake tastes even better on day two, after the flavors have had more time to meld.
Freezing Instructions: This cake freezes wonderfully. Once it’s fully chilled and set, wrap the entire springform pan in a layer of plastic wrap, then a layer of aluminum foil. Freeze for up to 3 months. To serve, thaw it in the refrigerator overnight. Add the toppings after thawing. I’ve done this for two Thanksgivings now, and it’s a lifesaver.
Reheating: You don’t need to reheat this cake. It’s meant to be served cold. If you’ve frozen it, just let it thaw in the fridge and serve as usual.
Nutritional Information & Benefits
This light no-bake cookie cake is a dessert, so it’s not a health food. But compared to many Thanksgiving desserts, it’s a lighter option that still feels indulgent.
Estimated Nutritional Values (per slice, based on 12 servings):
- Calories: 320
- Fat: 22g
- Saturated Fat: 13g
- Carbohydrates: 28g
- Sugar: 20g
- Protein: 4g
- Fiber: 1g
Health Highlights: The cream cheese provides a small amount of protein and calcium. The heavy cream adds healthy fats that help you feel satisfied with a smaller portion. If you use the nut topping, you’ll get a dose of healthy omega-3s and a little fiber. Dietary Considerations: This recipe contains dairy and gluten (from the Oreos). It can be adapted to be gluten-free or dairy-free as noted in the variations section. It is not suitable for a vegan diet without significant substitutions. Potential Allergens: Milk, wheat, soy (from the Oreos), and tree nuts (if using the pecan or walnut topping).
My personal perspective on this? I believe dessert should be enjoyed without guilt. This cake lets you have your slice and feel good about it. It’s not about being “good” or “bad”—it’s about enjoying a delicious, well-made treat that leaves you feeling satisfied, not stuffed.
FAQs
Can I use a different type of cookie for the crust?
Absolutely. Graham crackers, vanilla wafers, or even shortbread cookies would work. Just use about 2 cups of fine crumbs and 5 tablespoons of melted butter. The flavor will change, but the texture will be similar.
Why is my filling runny?
This usually happens for one of three reasons: the cream cheese wasn’t softened enough, the whipped cream was underwhipped, or the cake didn’t chill long enough. Make sure your cream cheese is at room temperature, whip the cream to stiff peaks, and give the cake at least 4 hours in the fridge.
Can I make this cake a day ahead?
Yes, and I actually recommend it. The cake needs at least 4 hours to set, but overnight is better. Making it a day ahead means one less thing to worry about on Thanksgiving. Just add the toppings right before serving.
How do I get clean slices?
Use a sharp knife and wipe it clean between each cut. Running the knife under hot water and drying it before slicing helps too. Make sure the cake has chilled for the full recommended time—a too-soft cake will squish when you cut it.
Can I skip the Oreo crust and use a different base?
Sure. A graham cracker crust is a classic alternative. You can also use a gluten-free cookie crust or even a nut-based crust (like almond flour and butter). Just keep the ratio of 2 cups crumbs to 5 tablespoons melted butter.
Conclusion
This light no-bake Thanksgiving cookie cake with Oreo crust is the dessert that keeps on giving. It’s simple enough for a beginner baker to tackle with confidence, yet impressive enough to steal the show at your holiday table. It saves you oven space, can be made ahead, and leaves everyone feeling like they got a special treat without the heavy, overstuffed feeling.
I love this recipe because it reminds me that the best things often come from the most unexpected places. An accountant in a clip-on tie taught me that Thanksgiving doesn’t have to be a stressful marathon of complicated recipes. Sometimes, the simplest dessert—made with love and a little bit of Oreo magic—is the one that brings everyone together.
I’d love to hear how yours turns out. Did you add your own twist? Did it become a new family tradition? Drop a comment below and let me know. And if you’re looking for another make-ahead dessert, you might also enjoy this light pumpkin cheesecake bars recipe I shared last fall. Happy Thanksgiving, and happy baking—or rather, happy no-baking!
Pin This Recipe!
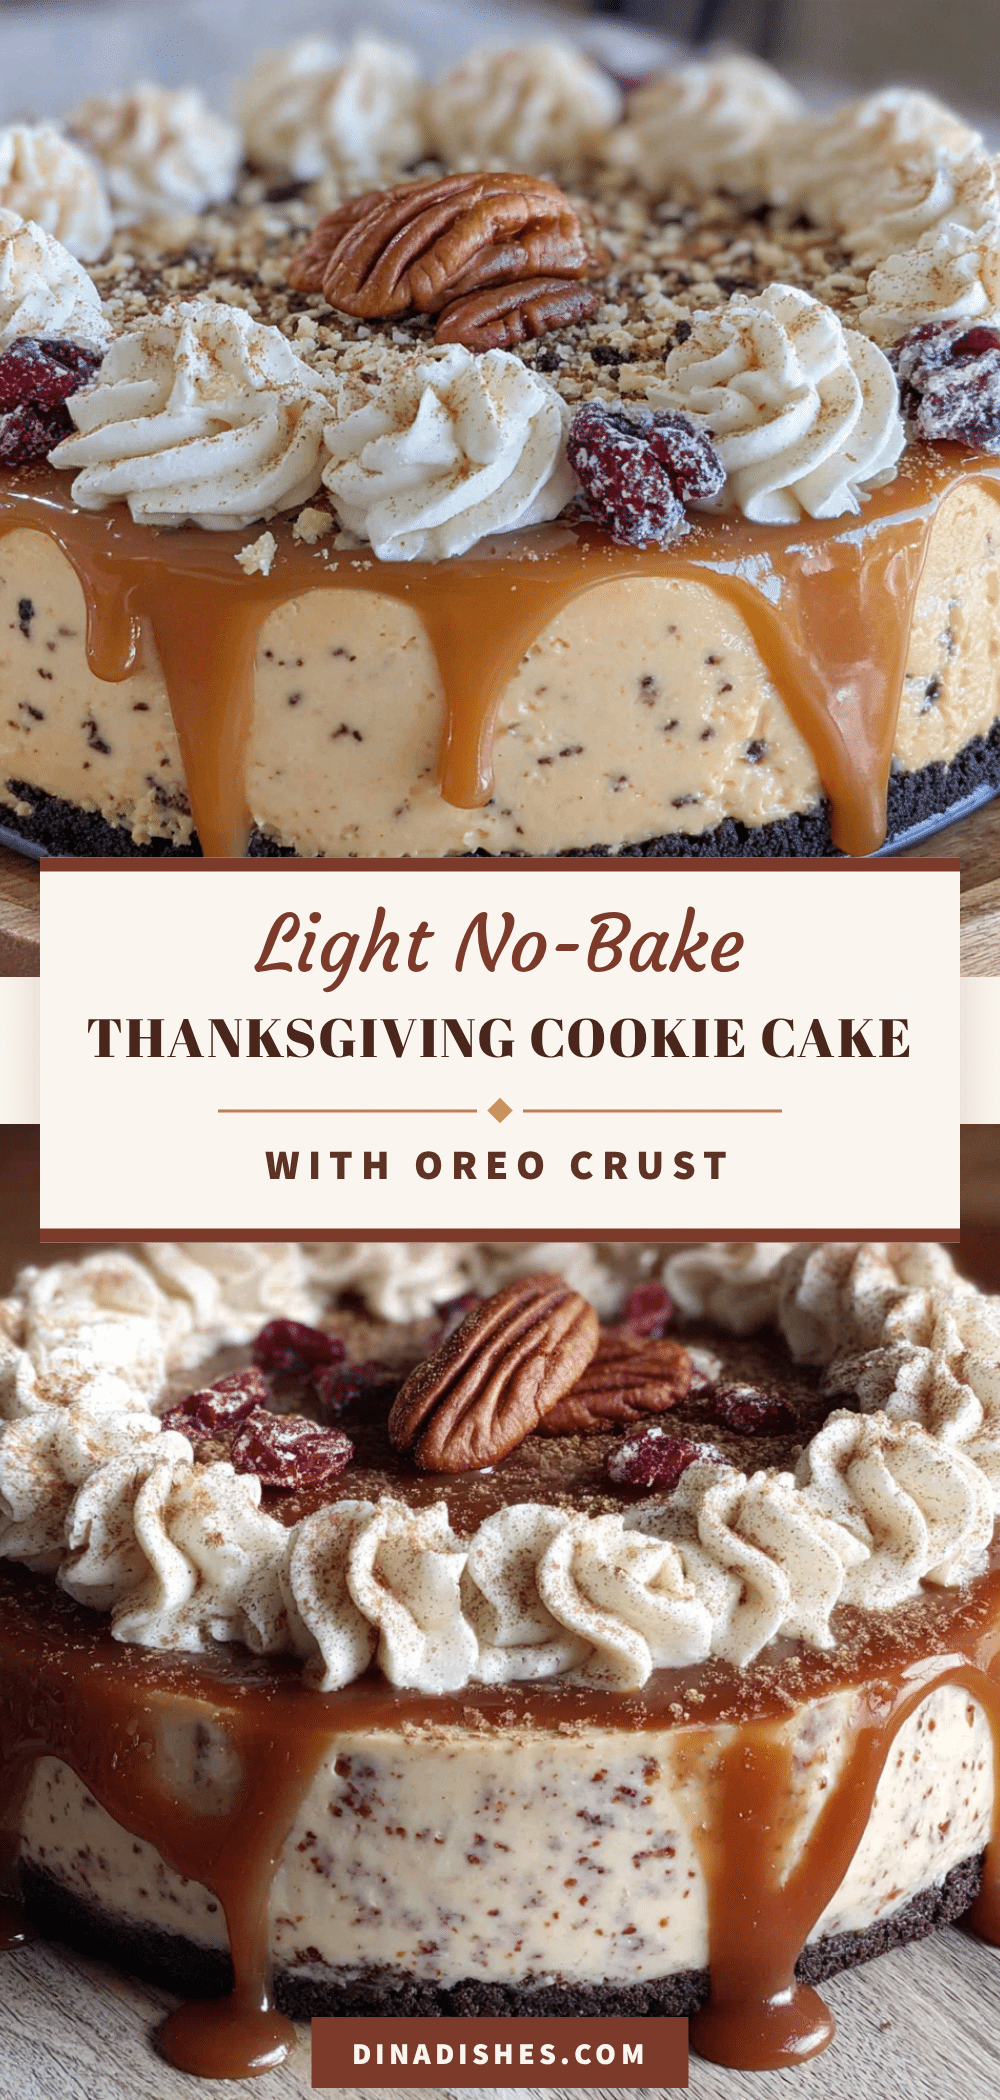
Light No-Bake Thanksgiving Cookie Cake with Oreo Crust
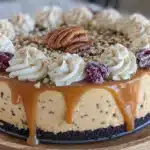
A light and creamy no-bake cookie cake with an Oreo crust, perfect for Thanksgiving. This make-ahead dessert is surprisingly light, crowd-pleasing, and requires no oven time.
- Prep Time: 30 minutes
- Cook Time: 0 minutes
- Total Time: 4 hours 30 minutes (includes chilling)
- Yield: 12 servings 1x
- Category: Dessert
- Cuisine: American
Ingredients
- 24 Oreo cookies (regular, not double-stuffed), crushed into fine crumbs
- 5 tablespoons unsalted butter, melted
- Pinch of salt (optional)
- 8 ounces cream cheese, softened to room temperature
- 1/2 cup granulated sugar
- 1 teaspoon vanilla extract
- 1 1/2 cups heavy whipping cream, cold
- 1/2 cup powdered sugar
- 1/2 cup chocolate chips, melted (for topping, optional)
- 1/4 cup chopped pecans or walnuts (for topping, optional)
- 1/4 cup caramel sauce (for topping, optional)
Instructions
- Make the Oreo crust: Place 24 Oreo cookies in a food processor and pulse until fine crumbs. Transfer to a bowl, add melted butter and a pinch of salt, and stir until moistened. Press firmly into the bottom and 1 inch up the sides of a 9-inch springform pan. Refrigerate while making the filling.
- Whip the cream: In a chilled large bowl, beat cold heavy whipping cream with an electric mixer on medium speed until it thickens. Add powdered sugar and continue beating until stiff peaks form. Set aside in the refrigerator.
- Make the cream cheese base: In another large bowl, beat softened cream cheese until smooth. Add granulated sugar and vanilla extract, and beat until smooth and creamy, about 2 minutes.
- Fold together: Add one-third of the whipped cream to the cream cheese mixture and gently fold with a rubber spatula until combined. Add the remaining whipped cream and fold until no white streaks remain and the mixture is light and airy.
- Assemble the cake: Remove the crust from the refrigerator. Spoon the filling into the crust and spread evenly. Smooth the top. If adding toppings, it’s best to add them after chilling.
- Chill: Cover the cake loosely with plastic wrap and refrigerate for at least 4 hours, preferably overnight, until firm.
- Serve: Run a thin knife around the edge of the pan, release the springform latch, and remove the ring. Add toppings if desired (drizzle melted chocolate, sprinkle nuts, and add caramel sauce). Slice with a sharp knife, wiping the blade clean between cuts.
Notes
Let cream cheese come to room temperature for a smooth filling. Chill the bowl and beaters for the whipped cream. Press the crust firmly to prevent crumbling. For best results, chill overnight. The cake can be made a day ahead and stored in the refrigerator for up to 5 days. It also freezes well for up to 3 months.
Nutrition
- Serving Size: 1 slice
- Calories: 320
- Sugar: 20
- Fat: 22
- Saturated Fat: 13
- Carbohydrates: 28
- Fiber: 1
- Protein: 4
Keywords: no-bake, Thanksgiving, cookie cake, Oreo crust, light dessert, make-ahead, cream cheese, holiday dessert