My niece looked up from the Halloween candy bucket, chocolate smeared across her cheek, and asked why I couldn’t just use yogurt instead of pudding for the dirt cups. I started to explain why that wouldn’t work—something about texture, about the way pudding sets, about tradition. Then I stopped. I mean, honestly, why couldn’t I?
That was three Halloweens ago, and I still think about that moment every time I make these Lighter Halloween Dirt Cups with Gummy Worms. I was so sure I knew the “right” way to make a dirt cup—pudding mix, Cool Whip, the whole sugar-laden deal. But she had a point. Why does a Halloween treat have to be a sugar bomb? Why can’t it taste good and make you feel okay about eating it?
So I tried it. I swapped the pudding for a creamy Greek yogurt base, kept the crushed cookies for that authentic “dirt” texture, and topped it with gummy worms peeking out like they’re escaping a graveyard. The first batch? Let’s just say I ate three before dinner. The texture was lighter, the tang from the yogurt balanced the sweetness perfectly, and honestly—it was better than the original.
Maybe you’ve been there, standing in the kitchen, thinking there has to be a way to make a fun Halloween treat without the sugar crash. These cups are it. They’re the kind of recipe that makes you feel clever, not deprived. And every time I make them, I remember that my niece taught me something important: sometimes the best ideas come from the people you’re trying to teach.
Why You’ll Love This Recipe
Let me tell you why these Lighter Halloween Dirt Cups with Gummy Worms have become my go-to Halloween treat. I’ve tested this recipe at three different Halloween parties, a classroom celebration, and even a grown-up dinner party (where they disappeared fastest). Here’s what makes them special:
- Quick & Easy: Five minutes of active prep. No kidding. If you can stir yogurt and crush cookies, you can make these.
- Simple Ingredients: Greek yogurt, sugar-free pudding mix, chocolate cookies, and gummy worms. That’s it. No weird stuff.
- Perfect for Halloween: They look spooky, they taste indulgent, and kids absolutely lose their minds over them.
- Healthier Twist: Each cup has about half the sugar of traditional dirt cups. You get the fun without the guilt.
- Crowd-Pleaser: I’ve served these to kids, adults, picky eaters, and health nuts. Everyone loves them.
What makes these different from every other dirt cup recipe? It’s the yogurt. Most recipes use instant pudding made with milk and topped with Cool Whip. I use Greek yogurt blended with sugar-free pudding mix. The result is creamy, tangy, and surprisingly rich—without the heavy, artificial taste. Plus, you get protein from the yogurt, which means these actually have some staying power. They’re comfort food reimagined—fun, festive, and actually good for you.
What Ingredients You Will Need
This recipe uses simple, wholesome ingredients to deliver that classic dirt cup experience without the sugar overload. Most of these are pantry staples or easy to find at any grocery store.
- Plain Greek yogurt, 2 cups (I prefer Fage 2% for its thick, creamy texture—it holds up better than thinner yogurts. Full-fat works too, but nonfat can be a bit watery.)
- Sugar-free vanilla pudding mix, 1 box (1 ounce) (Jell-O brand works great. This adds sweetness and thickening without extra sugar. If you can’t find sugar-free, regular works—just know it’ll be sweeter.)
- Chocolate sandwich cookies, 12 cookies (Oreos are the classic choice. I use regular, not double-stuffed, for the right dirt-to-cream ratio. Gluten-free versions work perfectly.)
- Gummy worms, about 24 pieces (I like the sour ones for extra kick. Any brand works—just make sure they’re soft and bendy for that “worm crawling out” look.)
- Whipped topping, optional, 1 cup (Sugar-free Cool Whip or homemade whipped cream. This is optional—I sometimes skip it for a lighter version. If you use it, it adds a cloud-like layer on top.)
- Green food coloring, optional, a few drops (For making “slime” or grass effect. Totally optional, but kids love it. Use gel food coloring for brighter color.)
- Small clear cups, 6 to 8 (4-ounce cups work best. I use plastic shot cups from the party store—they’re cheap and the perfect size. Clear is essential so you can see the layers.)
Ingredient tips from my kitchen: For the best texture, make sure your Greek yogurt is at room temperature before mixing. Cold yogurt doesn’t blend as smoothly with the pudding mix. Also, I’ve tested this with dairy-free yogurt (coconut-based works best), and it’s just as good—just make sure it’s thick, not runny. For a nut-free version, check your cookie labels; some chocolate sandwich cookies are made in facilities that process nuts.
Equipment Needed
You don’t need fancy equipment for these Lighter Halloween Dirt Cups with Gummy Worms. Here’s what you’ll need:
- Mixing bowl, medium-sized (Any bowl works. I use a glass one so I can see if the pudding mix is fully dissolved.)
- Whisk or spatula (A whisk works best for incorporating the pudding mix without lumps. A silicone spatula works in a pinch.)
- Ziploc bag or rolling pin (For crushing cookies. I prefer the bag method—less mess. Just put cookies in a bag, seal it, and crush with your hands or a rolling pin.)
- Small clear cups, 4-ounce size (I got a pack of 50 at the dollar store for $2. They’re perfect for parties. You can also use small mason jars or even shot glasses for tiny portions.)
- Spoon or piping bag (A spoon works fine. If you want clean layers, a piping bag or ziploc with the corner snipped off gives you more control.)
- Measuring cups and spoons (Standard set. Nothing fancy.)
Budget-friendly tip: Don’t buy special Halloween cups. Clear plastic cups from any party section work, and you can find them year-round. I’ve even used small yogurt cups (washed and dried) in a pinch.
Preparation Method
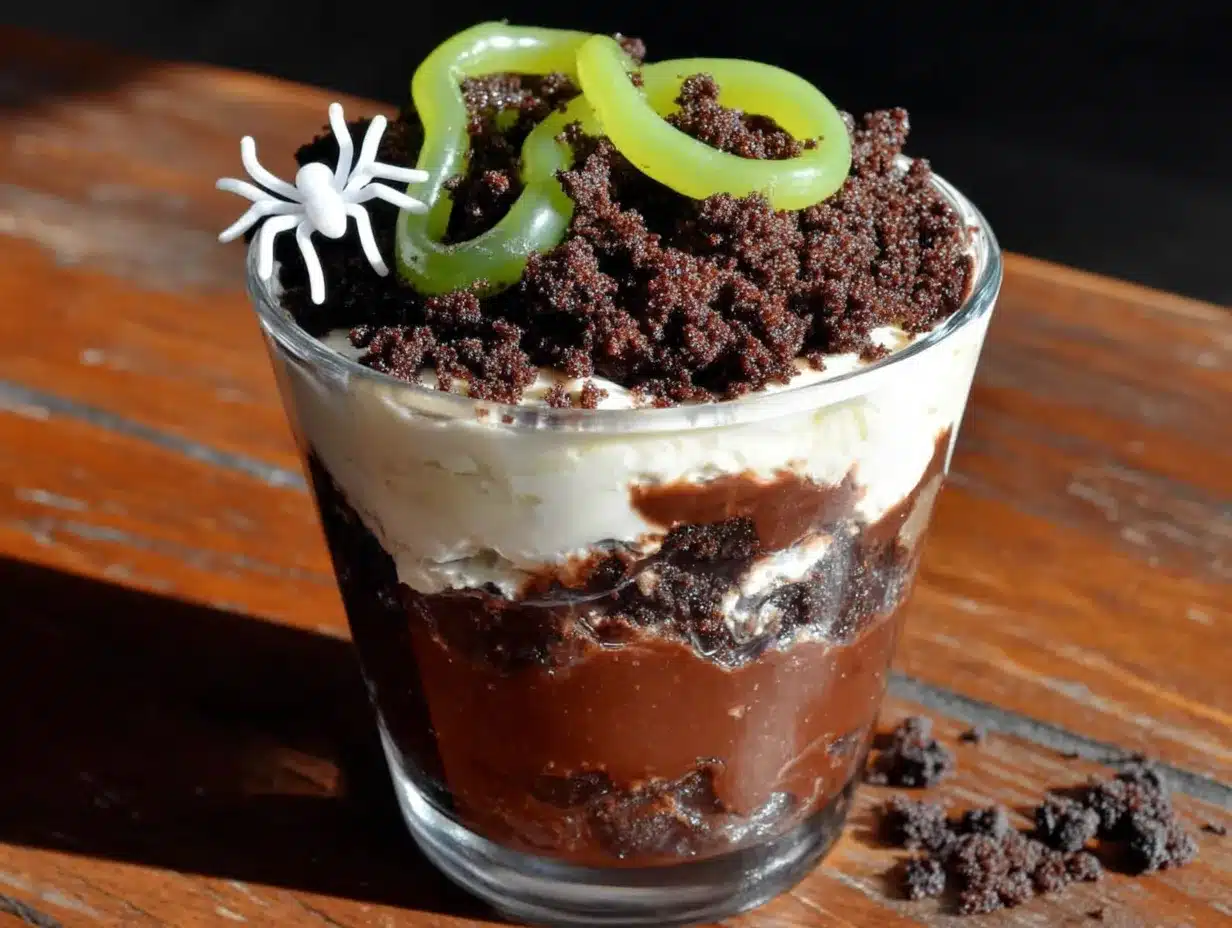
Let’s get into the nitty-gritty. This recipe is almost embarrassingly easy, but I’ll walk you through every step so you get perfect results every time.
- Crush the cookies. Place 12 chocolate sandwich cookies in a ziploc bag. Seal it tight—I learned this the hard way after cookie dust exploded across my kitchen. Use a rolling pin or your hands to crush them into fine crumbs. You want a mix of fine “dirt” and a few slightly larger pieces for texture. Set aside.
- Mix the yogurt base. In a medium bowl, combine 2 cups of plain Greek yogurt with 1 box of sugar-free vanilla pudding mix. Whisk vigorously for about 1 minute until the pudding mix is fully dissolved and the mixture thickens. It should look like a thick, creamy pudding. If it’s too thick, add a tablespoon of milk or water. If it’s too thin, let it sit for 2 minutes—it will continue to thicken. (Time: 2 minutes)
- Optional: add color. If you want a green “slime” layer, divide the yogurt mixture in half and add a few drops of green food coloring to one half. Stir until evenly colored. This step is purely for fun—kids love it, but it’s not necessary.
- Layer the cups. Take your clear cups and start with a layer of cookie crumbs at the bottom—about 1 tablespoon each. This gives the illusion of real dirt. Next, add a layer of the yogurt mixture—about 2 tablespoons. If you’re using the green version, alternate layers of white and green for a spooky effect.
- Add the worms. Take 2 to 3 gummy worms and gently press them into the yogurt mixture. Leave the ends sticking out so it looks like they’re crawling out of the dirt. This is the fun part—get creative with the positioning.
- Top with more “dirt” and worms. Add another thin layer of cookie crumbs on top. Press a few more gummy worms into the top, letting them dangle over the edge. For extra drama, add a dollop of whipped topping and sprinkle with more crumbs.
- Chill (optional but recommended). Refrigerate for at least 30 minutes before serving. This lets the flavors meld and the texture set. They’re good immediately, but better after a short chill. (Time: 30 minutes chilling)
Sensory cues: When you’re mixing the yogurt and pudding, you’ll feel it thicken within seconds—that’s the pudding mix activating. The cookie crumbs should look like dark, rich soil—fine enough to be believable but with a few pebbly bits. When you press the worms in, you want that satisfying squish of the yogurt giving way, with the worm staying upright.
Pro tip from a messy kitchen: Wet the spoon slightly before scooping the yogurt mixture—it slides off easier and makes cleaner layers. Also, crush the cookies in batches if you’re making a big batch. I once tried to crush 36 cookies at once and ended up with a bag explosion.
Cooking Tips & Techniques
Over the years, I’ve made these Lighter Halloween Dirt Cups with Gummy Worms probably 20 times, and I’ve learned a few things the hard way. Here are my best tips:
Don’t overmix the yogurt. I made this mistake once—I whisked the yogurt and pudding mix for too long, and it turned into a thin, watery mess. Stop as soon as it thickens. Overmixing breaks down the yogurt’s structure. About 1 minute of vigorous whisking is perfect.
Room temperature yogurt is key. Cold yogurt doesn’t absorb the pudding mix evenly. You’ll end up with lumps of dry pudding powder. Take the yogurt out of the fridge 15 minutes before you start. Trust me on this one—I learned after a lumpy batch that went straight in the trash.
Crush cookies in stages. Don’t try to get all the crumbs at once. I crush 4 cookies at a time in the bag, then pour them into a bowl. This gives you more control over the texture and prevents giant chunks from ruining the “dirt” effect. Plus, it’s oddly satisfying—like a mini stress ball session.
Make-ahead magic. These cups actually taste better after a few hours in the fridge. The cookie crumbs soften slightly, blending with the yogurt to create a more cohesive “dirt” texture. I make them the night before Halloween and just add the worms right before serving. The worms stay fresh, and the cups are perfectly chilled.
The worm trick. If your gummy worms are too sticky to handle, dust them lightly with a pinch of cocoa powder. It adds to the dirt effect and makes them easier to position. I stumbled on this when my hands were covered in sticky worm residue—now I do it every time.
Variations & Adaptations
One of the best things about this recipe is how adaptable it is. Here are some variations I’ve tried and loved:
Dairy-Free Version: Use coconut-based Greek yogurt (I like the brand Cocojune) and dairy-free chocolate sandwich cookies (Oreos are actually dairy-free!). The coconut adds a subtle tropical note that pairs surprisingly well with chocolate. My dairy-free friend nearly cried when she could finally eat a dirt cup at a party.
Pumpkin Spice Dirt Cups: Swap the vanilla pudding mix for sugar-free butterscotch or cheesecake flavor. Add 1 teaspoon of pumpkin pie spice to the yogurt mixture. Top with crushed ginger snaps instead of chocolate cookies. This is my fall favorite—it tastes like autumn in a cup.
Protein-Packed Version: Add one scoop of chocolate or vanilla protein powder to the yogurt mixture. Reduce the pudding mix to half a box to avoid it getting too thick. This turns these into a post-workout treat that still feels like a cheat. I’ve taken these to the gym for Halloween-themed snack days, and they’re always a hit.
Vegan Gummy Worms: Not all gummy worms are vegan—they often contain gelatin. Look for brands like Surf Sweets or YumEarth that use pectin instead. They’re just as chewy and come in fun shapes. My vegan niece approves.
Spooky Spider Cups: Instead of worms, use gummy spiders or place a chocolate spider ring on top. I did this for a “bug-themed” Halloween party, and the kids went wild. Same recipe, different vibe.
Serving & Storage Suggestions
These Lighter Halloween Dirt Cups with Gummy Worms are best served cold, straight from the fridge. The contrast between the cool, creamy yogurt and the crunchy cookie crumbs is the whole point.
Serving ideas: Arrange the cups on a platter with extra gummy worms scattered around like they’re escaping. For a party, use a large tray and label them “Worm Farm” or “Graveyard Cups.” I once served them on a black tablecloth with fake spiders and cobwebs—the visual was incredible.
Complementary drinks: These pair well with warm apple cider, hot chocolate, or even a pumpkin spice latte for adults. The richness of the drink balances the lightness of the cups. For kids, serve with milk or a fun Halloween punch.
Storage: Keep the cups covered in the refrigerator for up to 3 days. The texture changes slightly—the cookie crumbs soften, but honestly, it still tastes great. I’ve eaten them on day 3 and they were still delicious, just less crunchy. Do not freeze them—the yogurt separates and becomes grainy when thawed.
Reheating: No reheating needed! These are served cold. If they’ve been sitting out for more than 2 hours, just pop them back in the fridge for 15 minutes before serving.
Flavor development: The yogurt mixture actually gets creamier and more pudding-like after a day in the fridge. The flavors meld together beautifully. If you’re making these for a party, I highly recommend making them a day ahead. Just add the worms right before serving so they stay perky and fresh.
Nutritional Information & Benefits
These Lighter Halloween Dirt Cups with Gummy Worms are a healthier take on a classic treat, and the numbers back it up.
Estimated per serving (1 cup, without optional whipped topping):
- Calories: 120
- Protein: 8g
- Carbohydrates: 18g
- Fiber: 1g
- Sugar: 10g (compared to 22g in traditional dirt cups)
- Fat: 3g
Health benefits: Greek yogurt is packed with protein and probiotics, which support gut health and keep you full longer. The sugar-free pudding mix cuts down on added sugar without sacrificing sweetness. Even the gummy worms contribute a small amount of collagen (if they contain gelatin). This treat actually has some nutritional value—unlike most Halloween candy.
Dietary considerations: This recipe is naturally vegetarian and can be made gluten-free (use gluten-free cookies), dairy-free (use coconut yogurt), or vegan (use vegan yogurt and pectin-based gummy worms). Always check labels for allergens, especially if serving at a party with mixed dietary needs.
My perspective: I love that these cups let me participate in Halloween fun without the sugar crash. They’re satisfying enough that I don’t feel deprived, but light enough that I don’t regret eating two. That balance is hard to find in holiday treats, and it’s why I keep coming back to this recipe.
FAQs
Can I use regular yogurt instead of Greek yogurt?
You can, but the texture will be much thinner. Greek yogurt is thicker and holds up better to the pudding mix and cookie crumbs. If you use regular yogurt, reduce the amount by 1/4 cup and add an extra 1/2 tablespoon of pudding mix to help it thicken.
How far in advance can I make these?
You can make them up to 3 days ahead, but I recommend adding the gummy worms the day you serve them. The worms can soften and lose their shape if they sit in the yogurt too long. The yogurt mixture and cookie crumbs hold up perfectly for a few days.
Can I use homemade whipped cream instead of Cool Whip?
Absolutely! Whip 1 cup of heavy cream with 1 tablespoon of powdered sugar until stiff peaks form. It’s lighter and less sweet than Cool Whip, which actually works well with the tangy yogurt. Just keep it refrigerated and use within 24 hours.
My yogurt mixture turned out lumpy. What went wrong?
This usually happens when the yogurt is too cold. The pudding mix needs warmth to dissolve properly. Next time, let the yogurt sit at room temperature for 15 minutes before mixing. If it’s already lumpy, whisk vigorously for another minute—sometimes it smooths out with extra effort.
Can I use different types of cookies?
Yes! I’ve tried this with gluten-free chocolate cookies, golden Oreos for a “sand” effect, and even crushed graham crackers for a different texture. Each variation gives a slightly different flavor. Just make sure the cookies are crunchy enough to create that dirt-like crumb texture.
Conclusion
These Lighter Halloween Dirt Cups with Gummy Worms are proof that you don’t need a pile of sugar to make a fun, festive Halloween treat. They’re quick, easy, and surprisingly satisfying—the kind of recipe that makes you feel good about what you’re eating while still getting that nostalgic dirt cup experience.
I love that this recipe started with a question from my niece. It reminds me that sometimes the best ideas come from stepping outside what we think we know. Whether you’re making these for a classroom party, a Halloween gathering, or just a fun weekend treat with the kids, I hope they bring you the same joy they’ve brought me.
Go ahead and customize them—swap the worms for spiders, add a slime layer, or make them dairy-free. The beauty of this recipe is that it’s a starting point, not a rulebook. If you try them, let me know how they turn out! Drop a comment below or tag me in your photos. I can’t wait to see your spooky creations. Happy Halloween, and happy eating!
Pin This Recipe!
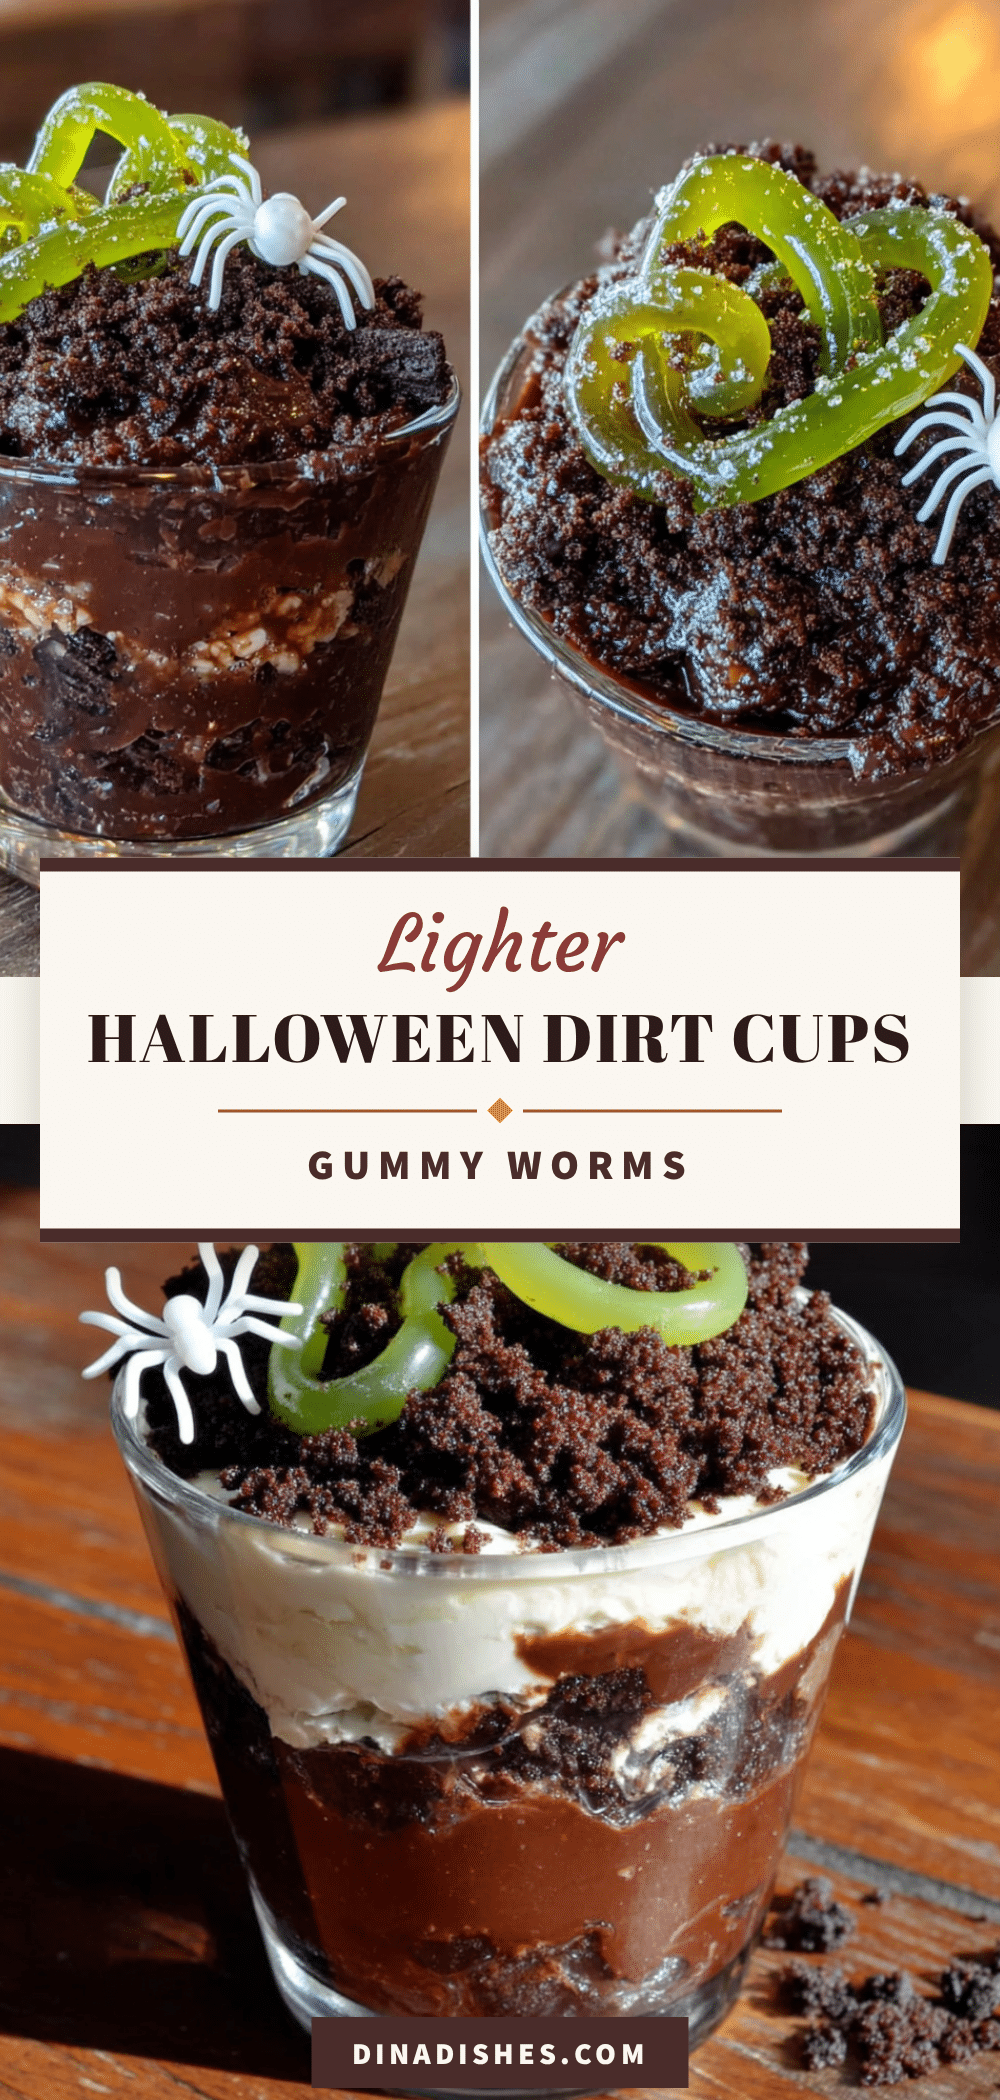
Lighter Halloween Dirt Cups with Gummy Worms
A healthier twist on classic dirt cups, made with Greek yogurt and sugar-free pudding mix for a creamy, tangy treat that’s quick to assemble and perfect for Halloween parties.
- Prep Time: 5 minutes
- Cook Time: 0 minutes
- Total Time: 35 minutes (including 30 minutes chilling)
- Yield: 6 to 8 servings 1x
- Category: Dessert
- Cuisine: American
Ingredients
- 2 cups plain Greek yogurt (preferably Fage 2%)
- 1 box (1 ounce) sugar-free vanilla pudding mix (e.g., Jell-O brand)
- 12 chocolate sandwich cookies (e.g., Oreos, regular not double-stuffed)
- 24 gummy worms (sour variety recommended)
- 1 cup whipped topping (optional, sugar-free Cool Whip or homemade whipped cream)
- A few drops green food coloring (optional, for slime effect)
- 6 to 8 small clear cups (4-ounce size)
Instructions
- Crush the cookies: Place 12 chocolate sandwich cookies in a ziploc bag, seal tightly, and crush with a rolling pin or your hands into fine crumbs with some larger pieces for texture. Set aside.
- Mix the yogurt base: In a medium bowl, combine 2 cups plain Greek yogurt with 1 box sugar-free vanilla pudding mix. Whisk vigorously for about 1 minute until the pudding mix is fully dissolved and the mixture thickens. If too thick, add a tablespoon of milk or water; if too thin, let sit for 2 minutes to thicken further.
- Optional: add color: If desired, divide the yogurt mixture in half and add a few drops of green food coloring to one half, stirring until evenly colored.
- Layer the cups: In each clear cup, add a layer of cookie crumbs (about 1 tablespoon) at the bottom. Then add a layer of the yogurt mixture (about 2 tablespoons). If using green coloring, alternate layers of white and green for a spooky effect.
- Add the worms: Gently press 2 to 3 gummy worms into the yogurt mixture, leaving the ends sticking out to look like they are crawling out.
- Top with more ‘dirt’ and worms: Add another thin layer of cookie crumbs on top. Press a few more gummy worms into the top, letting them dangle over the edge. Optionally, add a dollop of whipped topping and sprinkle with more crumbs.
- Chill (optional but recommended): Refrigerate for at least 30 minutes before serving to let flavors meld and texture set. They can be served immediately but are better after chilling.
Notes
For best texture, use room temperature Greek yogurt (let sit out for 15 minutes before mixing). Crush cookies in batches to avoid bag explosions. Make ahead up to 3 days, but add gummy worms just before serving to keep them fresh. Dust sticky worms with cocoa powder for easier handling. Overmixing the yogurt can make it watery; stop as soon as it thickens.
Nutrition
- Serving Size: 1 cup (without optio
- Calories: 120
- Sugar: 10
- Sodium: 150
- Fat: 3
- Saturated Fat: 1
- Carbohydrates: 18
- Fiber: 1
- Protein: 8
Keywords: Halloween dirt cups, gummy worms, Greek yogurt dessert, sugar-free treat, easy Halloween recipe, healthier dessert, no-bake dessert


