I was at my local hardware store—of all places—buying lightbulbs, when the woman behind me in line started talking about stuffing balls. Not the kind you throw at a tailgate, mind you. The kind you eat. She was maybe seventy, wearing a gardening apron with dirt on her knees, and she had this no-nonsense way of explaining things that made you stop and listen. “You need sausage,” she said, like it was the most obvious thing in the world. “And you need cheese. Lots of it.” I wasn’t expecting cooking advice from a complete stranger in the checkout aisle, but there I was, holding a sixty-watt bulb, completely captivated by her description of these perfect little spheres of savory goodness.
She told me her name was Margaret, and she’d been making these cheesy sausage stuffing balls for every family gathering since the Reagan administration. Her secret? She never measures anything. “I just go by feel,” she said, wiping a smudge of potting soil off her cheek. I, on the other hand, am a measurer. I like precision. So I went home, wrote down everything I remembered from our five-minute conversation, and spent the next three Sundays getting it right. The first batch was too dry. The second fell apart in the oven. The third—well, the third was the one where I actually called my neighbor to come taste it, and she didn’t leave until I gave her the recipe.
Honestly, I’ve made these cheesy sausage stuffing balls for every potluck, holiday party, and casual get-together since that day. They’re the kind of appetizer that disappears before you even put out the napkins. And every time someone asks for the recipe, I think of Margaret and her gardening apron. Maybe you’ve been there—that moment when a recipe finds you in the most unexpected way, and you just know it’s going to become a staple in your kitchen. Let me tell you, this is that recipe.
Why You’ll Love This Recipe
Let’s be real for a second. Finding an appetizer that’s both impressive and actually doable when you’re hosting is like finding a parking spot at the mall in December. It feels impossible. But these cheesy sausage stuffing balls? They’re the answer to your hosting prayers. I’ve tested this recipe more times than I can count, tweaking the ratios, testing different sausage brands, and even dragging my friend who’s a professional chef into my kitchen for a second opinion. Here’s why this version wins every time:
- Quick & Easy: From start to finish, you’re looking at about 35 minutes. Mix, roll, bake. That’s it. Perfect for when guests are on their way and you need something hot and amazing, fast.
- Simple Ingredients: No trips to specialty stores. No hunting down obscure spices. You probably have most of this in your pantry right now. The sausage, cheese, and stuffing mix are all standard grocery store finds.
- Perfect for Hosting: These are made for gatherings. They hold their shape, they stay warm longer than you’d expect, and they look like you spent way more effort than you actually did. Your guests will think you’re a kitchen wizard.
- Crowd-Pleaser: I’ve served these to kids who “don’t like stuffing,” adults who “don’t eat carbs,” and my uncle who claims he’s “not a sausage person.” They all went back for seconds. Thirds, in my uncle’s case.
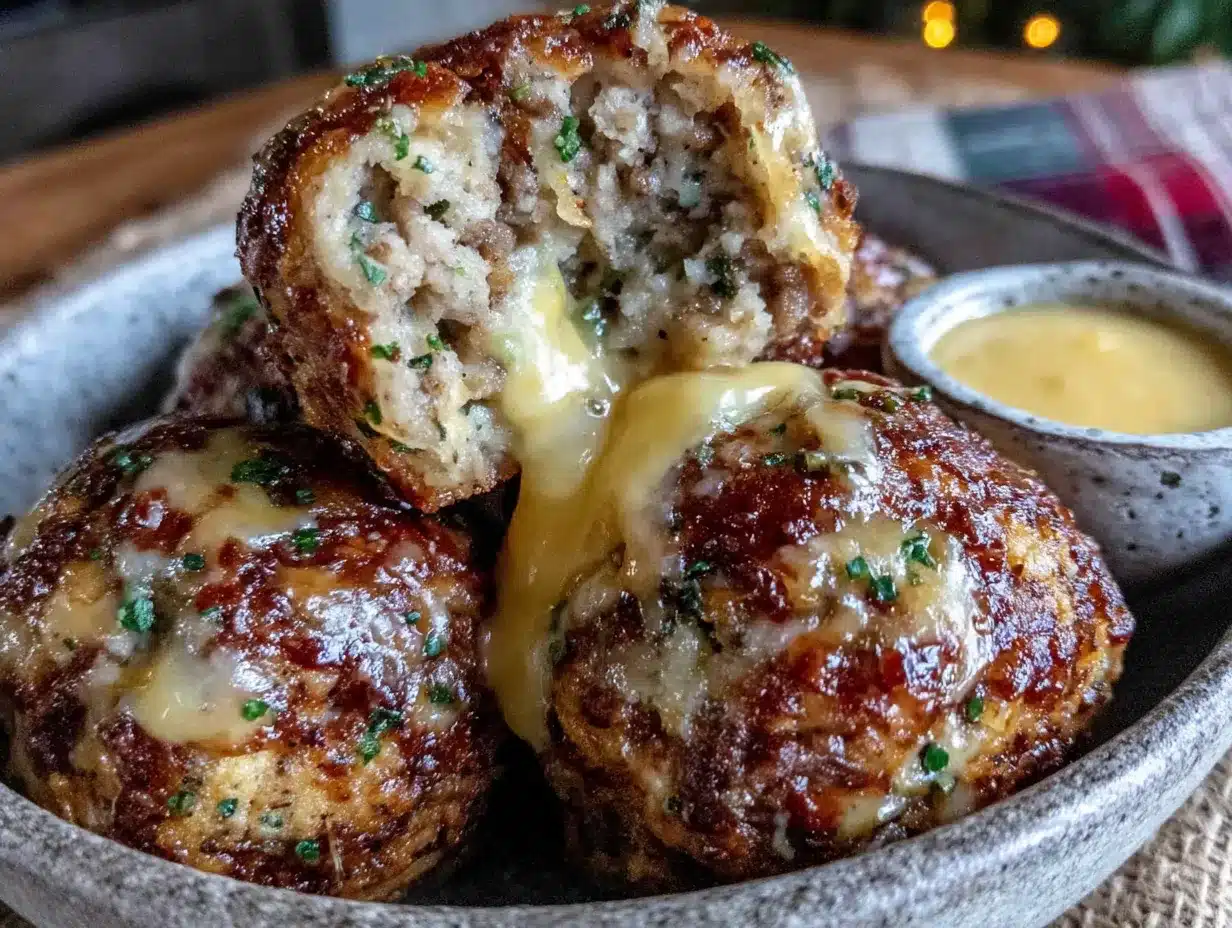
- Unbelievably Delicious: The outside gets this beautiful golden-brown crust while the inside stays tender, juicy, and packed with cheesy, savory flavor. It’s the texture combo that keeps people hovering around the serving platter.
What makes this recipe different from every other stuffing ball recipe out there is the ratio. I spent a lot of late nights figuring out the perfect balance of moisture to binder so these don’t dry out or fall apart. Plus, I use a specific cheese blend that melts at just the right temperature, creating pockets of gooey goodness in every bite. This isn’t just another version—it’s the version. The one you’ll pull out for Thanksgiving, Christmas, game day, and every random Tuesday when you want to impress someone.
This recipe is the kind that makes you close your eyes after the first bite. It’s comfort food reimagined—faster, easier, but with the same soul-soothing satisfaction. Perfect for impressing guests without stress, or turning a simple get-together into something memorable.
What Ingredients You Will Need
This recipe uses simple, straightforward ingredients to deliver bold flavor and satisfying texture without the fuss. Most of these are pantry staples, and the ones that aren’t are easy to find at any grocery store. Here’s what you’ll need and why each one matters:
For the Stuffing Balls
- 1 pound ground pork sausage (I prefer Jimmy Dean’s regular or mild—it has the perfect fat content for keeping these moist. If you like a little heat, go for the hot version.)
- 1 box (6 ounces) Stove Top stuffing mix, chicken flavor (This is the shortcut that makes these so easy. The seasoning blend is already perfect. Don’t use the “homestyle” version—it’s too coarse.)
- 1 ½ cups shredded sharp cheddar cheese (Buy a block and shred it yourself. Pre-shredded cheese has anti-caking agents that prevent it from melting as smoothly. Trust me on this.)
- ½ cup grated Parmesan cheese (The kind in the green can works fine here, but freshly grated adds even more nutty flavor. I use it when I’m feeling fancy.)
- ¾ cup chicken broth (Low-sodium is best so you can control the salt level. The stuffing mix and sausage already have plenty of sodium.)
- 2 large eggs, lightly beaten (These are the glue that holds everything together. Make sure they’re at room temperature so they incorporate evenly.)
- 2 tablespoons unsalted butter, melted (Adds richness and helps with browning. Don’t skip this—it makes a difference.)
- ½ teaspoon garlic powder (Not garlic salt. We’re adding enough salt from other ingredients.)
- ½ teaspoon onion powder (Adds depth without being overpowering. Fresh onion would add too much moisture.)
- ¼ teaspoon black pepper (Freshly ground is always better, but pre-ground works in a pinch.)
- 2 tablespoons fresh parsley, finely chopped (optional) (For color and a fresh pop of flavor. I add it when I’m serving these to company.)
Ingredient Selection Tips
When it comes to the sausage, look for something with a good fat content—around 20-25%. Lean sausage will give you dry stuffing balls, and nobody wants that. If you want to use turkey sausage, add an extra tablespoon of melted butter to compensate for the lower fat.
For the cheese, sharp cheddar gives you the most flavor punch, but you can experiment with other meltable cheeses. A smoked gouda would be incredible, or even a pepper jack if you want extra heat. Just make sure whatever cheese you choose, you shred it yourself.
The stuffing mix is the backbone here. I’ve tried using homemade stuffing crumbs, and honestly, it’s not worth the effort. The boxed mix has the perfect texture and seasoning. Just don’t use the “premium” or “homestyle” versions—they have bigger bread pieces that don’t bind as well.
Equipment Needed
You don’t need a lot of fancy equipment for these cheesy sausage stuffing balls, which is one of the reasons I love this recipe. Here’s what you’ll need:
- Large mixing bowl (Any big bowl works. I use my grandmother’s old ceramic one, but stainless steel or glass is fine.)
- Baking sheet (A standard half-sheet pan works perfectly. Line it with parchment paper for easiest cleanup.)
- Parchment paper (Non-stick foil works too, but parchment gives you the best browning on the bottom.)
- Cookie scoop or tablespoon (A 1.5-tablespoon cookie scoop is my secret weapon for evenly sized balls. If you don’t have one, use a regular tablespoon and your hands.)
- Measuring cups and spoons (For accuracy. I know Margaret doesn’t measure, but the rest of us should.)
- Small bowl (For beating the eggs before adding them to the mixture.)
- Cheese grater (If you’re taking my advice and shredding your own cheese.)
- Cooling rack (Optional, but placing the baked balls on a rack for a few minutes keeps the bottoms from getting soggy.)
If you don’t have a cookie scoop, wet your hands slightly before rolling the balls. The mixture is a little sticky, and damp hands make it much easier to work with. I learned that the hard way after my first batch looked more like sad lumps than perfect spheres.
Preparation Method
Alright, let’s make these cheesy sausage stuffing balls. I’ve broken this down step by step with all the little details that make the difference between good and absolutely irresistible.
- Preheat your oven to 375°F (190°C). Line a baking sheet with parchment paper and set it aside. Getting the oven hot before you start mixing ensures even baking from the moment these go in.
- In a large bowl, combine the dry stuffing mix, shredded cheddar, Parmesan, garlic powder, onion powder, and black pepper. Use a fork or your hands to mix everything together until the cheese is evenly distributed throughout the stuffing mix. This step is important—if you add the wet ingredients first, you’ll end up with clumps of cheese and dry pockets of stuffing.
- In a separate small bowl, beat the eggs lightly. Then add the chicken broth and melted butter, whisking until combined. The eggs should be at room temperature so they incorporate smoothly. Cold eggs can cause the butter to seize up.
- Add the ground sausage to the dry mixture. Use your hands to break it up and distribute it evenly. Yes, use your hands. A spoon won’t give you the same control. Just make sure your hands are clean and you’ve taken off any rings.
- Pour the wet mixture over the sausage and stuffing mixture. Now comes the fun part. Use your hands to mix everything together until it’s fully combined. You want every piece of sausage and every crumb of stuffing to be moistened. This takes about 2-3 minutes of thorough mixing. The mixture should hold together when you squeeze a handful—if it seems too dry, add a tablespoon more broth. If it’s too wet, add a tablespoon more stuffing mix.
- Let the mixture rest for 5 minutes. This is crucial. The stuffing needs time to absorb the liquid. If you skip this step, your balls might be dry in the center. I learned this after my first batch came out with a weird, powdery texture inside.
- Using a cookie scoop or tablespoon, portion the mixture into 1.5-inch balls. Roll them gently between your palms to shape them into smooth spheres. Don’t pack them too tightly—you want them tender, not dense. You should get about 24-28 balls, depending on size.
- Place the balls on the prepared baking sheet, spacing them about 1 inch apart. They don’t spread much, so you can fit them pretty close together. If you’re making a double batch, use two sheets and rotate them halfway through baking.
- Bake for 18-22 minutes, or until the tops are golden brown and the internal temperature reaches 165°F (74°C). The exact time depends on your oven and the size of your balls. At 20 minutes, they should be perfectly cooked—golden on the outside, juicy on the inside. If you like them extra crispy, leave them in for 22 minutes, but watch closely so they don’t burn.
- Remove from the oven and let them rest on the baking sheet for 5 minutes. This allows the cheese to set slightly so they hold their shape when you move them. After 5 minutes, transfer them to a serving platter or a cooling rack if you’re not serving immediately.
- Garnish with fresh parsley if desired, and serve warm. These are best within 30 minutes of coming out of the oven, but they’re still delicious at room temperature.
Cooking Tips & Techniques
After making these cheesy sausage stuffing balls more times than I care to count, I’ve picked up a few tricks that make the process smoother and the results more consistent. Here are the things I wish someone had told me the first time:
Don’t overmix. I know I said to mix thoroughly, but there’s a fine line. Once everything is combined, stop. Overmixing develops the proteins in the sausage and can make the balls tough. You want them tender, not like rubber erasers.
Use a thermometer. I know, I know—it feels fussy. But sausage needs to reach 165°F to be safe, and the only way to know for sure is with an instant-read thermometer. Stick it in the center of the biggest ball. If it’s done, they’re all done.
Make them ahead. Here’s a hosting hack: you can assemble the balls up to 24 hours in advance. Just arrange them on the baking sheet, cover with plastic wrap, and refrigerate. When you’re ready to bake, add 3-5 minutes to the cooking time since they’re starting cold. This is a lifesaver when you’re hosting a party and need to minimize last-minute stress.
Freeze for later. These freeze beautifully. Place the uncooked balls on a baking sheet and freeze until solid, then transfer them to a freezer bag. They’ll keep for up to 3 months. Bake from frozen, adding about 5-7 minutes to the cooking time. I always keep a bag in my freezer for unexpected guests.
Watch your oven. Every oven runs differently. I’ve baked these in three different ovens, and the cooking time varies by up to 5 minutes. Start checking at 18 minutes. You’re looking for deep golden brown, not pale yellow.
The first time I made these, I forgot the eggs. I was halfway through rolling when I realized the mixture wasn’t holding together. I had to dump everything back in the bowl, beat the eggs, and mix again. The balls still turned out fine, but they were a little denser than usual. Lesson learned: read the recipe twice before you start.
Variations & Adaptations
One of the best things about these cheesy sausage stuffing balls is how adaptable they are. Here are some variations I’ve tried and loved:
Spicy Southwest Version: Use hot breakfast sausage, add 1 can (4 ounces) of diced green chiles (drained), and swap the cheddar for pepper jack cheese. The result is a stuffing ball with a kick that’s perfect for game day. I made these for a Super Bowl party and they were gone before halftime.
Turkey and Herb Version: Substitute ground turkey for the pork sausage, add 1 teaspoon dried sage and ½ teaspoon dried thyme to the dry mix, and use a “savory herb” stuffing mix instead of chicken flavor. This version is a little lighter but still packed with flavor. Perfect for Thanksgiving leftovers.
Vegetarian Option: Replace the sausage with 1 cup finely chopped mushrooms (cooked down to remove moisture) and ½ cup cooked lentils. Use vegetable broth instead of chicken broth. The texture is different—a little more delicate—but the flavor is surprisingly meaty. My vegetarian sister-in-law requests these every year.
Gluten-Free Adaptation: Use a gluten-free stuffing mix (I’ve had good luck with the Aleia’s brand) and make sure your sausage is gluten-free. The rest of the ingredients are naturally gluten-free. The texture is slightly crumblier, so handle them gently.
Air Fryer Method: Preheat your air fryer to 375°F (190°C). Arrange the balls in a single layer in the basket (you might need to work in batches). Cook for 10-12 minutes, shaking the basket halfway through. They come out extra crispy on the outside and perfectly tender inside. This is my go-to method when I’m only making a small batch.
I once tried a “breakfast” version with maple sausage and added a tablespoon of maple syrup to the wet ingredients. It was… interesting. Not bad, but definitely not the savory crowd-pleaser I was going for. Stick with the original for parties, save the maple experiment for a lazy Sunday brunch.
Serving & Storage Suggestions
These cheesy sausage stuffing balls are incredibly versatile when it comes to serving. Here’s how I recommend presenting and storing them:
Serving Temperature: Serve them warm, straight from the oven. They’re at their peak within the first 30 minutes. If you’re hosting, time the baking so they come out right as guests arrive. The smell alone will draw people into the kitchen.
Presentation: Arrange them on a large platter, maybe with a small bowl of honey mustard or ranch dressing for dipping. I like to sprinkle a little fresh parsley over the top for color. If you’re feeling fancy, stick a toothpick in each one for easy grabbing. For a holiday party, I’ve arranged them in a wreath shape on a round platter with rosemary sprigs as decoration—it looks stunning.
What to Serve Alongside: These pair beautifully with a crisp green salad or roasted vegetables if you’re serving them as a main course. As an appetizer, they’re great with a cheese board, crudités, or other finger foods. For a full holiday spread, serve them alongside roasted turkey, mashed potatoes, and cranberry sauce.
Storage: Leftover stuffing balls can be stored in an airtight container in the refrigerator for up to 4 days. To reheat, place them on a baking sheet in a 350°F (175°C) oven for 8-10 minutes, or until heated through. The microwave works in a pinch, but the texture won’t be as good—the outside will get soft instead of crispy.
Freezing: Baked stuffing balls freeze well for up to 3 months. Let them cool completely, then place them in a single layer on a baking sheet and freeze until solid. Transfer to a freezer bag. To reheat, bake from frozen at 350°F (175°C) for 12-15 minutes. They taste almost as good as fresh.
One thing I’ve noticed—the flavors actually deepen after a day in the fridge. If you can resist eating them all, leftover stuffing balls make an amazing lunch the next day. I’ve even crumbled them over a salad for a quick, satisfying meal.
Nutritional Information & Benefits
Let’s be honest—these cheesy sausage stuffing balls are a treat, not a health food. But here’s what you need to know nutritionally, based on a serving size of 2 balls (assuming the recipe makes 24 balls total):
| Nutrient | Amount Per Serving (2 balls) |
|---|---|
| Calories | 220 |
| Total Fat | 15g |
| Saturated Fat | 7g |
| Cholesterol | 65mg |
| Sodium | 580mg |
| Total Carbohydrates | 12g |
| Dietary Fiber | 1g |
| Sugars | 2g |
| Protein | 12g |
On the plus side, these do provide a decent amount of protein thanks to the sausage and cheese. The calcium from the cheese is a nice bonus. If you’re watching your sodium, use low-sodium broth and consider reducing the amount of Parmesan (which is quite salty).
For a slightly lighter version, you can use turkey sausage and reduced-fat cheese. The texture will be a little different, but the flavor is still great. I’ve also made these with whole-wheat stuffing mix for a tiny fiber boost.
These are not gluten-free, dairy-free, or low-carb, so keep that in mind if you’re serving guests with dietary restrictions. But for an occasional indulgence? They’re absolutely worth it.
Conclusion
These cheesy sausage stuffing balls have become my go-to appetizer for every gathering, and I honestly can’t imagine hosting without them. They’re the recipe that makes you look like you spent hours in the kitchen when really, you just mixed, rolled, and baked. The combination of savory sausage, melted cheese, and perfectly seasoned stuffing is irresistible—I’ve never seen a platter come back with leftovers.
What I love most about this recipe is how forgiving it is. You can make them ahead, freeze them, adjust the seasonings, swap the cheese—they always turn out delicious. It’s the kind of recipe that builds your confidence in the kitchen because it works every single time.
I’d love to hear how these turn out for you. Did you try any variations? Did they disappear as fast at your party as they do at mine? Drop a comment below and let me know. And if you’re looking for more crowd-pleasing appetizers, check out my crispy garlic chicken bites or my baked brie with honey and walnuts—they’re both perfect for hosting.
Now go preheat that oven. Your guests are going to love you for it.
Frequently Asked Questions
Can I make these cheesy sausage stuffing balls ahead of time?
Absolutely! You can assemble the balls up to 24 hours in advance and refrigerate them on the baking sheet. Just add 3-5 minutes to the baking time since they’re starting cold. You can also freeze them uncooked for up to 3 months.
Can I use a different type of sausage?
Yes, any ground sausage works. Italian sausage (sweet or hot) gives a different flavor profile. Turkey sausage is a lighter option, but add an extra tablespoon of melted butter to keep them moist. Just avoid fully cooked sausage links—you need raw sausage for the binding to work.
Why did my stuffing balls fall apart?
This usually happens for one of three reasons: not enough moisture (add more broth next time), not enough binding (make sure you have enough egg), or not mixing thoroughly enough. The mixture should hold together when you squeeze a handful. If it crumbles, add a little more broth and mix again.
Can I make these in an air fryer?
Yes! Preheat your air fryer to 375°F (190°C) and cook for 10-12 minutes, shaking the basket halfway through. You might need to work in batches depending on the size of your air fryer. They come out extra crispy on the outside.
How do I reheat leftovers without drying them out?
The best way is in the oven at 350°F (175°C) for 8-10 minutes. This restores the crispy exterior without drying out the inside. The microwave works in a pinch, but the texture won’t be as good. If you’re reheating from frozen, add 5-7 minutes to the oven time.
Pin This Recipe!
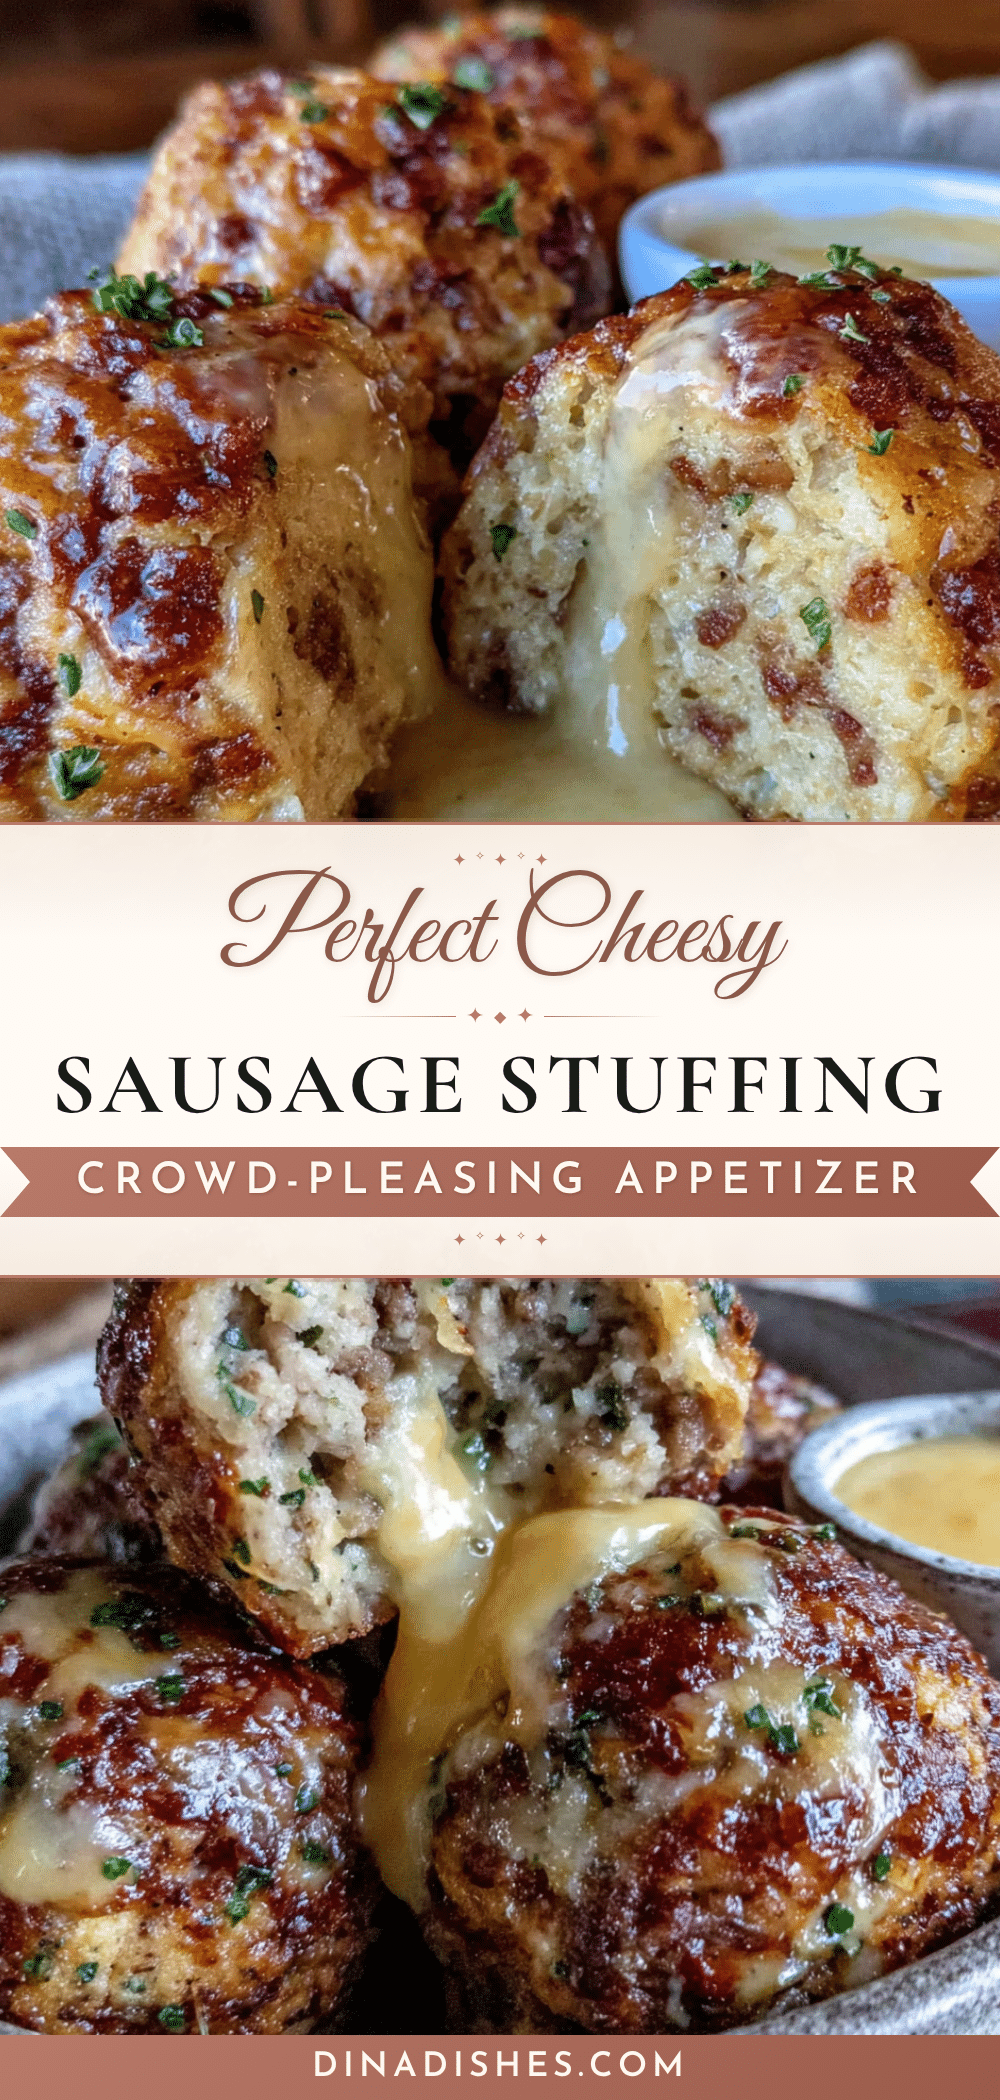
Perfect Cheesy Sausage Stuffing Balls: Easy Appetizer Recipe

These cheesy sausage stuffing balls are the ultimate crowd-pleasing appetizer—easy to make, packed with savory flavor, and perfect for any gathering. With a golden-brown crust and tender, cheesy interior, they disappear fast!
- Prep Time: 15 minutes
- Cook Time: 20 minutes
- Total Time: 35 minutes
- Yield: 24-28 balls (12-14 servings) 1x
- Category: Appetizer
- Cuisine: American
Ingredients
- 1 pound ground pork sausage (Jimmy Dean’s regular or mild recommended)
- 1 box (6 ounces) Stove Top stuffing mix, chicken flavor
- 1 ½ cups shredded sharp cheddar cheese
- ½ cup grated Parmesan cheese
- ¾ cup low-sodium chicken broth
- 2 large eggs, lightly beaten (room temperature)
- 2 tablespoons unsalted butter, melted
- ½ teaspoon garlic powder
- ½ teaspoon onion powder
- ¼ teaspoon black pepper
- 2 tablespoons fresh parsley, finely chopped (optional)
Instructions
- Preheat your oven to 375°F (190°C). Line a baking sheet with parchment paper and set aside.
- In a large bowl, combine the dry stuffing mix, shredded cheddar, Parmesan, garlic powder, onion powder, and black pepper. Mix until the cheese is evenly distributed.
- In a separate small bowl, beat the eggs lightly. Add the chicken broth and melted butter, whisking until combined.
- Add the ground sausage to the dry mixture. Use your hands to break it up and distribute it evenly.
- Pour the wet mixture over the sausage and stuffing mixture. Use your hands to mix everything together until fully combined (about 2-3 minutes). The mixture should hold together when squeezed.
- Let the mixture rest for 5 minutes to allow the stuffing to absorb the liquid.
- Using a cookie scoop or tablespoon, portion the mixture into 1.5-inch balls. Roll gently between your palms to shape into smooth spheres. Do not pack too tightly. You should get about 24-28 balls.
- Place the balls on the prepared baking sheet, spacing them about 1 inch apart.
- Bake for 18-22 minutes, or until the tops are golden brown and the internal temperature reaches 165°F (74°C).
- Remove from the oven and let them rest on the baking sheet for 5 minutes. Transfer to a serving platter or cooling rack.
- Garnish with fresh parsley if desired, and serve warm.
Notes
Don’t overmix to avoid tough balls. Use a thermometer to ensure sausage reaches 165°F. Can be assembled up to 24 hours in advance and refrigerated. Freeze uncooked balls for up to 3 months. For air fryer: cook at 375°F for 10-12 minutes, shaking halfway.
Nutrition
- Serving Size: 2 balls
- Calories: 220
- Sugar: 2
- Sodium: 580
- Fat: 15
- Saturated Fat: 7
- Carbohydrates: 12
- Fiber: 1
- Protein: 12
Keywords: cheesy sausage stuffing balls, stuffing balls, sausage appetizer, holiday appetizer, game day snack, easy appetizer, cheesy sausage balls