There used to be a little catering shop on the corner of Elm and 4th called The Snackery that made the most incredible veggie trays for Halloween parties. When they closed their doors three years ago, I honestly felt a little lost. Their spider web veggie tray wasn’t just vegetables on a plate—it was art. The ranch dip was so creamy and herbaceous that people would hover around it like it was the main event. After twelve tries—and some truly sad-looking webs that looked more like tangled fishing line—I finally cracked the code.
The secret isn’t complicated, and that’s what drove me crazy at first. I kept overthinking it, trying to find some fancy technique that didn’t exist. But let me tell you, the day I nailed that perfect web pattern with the dip in the center, I actually texted a photo to my sister with no explanation. She knew. She called me within thirty seconds, laughing and saying, “You got it, didn’t you?”
This isn’t just another veggie platter with a sad bowl of ranch in the middle. This is the kind of appetizer that makes people stop mid-conversation and point. It’s the centerpiece that says, “I put actual thought into this party,” without requiring you to spend hours in the kitchen. The web is made entirely from vegetables, so it’s naturally healthy and colorful, and the dip is made from scratch with ingredients you probably already have. Maybe you’ve been there—staring at Pinterest boards of elaborate Halloween snacks that look amazing but take all day. This one gives you the wow factor without the stress.
The first time I made it for a Halloween get-together, I accidentally used too much dill in the ranch. My friend Mark took one bite, raised his eyebrows, and said, “This tastes like a pickle farm.” We still joke about it, but now I measure my dill carefully. That’s the thing about this recipe—it’s forgiving. Even when I messed up, people still devoured it. That’s when I knew I had to share it.
Why You’ll Love This Recipe
This spider web veggie tray is the kind of appetizer that does double duty. It looks like you spent hours creating something elaborate, but it comes together in about twenty minutes of active prep time. As someone who has tested this recipe for three different Halloween parties, a Thanksgiving potluck, and one random Tuesday night when I just wanted to feel festive, I can tell you it delivers every single time.
- Quick & Easy: You can assemble the entire tray in under 25 minutes. The dip takes about 5 minutes to whisk together, and the vegetable arrangement is surprisingly simple once you know the pattern.
- Simple Ingredients: No obscure produce or specialty items. Everything comes from a standard grocery store, and you probably already have the ranch ingredients in your fridge.
- Perfect for Parties: This was literally designed for Halloween gatherings, but I’ve served it at football watch parties and birthday dinners with equal success. It’s a conversation starter and a crowd-pleaser.
- Naturally Healthy: All the crunch comes from fresh vegetables, so guests can snack without guilt. The ranch dip uses Greek yogurt, which adds protein and cuts the calories compared to store-bought versions.
- Crowd-Pleaser: I’ve never brought this anywhere without someone asking for the recipe. Kids love the web pattern, and adults appreciate the homemade dip.
What makes this recipe different from every other veggie tray out there is the technique. Instead of just arranging vegetables around a bowl of dip, you actually build the web using thin strips of vegetables that radiate from the center. The dip sits in the middle like a spider’s waiting spot, and the vegetables create the illusion of silken threads. It’s clever without being complicated, and that’s the sweet spot for entertaining.
This recipe isn’t just good—it’s the kind that makes people lean in and say, “Wait, how did you do that?” It’s comfort food reimagined as party art. Perfect for impressing guests without stress, or turning a simple snack into something memorable.
What Ingredients You Will Need
This recipe uses simple, mostly pantry-stable ingredients to create something that looks far more complex than it is. The vegetables are flexible based on what’s in season or what your family likes, but the dip is non-negotiable in my house—it’s what makes people come back for thirds.
For the Ranch Dip
- 1 cup plain Greek yogurt (I prefer Fage 2% for the thickest texture; it holds up better than thinner yogurts)
- 1/2 cup mayonnaise (Duke’s or Hellmann’s work beautifully; avoid Miracle Whip here—it’s too sweet)
- 1 tablespoon fresh lemon juice (about half a lemon; bottled works in a pinch but fresh tastes brighter)
- 1 teaspoon dried dill weed (start with this amount and add more to taste; I accidentally used 2 teaspoons once and it was very… dilly)
- 1/2 teaspoon garlic powder (not garlic salt—you’ll add salt separately)
- 1/2 teaspoon onion powder
- 1/4 teaspoon dried parsley
- 1/4 teaspoon dried chives (optional but adds a nice mild onion flavor)
- Salt and black pepper to taste (I use about 1/4 teaspoon salt and 1/8 teaspoon pepper)
- 1-2 tablespoons milk or buttermilk to thin (only if needed; I usually skip this)
For the Spider Web Veggie Tray
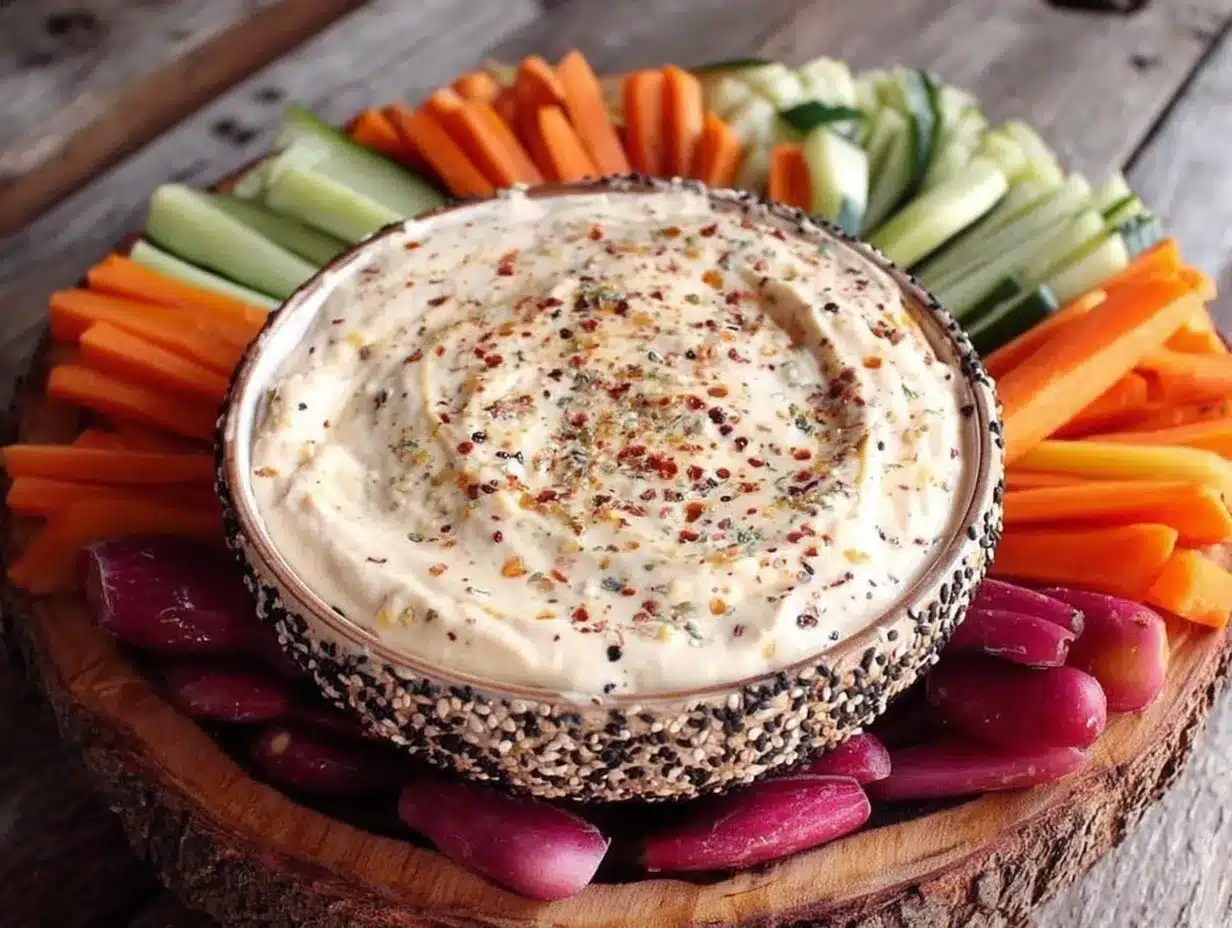
- 1 large round platter or pizza pan (12-14 inches wide; white or light-colored shows the web best)
- 1 cup cherry tomatoes (halved; these become the “spider” in the center)
- 1 large cucumber (sliced into thin rounds; use English cucumber for fewer seeds)
- 2-3 large carrots (peeled and cut into thin ribbons using a vegetable peeler)
- 1 yellow bell pepper (sliced into thin strips; orange or red work too for color variety)
- 1 cup broccoli florets (small pieces; trim the stems flat so they sit nicely)
- 1 cup cauliflower florets (same as broccoli—keep pieces bite-sized)
- 1/2 cup black olives (sliced; these add contrast and look like little spider bodies)
- Fresh spinach or lettuce leaves (for lining the platter; optional but adds nice color)
For the vegetable ribbons, you want them thin enough to bend into gentle curves but thick enough to hold their shape. I use a Y-shaped vegetable peeler for this—it’s faster than a knife and gives you consistent strips. If you don’t have one, a sharp knife works, just go slow and aim for even thickness.
One thing I learned the hard way: don’t prep the vegetables more than a few hours ahead. Cucumber slices release water and get slimy, and carrot ribbons lose their curl. The dip can be made up to three days in advance and actually tastes better after sitting overnight—the flavors meld together beautifully.
Equipment Needed
You don’t need any fancy gadgets for this recipe, which is part of why I love it. Here’s what you’ll need:
- Large round platter or pizza pan: A 12-14 inch round surface is ideal. I use a white porcelain pizza pan I found at a thrift store for $3. A wooden cutting board works too, but the contrast of vegetables against a light background really makes the web pop.
- Vegetable peeler: A Y-shaped peeler gives you the best control for making carrot ribbons. My OXO Good Grips peeler has lasted me five years and still works like new.
- Small mixing bowl: For the ranch dip. Any medium bowl works, but a wide, shallow bowl looks nicer on the platter.
- Whisk or fork: For combining the dip ingredients. A whisk is faster, but a fork works perfectly fine.
- Sharp knife and cutting board: For slicing vegetables. A mandoline slicer is optional but helpful for getting uniform cucumber rounds.
- Small round bowl or ramekin: For the dip in the center of the web. I use a 4-inch white ramekin that nestles perfectly into the vegetable arrangement.
- Paper towels: For drying vegetables after washing. Wet vegetables slide around and make the web pattern messy.
If you don’t have a round platter, a large square baking sheet works fine—just arrange the web in a circular pattern in the center. I’ve even used a large dinner plate in a pinch, though you’ll need to scale down the vegetables slightly.
Preparation Method
- Make the ranch dip first. In a small bowl, combine the Greek yogurt, mayonnaise, lemon juice, dill weed, garlic powder, onion powder, parsley, chives, salt, and pepper. Whisk until smooth and creamy. Taste and adjust seasoning—I usually add a pinch more dill and a crack of black pepper. Cover and refrigerate for at least 30 minutes (or up to 3 days). The flavors really develop as it sits.
- Prepare your vegetables. Wash and dry everything thoroughly. Wet vegetables are slippery and won’t stay in place. Pat them dry with paper towels—this step matters more than you think.
- Make the carrot ribbons. Using your vegetable peeler, peel long, thin strips from the carrots. You want about 15-20 ribbons total. Set them aside on a paper towel. They’ll curl naturally, which is perfect for the web effect.
- Slice the cucumber. Cut the cucumber into thin rounds, about 1/4 inch thick. If using an English cucumber, you don’t need to peel it. For regular cucumbers, I leave the peel on for color and texture.
- Prep the remaining vegetables. Cut the bell pepper into thin strips about 2 inches long. Halve the cherry tomatoes. Slice the olives. Break the broccoli and cauliflower into small, uniform florets.
- Line your platter. If using spinach or lettuce, arrange a single layer of leaves over the entire surface of your platter. This creates a green “base” that makes the vegetables pop. Skip this step if you prefer a cleaner look.
- Place the dip bowl. Set your small bowl or ramekin of ranch dip in the exact center of the platter. This is the anchor point for your entire web.
- Create the web strands. Take your carrot ribbons and lay them out like spokes of a wheel, radiating from the edge of the dip bowl to the outer edge of the platter. Space them evenly—you should have about 8-10 strands. Gently curve each ribbon so they look like natural, flowing threads.
- Add the circular webbing. Using the cucumber rounds, create concentric circles around the dip bowl. Start about 1 inch from the bowl and space each circle about 1 inch apart. Gently tuck the cucumber slices under the carrot ribbons to create the illusion that the web is woven together.
- Fill in the gaps. Arrange the bell pepper strips, broccoli florets, cauliflower florets, and cherry tomatoes in the spaces between the web strands. Distribute them evenly so every section has a variety of colors and textures. Tuck the olive slices in randomly—they look like little spiders crawling on the web.
- Create the spider. Take one extra-large olive or two smaller olives and place them on top of the dip in the center. If you’re feeling creative, cut thin strips of bell pepper for spider legs and arrange them around the olive. This is optional but always gets a laugh.
- Final check. Step back and look at your platter. Adjust any vegetables that look uneven. The web should feel balanced and intentional. If something looks off, just rearrange—it’s vegetables, not surgery.
One thing I learned after my third attempt: don’t overcrowd the platter. You want to see the web pattern clearly, not bury it under a mountain of vegetables. Leave about an inch of space between each vegetable piece so the design is visible. Empty space is your friend here.
Cooking Tips & Techniques
Let me save you some frustration. The first time I made this, I arranged everything too tightly and the web completely disappeared under a pile of broccoli. It looked like a green blob with some sad carrot strings. Here’s what I’ve learned since then:
Work in layers. Start with the largest vegetables (cucumber rounds and carrot ribbons) to establish the web structure, then fill in with smaller pieces. This gives you a framework to build on rather than trying to create a pattern from random pieces.
Keep vegetables dry. I cannot stress this enough. Moisture makes everything slide around and turns your beautiful web into a slippery mess. After washing, spread vegetables on a clean kitchen towel and let them air dry for 10 minutes before arranging.
Make the dip ahead. The ranch actually improves overnight. The dried herbs rehydrate and the flavors meld together in a way that fresh dip just doesn’t match. I always make mine the day before and let it sit covered in the fridge.
Use a template if you’re nervous. Before I got confident with the pattern, I would lightly trace a spider web design onto a piece of parchment paper and place it under the platter as a guide. You can see the lines through a white platter, and it helps you keep the spokes even.
Don’t stress about perfection. I once made this for a party and accidentally used two different sizes of cucumber slices. The web looked slightly lopsided, and you know what? Nobody noticed. Everyone was too busy eating and complimenting the dip. The imperfections make it look handmade and charming.
Temperature matters. Take the dip out of the fridge about 15 minutes before serving. Cold ranch dulls the flavors, and letting it warm slightly brings out the herbs and garlic. Keep the vegetables chilled though—cold veggies are crunchier and more refreshing.
Variations & Adaptations
This recipe is incredibly flexible, which is great because every party has different dietary needs. Here are some variations I’ve tried and loved:
Dairy-Free Ranch: Swap the Greek yogurt for a dairy-free yogurt alternative (I like Kite Hill plain unsweetened) and use vegan mayonnaise. The flavor is slightly tangier but still delicious. I brought this version to a friend’s house who’s lactose intolerant, and she asked for the recipe twice.
Spicy Ranch: Add 1/2 teaspoon of cayenne pepper or a minced jalapeño to the dip. This version was a hit at a football watch party where everyone wanted something with kick. Start with less and add more—you can always increase heat but can’t take it away.
Seasonal Vegetable Swap: In summer, use zucchini ribbons instead of carrots and add fresh corn kernels. In fall, incorporate roasted butternut squash cubes or raw apple slices (dipped in lemon water to prevent browning). Winter calls for more hearty vegetables like jicama sticks and radish slices.
Protein Boost: Add cooked, chilled shrimp arranged around the edges of the web, or include cheese cubes (cheddar or pepper jack) for extra staying power. This turns the appetizer into something that could almost be a light meal.
Kid-Friendly Version: My nephew refuses to eat anything green, so I make a version with only orange, yellow, and white vegetables. Carrot ribbons, yellow bell peppers, cauliflower, and corn kernels. He still calls it “the spider web” and eats twice as many vegetables as he normally would.
Different Dip Options: While the ranch is classic, I’ve also made this with a green goddess dip (herbs, anchovy paste, buttermilk) and a spicy chipotle lime dip. Both work beautifully with the vegetable web concept.
Serving & Storage Suggestions
This platter is designed to be served at room temperature, which makes it perfect for parties where food sits out for a while. Here’s how to handle serving and leftovers:
Serving temperature: Arrange the platter and let it sit at room temperature for about 15 minutes before guests arrive. The dip should be cool but not ice-cold. If you’re serving outside on a warm day, keep the platter in the shade and replenish vegetables as needed.
Presentation tips: Place the platter at eye level or slightly elevated so guests can see the web pattern before they start digging in. I put mine on a cake stand once, and it became the centerpiece of the whole table. Add a small sign that says “Don’t get caught in the web!” for a fun touch.
What to serve alongside: This pairs beautifully with other finger foods like stuffed mushrooms, meatballs, or a cheese board. For drinks, a crisp white wine or a light beer complements the fresh vegetables. If you’re hosting kids, apple cider or sparkling water with lemon slices works great.
Storage instructions: Leftover vegetables can be stored in an airtight container in the refrigerator for up to 2 days. The dip keeps for up to 5 days. Unfortunately, once the vegetables are arranged, they don’t hold up well for the next day—the cucumber gets watery and the carrot ribbons lose their curl. I recommend only making what you’ll eat in one sitting.
Reheating the dip: You don’t need to reheat anything, but if the dip thickens in the fridge, stir in a teaspoon of milk or water to bring it back to the right consistency. Let it sit at room temperature for 10 minutes before serving again.
Flavor development: The dip honestly tastes better on day two. The dried herbs fully rehydrate and the garlic mellows out. I’ve been known to make extra dip just to have it for snacking during the week with regular vegetables.
Nutritional Information & Benefits
This recipe is naturally healthy, which makes it a great option for parties where you want to offer something nutritious alongside the indulgent treats. Here’s an approximate breakdown per serving (based on 8 servings):
| Nutrient | Amount per Serving |
|---|---|
| Calories | 145 |
| Total Fat | 9g |
| Saturated Fat | 2g |
| Cholesterol | 10mg |
| Sodium | 310mg |
| Total Carbohydrates | 12g |
| Dietary Fiber | 3g |
| Sugars | 5g |
| Protein | 6g |
| Vitamin A | 120% DV |
| Vitamin C | 80% DV |
| Calcium | 8% DV |
| Iron | 6% DV |
The Greek yogurt in the ranch provides probiotics and protein, while the colorful vegetables deliver a wide range of vitamins and antioxidants. Carrots are rich in beta-carotene for eye health, bell peppers pack more vitamin C than oranges, and cucumbers are hydrating and low in calories. This is one appetizer you can feel good about serving—and eating.
For those watching their carb intake, this recipe is naturally low-carb and can be made keto-friendly by using full-fat yogurt and mayonnaise. It’s also gluten-free as written, just double-check your mayonnaise brand for any hidden gluten.
Conclusion
This spider web veggie tray with ranch dip is the appetizer that keeps on giving. It looks impressive, tastes fresh and creamy, and actually makes people excited to eat their vegetables. After years of showing up to parties with store-bought veggie trays that everyone ignores, this is the one that gets photographed, shared, and requested again.
I love this recipe because it proves that you don’t need complicated techniques or expensive ingredients to create something memorable. It’s just vegetables arranged with intention and a dip made from pantry staples. That’s the kind of cooking I believe in—accessible, beautiful, and genuinely delicious.
Try this for your next Halloween party, fall gathering, or any occasion where you want to bring something that stands out. Customize the vegetables based on what looks good at the market, adjust the dip to your taste, and don’t be afraid to get creative with the spider in the center. I promise, the first time someone says, “Wait, you made this yourself?” you’ll feel like a kitchen rock star.
Now go make that web! And when you do, come back and tell me how it turned out in the comments. Did you add your own twist? Did the spider get eaten first? I want to hear all about it. Happy Halloween, and happy snacking!
Frequently Asked Questions
Can I make this spider web veggie tray the night before?
You can prepare the dip up to three days in advance and chop the vegetables the night before, but I recommend assembling the platter no more than 2-3 hours before serving. Cucumber slices release water over time, and the carrot ribbons lose their curl if they sit too long. Store chopped vegetables in separate bags in the fridge and arrange them fresh on party day.
What if I don’t have a round platter?
No problem at all! A large square baking sheet, rectangular serving tray, or even a wooden cutting board works perfectly. Just arrange the web in a circular pattern in the center of whatever surface you’re using. I’ve even used a clean pizza box lined with parchment paper for a casual backyard party—it worked surprisingly well.
How do I keep the vegetables from sliding around?
The key is drying your vegetables thoroughly after washing. Use paper towels or a clean kitchen towel to pat everything dry. If you’re still having trouble, arrange a single layer of spinach or lettuce leaves on the platter first—the texture gives the vegetables something to grip onto. Also, make sure your dip bowl has a flat bottom so it stays put.
Can I use store-bought ranch instead of homemade?
You absolutely can, and I won’t judge you for it. The homemade version takes about 5 minutes and tastes noticeably fresher, but a good quality store-bought ranch works in a pinch. If using bottled ranch, look for one that’s thick (not runny) so it stays in the center of the web without spreading. I recommend Hidden Valley or Ken’s Steak House for best results.
What other vegetables work well for the web strands?
Besides carrot ribbons, you can use thin strips of zucchini, yellow squash, or even bell pepper slices for the radiating spokes. For the circular webbing, cucumber rounds are classic, but you can also use radish slices, jicama rounds, or even thin coins of summer squash. The key is using vegetables that are firm enough to hold their shape and light enough in color to show the pattern.
Pin This Recipe!
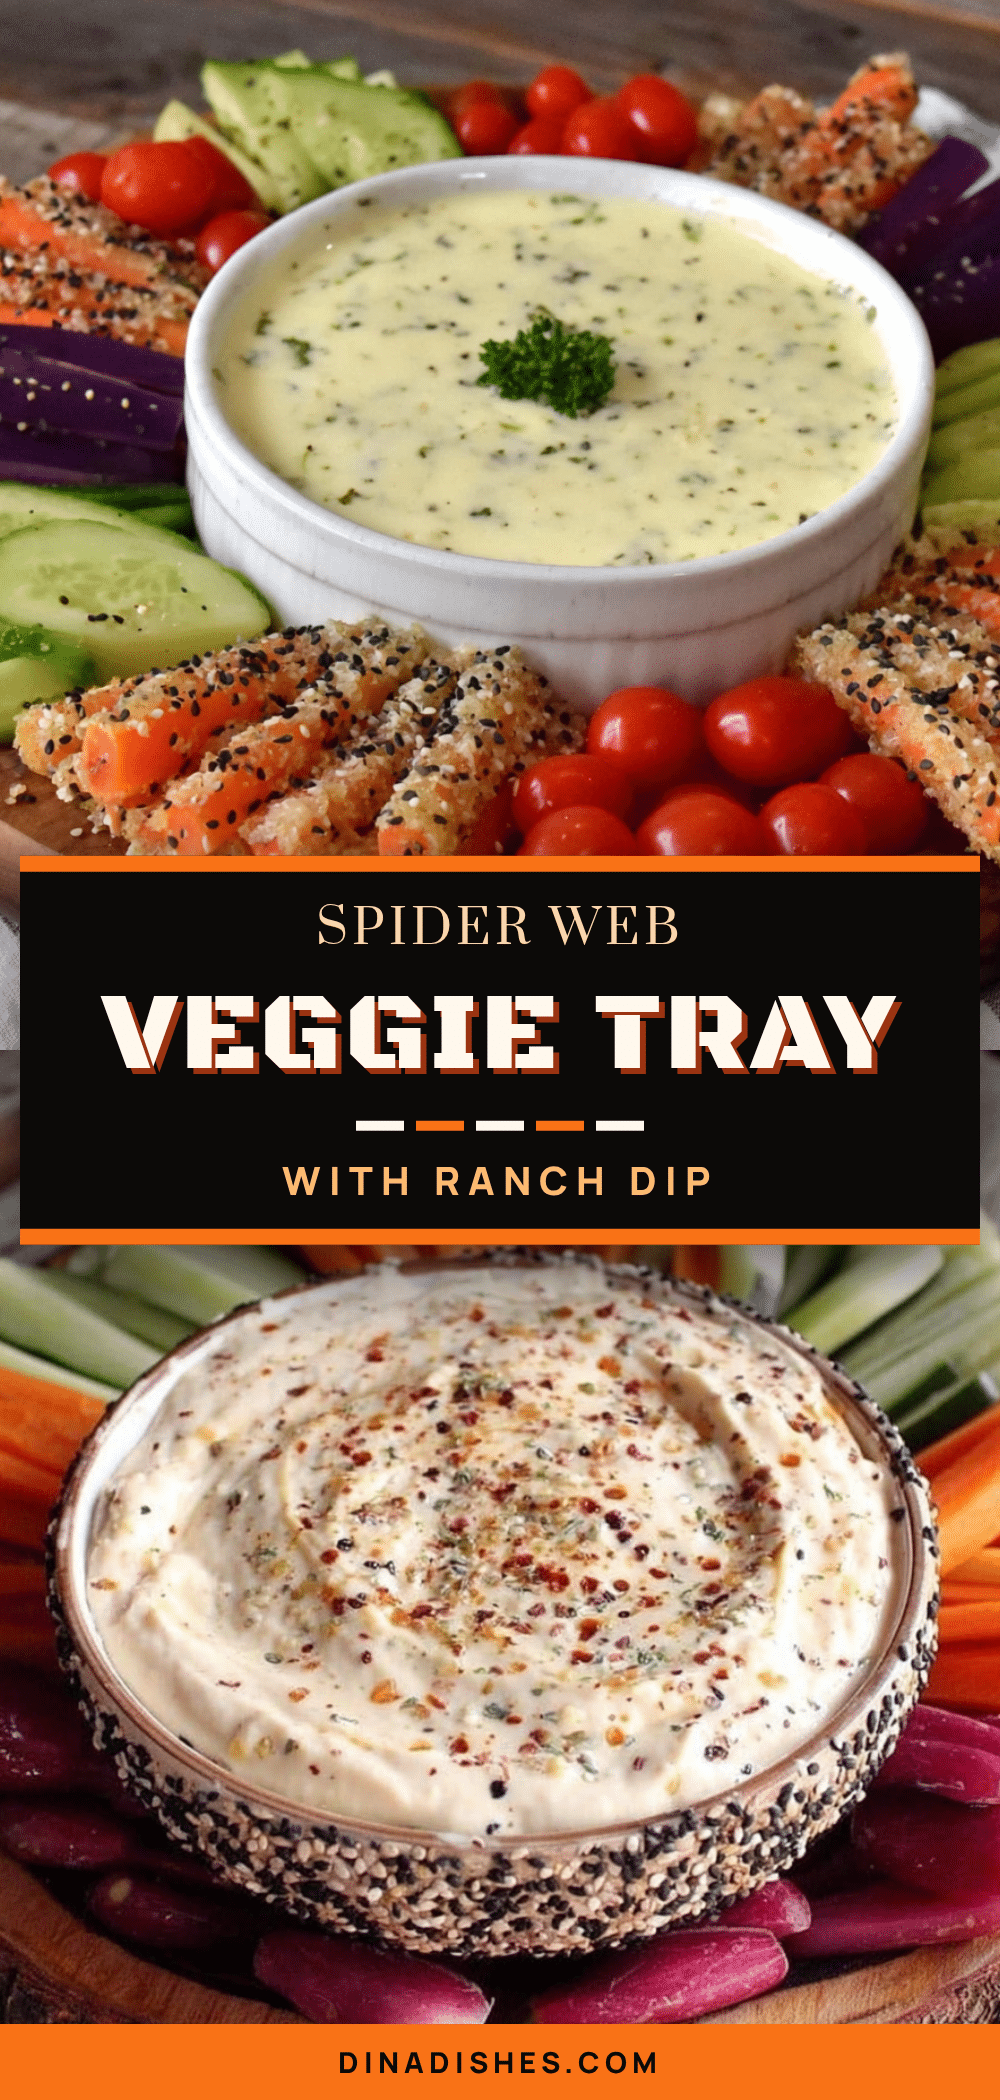
Perfect Spider Web Veggie Tray with Easy Ranch Dip

A stunning Halloween appetizer featuring a spider web design made from fresh vegetables around a creamy homemade ranch dip. Quick to assemble and naturally healthy, this crowd-pleaser is perfect for parties.
- Prep Time: 20 minutes
- Cook Time: 0 minutes
- Total Time: 20 minutes
- Yield: 8 servings 1x
- Category: Appetizer
- Cuisine: American
Ingredients
- 1 cup plain Greek yogurt (preferably Fage 2%)
- 1/2 cup mayonnaise (Duke’s or Hellmann’s)
- 1 tablespoon fresh lemon juice (about half a lemon)
- 1 teaspoon dried dill weed
- 1/2 teaspoon garlic powder
- 1/2 teaspoon onion powder
- 1/4 teaspoon dried parsley
- 1/4 teaspoon dried chives (optional)
- Salt and black pepper to taste (about 1/4 teaspoon salt and 1/8 teaspoon pepper)
- 1–2 tablespoons milk or buttermilk to thin (optional)
- 1 large round platter or pizza pan (12–14 inches wide)
- 1 cup cherry tomatoes (halved)
- 1 large cucumber (sliced into thin rounds; English cucumber preferred)
- 2–3 large carrots (peeled and cut into thin ribbons)
- 1 yellow bell pepper (sliced into thin strips)
- 1 cup broccoli florets (small pieces)
- 1 cup cauliflower florets (small pieces)
- 1/2 cup black olives (sliced)
- Fresh spinach or lettuce leaves (for lining the platter, optional)
Instructions
- Make the ranch dip first. In a small bowl, combine the Greek yogurt, mayonnaise, lemon juice, dill weed, garlic powder, onion powder, parsley, chives, salt, and pepper. Whisk until smooth and creamy. Taste and adjust seasoning. Cover and refrigerate for at least 30 minutes (or up to 3 days).
- Prepare your vegetables. Wash and dry everything thoroughly. Pat them dry with paper towels.
- Make the carrot ribbons. Using a vegetable peeler, peel long, thin strips from the carrots. You want about 15-20 ribbons total. Set them aside on a paper towel.
- Slice the cucumber into thin rounds, about 1/4 inch thick.
- Prep the remaining vegetables. Cut the bell pepper into thin strips about 2 inches long. Halve the cherry tomatoes. Slice the olives. Break the broccoli and cauliflower into small, uniform florets.
- Line your platter. If using spinach or lettuce, arrange a single layer of leaves over the entire surface of your platter.
- Place the dip bowl. Set your small bowl or ramekin of ranch dip in the exact center of the platter.
- Create the web strands. Take your carrot ribbons and lay them out like spokes of a wheel, radiating from the edge of the dip bowl to the outer edge of the platter. Space them evenly—you should have about 8-10 strands. Gently curve each ribbon.
- Add the circular webbing. Using the cucumber rounds, create concentric circles around the dip bowl. Start about 1 inch from the bowl and space each circle about 1 inch apart. Gently tuck the cucumber slices under the carrot ribbons.
- Fill in the gaps. Arrange the bell pepper strips, broccoli florets, cauliflower florets, and cherry tomatoes in the spaces between the web strands. Tuck the olive slices in randomly.
- Create the spider. Take one extra-large olive or two smaller olives and place them on top of the dip in the center. Optionally, cut thin strips of bell pepper for spider legs and arrange them around the olive.
- Final check. Step back and look at your platter. Adjust any vegetables that look uneven.
Notes
The dip can be made up to 3 days in advance and tastes better after sitting overnight. Don’t prep vegetables more than a few hours ahead as cucumber slices release water and carrot ribbons lose their curl. Keep vegetables dry to prevent sliding. For best results, let dip sit at room temperature for 15 minutes before serving.
Nutrition
- Serving Size: 1 serving (about 1 c
- Calories: 145
- Sugar: 5
- Sodium: 310
- Fat: 9
- Saturated Fat: 2
- Carbohydrates: 12
- Fiber: 3
- Protein: 6
Keywords: Halloween appetizer, veggie tray, spider web, ranch dip, party platter, healthy snack, vegetable platter