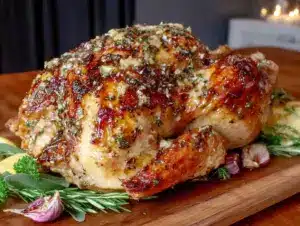
This was supposed to be a slow-roasted, all-day affair. I had the brine ready, the schedule timed to the minute, and a turkey that needed to be in the oven by 7 AM. Then my oven decided it had other plans. It clicked, hummed, and then just… died. At 10 AM on a Wednesday, with a fully defrosted bird and a kitchen full of people expecting dinner by 5, I grabbed my phone and called my neighbor, Mike. “Can I borrow your oven for a few hours?” I asked, already picturing the logistical nightmare. He said yes, but his oven was smaller and ran about 50 degrees hotter than mine. I had about thirty minutes to completely rework my plan. Forget the brine, forget the low-and-slow. I needed something fast, foolproof, and one that would work in an unpredictable oven. I grabbed the butter, threw in every herb I had, and cranked the heat. Honestly, I was bracing for disaster. What came out of that oven was nothing like the plan—and better. The skin was so crispy it shattered when I cut into it, and the meat was juicy in a way that felt almost unfair. I mean, I had to sit down and just stare at it for a minute. Maybe you’ve been there—when a plan falls apart and something better shows up instead. That’s this turkey.
Why You’ll Love This Recipe
Look, I get it. Roasting a whole turkey usually feels like a project that requires a PhD in time management and a second oven. This recipe throws all that stress out the window. It’s built for the cook who wants a show-stopping centerpiece without spending the entire day in the kitchen. You get all the flavor, all the crispy skin, and none of the drama.
- Quick & Easy: This bird is on the table in under two and a half hours, start to finish. No brining, no basting, no complicated steps. It’s the perfect solution for a busy weeknight or a holiday meal when you’re short on oven space and patience.
- Simple Ingredients: You probably have everything you need right now. Butter, garlic, and a handful of dried herbs from your pantry. No fancy truffle oil or imported sea salt required.
- Perfect for Weeknights & Holidays: It’s impressive enough for Thanksgiving but simple enough for a random Tuesday when you’re craving a roast chicken’s bigger, more satisfying cousin.
- Crowd-Pleaser: That crispy skin is the first thing to disappear. Kids fight over it, and adults pretend not to. The meat is so tender and flavorful that even the white meat fans won’t complain about dryness.
- Unbelievably Delicious: The high-heat method creates a magical crust while locking in moisture. The herb butter seeps into every crevice, infusing the meat with garlic and thyme. It’s comfort food at its most satisfying.
What makes this recipe different from the rest? It’s the high-heat method combined with a simple, potent herb butter. No brining, no basting, no flipping. Just a hot oven and a flavorful butter that does all the work. It’s not just another turkey recipe—it’s your best version of a quick, reliable roast.
This recipe is the kind that makes you close your eyes after the first bite. It’s comfort food reimagined—faster, simpler, but with the same soul-soothing satisfaction. Perfect for impressing guests without stress, or turning a simple meal into something memorable. The first time I made it after the oven incident, my husband asked if I had secretly ordered takeout. That’s the kind of reaction you’re after.
What Ingredients You Will Need
This recipe uses simple, wholesome ingredients to deliver bold flavor and satisfying texture without the fuss. Most of these are pantry staples, which is exactly what you want when you’re short on time and energy.
- 1 whole turkey (10-12 lbs / 4.5-5.5 kg), thawed if frozen – A smaller bird is key here. It cooks faster and more evenly at high heat. Look for one that’s fresh or fully thawed. I usually grab a 12-pounder from the local grocery store.
- 1/2 cup (1 stick / 113 g) unsalted butter, softened – The base of our magic herb butter. Make sure it’s at room temperature so it spreads easily. You can use salted butter, but adjust the added salt in the recipe.
- 4 cloves garlic, minced – Fresh garlic is non-negotiable here. It adds a pungent, savory depth that powdered garlic just can’t match. I recommend using a microplane for a finer paste.
- 2 tablespoons fresh rosemary, finely chopped – Rosemary brings an earthy, pine-like aroma that pairs beautifully with poultry. If you only have dried, use 2 teaspoons.
- 2 tablespoons fresh thyme leaves – Thyme is a classic turkey herb. It’s subtle but essential. Again, dried works in a pinch—use 2 teaspoons.
- 1 tablespoon fresh sage, finely chopped – Sage adds that slightly peppery, almost floral note that makes turkey taste like Thanksgiving. Dried sage (1 teaspoon) is a fine substitute.
- 1 teaspoon salt – I use kosher salt for its clean flavor and easy pinchability. It helps season the skin and the meat.
- 1/2 teaspoon black pepper, freshly ground – Freshly ground pepper is more aromatic and adds a gentle heat. Pre-ground works, but it’s not the same.
- 1 lemon, halved – This goes inside the cavity. It steams and infuses the meat with a bright, citrusy note that cuts through the richness.
- 1 onion, quartered – Another cavity filler. It adds sweetness and moisture as it roasts.
- 4 sprigs fresh rosemary, thyme, and sage (optional, for the cavity) – If you have extra herbs, toss them in the cavity for even more flavor. No need to chop them.
Ingredient Selection Tips: For the best texture, I recommend using a brand like Land O’Lakes for the butter and Diamond Crystal for the kosher salt. If you’re using a frozen turkey, make sure it’s fully thawed in the refrigerator for 24 hours per 5 pounds. A partially frozen bird will cook unevenly and might not reach a safe internal temperature in time.
Substitution Guidance: You can swap the butter with a high-quality olive oil or a dairy-free butter alternative for a lactose-free option. If you don’t have fresh herbs, dried herbs work—just use one-third of the amount. For a gluten-free version, this recipe is naturally gluten-free as written.
Equipment Needed
You don’t need a professional kitchen to pull this off. Just a few basics that you probably already own.
- Roasting Pan: A sturdy metal or ceramic pan with a rack is ideal. The rack lifts the turkey off the bottom, allowing hot air to circulate and crisp the skin all over. No rack? No problem. You can use a few thick carrot and celery sticks as a makeshift rack.
- Instant-Read Meat Thermometer: This is your best friend. Don’t guess—check. A digital thermometer gives you an accurate reading in seconds. I’ve used a ThermoPro for years, and it’s never let me down.
- Kitchen Twine: For trussing the legs. It helps the turkey cook evenly and keeps the stuffing (if you’re using any) inside. You can also use unflavored dental floss in a pinch.
- Small Bowl: For mixing the herb butter. Any bowl will do.
- Chef’s Knife & Cutting Board: For chopping herbs and prepping the aromatics.
- Pastry Brush (optional): Useful for spreading the butter evenly under the skin, but your clean hands work just as well.
Budget-Friendly Options: If you don’t own a roasting pan, a large, rimmed baking sheet lined with aluminum foil works perfectly. Just be careful of drips. And if you don’t have a meat thermometer, you can check doneness by piercing the thigh—the juices should run clear. But honestly, a thermometer is a worthwhile investment for perfect results every time.
Preparation Method
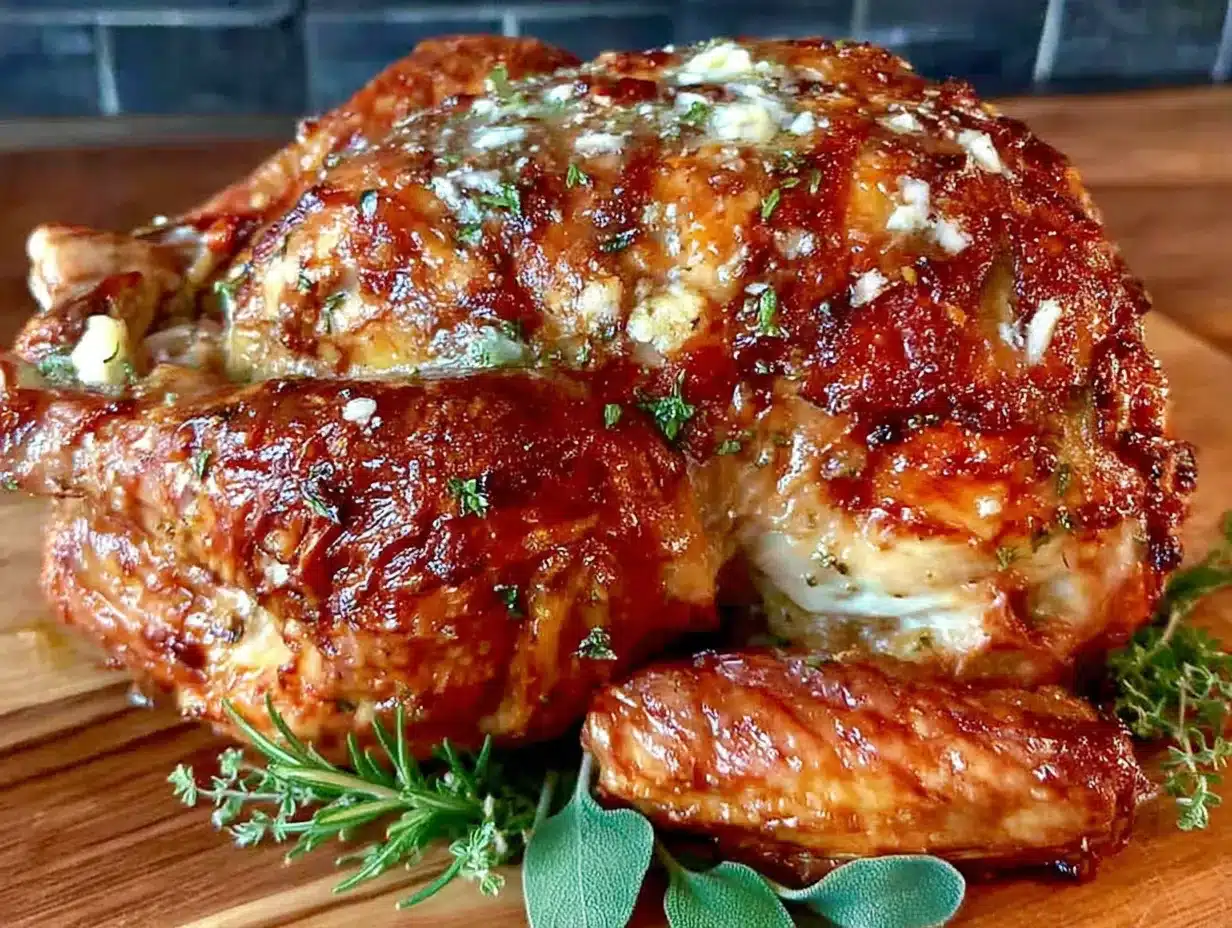
Alright, let’s get cooking. This method is straightforward, but pay attention to a few key steps for that perfect, crispy skin.
- Preheat your oven to 450°F (230°C). Get it screaming hot. This high heat is the secret to the crispy skin. Position a rack in the lower third of the oven to ensure the turkey cooks evenly without the top burning.
- Prepare the turkey. Take your thawed turkey out of its packaging. Remove the giblets and neck from the cavity—save them for stock if you like. Pat the turkey completely dry with paper towels, inside and out. This is crucial. Any moisture on the skin will steam instead of crisp. Let it sit on a cutting board for about 20 minutes to come to room temperature slightly.
- Make the herb butter. In a small bowl, combine the softened butter, minced garlic, chopped rosemary, thyme, sage, salt, and pepper. Mix until everything is evenly distributed. It should look like a fragrant, slightly chunky paste. Taste a tiny bit—it should be well-seasoned.
- Apply the herb butter. Gently loosen the skin of the turkey breast. Use your fingers to carefully separate the skin from the meat, working from the neck end down toward the legs. Be gentle—you don’t want to tear the skin. Spoon about two-thirds of the herb butter under the skin, spreading it evenly over the breast meat. Rub the remaining butter all over the outside of the turkey, including the legs and wings. Don’t forget the underside.
- Stuff the cavity. Place the halved lemon, quartered onion, and any extra herb sprigs inside the turkey cavity. This adds moisture and flavor from the inside out. Don’t overstuff—you want air to circulate.
- Truss the turkey. Tie the legs together with kitchen twine. This helps the turkey cook evenly and keeps the aromatics inside. Tuck the wing tips under the body of the bird to prevent them from burning.
- Place in the roasting pan. Set the turkey breast-side up on the rack in your roasting pan. If you don’t have a rack, place it directly on the pan, but be prepared for the bottom to be a bit less crispy.
- Roast at 450°F for 30 minutes. This initial blast of high heat starts the crisping process. Don’t open the oven door during this time—you’ll let all the heat out.
- Reduce heat to 350°F (175°C). After 30 minutes, reduce the oven temperature without opening the door (if possible). Continue roasting for another 1 hour to 1 hour 15 minutes, or until the internal temperature reaches 165°F (74°C) in the thickest part of the thigh, not touching the bone. The total cooking time for a 12-pound bird is about 1.5 to 1.75 hours.
- Check for doneness. Start checking the temperature about 15 minutes before you think it’ll be done. Insert the thermometer into the inner thigh, near the breast. It should read 165°F (74°C). If the skin is getting too dark but the meat isn’t done, tent the turkey loosely with aluminum foil.
- Rest the turkey. Once it’s done, carefully transfer the turkey to a cutting board. Let it rest for at least 20-30 minutes before carving. This is non-negotiable. The juices need time to redistribute, ensuring moist meat. Don’t skip this step—I learned this the hard way when I carved a bird too early and ended up with a pool of juice on the cutting board and dry meat on the plate.
- Carve and serve. After resting, carve the turkey and serve immediately. The skin will be shatteringly crisp, and the meat will be tender and juicy.
Cooking Tips & Techniques
Let me share a few things I’ve learned the hard way so you don’t have to.
The Drying Step is Everything. I cannot stress this enough. Patting the turkey dry is the single most important step for crispy skin. If you have time, let it sit uncovered in the refrigerator for a few hours or even overnight. This dries out the skin even more, leading to an incredibly crispy result. The first time I skipped this, I ended up with soggy, rubbery skin. Never again.
Don’t Overcrowd the Pan. If you’re roasting vegetables alongside the turkey (which I often do), make sure they’re in a single layer. Too many veggies will release steam and prevent the skin from crisping. I usually roast the veggies on a separate sheet pan for the last 30 minutes.
The Butter Under the Skin Trick. This is the secret to juicy breast meat. The butter melts and bastes the meat from the inside, keeping it incredibly moist. Don’t skip this step. I once tried just rubbing butter on the outside, and the breast meat was noticeably drier.
My Biggest Failure: I once forgot to take the giblets out of the cavity. The turkey was roasting away, and I kept smelling something off. I pulled it out, searched everywhere, and finally found the bag of giblets, still inside, now partially cooked. The turkey was fine, but I felt like a complete fool. So, double-check that cavity!
Timing and Multitasking: While the turkey is roasting, you have plenty of time to make sides. I usually prep a simple gravy with the pan drippings, roast some potatoes, and steam some green beans. The turkey’s resting time is perfect for finishing up last-minute dishes.
Consistency Tip: Every oven is different. The first time you make this, check the temperature early. If your oven runs hot, you might need to reduce the initial high-heat time to 20 minutes. Keep an eye on the skin color—it should be a deep golden brown, not black.
Variations & Adaptations
This recipe is a great base, and it’s easy to tweak based on what you have or what you’re craving.
- Citrus & Herb Variation: Swap the lemon for an orange or a grapefruit. Add a teaspoon of orange zest to the herb butter. The citrus adds a sweet, bright note that’s fantastic with the herbs. I tried this one Christmas, and it was a huge hit.
- Spicy Herb Butter: Add 1/2 teaspoon of red pepper flakes or a minced chipotle pepper in adobo sauce to the butter. It gives the turkey a subtle, smoky heat that’s unexpected and delicious. This is my go-to when I want a little kick.
- Dairy-Free Adaptation: Use a high-quality vegan butter or olive oil in place of the butter. The texture will be slightly different—the skin might not be quite as shatteringly crisp—but the flavor will still be fantastic. Make sure the vegan butter is firm enough to spread.
- Garlic & Herb Paste: If you’re out of butter, make a paste with olive oil, garlic, herbs, salt, and pepper. Rub it all over and under the skin. It won’t be as rich, but it’s still incredibly flavorful and a great option for a lighter meal.
- Different Poultry: This method works beautifully for a large chicken (5-6 lbs) or a couple of Cornish hens. Adjust the cooking time accordingly. A 5-pound chicken might only need 45 minutes to an hour total.
Serving & Storage Suggestions
This turkey is best served hot, right after its rest. The skin is at its peak crispiness, and the meat is perfectly tender.
Serving: Carve the turkey and arrange it on a warm platter. Garnish with fresh herbs and lemon slices for a beautiful presentation. It pairs perfectly with classic sides like mashed potatoes, roasted vegetables, and a simple green salad. A rich, pan gravy made from the drippings is the perfect finishing touch. I love serving it with a side of cranberry orange relish for a burst of acidity.
Storage: Leftover turkey can be stored in an airtight container in the refrigerator for up to 3-4 days. The skin will lose its crispiness, but the meat will remain moist and flavorful. For longer storage, you can freeze the carved meat for up to 3 months. Wrap it tightly in plastic wrap and then in foil to prevent freezer burn.
Reheating: The best way to reheat leftover turkey is to avoid the microwave, which will dry it out. Instead, place the slices in a single layer in a baking dish, add a splash of chicken broth or gravy, and cover with foil. Reheat in a 300°F (150°C) oven for about 10-15 minutes, or until warmed through. For a quick lunch, I sometimes shred the cold turkey and toss it into a salad or a leftover turkey sandwich.
Flavor Development: The flavors of the herb butter actually deepen overnight. Cold turkey sandwiches the next day are amazing. The herbs have had time to meld, and the meat is even more flavorful. It’s one of the best parts of making a whole turkey.
Nutritional Information & Benefits
While this is a rich, indulgent dish, it also offers some nutritional benefits when enjoyed in moderation.
Estimated Nutritional Values (per 3.5 oz / 100g serving of white meat without skin):
| Nutrient | Amount |
|---|---|
| Calories | 165 kcal |
| Protein | 31 g |
| Fat | 3.5 g |
| Saturated Fat | 1 g |
| Carbohydrates | 0 g |
| Sodium | 70 mg |
Health Benefits: Turkey is a fantastic source of lean protein, which is essential for muscle building and repair. It’s also rich in B vitamins, particularly B6 and B12, which support energy metabolism and brain function. The herbs in the butter—rosemary, thyme, and sage—are packed with antioxidants and have anti-inflammatory properties. Garlic is known for its immune-boosting benefits.
Dietary Considerations: This recipe is naturally gluten-free, low-carb, and keto-friendly (especially if you skip the skin or use olive oil). It’s also a great source of protein for those on a high-protein diet. The main allergen is dairy from the butter, but this is easily substituted. From a personal wellness perspective, I love that this recipe allows me to enjoy a comforting, family-style meal without feeling like I’ve completely derailed my healthy eating habits.
Conclusion
This Quick Herb Butter Roasted Turkey is proof that you don’t need a complicated recipe or a full day in the kitchen to create something truly special. It’s fast, it’s foolproof, and it delivers that perfect, crispy skin and juicy meat that everyone craves. Whether it’s for a holiday dinner or a weeknight meal that feels like a celebration, this recipe is a keeper. I honestly look forward to making it every time I get the chance. It reminds me that sometimes the best things come from unexpected detours.
I’d love to hear how it turns out for you! Did you try any variations? Did your family fight over the crispy skin like mine does? Drop a comment below and let me know. And if you loved it, please share it with a friend who needs a stress-free turkey recipe in their life. Happy cooking!
Frequently Asked Questions
Can I use a larger turkey for this recipe?
This method works best for turkeys between 10-14 pounds. A larger bird (15+ pounds) will take much longer to cook through at this high heat, and the outside might burn before the inside is done. For larger birds, stick to a traditional low-and-slow method.
Do I need to baste the turkey?
Nope! That’s the beauty of this recipe. The herb butter under the skin keeps the meat moist, and the high heat creates a crispy crust without needing to open the oven door. Basting actually releases heat and can make the skin soggy, so skip it.
How do I know when the turkey is done without a thermometer?
While a thermometer is best, you can check by piercing the thickest part of the thigh with a knife. The juices should run clear, not pink. The drumsticks should also move easily in their sockets. But honestly, a $10 thermometer is worth it for peace of mind.
Can I prepare the herb butter ahead of time?
Absolutely! You can mix the herb butter up to 3 days in advance and store it in the refrigerator. Let it come to room temperature before using so it spreads easily. You can also freeze it for up to 3 months.
My skin isn’t crispy. What went wrong?
The most common culprit is moisture. Make sure you pat the turkey completely dry, inside and out, before applying the butter. Also, don’t overcrowd the pan, and resist the urge to open the oven door during the first 30 minutes of cooking. If your oven runs cool, you might need to increase the initial high-heat time slightly.
Pin This Recipe!