Let me tell you, this graveyard snack board is the kind of recipe that makes you feel like a Halloween hero without breaking a sweat. I mean, it’s perfect for those nights when you want something festive but don’t have hours to spend in the kitchen. Here’s why this one’s a keeper:
- Quick & Easy: Comes together in under 20 minutes, seriously. You can throw this together while the kids are still arguing over costumes.
- Simple Ingredients: No fancy grocery trips needed. Most of this stuff is probably already in your pantry or snack drawer.
- Perfect for Halloween Parties: Great for classroom parties, pre-trick-or-treat snacking, or just a fun Friday night movie marathon.
- Crowd-Pleaser: Kids and adults both go crazy for it. I’ve watched grown-ups pick around the “graveyard” to grab the chocolate-covered pretzels.
- Unbelievably Fun: The texture and flavor combo is next-level comfort food meets spooky season.
What makes this board different from all those other Halloween snack boards out there? It’s the little details that make it feel special without being fussy. The way the pretzel “tombstones” stand up in the chocolate “dirt” gives it that graveyard vibe that actually works. And the best part? You can customize it with whatever snacks your family loves most.
Honestly, this recipe isnt just good—it is the kind that makes you close your eyes after the first bite. It’s Halloween snacking reimagined—faster, easier, but with the same soul-soothing satisfaction. Perfect for impressing guests without stress, or turning a simple Tuesday night into something memorable.
What Ingredients You Will Need
This recipe uses simple, snack-aisle ingredients to deliver that spooky graveyard vibe without the fuss. Most of these are pantry staples or easy to find at any grocery store.
For the Graveyard Base
- Chocolate pudding cups (4-6 individual cups, or one large batch of homemade pudding) — this creates the “dirt” base
- Chocolate sandwich cookies (like Oreos, about 1 cup crushed) — I recommend Oreo brand for the best dark “dirt” texture
- Chocolate-covered pretzels (about 1 cup) — these become your tombstones; look for the thicker ones that stand up better
- Green frosting or decorating gel (to write “RIP” on the tombstones) — Wilton brand works great
For the Snack Mix Elements
- Pretzel sticks (about 1 cup) — these become the fence around the graveyard
- Pumpkin-shaped candy corn (about 1/2 cup) — adds that fall color pop (adds seasonal charm)
- Ghost-shaped marshmallows (about 1 cup) — if you can find them; regular marshmallows work too
- Halloween M&Ms (about 1/2 cup) — the orange and purple ones look great
- Roasted and salted pumpkin seeds (about 1/2 cup) — adds crunch and fits the theme
- Dried cranberries or cherries (about 1/4 cup) — looks like little “blood drops” if you’re going for creepy
For the Board Assembly
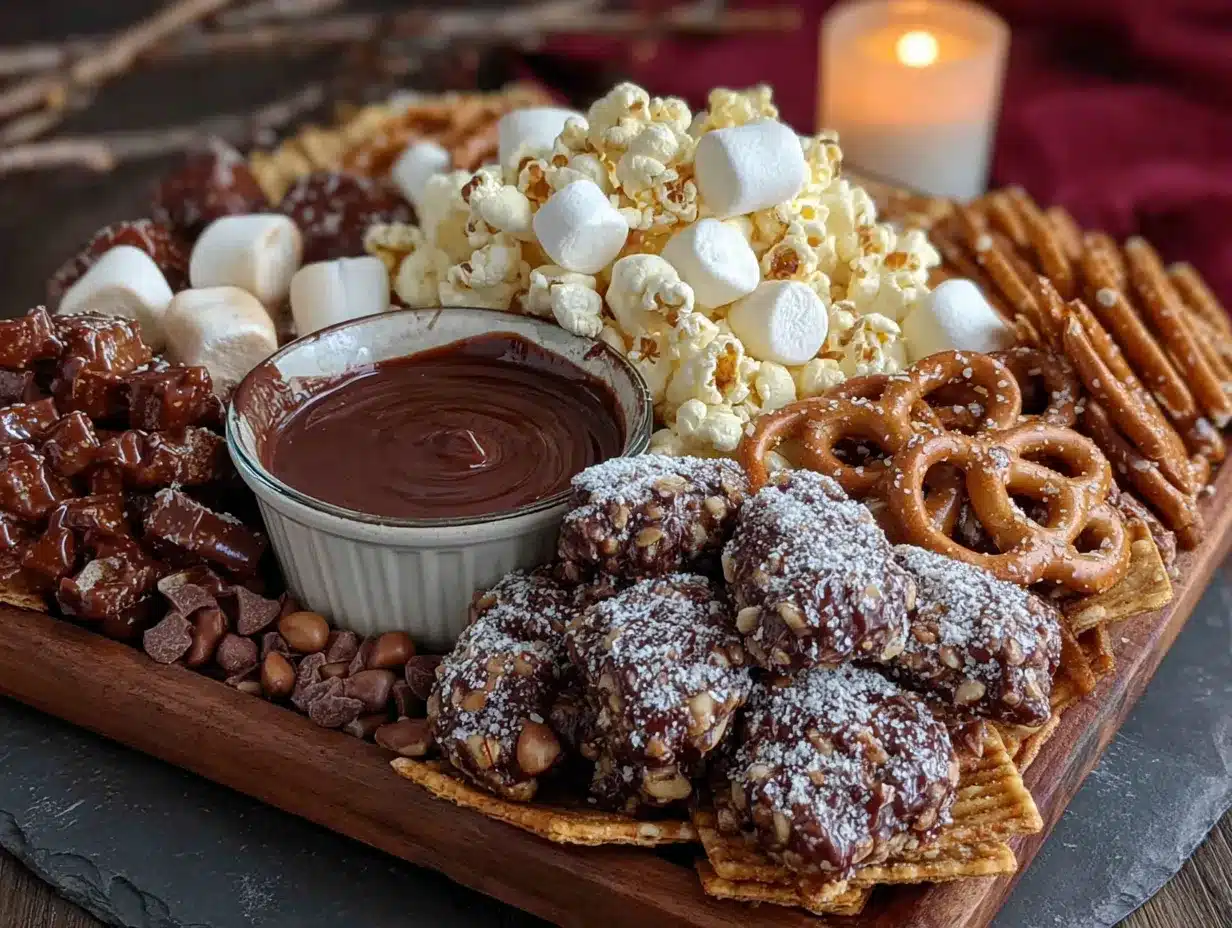
- Large wooden cutting board or serving platter (at least 12×16 inches) — a rimmed baking sheet works in a pinch
- Small bowls or ramekins (2-3) — for holding the pudding and any wetter ingredients
- Toy skeleton hands or plastic spiders (optional but fun) — for decoration
If you can’t find ghost-shaped marshmallows, just use regular ones and draw little faces with a food-safe marker. For a dairy-free option, use coconut milk chocolate pudding and dairy-free chocolate cookies. I’ve also swapped the chocolate-covered pretzels for plain ones when I couldn’t find them—still works, just less spooky-looking.
Equipment Needed
You don’t need much for this one, which is honestly my favorite part. Here’s what you’ll need:
- Large wooden cutting board or serving platter — I use a 14×20 inch board I found at a thrift store for $5. A rimmed baking sheet works just as well.
- Small bowls or ramekins (2-3) — for holding the pudding cups and any loose ingredients
- Ziploc bag or rolling pin — for crushing the cookies into “dirt” without making a huge mess
- Small piping bag or ziploc bag — for writing “RIP” on the tombstones with frosting
- Sharp knife or kitchen shears — for cutting any marshmallows or pretzels if needed
- Measuring cups and spoons — though honestly, I eyeball most of it now
If you don’t have a piping bag, just snip a tiny corner off a ziploc bag—works like a charm. And if you’re using a baking sheet, the rim actually helps keep everything contained, which is nice for this kind of board.
Preparation Method
Alright, let’s get to the fun part. Here’s how to build your spooky graveyard snack board step by step.
Step 1: Crush the Cookies (5 minutes)
Place the chocolate sandwich cookies in a ziploc bag and seal it tight. Use a rolling pin or the bottom of a heavy glass to crush them into fine crumbs. You want it to look like dirt—some bigger pieces are fine, they add texture. Set aside about 2 tablespoons for later garnish.
Pro tip: If you’re using a food processor, just pulse a few times. Don’t overdo it or you’ll get cookie butter instead of dirt. Trust me, I learned that the hard way.
Step 2: Prepare the Tombstones (5 minutes)
Take the chocolate-covered pretzels and arrange them on a small plate. Using the green frosting or decorating gel, write “RIP” on each one. You can also write “BOO” or “SCARY” if you’re feeling creative. Let them sit for a few minutes so the frosting sets.
Personal note: I always mess up the first one. Keep a few extra pretzels handy for practice. My handwriting looks like a spider crawled through frosting, but the kids love it anyway.
Step 3: Set Up the Pudding Base (3 minutes)
If using individual pudding cups, open them and place them on the board where you want the graveyard to be. If using a large batch, spoon the pudding into a small bowl or directly onto the board in a rectangular shape. The pudding should be about 1/2 inch thick.
Sensory cue: The pudding should look dark and glossy, like freshly turned soil. If it’s too runny, it won’t hold the tombstones upright.
Step 4: Add the “Dirt” Layer (2 minutes)
Sprinkle the crushed cookies over the pudding base, covering it completely. Press down gently so the crumbs stick to the pudding. This creates the graveyard dirt. Save a pinch of crumbs for the final touch.
Step 5: Arrange the Tombstones and Fence (3 minutes)
Gently press the chocolate-covered pretzel tombstones into the dirt at different angles—some straight, some leaning slightly. Then take the pretzel sticks and arrange them in a line around the graveyard to create a fence. Break a few in half for the corners.
Troubleshooting tip: If your tombstones keep falling over, make a small dent in the pudding with your finger first, then press the pretzel in. The extra surface area helps them stay upright.
Step 6: Add the Snack Mix Elements (5 minutes)
Now the fun part—fill in the rest of the board. Arrange the ghost marshmallows around the graveyard like little spirits floating by. Scatter the pumpkin candy corn and Halloween M&Ms in clusters. Add the pumpkin seeds and dried cranberries in small piles. Tuck the plastic spiders or skeleton hands in between the snacks for that extra spooky touch.
Visual cue: You want the board to look full but not crowded. Leave a little space between the graveyard and the other snacks so the board feels intentional, not just dumped.
Step 7: Final Touch (1 minute)
Sprinkle that reserved cookie crumb dust over the whole board like a light dusting of “dirt.” This ties everything together and makes it feel cohesive.
Cooking Tips & Techniques
I’ve made this board about a dozen times now, and let me tell you, I’ve learned a few things the hard way. Here are my best tips for nailing it every time.
Don’t overthink the tombstones. I spent way too long trying to make perfect letters the first time. Kids don’t care if your “RIP” looks like a kindergartner wrote it—actually, they might like it better that way. Just go for it.
Keep the pudding cold. If you’re making this ahead, keep the pudding cups in the fridge until you’re ready to assemble. Warm pudding won’t hold the cookie crumbs properly, and nobody wants a soupy graveyard.
Use a rimmed board or baking sheet. I learned this one the messy way. A flat cutting board works, but things tend to slide off the edges. A rimmed baking sheet keeps everything contained, especially if kids are reaching for snacks.
Make it a build-your-own activity. One time I set out all the ingredients separately and let the kids assemble their own mini graveyards in small bowls. It was chaos, but the best kind of chaos. They ate way more snacks than usual and had a blast doing it.
Prep the tombstones the night before. If you’re short on time Halloween day, write the “RIP” on the pretzels the night before and let them dry overnight. One less thing to do when you’re rushing around.
Watch out for humidity. If it’s a rainy Halloween, the pretzels might get soggy. I keep a backup bag of plain pretzels just in case. You can always swap them out last minute.
Variations & Adaptations
One of the best things about this board is how easy it is to switch things up. Here are some variations I’ve tried that turned out great.
Dietary Adaptations
Gluten-Free Version: Use gluten-free chocolate sandwich cookies and pretzels. Most candy corn and M&Ms are naturally gluten-free, but double-check the labels. I’ve used the Glutino brand pretzels and they work perfectly.
Dairy-Free Version: Use coconut milk chocolate pudding and dairy-free chocolate cookies. The Enjoy Life brand makes great dairy-free chocolate chips if you want to make your own chocolate-covered pretzels.
Seasonal Twists
Christmas Graveyard: Swap the Halloween M&Ms for red and green ones, use snowflake-shaped marshmallows instead of ghosts, and add crushed candy canes for “snow.”
Thanksgiving Graveyard: Use fall-colored candy corn, add dried cranberries and pumpkin seeds, and use apple cider donuts as the “tombstones” (just cut them into rectangles).
Flavor Variations
Peanut Butter Graveyard: Use peanut butter cookies for the dirt (crushed), peanut butter-filled pretzels for the tombstones, and add Reese’s Pieces to the mix. My kids beg for this version.
White Chocolate Graveyard: Use white chocolate pudding (or vanilla pudding with white food coloring), white chocolate-covered pretzels, and add white chocolate chips to the mix. It looks like a snowy graveyard.
Personal Variation I Tried
Last year, I made a “haunted house” version by adding a small gingerbread house kit in the middle of the board. I decorated it with black icing and placed it behind the graveyard. It was a little extra work, but the kids went absolutely nuts for it. Just a thought if you want to go all out.
Serving & Storage Suggestions
This board is best served at room temperature, right after assembly. The contrast between the cold pudding and the crunchy pretzels is part of the magic. I usually set it out about 15 minutes before guests arrive so everything settles nicely.
Presentation tips: Place the board in the center of the table where everyone can reach it. Add a few tea light candles (battery-operated, please!) around the board for that eerie glow. I also like to scatter a few fake spider webs under the board for extra spooky vibes.
Complementary dishes: This board pairs great with a warm mug of apple cider or hot chocolate. If you’re serving it as part of a bigger spread, try it alongside spider web dip and mummy dogs for a full Halloween meal.
Storage instructions: If you have leftovers (unlikely, but possible), separate the pudding from the dry snacks. The pudding keeps in the fridge for 2-3 days, and the dry snacks can be stored in an airtight container at room temperature for up to a week.
Reheating: You don’t really reheat this one, but if the pretzels get soft, you can crisp them up in a 300°F oven for 5 minutes. Just let them cool before putting them back on the board.
How flavors develop: Honestly, this board is best fresh. The pretzels start to soften after about an hour from the humidity in the air. If you’re serving it at a party, assemble it right before guests arrive for the best texture.
Nutritional Information & Benefits
Let’s be real—this is a treat, not a health food. But here’s a rough estimate per serving (based on 8 servings from the full board):
| Nutrient | Amount Per Serving |
|---|---|
| Calories | 280-320 |
| Total Fat | 12-15g |
| Saturated Fat | 5-7g |
| Carbohydrates | 40-45g |
| Sugar | 25-30g |
| Protein | 4-6g |
| Sodium | 200-250mg |
Health benefits of key ingredients: The pumpkin seeds are actually a good source of magnesium and zinc, which support immune function. Dark chocolate (if you use it) has antioxidants. And the pretzels provide quick energy for all that trick-or-treating.
Dietary considerations: This recipe contains gluten, dairy, and soy depending on your ingredient choices. For a gluten-free version, use gluten-free pretzels and cookies. For a dairy-free version, use coconut milk pudding. Always check labels for potential allergens.
My personal perspective: I don’t believe in labeling foods as “good” or “bad.” Halloween comes once a year, and this board is meant to be fun. Enjoy it, share it with loved ones, and don’t stress about the numbers. Balance is key, and this board brings a lot of joy to the table.
Conclusion
Look, I know there are a million Halloween snack ideas out there. But this quick spooky graveyard snack mix board is the one that keeps me coming back year after year. It’s fast, it’s fun, and it actually looks impressive without requiring any real cooking skills.
The best part? You can customize it based on what your family loves. Don’t like ghost marshmallows? Swap them for something else. Want to add more chocolate? Go for it. This board is forgiving, flexible, and always a hit.
I’d love to hear how yours turns out. Did you add something weird? Did your kids try to eat the plastic spiders? (Mine did.) Drop a comment below and share your creation—I genuinely love seeing how people make this their own.
Happy Halloween, and happy snacking. You’ve got this.
Frequently Asked Questions
Can I make this graveyard snack board ahead of time?
You can prep the tombstones and crush the cookies up to 2 days ahead. But assemble the board no more than 1 hour before serving to keep the pretzels crunchy.
What if I can’t find ghost-shaped marshmallows?
Regular marshmallows work fine. You can draw little ghost faces on them with a food-safe marker, or just leave them plain—they still look cute.
How do I keep the tombstones from falling over?
Make a small dent in the pudding with your finger first, then press the pretzel in. The extra surface area helps them stay upright. You can also use a thicker pudding for more stability.
Can I use homemade pudding instead of store-bought?
Absolutely! Homemade chocolate pudding works great and often has a richer flavor. Just make sure it’s fully set and chilled before you add the cookie crumbs.
What’s the best way to serve this to a crowd?
Set out small plates and let everyone grab their own snacks from the board. If you’re worried about double-dipping, provide small tongs or spoons for each section.
Pin This Recipe!
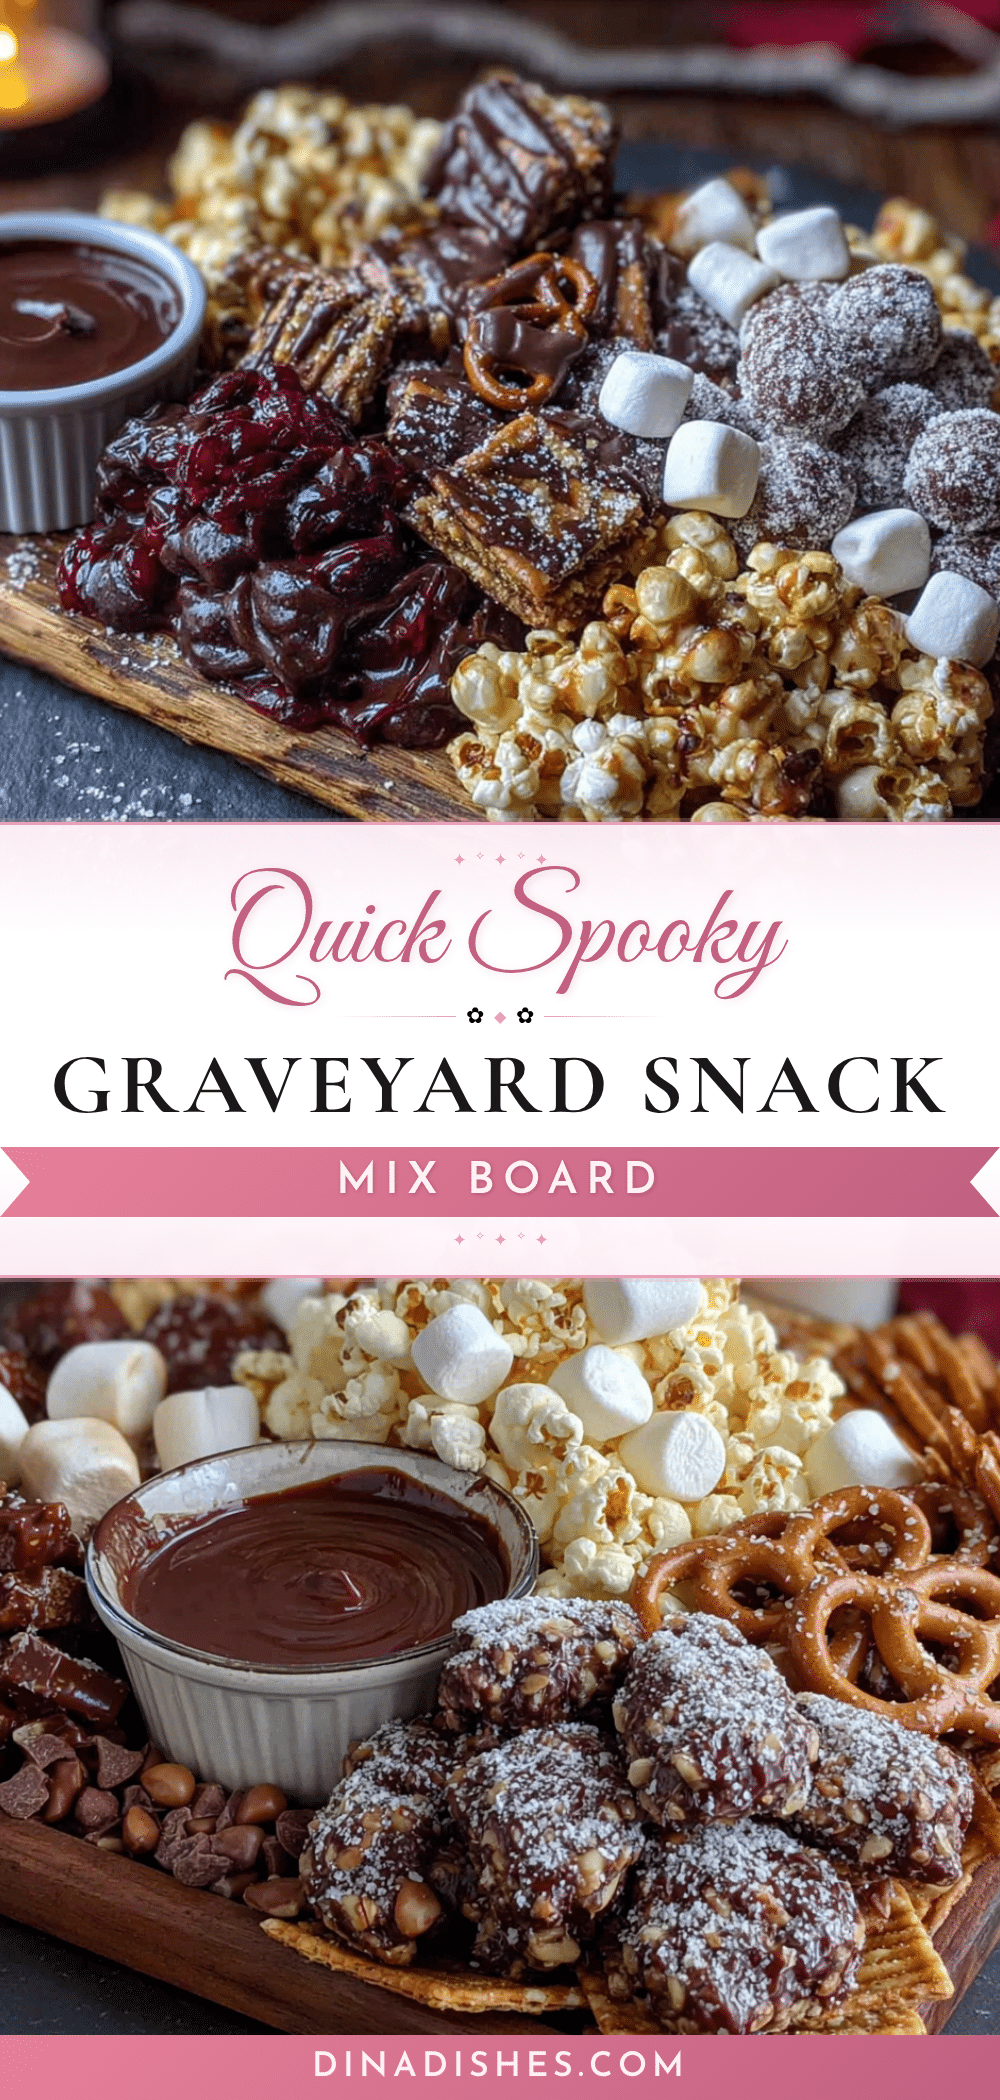
Quick Spooky Graveyard Snack Mix Board: Easy Halloween Treat
This graveyard snack board is a quick and easy Halloween treat that comes together in under 20 minutes. It features a chocolate pudding ‘dirt’ base with pretzel tombstones and a variety of festive snacks, perfect for parties or movie nights.
- Prep Time: 20 minutes
- Cook Time: 0 minutes
- Total Time: 20 minutes
- Yield: 8 servings 1x
- Category: Appetizer
- Cuisine: American
Ingredients
- 4–6 individual chocolate pudding cups (or one large batch of homemade pudding)
- 1 cup chocolate sandwich cookies (like Oreos), crushed
- 1 cup chocolate-covered pretzels
- Green frosting or decorating gel (to write ‘RIP’ on tombstones)
- 1 cup pretzel sticks
- 1/2 cup pumpkin-shaped candy corn
- 1 cup ghost-shaped marshmallows (or regular marshmallows)
- 1/2 cup Halloween M&Ms
- 1/2 cup roasted and salted pumpkin seeds
- 1/4 cup dried cranberries or cherries
- Large wooden cutting board or serving platter (at least 12×16 inches)
- 2–3 small bowls or ramekins
- Toy skeleton hands or plastic spiders (optional, for decoration)
Instructions
- Crush the chocolate sandwich cookies in a ziploc bag using a rolling pin or heavy glass until they resemble fine crumbs. Set aside about 2 tablespoons for garnish.
- Arrange the chocolate-covered pretzels on a small plate and write ‘RIP’ (or ‘BOO’, ‘SCARY’) on each using green frosting or decorating gel. Let them sit for a few minutes to set.
- Open the pudding cups and place them on the board where you want the graveyard to be. If using a large batch, spoon the pudding into a small bowl or directly onto the board in a rectangular shape, about 1/2 inch thick.
- Sprinkle the crushed cookies over the pudding base, covering it completely. Press down gently so the crumbs stick.
- Gently press the chocolate-covered pretzel tombstones into the dirt at different angles. Arrange the pretzel sticks in a line around the graveyard to create a fence, breaking a few in half for corners.
- Arrange the ghost marshmallows, pumpkin candy corn, Halloween M&Ms, pumpkin seeds, and dried cranberries around the board in clusters. Tuck in plastic spiders or skeleton hands if using.
- Sprinkle the reserved cookie crumb dust over the whole board for a light ‘dirt’ dusting.
Notes
Prep tombstones and crush cookies up to 2 days ahead. Assemble board no more than 1 hour before serving to keep pretzels crunchy. For dairy-free, use coconut milk pudding and dairy-free cookies. For gluten-free, use gluten-free pretzels and cookies.
Nutrition
- Serving Size: 1 serving (based on
- Calories: 300
- Sugar: 27.5
- Sodium: 225
- Fat: 13.5
- Saturated Fat: 6
- Carbohydrates: 42.5
- Fiber: 2
- Protein: 5
Keywords: Halloween, snack board, graveyard, easy, quick, party, treat, spooky