I was at the hardware store, of all places, last October, picking up a new showerhead because the old one had finally given up the ghost. The guy behind the counter, a quiet, older man named Earl who I’d only ever exchanged nods with, rang me up and then, completely out of the blue, said, “My wife makes these pumpkin cheesecake bars that even my grandson, who won’t touch a vegetable, eats three of.” I blinked. We were standing between aisles of plumbing supplies and paint swatches. It was the last place on earth I expected a recipe recommendation. But Earl was already grabbing a scrap of receipt paper and scribbling down ingredients. “No oven needed,” he added, almost apologetically. “Makes ’em easy.” I honestly just stood there, holding my showerhead, feeling like I’d stumbled into some sort of culinary secret society.
I mean, let’s be real—I was skeptical. A no-bake dessert that pleases a picky kid and comes recommended by a hardware store clerk? It felt like a tall order. But something about the way he described the creamy texture and that spicy, gingersnap crust made me want to try it. I got home, still in my coat, and decided to make a batch right then and there. The kitchen was a mess, and I accidentally used salted butter instead of unsalted in the crust, but you know what? It was a happy accident. That little bit of extra salt made the sweet, pumpkin-spiced filling sing.
These no-bake pumpkin cheesecake bars have become my secret weapon for fall. They are the kind of dessert that makes everyone—from your toddler to your mother-in-law—close their eyes for a second after the first bite. And honestly, for a busy parent trying to get a sensible dinner on the table without a fuss, a dessert that comes together in twenty minutes and doesn’t require turning on the oven is a genuine lifesaver. Maybe you’ve been there, staring at a pile of dishes and a craving for something special, but with zero energy left to bake. These bars are your answer.
Why You’ll Love This Recipe
Let’s face it, finding a dessert that feels fancy but is actually simple enough for a Tuesday night is a win. These no-bake pumpkin cheesecake bars check every box for a busy family. They are a total crowd-pleaser, and I’ve tested them on my own crew more times than I can count. Here is why this recipe works so well:
- Quick & Easy: You can have these assembled in about 20 minutes. No oven, no complicated steps, just a few bowls and a fridge.
- Simple Ingredients: You probably already have most of what you need in your pantry. It’s a budget-friendly recipe that won’t require a special trip to a fancy grocery store.
- Perfect for Family Meals: Whether it’s a weeknight treat, a Thanksgiving potluck, or a Halloween party, these bars fit right in. They travel well and hold up beautifully.
- Crowd-Pleaser: I’ve yet to meet a kid who doesn’t love these. The creamy, sweet filling and crunchy crust are a guaranteed hit with even the pickiest eaters.
- Unbelievably Delicious: This isn’t just another pumpkin dessert. The texture is silky smooth, and the flavor is perfectly balanced—not too sweet, with just the right amount of warm spice.
What makes this version different from the rest? It’s all in the technique. Instead of a complicated custard, we use a clever combination of cream cheese, pumpkin puree, and a secret ingredient—a bit of instant vanilla pudding mix. This little trick stabilizes the filling, giving it that firm, sliceable texture without needing gelatin or an oven. It’s a foolproof method that delivers perfect results every single time.
This recipe is the kind that makes you look like a hero without any of the stress. It’s comfort food reimagined—faster, easier, but with the same soul-soothing satisfaction of a classic cheesecake. Perfect for impressing guests without breaking a sweat, or turning a simple weeknight into something a little more special.
What Ingredients You Will Need
This recipe uses simple, wholesome ingredients to deliver big flavor and that perfect, creamy texture. Most of these are pantry staples, especially if you do a lot of fall baking. Here is what you need and why each one matters.
For the Crust
- 2 cups (200g) gingersnap cookie crumbs: These provide a warm, spicy base that complements the pumpkin perfectly. I recommend using store-bought gingersnaps for consistency. You can also use graham cracker crumbs or vanilla wafers if you prefer a milder flavor.
- 6 tablespoons (85g) unsalted butter, melted: This binds the crumbs together. Using unsalted butter lets you control the salt level. If you only have salted butter, just reduce any added salt in the recipe.
- 2 tablespoons (25g) granulated sugar: A little extra sweetness for the crust. You can omit this if your cookies are already quite sweet.
For the Pumpkin Cheesecake Filling
- 16 ounces (450g) cream cheese, softened: This is the star of the show. Make sure it’s at room temperature so you get a perfectly smooth, lump-free filling. I prefer full-fat cream cheese for the best texture and flavor.
- 1 cup (200g) granulated sugar: Adds the necessary sweetness to balance the tangy cream cheese and earthy pumpkin.
- 1 can (15 ounces or 425g) pumpkin puree: Not pumpkin pie filling! Make sure you grab 100% pure pumpkin puree. This gives the bars their lovely color and flavor.
- 1 teaspoon vanilla extract: Enhances all the other flavors.
- 1 ½ teaspoons pumpkin pie spice: You can use a store-bought blend or make your own with cinnamon, nutmeg, ginger, and cloves.
- 1 teaspoon ground cinnamon: For that extra warm, cozy flavor.
- ¼ teaspoon salt: Balances the sweetness and brings out the pumpkin flavor.
- 1 box (3.4 ounces or 96g) instant vanilla pudding mix: This is the secret to the firm, sliceable texture. Do not cook it; just use the dry powder. It stabilizes the cheesecake so it sets up perfectly in the fridge.
For the Topping (Optional but Recommended)
- 1 cup (240ml) heavy cream: For making a simple whipped cream topping. You can also use a store-bought tub of whipped topping if you are short on time.
- 2 tablespoons (15g) powdered sugar: To sweeten the whipped cream.
- ½ teaspoon vanilla extract: For flavoring the whipped cream.
- Caramel sauce, for drizzling (optional): A little drizzle of salted caramel takes these bars over the top.
Ingredient Notes & Substitutions: For a gluten-free version, use gluten-free gingersnap cookies or graham crackers. If you are dairy-free, you can use a high-quality dairy-free cream cheese and a vegan butter stick, but the texture might be slightly softer. I’ve tried it with a plant-based cream cheese from Miyoko’s, and it worked pretty well. The instant pudding mix is key—do not skip it or substitute it with cook-and-serve pudding. It won’t work the same way.
Equipment Needed
You don’t need a lot of fancy gear for this recipe, which is part of its charm. Here is what you will need to get the job done.
- 9×9-inch baking dish: This is the perfect size for these bars. An 8×8-inch dish will work too, but your bars will be a little thicker. Line it with parchment paper for easy removal.
- Food processor or zip-top bag: For crushing the gingersnap cookies into fine crumbs. A food processor is faster, but a rolling pin and a sturdy bag work just as well.
- Medium mixing bowls: You’ll need one for the crust and one for the filling.
- Electric hand mixer or stand mixer: A hand mixer is perfect for this. A stand mixer works too, but a hand mixer is easier to clean up.
- Rubber spatula: For scraping down the sides of the bowl and spreading the filling evenly.
- Measuring cups and spoons: For accurate measurements.
Budget-Friendly Tip: If you don’t have a food processor, just place the cookies in a large zip-top bag, seal it, and crush them with a rolling pin or the bottom of a heavy pan. It’s a great way to let the kids help out.
Preparation Method
This recipe comes together in a few simple steps. Follow these instructions carefully, and you will have perfect no-bake pumpkin cheesecake bars every time.
- Prepare the Crust (5 minutes): In a medium bowl, combine the 2 cups of gingersnap crumbs, 2 tablespoons of sugar, and 6 tablespoons of melted butter. Stir with a fork until the mixture looks like wet sand and holds together when you press it. It should feel moist, not dry.
- Press the Crust (5 minutes): Line your 9×9-inch baking dish with a sheet of parchment paper, leaving some overhang on two sides. This will make lifting the bars out later a breeze. Pour the crumb mixture into the dish. Use the bottom of a flat measuring cup or a glass to press it down firmly and evenly. Make sure the crust is compact—this prevents it from crumbling when you cut the bars. Pop the dish in the fridge to chill while you make the filling.
- Make the Filling (10 minutes): In a large mixing bowl, beat the 16 ounces of softened cream cheese with an electric hand mixer on medium speed until it is smooth and creamy, about 1 minute. Scrape down the sides of the bowl. Add the 1 cup of sugar and beat again until combined, another 30 seconds.
- Add the Pumpkin and Spices (3 minutes): Add the 15-ounce can of pumpkin puree, 1 teaspoon of vanilla, 1 ½ teaspoons of pumpkin pie spice, 1 teaspoon of cinnamon, and the ¼ teaspoon of salt. Mix on low speed until everything is well incorporated. The mixture will look beautiful and orange.
- Incorporate the Pudding Mix (2 minutes): This is the crucial step. Sprinkle the entire box of dry instant vanilla pudding mix over the pumpkin mixture. Beat on low speed until the pudding is fully incorporated and the mixture begins to thicken slightly, about 1-2 minutes. Do not overmix. You will feel it get a little stiffer.
- Assemble the Bars (2 minutes): Take the chilled crust out of the fridge. Spoon the pumpkin cheesecake filling over the crust. Use your rubber spatula to spread it into an even layer. Give the pan a gentle tap on the counter to release any air bubbles.
- Chill (At least 4 hours, preferably overnight): Cover the dish with plastic wrap or foil and place it in the refrigerator. The bars need at least 4 hours to set up, but overnight is best. This allows the pudding to fully stabilize the filling, giving you clean, sharp slices.
- Make the Whipped Cream (5 minutes, right before serving): In a chilled bowl, combine 1 cup of heavy cream, 2 tablespoons of powdered sugar, and ½ teaspoon of vanilla. Beat with an electric mixer on medium-high speed until stiff peaks form. Be careful not to over-whip it into butter.
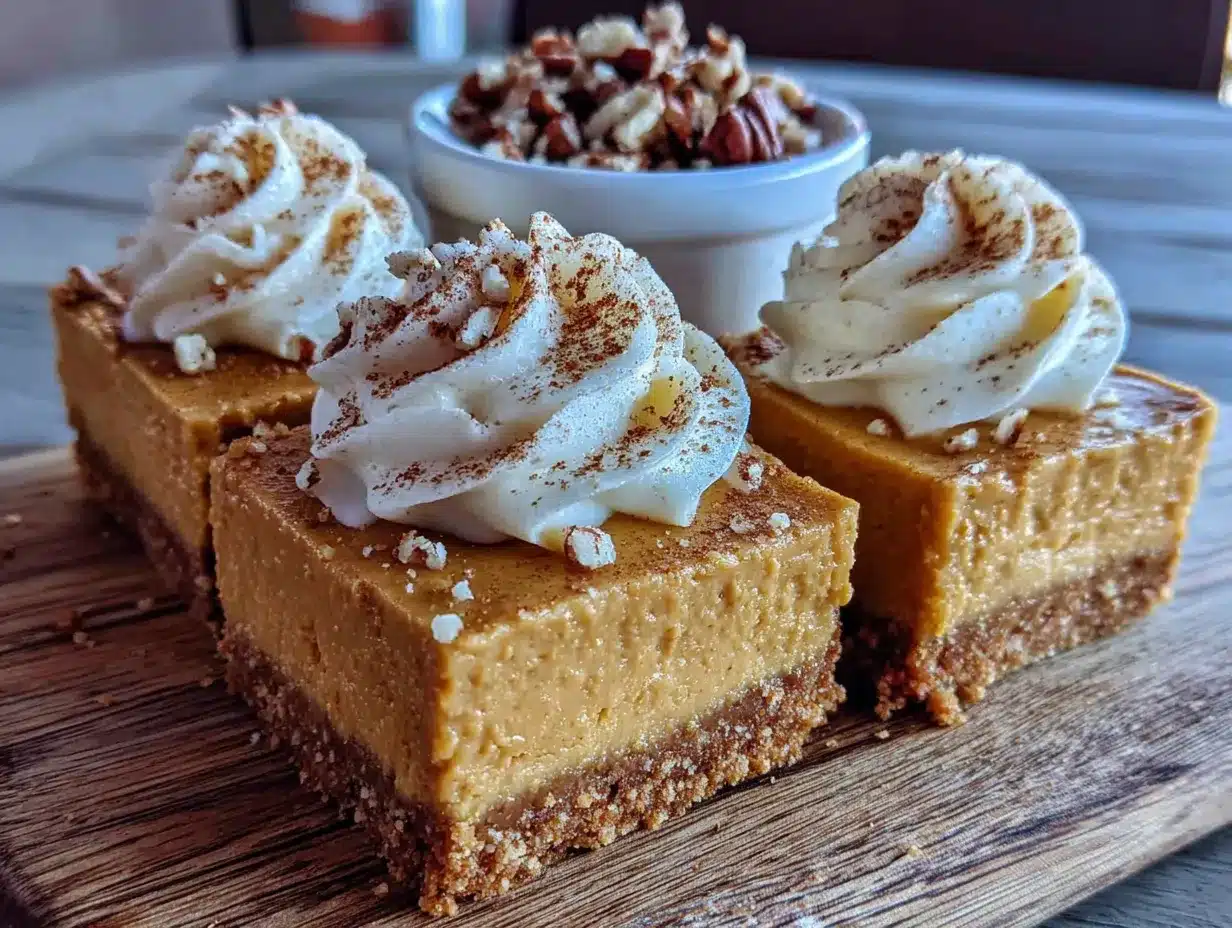
- Slice and Serve (5 minutes): Once the bars are fully set, use the parchment paper overhang to lift the entire block out of the dish. Place it on a cutting board. Use a sharp knife to cut into 9 or 16 squares. For clean cuts, wipe the knife clean between each slice. Top each bar with a dollop of whipped cream and a drizzle of caramel sauce, if desired.
Personal Tip: I always make the filling while the crust is chilling. It saves time. Also, don’t worry if your filling looks a little soft when you first spread it. It will firm up beautifully in the fridge. Patience is key here!
Cooking Tips & Techniques
I have learned a few things the hard way when making these no-bake pumpkin cheesecake bars. Here are my best tips to ensure your bars turn out perfect every time.
Room Temperature Cream Cheese is Non-Negotiable: I cannot stress this enough. If your cream cheese is cold, your filling will be lumpy. Take it out of the fridge at least 30 minutes before you start. If you forget, you can cut it into cubes and microwave it in 10-second intervals until it’s soft, but be careful not to melt it.
Don’t Skip the Pudding Mix: I know it might seem like a strange ingredient, but the dry instant pudding mix is what gives these bars their firm, sliceable texture without any baking. It absorbs excess moisture and acts as a stabilizer. Do not substitute it with cook-and-serve pudding.
Press the Crust Firmly: A loose crust will crumble when you cut the bars. Use the bottom of a glass or a measuring cup to really pack those crumbs down. A compact crust is the foundation of a good bar.
Patience for Perfect Slices: The hardest part of this recipe is waiting. If you try to cut the bars too soon, they will be a gooey mess. Give them a full 4 hours, but overnight is truly best. I once cut into them after only 3 hours because I was impatient, and it was a sad, sloppy situation. Learn from my mistake.
Clean Cuts: For the prettiest bars, use a long, sharp knife. Run it under hot water, wipe it dry, then make your cut. Wipe the blade clean between each slice. This gives you those beautiful, Instagram-worthy edges.
Variations & Adaptations
One of the best things about this recipe is how easy it is to tweak. Here are a few ways to make it your own.
- Gluten-Free Option: Simply use gluten-free gingersnap cookies or graham crackers for the crust. The rest of the ingredients are naturally gluten-free, but always double-check your pudding mix label.
- Dairy-Free Version: Use a high-quality dairy-free cream cheese and a plant-based butter stick. The texture will be slightly softer, but it will still be delicious. I recommend Tofutti or Miyoko’s cream cheese for the best results.
- Spice It Up: If you like a stronger spice profile, add a pinch of ground cloves, allspice, or even a tiny pinch of cayenne pepper to the filling for a warm kick.
- Chocolate Lovers: Drizzle the finished bars with melted dark chocolate instead of caramel sauce. You can also add a layer of chocolate ganache on top of the crust before adding the pumpkin filling.
- Make it a Pie: Instead of a square dish, press the crust into a standard 9-inch pie plate and fill it with the pumpkin cheesecake mixture. Chill as directed. This makes for a beautiful presentation.
I once tried a variation where I added a swirl of salted caramel into the filling before chilling. I just dropped spoonfuls of caramel on top and swirled it with a knife. It was a beautiful mess, and honestly, it was the best version I’ve ever made. Don’t be afraid to experiment.
Serving & Storage Suggestions
These no-bake pumpkin cheesecake bars are best served cold, straight from the fridge. The chilled, creamy texture is what makes them so satisfying.
Serving: For the best presentation, remove the bars from the pan using the parchment paper sling. Place the whole block on a cutting board and slice it into squares. A dollop of freshly whipped cream and a drizzle of salted caramel sauce is the classic way to serve them. You can also sprinkle a little extra cinnamon or crushed gingersnaps on top for a bit of crunch. They are perfect for a Thanksgiving dessert table, a fall potluck, or just a special after-school treat.
Storage: Store any leftover bars in an airtight container in the refrigerator. They will keep well for up to 5 days. In fact, the flavors continue to meld and deepen over time, so they might taste even better on day two!
Freezing: These bars freeze beautifully. Once the bars are fully set, you can freeze the entire block or individual slices. Wrap them tightly in plastic wrap, then in a layer of foil, and place them in a freezer-safe bag. They will keep for up to 3 months. To thaw, transfer them to the refrigerator overnight. I love having a few slices stashed away for a sudden craving. It’s a real treat to pull one out on a random Tuesday.
Nutritional Information & Benefits
While these are definitely a treat, they do offer a few nutritional perks thanks to the star ingredient. Here is a general breakdown per bar (based on 9 servings).
| Nutrient | Amount per Serving |
|---|---|
| Calories | ~380 |
| Fat | 24g |
| Carbohydrates | 38g |
| Protein | 5g |
| Sugar | 28g |
| Vitamin A | High (from pumpkin) |
Health Benefits: Pumpkin is packed with vitamin A, which is great for eye health and your immune system. It’s also a good source of fiber. The cream cheese provides a bit of calcium and protein. Of course, this is a dessert, so enjoy it in moderation, but it’s nice to know you’re getting a little something good from that beautiful orange filling.
Dietary Considerations: This recipe is vegetarian. As mentioned, it can easily be made gluten-free and dairy-free with simple substitutions. It contains dairy and gluten in its standard form.
Conclusion
These no-bake pumpkin cheesecake bars are more than just a dessert; they are a little piece of fall that comes together without any fuss. They are the recipe I turn to when I want something special but don’t have the time or energy for a complicated bake. They have saved me more times than I can count, from last-minute dinner parties to those days when the kids just need a little something sweet to turn their frowns upside down.
I love that this recipe came from Earl at the hardware store. It reminds me that the best recipes often come from the most unexpected places. It’s a story I love to tell, and the bars themselves are a story worth tasting.
I encourage you to make these your own. Add a little extra spice, drizzle on your favorite sauce, or just enjoy them as they are. They are foolproof and forgiving. So go ahead, give them a try. I promise you won’t be disappointed. And when you do, come back and let me know how they turned out in the comments! I love hearing your stories and seeing your photos.
Frequently Asked Questions
Can I use pumpkin pie filling instead of pumpkin puree?
No, you should not use pumpkin pie filling. It is pre-sweetened and spiced, which will throw off the balance of the recipe. Always use 100% pure pumpkin puree for the best results.
Why did my bars turn out too soft?
This usually happens for two reasons: either you didn’t chill them long enough, or you used cook-and-serve pudding instead of instant pudding mix. The instant pudding is key for stabilization. Make sure you give the bars at least 4 hours, or better yet, overnight, to set up properly.
Can I make these bars vegan?
Yes, you can! Use a high-quality dairy-free cream cheese and a vegan butter stick. Make sure your sugar is vegan-friendly. The texture will be slightly softer, but the flavor will still be delicious. Some readers have had success with Tofutti cream cheese.
How do I get clean, perfect slices?
Use a sharp knife and run it under hot water, then wipe it dry before each cut. The heat helps the knife glide through the cold cheesecake without sticking. Wiping the blade clean between slices prevents the filling from smearing.
Can I use a different crust?
Absolutely! Graham cracker crumbs, vanilla wafer crumbs, or even crushed shortbread cookies all make excellent crusts. You can also use gluten-free versions of any of these. The ratio of crumbs to butter should remain the same.
Pin This Recipe!
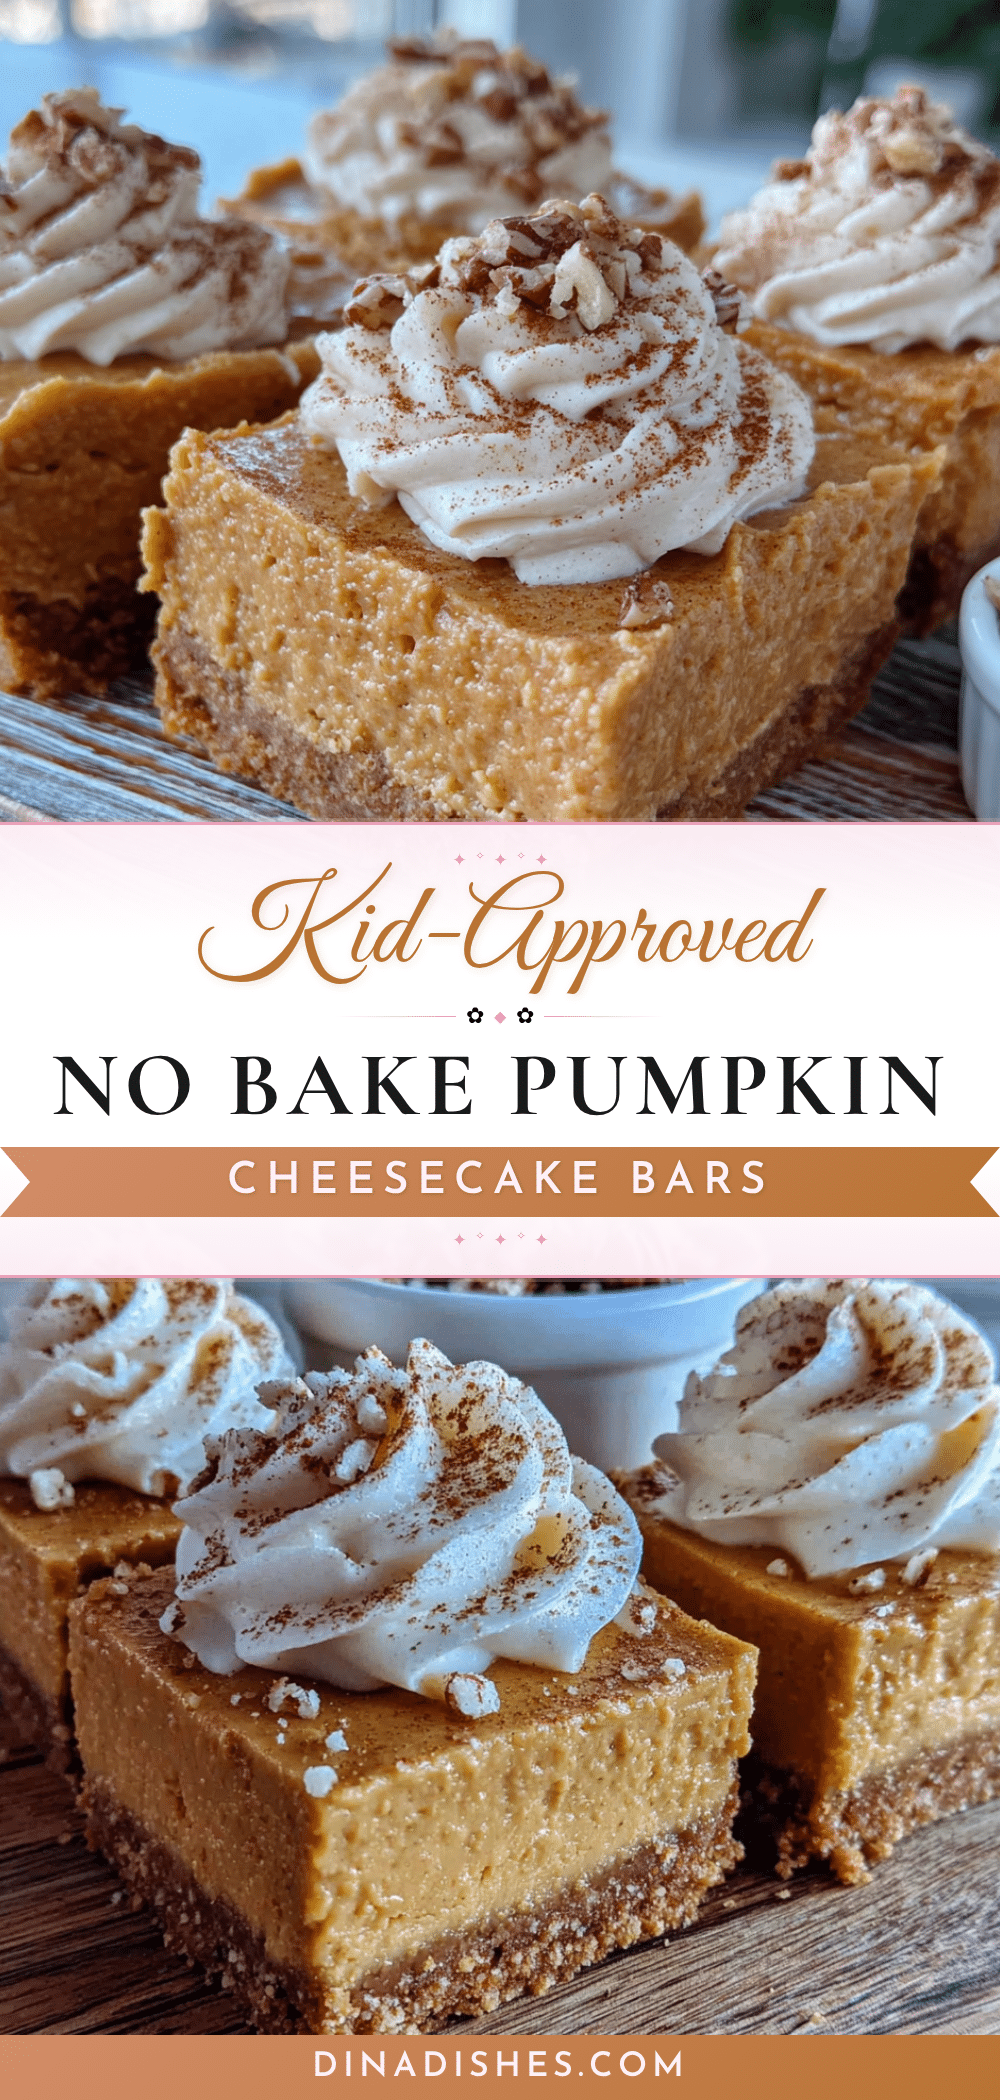
The Best No-Bake Pumpkin Cheesecake Bars (Kid-Approved)
These no-bake pumpkin cheesecake bars are a quick and easy fall dessert that comes together in just 20 minutes. With a creamy, spiced pumpkin filling and a crunchy gingersnap crust, they are a guaranteed crowd-pleaser for busy families.
- Prep Time: 20 minutes
- Cook Time: 0 minutes
- Total Time: 4 hours 20 minutes (includes chilling time)
- Yield: 9 to 16 servings 1x
- Category: Dessert
- Cuisine: American
Ingredients
- 2 cups (200g) gingersnap cookie crumbs
- 6 tablespoons (85g) unsalted butter, melted
- 2 tablespoons (25g) granulated sugar
- 16 ounces (450g) cream cheese, softened
- 1 cup (200g) granulated sugar
- 1 can (15 ounces or 425g) pumpkin puree
- 1 teaspoon vanilla extract
- 1 ½ teaspoons pumpkin pie spice
- 1 teaspoon ground cinnamon
- ¼ teaspoon salt
- 1 box (3.4 ounces or 96g) instant vanilla pudding mix
- 1 cup (240ml) heavy cream
- 2 tablespoons (15g) powdered sugar
- ½ teaspoon vanilla extract
- Caramel sauce, for drizzling (optional)
Instructions
- Prepare the Crust: In a medium bowl, combine the 2 cups of gingersnap crumbs, 2 tablespoons of sugar, and 6 tablespoons of melted butter. Stir with a fork until the mixture looks like wet sand and holds together when you press it.
- Press the Crust: Line your 9×9-inch baking dish with a sheet of parchment paper, leaving some overhang on two sides. Pour the crumb mixture into the dish. Use the bottom of a flat measuring cup or a glass to press it down firmly and evenly. Pop the dish in the fridge to chill while you make the filling.
- Make the Filling: In a large mixing bowl, beat the 16 ounces of softened cream cheese with an electric hand mixer on medium speed until it is smooth and creamy, about 1 minute. Scrape down the sides of the bowl. Add the 1 cup of sugar and beat again until combined, another 30 seconds.
- Add the Pumpkin and Spices: Add the 15-ounce can of pumpkin puree, 1 teaspoon of vanilla, 1 ½ teaspoons of pumpkin pie spice, 1 teaspoon of cinnamon, and the ¼ teaspoon of salt. Mix on low speed until everything is well incorporated.
- Incorporate the Pudding Mix: Sprinkle the entire box of dry instant vanilla pudding mix over the pumpkin mixture. Beat on low speed until the pudding is fully incorporated and the mixture begins to thicken slightly, about 1-2 minutes. Do not overmix.
- Assemble the Bars: Take the chilled crust out of the fridge. Spoon the pumpkin cheesecake filling over the crust. Use your rubber spatula to spread it into an even layer. Give the pan a gentle tap on the counter to release any air bubbles.
- Chill: Cover the dish with plastic wrap or foil and place it in the refrigerator. The bars need at least 4 hours to set up, but overnight is best.
- Make the Whipped Cream: In a chilled bowl, combine 1 cup of heavy cream, 2 tablespoons of powdered sugar, and ½ teaspoon of vanilla. Beat with an electric mixer on medium-high speed until stiff peaks form.
- Slice and Serve: Once the bars are fully set, use the parchment paper overhang to lift the entire block out of the dish. Place it on a cutting board. Use a sharp knife to cut into 9 or 16 squares. Top each bar with a dollop of whipped cream and a drizzle of caramel sauce, if desired.
Notes
Make sure cream cheese is at room temperature to avoid lumps. Do not substitute instant pudding mix with cook-and-serve pudding. For clean slices, run a sharp knife under hot water and wipe dry between cuts. Bars can be stored in the refrigerator for up to 5 days or frozen for up to 3 months.
Nutrition
- Serving Size: 1 bar (based on 9 se
- Calories: 380
- Sugar: 28
- Fat: 24
- Carbohydrates: 38
- Protein: 5
Keywords: no-bake pumpkin cheesecake bars, pumpkin dessert, fall dessert, easy cheesecake bars, kid-friendly dessert, no-bake dessert, pumpkin cheesecake