There used to be a tiny bakery tucked between a laundromat and a vintage shop on the corner of Elm and 4th, a place called The Sugar Jar. They made a salted caramel apple crisp that was, honestly, life-changing. The kind where the caramel seeped into every single apple slice and the oat topping was so buttery and crisp it practically shattered when you tapped it with a fork. When they closed two years ago—the owner retired and moved to Oregon, lucky her—I felt a genuine pang of loss. I mean, I actually stood outside the dark, empty window and sighed. Dramatic? Maybe. But you know that feeling when a comfort food you rely on just disappears?
After eleven tries—eleven!—I finally got it. The first few attempts were sad, watery messes. One was so dry it could have been used as packing material. Another was so sweet it made my teeth ache for days. But this version? This is the one. The apples are tender but not mushy, the oat crumble is perfectly crunchy, and that salted caramel sauce weaves through everything like a warm, cozy hug. I actually cried a little when I pulled it out of the oven and smelled that familiar, buttery, cinnamon-spiced air. It felt like coming home to a place that didn’t exist anymore, except now it does. In my kitchen. And soon, in yours.
Honestly, this is the recipe I’ve been chasing. The one I’d order every single time at The Sugar Jar, trying to figure out what made it so special. Was it the specific apple variety? The ratio of oats to butter? The pinch of flaky salt on top? It was all of those things, combined with a little patience and a lot of taste-testing. Let me tell you, the things I do for a good dessert. But when you take that first bite and the warm, spiced apples, the crunchy oat crumble, and the salty-sweet caramel all hit at once, you’ll understand why it was worth every single failed batch.
Why You’ll Love This Recipe
This isn’t just another apple crisp recipe you’ll find floating around the internet. I’ve tested this one over and over, tweaking the caramel temperature and the oat-to-butter ratio until it was absolutely perfect. It’s the kind of dessert that makes people close their eyes after the first bite. No joke.
- Quick & Easy: From start to finish, this comes together in about an hour. Most of that time is hands-off baking, so you can relax while your kitchen fills with the most incredible aroma.
- Simple Ingredients: You probably have most of these in your pantry right now. Apples, oats, butter, brown sugar, and a few spices. No weird, hard-to-find stuff here.
- Perfect for Cozy Evenings: This is the ultimate comfort food for a chilly autumn night, a rainy Sunday, or any day that just needs a little warming up. It’s like a sweater for your soul.
- Crowd-Pleaser: I’ve served this at family dinners, potlucks, and casual get-togethers, and it disappears every single time. Kids and adults go crazy for it.
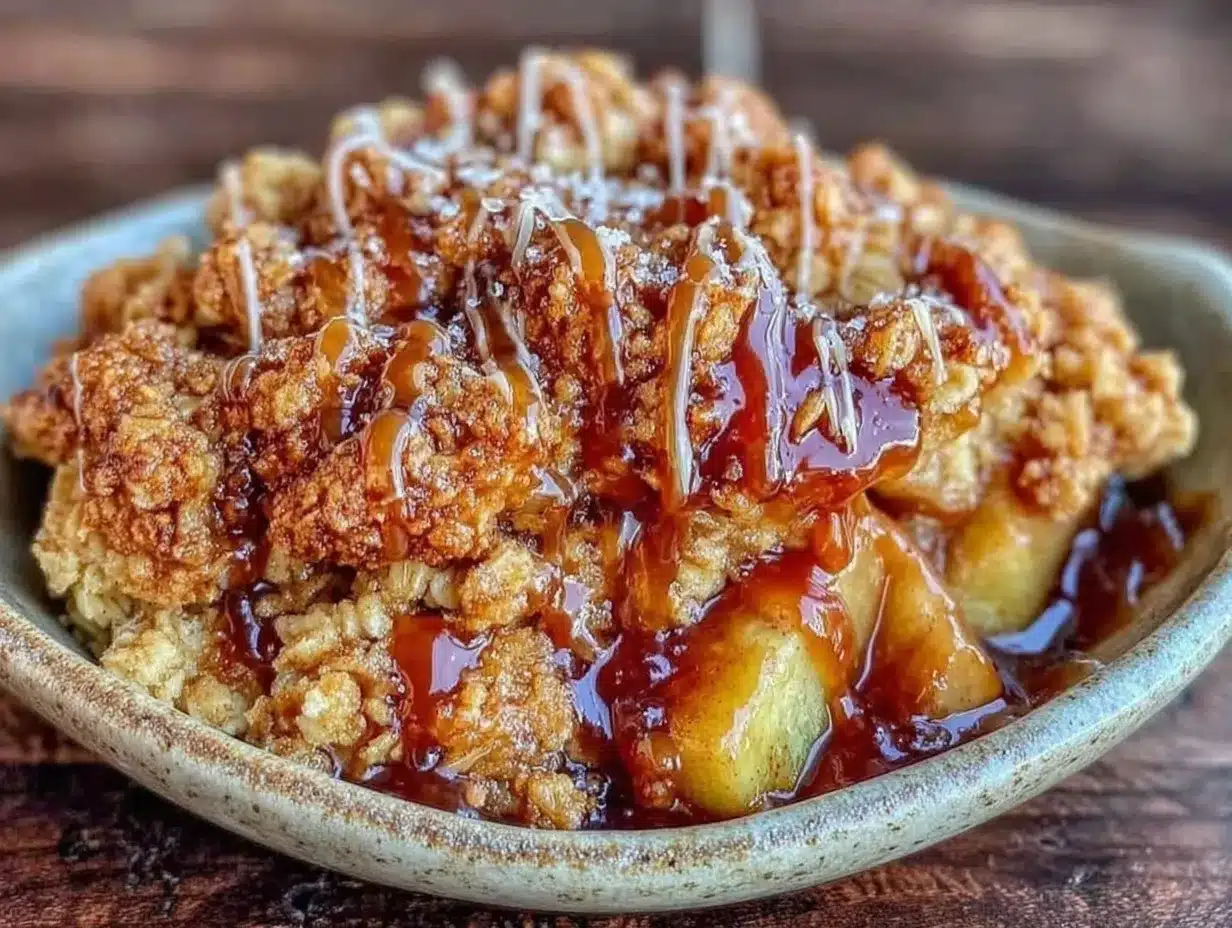
- Unbelievably Delicious: The combination of tender, spiced apples, a buttery, crunchy oat crumble, and that rich, homemade salted caramel sauce is next-level. It’s comfort food at its absolute finest.
What makes this recipe different is the caramel. Most apple crisps rely on the apples and topping alone, but that salted caramel sauce gets drizzled between the layers and over the top, seeping into every nook and cranny. It adds a depth of flavor that’s just incredible. Plus, I’ve perfected the oat crumble so it stays crunchy, even the next day. No soggy topping here, I promise.
This is the recipe you turn to when you need a hug in a bowl. It’s soul-soothing, simple, and absolutely unforgettable. Trust me, you’re going to love it.
What Ingredients You Will Need
This recipe uses simple, wholesome ingredients to create something truly special. Most of these are pantry staples, so you can whip this up whenever the craving hits. Here’s what you’ll need and a little bit about why each one matters.
For the Apple Filling
- Apples, 6 medium (about 2.5 lbs or 1.1 kg): I recommend a mix of sweet and tart apples. Honeycrisp and Granny Smith are my go-to combo. The Honeycrisp add sweetness and hold their shape, while the Granny Smith bring that needed tang. Peel, core, and slice them into ¼-inch thick pieces.
- Granulated Sugar, ¼ cup (50 g): Just enough to help the apples release their juices and create a light syrup.
- Brown Sugar, ¼ cup (50 g), packed: Adds a deeper, molasses-like sweetness that pairs beautifully with the caramel.
- All-Purpose Flour, 2 tablespoons (16 g): This helps thicken the apple juices as they bake, preventing a watery filling.
- Lemon Juice, 1 tablespoon (15 ml): A splash of acidity balances the sweetness and keeps the apples from browning too much.
- Ground Cinnamon, 1 teaspoon: The classic warming spice for apples. It’s non-negotiable here.
- Ground Nutmeg, ¼ teaspoon: Adds a subtle, earthy warmth that complements the cinnamon.
- Salt, ¼ teaspoon: Enhances all the other flavors and balances the sweetness.
For the Oat Crumble
- Rolled Oats, 1 cup (90 g): Use old-fashioned rolled oats, not quick oats. They give the best texture and crunch. I prefer Bob’s Red Mill for consistent quality.
- All-Purpose Flour, ¾ cup (95 g): Provides structure to the crumble.
- Brown Sugar, ½ cup (100 g), packed: For that deep, caramel-like sweetness in the topping.
- Unsalted Butter, ½ cup (1 stick or 113 g), cold and cubed: This is key. Cold butter creates those lovely, craggy chunks of crumble as it melts in the oven. Do not use melted butter here.
- Ground Cinnamon, ½ teaspoon: A little extra warmth in the topping.
- Salt, ¼ teaspoon: Balances the sweetness and makes the topping pop.
For the Salted Caramel Sauce
- Granulated Sugar, 1 cup (200 g): The base of the caramel.
- Unsalted Butter, 6 tablespoons (85 g), cut into pieces, at room temperature: Adding room-temperature butter helps it emulsify smoothly into the hot sugar.
- Heavy Cream, ½ cup (120 ml), at room temperature: This creates the rich, creamy texture. It must be at room temperature to prevent the caramel from seizing.
- Flaky Sea Salt, 1 teaspoon (plus more for sprinkling): I use Maldon sea salt flakes. They add that perfect salty crunch that makes this recipe sing.
- Vanilla Extract, 1 teaspoon: A little vanilla rounds out all the flavors beautifully.
Substitution Guidance
If you need a gluten-free option, you can swap the all-purpose flour in both the filling and the crumble for a good 1:1 gluten-free baking flour blend. For a dairy-free version, use a high-quality vegan butter in the crumble and the caramel, and swap the heavy cream for full-fat coconut cream. The texture will be slightly different, but still delicious. I’ve tried it with a friend who’s dairy-free, and she was thrilled.
Equipment Needed
You don’t need a ton of fancy equipment for this recipe, which is part of its charm. Here’s what you’ll need:
- 9×13-inch Baking Dish (or similar 3-quart dish): This is the perfect size for a generous crisp. A 10-inch cast-iron skillet also works beautifully and looks gorgeous for serving.
- Medium Saucepan: For making the salted caramel. A heavy-bottomed saucepan is best for even heat distribution.
- Large Mixing Bowls: One for the apples and one for the crumble topping.
- Chef’s Knife and Cutting Board: For peeling and slicing the apples.
- Measuring Cups and Spoons: Accuracy matters, especially for the caramel.
- Wooden Spoon or Silicone Spatula: For stirring the caramel and the filling.
- Pastry Cutter or Two Forks: For cutting the cold butter into the crumble ingredients. Your fingertips work too, but try not to overheat the butter.
I’ve made this with a cheap baking dish and a whisk, and it still turned out great. Don’t stress if you don’t have a pastry cutter—two forks or even your hands will do the job. Just remember, cold butter is your friend for a perfect crumble.
Preparation Method
Alright, let’s get to the fun part. Follow these steps, and you’ll have a dessert that tastes like it came from a fancy bakery, but you made it in your own cozy kitchen.
- Preheat your oven to 350°F (175°C). Get that oven going first so it’s nice and hot when your crisp is ready to go in.
- Make the salted caramel sauce first. This is the heart of the recipe. In a medium, heavy-bottomed saucepan, spread the 1 cup of granulated sugar in an even layer. Cook over medium heat, without stirring, until the sugar begins to melt around the edges. I know it’s tempting, but resist the urge to stir! Just swirl the pan occasionally to help the sugar melt evenly. It will clump up at first, then smooth out into a beautiful amber liquid. This takes about 8-10 minutes. Watch it closely—it can go from perfect to burnt in seconds. You’re looking for a deep amber color, like a new penny.
- Finish the caramel. Once the sugar is melted and amber, remove the pan from the heat immediately. Carefully add the 6 tablespoons of room-temperature butter, one piece at a time, whisking constantly. The mixture will bubble up furiously—don’t panic, that’s normal! Once all the butter is incorporated and smooth, slowly drizzle in the ½ cup of room-temperature heavy cream while whisking. Again, it will bubble up. Whisk until smooth. Stir in 1 teaspoon of flaky sea salt and 1 teaspoon of vanilla extract. Set the caramel aside to cool slightly while you prep the apples and crumble.
- Prepare the apples. In a large bowl, combine the sliced apples, ¼ cup granulated sugar, ¼ cup packed brown sugar, 2 tablespoons flour, 1 tablespoon lemon juice, 1 teaspoon cinnamon, ¼ teaspoon nutmeg, and ¼ teaspoon salt. Toss everything together until the apples are evenly coated. Let them sit for about 5 minutes while you make the crumble. This helps the apples release their juices and start creating that lovely filling.
- Make the oat crumble. In a separate large bowl, whisk together 1 cup rolled oats, ¾ cup flour, ½ cup packed brown sugar, ½ teaspoon cinnamon, and ¼ teaspoon salt. Add the ½ cup of cold, cubed butter. Using a pastry cutter, two forks, or your fingertips, work the butter into the dry ingredients until the mixture looks like coarse, crumbly sand with some pea-sized butter lumps remaining. You want those lumps—they’ll melt into buttery, crispy pockets in the oven. Don’t overwork it, or the crumble will be tough.
- Assemble the crisp. Spread the apple mixture evenly into your 9×13-inch baking dish. Drizzle about half of the salted caramel sauce over the apple filling. You don’t need to cover every inch—just let it fall in ribbons. Sprinkle the oat crumble evenly over the top, covering the apples completely. Don’t press it down; you want it to stay light and crumbly.
- Bake. Place the dish on a baking sheet to catch any drips (trust me on this). Bake for 40-45 minutes, or until the filling is bubbly and the topping is golden brown and crisp. If the topping starts to brown too quickly after 30 minutes, loosely tent the dish with aluminum foil. Your kitchen will smell absolutely incredible at this point.
- Cool and serve. Let the crisp cool on a wire rack for at least 15-20 minutes. This is important—it allows the filling to set up so it’s not a runny mess. Drizzle the remaining salted caramel sauce over the top just before serving. Sprinkle with a little extra flaky sea salt if you’re feeling fancy.
Cooking Tips & Techniques
I’ve made this recipe more times than I care to count, and I’ve learned a few things along the way. Here are my best tips to ensure your crisp turns out perfect every single time.
Don’t skip the caramel step. I know it seems like an extra hassle, but making your own salted caramel is what takes this from a good apple crisp to an unforgettable one. The store-bought stuff is too sweet and lacks that deep, toasty flavor. Plus, homemade caramel is honestly not that hard once you get the hang of it. Just be patient and watch the sugar closely.
Keep your butter cold. This is the number one rule for a perfect crumble topping. If the butter gets too warm, you’ll end up with a dense, greasy paste instead of those beautiful, craggy chunks. If you have warm hands, use a pastry cutter or two forks. Pop the crumble in the fridge for 10 minutes if your kitchen is warm.
Use a mix of apple varieties. I cannot stress this enough. Using all one type of apple is a common mistake. A mix of sweet and tart gives you a more complex flavor and a better texture. Some apples will break down slightly, creating a lovely, jammy filling, while others will hold their shape for a little bite. It’s the best of both worlds.
Let it rest before serving. I know how hard it is to wait when that amazing smell is filling your house, but letting the crisp cool for at least 15-20 minutes is crucial. The filling needs time to thicken. If you serve it piping hot, it will be soupy and run all over the plate. Patience, my friend.
One of my biggest failures? The time I tried to double the recipe and used a pan that was too small. The filling bubbled over everywhere, the topping was soggy, and my oven was a mess. Learn from my mistake: use the right size dish and don’t overfill it. A 9×13 is perfect for this recipe.
Variations & Adaptations
One of the best things about this recipe is how adaptable it is. Here are a few ways you can make it your own.
- Gluten-Free Version: As I mentioned earlier, swap the all-purpose flour in both the filling and the crumble for a 1:1 gluten-free baking flour blend. I’ve used Bob’s Red Mill 1-to-1 Baking Flour with great results. The crumble might be a little more delicate, but the flavor is still spot on.
- Add Some Nuts: For extra crunch, add ½ cup of chopped pecans or walnuts to the oat crumble. Toast them lightly in a dry pan first for even more flavor. I love the combination of pecans with the salted caramel.
- Spice It Up: Feeling adventurous? Add a pinch of cardamom or ginger to the apple filling along with the cinnamon and nutmeg. It adds a lovely, unexpected warmth that’s perfect for fall.
- Berry Apple Crisp: Swap half of the apples for fresh or frozen berries. Blueberries or raspberries work beautifully. Just toss them with a little extra flour to help thicken the extra juices. It’s a gorgeous, colorful twist.
- Make It a Breakfast Crisp: Okay, hear me out. This is delicious with a dollop of Greek yogurt for breakfast. I’ve done it on a lazy Sunday morning, and it felt like a special treat. Just go a little lighter on the caramel.
I once tried a version with pears instead of apples, and it was fantastic. Pears are softer, so they break down more, creating an almost jammy filling. Just use firm, slightly underripe pears so they don’t turn to complete mush.
Serving & Storage Suggestions
This crisp is best served warm, with the filling still bubbling gently and the topping perfectly crisp. Here’s how to make the most of it.
Serving: Scoop generous portions into bowls. The classic pairing is a scoop of vanilla ice cream—the cold, creamy vanilla against the warm, spiced apples and crunchy topping is pure magic. A dollop of lightly sweetened whipped cream is also wonderful. For an extra touch, drizzle a little more of the reserved salted caramel sauce on top and sprinkle with a pinch of flaky sea salt. It’s a showstopper.
What to Serve With It: A cup of hot coffee or a glass of cold milk are perfect companions. If you’re feeling fancy, a bourbon or rye whiskey on the rocks pairs beautifully with the caramel and spice notes. For a non-alcoholic option, a warm apple cider is a no-brainer.
Storage: Leftover crisp can be stored in the refrigerator, covered tightly, for up to 4 days. The topping will lose some of its crunch, but the flavor will still be amazing. In fact, the flavors meld together even more overnight.
Reheating: The best way to reheat is in the oven. Place the crisp in a 350°F (175°C) oven for about 10-15 minutes, until warmed through and the topping crisps back up. You can use the microwave in a pinch, but the topping will be soft. If you do microwave it, try to reheat individual portions and eat it right away.
Freezing: You can freeze the assembled, unbaked crisp for up to 3 months. Wrap the dish tightly in plastic wrap and then foil. To bake from frozen, add about 15-20 minutes to the baking time. You can also freeze the baked, cooled crisp. Just thaw it in the fridge overnight and reheat in the oven.
Nutritional Information & Benefits
While this is definitely a treat, it does have some redeeming qualities. Here’s a rough estimate of the nutritional information per serving (based on 8 servings).
| Nutrient | Amount Per Serving |
|---|---|
| Calories | ~480 |
| Total Fat | 22g |
| Saturated Fat | 13g |
| Carbohydrates | 70g |
| Fiber | 5g |
| Sugar | 48g |
| Protein | 4g |
| Sodium | 320mg |
Apples are a good source of fiber and vitamin C, and oats are known for their heart-healthy beta-glucan. The nuts, if you add them, provide healthy fats and protein. Of course, this is still a dessert, so enjoy it in moderation. But honestly, a little bit of butter and sugar now and then is good for the soul. This recipe is a wonderful way to use up a bounty of fall apples and create a cozy, comforting dessert that brings people together.
If you’re watching your sugar intake, you can reduce the sugar in the apple filling by a couple of tablespoons, but the caramel really needs the full amount for the right texture. This recipe is not gluten-free or dairy-free as written, but see the variations section for easy adaptations.
Conclusion
This salted caramel apple crisp with oat crumble is more than just a dessert. It’s a warm hug on a cold day. It’s the smell of autumn filling your kitchen. It’s the taste of a memory you thought you’d lost, recreated in your own home. After chasing that perfect version from The Sugar Jar, I can honestly say this recipe has become a beloved staple in my kitchen, and I hope it becomes one in yours too.
Don’t be afraid to make it your own. Swap the apples for pears, add some pecans, or go heavy on the caramel. The best recipes are the ones that feel like you. I love this recipe because it’s forgiving, it’s delicious, and it always makes the people I share it with smile. That’s the whole point, isn’t it?
I’d love to hear how yours turns out! Leave a comment below and let me know if you tried any fun variations. Tag me in your photos on social media—I love seeing your creations. Now go preheat that oven and make something cozy. You deserve it.
Frequently Asked Questions
Can I use quick oats instead of rolled oats?
I really don’t recommend it. Quick oats are more finely processed and will absorb liquid differently, resulting in a softer, less crunchy topping. Rolled oats give you that wonderful, hearty texture that makes a crisp so satisfying.
Do I have to peel the apples?
For this recipe, yes. The peel can become tough and chewy during baking, which isn’t pleasant in a tender apple filling. Plus, peeled apples break down more evenly, creating a smoother, more cohesive filling.
My caramel seized up and turned into a hard, sugary lump. What did I do wrong?
Don’t worry, it happens to the best of us! This usually happens if the cream or butter you added was too cold. Always make sure your dairy ingredients are at room temperature before adding them to the hot sugar. If it does seize, you can try gently reheating it over low heat while whisking constantly. Sometimes it will come back together.
Can I make this ahead of time?
Absolutely! You can assemble the entire crisp (without baking) a day ahead. Cover it and store it in the refrigerator. When you’re ready to bake, you may need to add 10-15 minutes to the baking time since you’re starting from cold. You can also make the caramel sauce up to a week in advance and store it in the fridge.
How do I keep the oat crumble from getting soggy overnight?
While it’s best fresh, you can help maintain some crunch by storing leftovers uncovered in the refrigerator. The airflow will help keep the topping from getting too soft. When reheating, use the oven instead of the microwave to help crisp it back up.
Pin This Recipe!

The Best Salted Caramel Apple Crisp (Easy Recipe)

This salted caramel apple crisp features tender, spiced apples, a buttery, crunchy oat crumble, and a rich homemade salted caramel sauce that weaves through every layer. It’s the ultimate comfort dessert, perfect for cozy evenings and guaranteed to impress.
- Prep Time: 20 minutes
- Cook Time: 45 minutes
- Total Time: 1 hour 5 minutes
- Yield: 8 servings 1x
- Category: Dessert
- Cuisine: American
Ingredients
- 6 medium apples (about 2.5 lbs or 1.1 kg), peeled, cored, and sliced into ¼-inch thick pieces (recommend a mix of Honeycrisp and Granny Smith)
- ¼ cup (50 g) granulated sugar
- ¼ cup (50 g) packed brown sugar
- 2 tablespoons (16 g) all-purpose flour
- 1 tablespoon (15 ml) lemon juice
- 1 teaspoon ground cinnamon
- ¼ teaspoon ground nutmeg
- ¼ teaspoon salt
- 1 cup (90 g) rolled oats (old-fashioned)
- ¾ cup (95 g) all-purpose flour
- ½ cup (100 g) packed brown sugar
- ½ cup (1 stick or 113 g) unsalted butter, cold and cubed
- ½ teaspoon ground cinnamon
- ¼ teaspoon salt
- 1 cup (200 g) granulated sugar (for caramel)
- 6 tablespoons (85 g) unsalted butter, cut into pieces, at room temperature (for caramel)
- ½ cup (120 ml) heavy cream, at room temperature (for caramel)
- 1 teaspoon flaky sea salt (for caramel, plus more for sprinkling)
- 1 teaspoon vanilla extract (for caramel)
Instructions
- Preheat your oven to 350°F (175°C).
- Make the salted caramel sauce first. In a medium, heavy-bottomed saucepan, spread the 1 cup of granulated sugar in an even layer. Cook over medium heat, without stirring, until the sugar begins to melt around the edges. Swirl the pan occasionally to help the sugar melt evenly. Cook until the sugar is a deep amber color, about 8-10 minutes.
- Remove the pan from the heat immediately. Carefully add the 6 tablespoons of room-temperature butter, one piece at a time, whisking constantly. The mixture will bubble up. Once all the butter is incorporated and smooth, slowly drizzle in the ½ cup of room-temperature heavy cream while whisking. Whisk until smooth. Stir in 1 teaspoon of flaky sea salt and 1 teaspoon of vanilla extract. Set aside to cool slightly.
- In a large bowl, combine the sliced apples, ¼ cup granulated sugar, ¼ cup packed brown sugar, 2 tablespoons flour, 1 tablespoon lemon juice, 1 teaspoon cinnamon, ¼ teaspoon nutmeg, and ¼ teaspoon salt. Toss until the apples are evenly coated. Let sit for about 5 minutes.
- In a separate large bowl, whisk together 1 cup rolled oats, ¾ cup flour, ½ cup packed brown sugar, ½ teaspoon cinnamon, and ¼ teaspoon salt. Add the ½ cup of cold, cubed butter. Using a pastry cutter, two forks, or your fingertips, work the butter into the dry ingredients until the mixture looks like coarse, crumbly sand with some pea-sized butter lumps remaining.
- Spread the apple mixture evenly into a 9×13-inch baking dish. Drizzle about half of the salted caramel sauce over the apple filling. Sprinkle the oat crumble evenly over the top, covering the apples completely. Do not press it down.
- Place the dish on a baking sheet. Bake for 40-45 minutes, or until the filling is bubbly and the topping is golden brown and crisp. If the topping starts to brown too quickly after 30 minutes, loosely tent the dish with aluminum foil.
- Let the crisp cool on a wire rack for at least 15-20 minutes. Drizzle the remaining salted caramel sauce over the top just before serving. Sprinkle with a little extra flaky sea salt if desired.
Notes
For a gluten-free version, swap the all-purpose flour in both the filling and the crumble for a 1:1 gluten-free baking flour blend. For a dairy-free version, use high-quality vegan butter in the crumble and the caramel, and swap the heavy cream for full-fat coconut cream. The caramel can be made up to a week in advance and stored in the refrigerator. The assembled, unbaked crisp can be frozen for up to 3 months.
Nutrition
- Serving Size: 1 serving (1/8 of re
- Calories: 480
- Sugar: 48
- Sodium: 320
- Fat: 22
- Saturated Fat: 13
- Carbohydrates: 70
- Fiber: 5
- Protein: 4
Keywords: salted caramel apple crisp, apple crisp, easy apple crisp, oat crumble, fall dessert, apple dessert, caramel apple crisp