I was standing in the baking aisle of our local grocery store last November when the smell hit me—not cinnamon or nutmeg, but that weirdly specific scent of a new plastic cookie cutter package. And suddenly I was six years old at my Aunt Peggy’s kitchen table, pressing a lopsided turkey-shaped cutter into dough that was way too warm, while she laughed and said “honey, that bird’s gonna need a second leg.” She passed away five years ago, and I honestly hadn’t thought about those afternoons in forever. But there I was, holding a pack of fall-themed cutters, and I could almost feel her flour-dusted hand guiding mine.
I bought the cutters, obviously. And then I spent three weeks trying to recreate cookies that tasted like those afternoons—not too sweet, sturdy enough for little hands to decorate, and made with ingredients I didn’t feel guilty about. Because let’s face it, most holiday cookies are basically butter and sugar delivery systems. Which is fine. But I wanted something my kids could help make without me worrying about the sugar crash at 3 PM. These wholesome turkey-shaped peanut butter cookies were the result of that mission. And honestly? Aunt Peggy would’ve approved. Maybe you’ve been there too—chasing a taste from your past that you can’t quite pin down, but you keep trying anyway.
The first batch was a disaster. Too crumbly, the turkeys looked more like deformed chickens, and my four-year-old ate half the dough before I could get them in the oven. But by batch three, something clicked. The peanut butter gave them this rich, nutty flavor that worked perfectly with just a touch of honey for sweetness. And the texture? Soft in the middle, slightly crisp at the edges—exactly what a kid-friendly cookie should be. I’ve been making them every Thanksgiving since, and they’ve become the thing my nieces and nephews ask for before the turkey even hits the table.
Why You’ll Love This Recipe
These aren’t your typical holiday cookies. I’ve tested this recipe more times than I care to admit, and here’s what makes them stand out:
- Quick & Easy: From mixing bowl to cooling rack in under 25 minutes. Perfect for those moments when your kid announces they need 24 cookies for the school party tomorrow morning.
- Simple Ingredients: You probably have everything in your pantry right now. No trips to specialty stores or hunting down obscure flours.
- Perfect for Thanksgiving: Great for classroom parties, playdates, or keeping little hands busy while you tackle the actual turkey.
- Crowd-Pleaser: I’ve brought these to three different gatherings and they disappear faster than the store-bought stuff. Kids love the shape, adults love the taste.
- Unbelievably Delicious: The peanut butter and honey combo creates this deep, toasty flavor that somehow manages to be both wholesome and indulgent.
What makes these different from every other peanut butter cookie recipe out there? It’s the texture. I spent ages figuring out how to get a cookie that holds its shape (turkeys need defined tail feathers, people) without being dry or crumbly. The secret is the ratio of peanut butter to flour—too much flour and they taste like cardboard, too little and your turkeys look like they melted in the sun. This version hits that sweet spot where the dough is easy to work with, the cookies hold their shape during baking, and they come out soft and tender every single time.
These cookies are the kind that make you feel good about feeding them to your kids. They’ve got protein from the peanut butter, they’re sweetened with honey instead of refined sugar, and they’re made with whole ingredients you can pronounce. But honestly? They just taste like childhood. The kind of cookie that makes you close your eyes after the first bite and remember what it felt like to be small and sticky-fingered and happy.
What Ingredients You Will Need
This recipe uses simple, wholesome ingredients to create cookies that are both delicious and sturdy enough for little hands to decorate. Most of these are pantry staples, which means you can whip up a batch whenever the mood strikes.
For the Cookies
- Natural peanut butter, 1 cup (250g) – I prefer using creamy natural peanut butter with no added sugar. The kind where the oil separates on top? That’s the one. Just stir it well before measuring. I’ve tested this with Skippy Natural and it works great, but avoid the super-processed stuff with hydrogenated oils—it changes the texture.
- Honey, ½ cup (170g) – Use raw honey if you’ve got it. The floral notes add a lovely complexity. For a vegan version, maple syrup works but the cookies will spread a bit more.
- Unsalted butter, ¼ cup (56g), softened – Let it sit out for about 30 minutes before starting. If you’re dairy-free, coconut oil works beautifully—just make sure it’s softened, not melted.
- Large egg, 1, room temperature – This helps bind everything together. If your egg is cold, place it in a bowl of warm water for 5 minutes before using.
- Vanilla extract, 1 teaspoon – Pure vanilla makes a difference here. The imitation stuff has a chemical aftertaste that doesn’t play well with the peanut butter.
- Whole wheat pastry flour, 1½ cups (180g) – This is my secret weapon. It gives the cookies a nuttier flavor and better texture than all-purpose flour, but it’s lighter than regular whole wheat flour. If you don’t have it, use 1 cup all-purpose flour plus ½ cup white whole wheat flour.
- Baking soda, ½ teaspoon – Helps the cookies rise just a touch without spreading too much.
- Salt, ¼ teaspoon – Enhances the peanut butter flavor. Skip this if your peanut butter is salted.
For Decorating
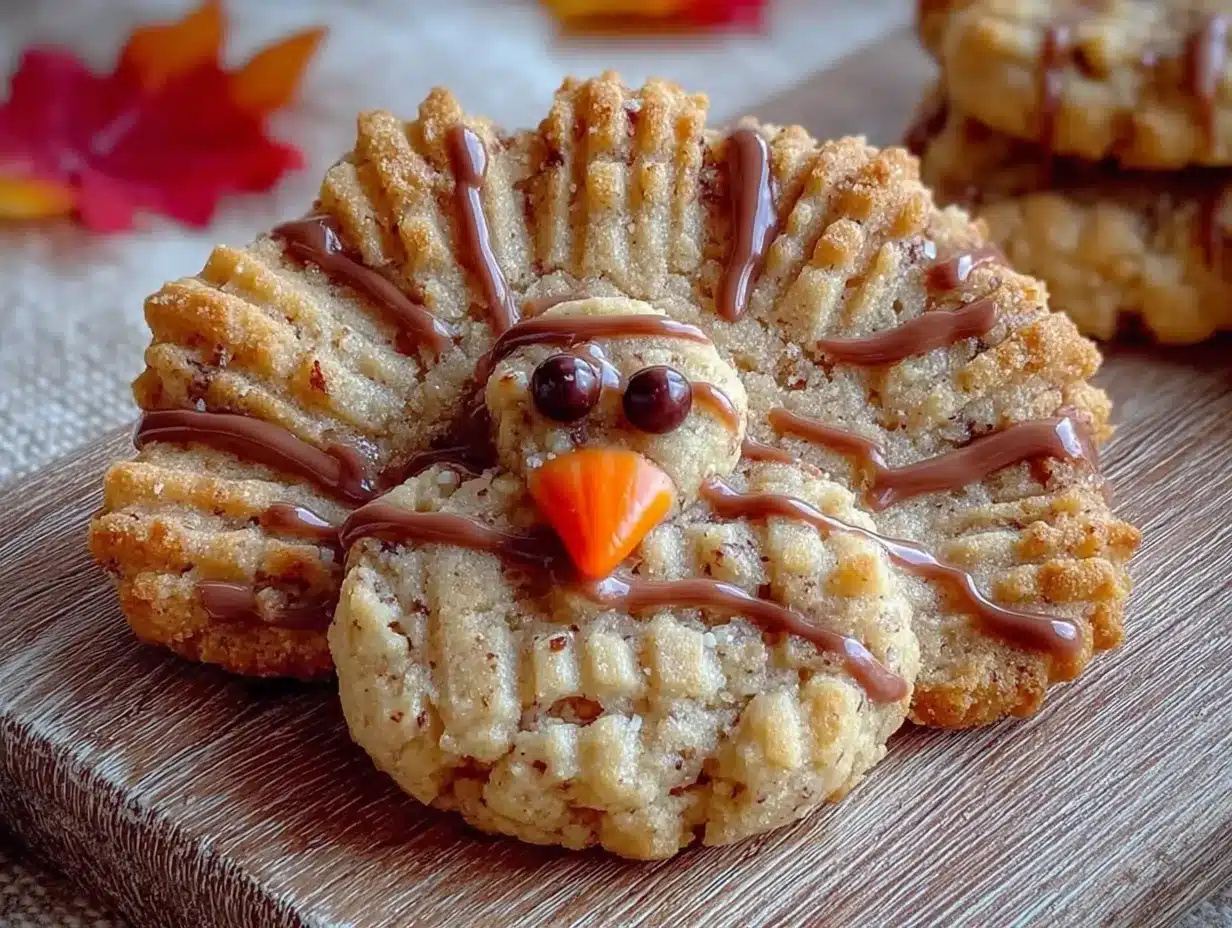
- Candy eyes, 24 pairs – Those little white and black circles you find in the baking aisle. They’re basically mandatory for turkey cookies.
- Mini chocolate chips, ¼ cup – For the beaks and waddles. You’ll need about 2 per cookie.
- Candy corn, 24 pieces – These make perfect turkey tail feathers. Yes, they’re sugary, but a little goes a long way.
- Red icing or mini red M&Ms – For the wattle (that’s the red dangly bit under the turkey’s beak). I’ve used both and prefer the M&Ms for convenience.
Equipment Needed
You don’t need a fancy kitchen to make these cookies. Here’s what you’ll actually use:
- Turkey-shaped cookie cutter – Obviously. I found mine at a craft store for $3.99. If you can’t find one, a large round cutter works too—just call them “turkey patties” and the kids won’t care.
- Large mixing bowl – Any bowl will do, but a wide one makes mixing easier.
- Hand mixer or stand mixer – You can mix by hand, but the peanut butter makes the dough pretty stiff. I’ve done it both ways and the mixer saves about 10 minutes of arm fatigue.
- Baking sheets (2) – Light-colored sheets work best. Dark sheets can cause the bottoms to brown too quickly.
- Parchment paper – Non-negotiable for this recipe. The cookies stick less and clean-up is a breeze.
- Cooling rack – Lets air circulate so the cookies don’t get soggy on the bottom.
- Spatula – A thin metal one works best for transferring the cookies.
- Small offset spatula – Optional, but great for spreading icing if you go that route.
My first time making these, I didn’t have a turkey cutter and used a gingerbread man cutter instead. The kids called them “mutant turkeys” and they were a huge hit. So don’t stress if you’re missing something—improvisation is part of the fun.
Preparation Method
- Preheat and prep. Set your oven to 350°F (175°C). Line two baking sheets with parchment paper. This is your insurance policy against stuck cookies.
- Cream the wet ingredients. In your mixing bowl, combine the softened butter, peanut butter, and honey. Beat on medium speed for about 2 minutes until everything is smooth and well-combined. Scrape down the sides halfway through. The mixture should look like thick, glossy caramel.
- Add the egg and vanilla. Crack the egg into a small bowl first (just in case of shells), then add it to the peanut butter mixture along with the vanilla. Beat on low until incorporated, about 30 seconds. Don’t overmix here—you’ll get tough cookies.
- Mix the dry ingredients. In a separate bowl, whisk together the flour, baking soda, and salt. This step seems fussy but it ensures the baking soda is evenly distributed. Nobody wants a cookie that tastes like a science experiment.
- Combine wet and dry. Add the flour mixture to the wet ingredients in two batches, mixing on low after each addition. The dough will be stiff—thicker than regular cookie dough but softer than play-doh. If it feels too sticky, add a tablespoon more flour. Too dry? Add a teaspoon of milk.
- Chill the dough (optional but recommended). Wrap the dough in plastic wrap and refrigerate for 20 minutes. This makes it easier to handle and helps the cookies hold their shape. If you’re in a hurry, skip it—the cookies will just spread a tiny bit more.
- Roll and cut. Lightly flour your work surface and rolling pin. Roll the dough to about ¼-inch thickness. Cut out your turkeys and carefully transfer them to the prepared baking sheets, spacing them about 2 inches apart. You’ll get about 12 cookies per sheet.
- Bake. Place one sheet at a time in the middle rack of your oven. Bake for 8-10 minutes, rotating the sheet halfway through. The cookies are done when the edges are just barely golden brown. The centers will look slightly underdone—that’s perfect. They’ll continue cooking on the hot sheet.
- Cool. Let the cookies sit on the baking sheet for 5 minutes. This is crucial—they’re fragile when hot. Then transfer to a cooling rack to cool completely before decorating. If you try to decorate them while they’re warm, the candy will slide right off. Trust me, I learned this the hard way.
- Decorate. Once completely cool, press on the candy eyes, mini chocolate chips for beaks, candy corn for tail feathers, and red M&Ms for wattles. A tiny dab of icing helps everything stick if needed. Let the kids go wild—my four-year-old’s turkeys look like they’ve been through a blender and she’s never been prouder.
Cooking Tips & Techniques
I’ve made these cookies at least a dozen times now, and I’ve collected some hard-won wisdom along the way.
The dough temperature matters more than you think. If your kitchen is warm, the peanut butter will get soft and the dough will become sticky and impossible to work with. I keep a small bowl of flour nearby and dust my hands and rolling pin frequently. One time I made the mistake of leaving the dough on the counter while I answered the phone, and by the time I came back, it had turned into a sticky mess. Learned that lesson.
Don’t overbake. This is the number one mistake people make with peanut butter cookies. They look underdone when you pull them out, but they firm up as they cool. I’ve had batches that looked alarmingly soft straight from the oven, but after 10 minutes on the cooling rack, they were perfect. Overbaked cookies get dry and crumbly, and your turkeys will fall apart when the kids try to eat them.
Use a thin spatula. These cookies are delicate when warm. I use a thin metal spatula to transfer them from the baking sheet to the cooling rack. My first batch, I used a thick plastic spatula and ended up with several headless turkeys. It was tragic, but the kids didn’t complain.
Chill between batches. If you’re making multiple batches, pop the unused dough back in the fridge between rounds. Warm dough spreads more, and you’ll end up with flat turkeys that look more like pancakes. Nobody wants that.
Let the kids decorate on wax paper. Trust me on this one. Have them decorate on a piece of wax paper or parchment, then transfer the finished cookies to a plate. It saves you from scraping dried icing off your counter at 10 PM.
Variations & Adaptations
These cookies are surprisingly flexible. Here are some variations I’ve tried and loved:
Gluten-Free Version: Substitute the whole wheat pastry flour with a 1:1 gluten-free baking flour. I’ve tested this with Bob’s Red Mill Gluten-Free 1-to-1 Baking Flour and the texture was spot-on. Just add an extra tablespoon of peanut butter to compensate for the lack of gluten.
Vegan Adaptation: Replace the butter with coconut oil (use the same amount) and the egg with a flax egg (1 tablespoon ground flaxseed mixed with 3 tablespoons water, let sit for 5 minutes). The cookies will be slightly more crumbly, so handle them gently. I made these for a friend’s vegan Thanksgiving and they disappeared before the actual dessert course.
Nut-Free Option: Use sunflower seed butter instead of peanut butter. The color will be darker (sunflower butter turns greenish when baked, which is normal but weird-looking). Add a teaspoon of lemon juice to prevent the color change, or just embrace the green turkeys—my kids thought they were hilarious.
Different Shapes: Don’t limit yourself to turkeys. This dough works beautifully with any cookie cutter. I’ve made pumpkins, leaves, and even dinosaurs (because why should Thanksgiving have all the fun?). The baking time stays the same regardless of shape.
Flavor Twists: Add ½ teaspoon of cinnamon or pumpkin pie spice to the dry ingredients for a warmer flavor. Or swap the vanilla for almond extract—it pairs beautifully with peanut butter.
Serving & Storage Suggestions
These cookies are best served at room temperature, which means they’re ready to go whenever you are. I like to arrange them on a platter with the turkey faces facing outward—it makes a cute presentation that kids absolutely lose their minds over.
For storage, place the decorated cookies in an airtight container with wax paper between layers. They’ll stay fresh for up to 5 days at room temperature. After that, they start to get a bit dry. Not that they’ll last that long—in my house, they’re gone within 48 hours.
You can freeze the undecorated cookies for up to 3 months. Just place them in a freezer-safe bag with the air squeezed out. When you’re ready to serve, thaw them at room temperature for about 30 minutes, then decorate. This is my secret weapon for Thanksgiving week—I make the cookies a week ahead and freeze them, then pull them out the morning of the party.
The flavors actually develop a bit overnight. The peanut butter and honey meld together, and the cookies get slightly softer and more flavorful. So if you can resist eating them all on day one, they’re even better on day two.
These cookies pair beautifully with a glass of cold milk (obviously), hot apple cider, or a cup of coffee for the adults. I’ve also crumbled them over vanilla ice cream for a quick dessert that looks way more impressive than it is.
Nutritional Information & Benefits
Per cookie (based on 24 cookies, undecorated): Approximately 140 calories, 8g fat, 15g carbohydrates, 4g protein, 2g fiber, 6g sugar.
These cookies are a healthier alternative to traditional sugar cookies. The peanut butter provides protein and healthy fats that help stabilize blood sugar—which means your kids won’t crash an hour after eating them. The honey offers antioxidants and has a lower glycemic index than refined sugar. And the whole wheat pastry flour adds fiber and nutrients that white flour just doesn’t have.
That said, they’re still cookies. I’m not here to pretend they’re health food. But compared to the typical holiday cookie that’s basically butter and sugar with a side of food coloring? These are a solid choice for when you want to give your kids a treat without the guilt.
For those with allergies: These cookies contain peanuts, wheat, eggs, and dairy. The vegan version eliminates eggs and dairy but still contains wheat and peanuts. The nut-free version eliminates peanuts but still contains wheat, eggs, and dairy. Always check your specific ingredients for cross-contamination warnings if allergies are a concern.
FAQs
Can I use crunchy peanut butter instead of creamy?
Yes, but the texture will be different. The cookie will have little peanut bits throughout, which some people love. Just note that the dough might be slightly harder to roll out evenly because of the chunks.
My dough is too sticky. What did I do wrong?
Probably one of three things: your peanut butter was too warm, you used a brand with added oils, or your kitchen is hot. Pop the dough in the fridge for 20 minutes and try again. If it’s still sticky, add flour one tablespoon at a time until it feels right.
Can I make these without a turkey cookie cutter?
Absolutely. Use any fall-themed cutter—leaves, pumpkins, acorns. Or just roll the dough into balls and flatten them with a fork for classic peanut butter cookies. The kids won’t care about the shape as long as they taste good.
Why did my cookies spread into blobs?
Your dough was too warm, or your baking soda is old. Make sure your dough is chilled before baking, and check that your baking soda hasn’t expired (it should fizz when mixed with vinegar). Also, don’t skip the parchment paper—it helps the cookies hold their shape.
How do I get the candy to stay on?
Press the decorations into the cookies while they’re still slightly warm—about 5 minutes out of the oven. If they’ve cooled completely, use a tiny dab of frosting or honey as “glue” to hold everything in place.
Conclusion
These wholesome turkey-shaped peanut butter cookies have become a staple in our house, and I hope they become one in yours too. They’re not perfect—some batches come out a little lopsided, the candy eyes sometimes fall off, and my kids’ decorating skills leave a lot to be desired. But that’s kind of the point. These cookies are about the process as much as the result. They’re about flour-covered countertops and sticky little fingers and the smell of peanut butter and honey filling your kitchen on a crisp fall afternoon.
I’d love to hear how yours turn out. Did your kids come up with creative decorations? Did you try a variation that worked particularly well? Drop a comment below and share your turkey cookie adventures. And if you make these for a school party or Thanksgiving gathering, tag me in your photos—I genuinely get excited seeing other people’s interpretations of this recipe.
Go ahead, preheat that oven. Aunt Peggy would want you to.
Pin This Recipe!
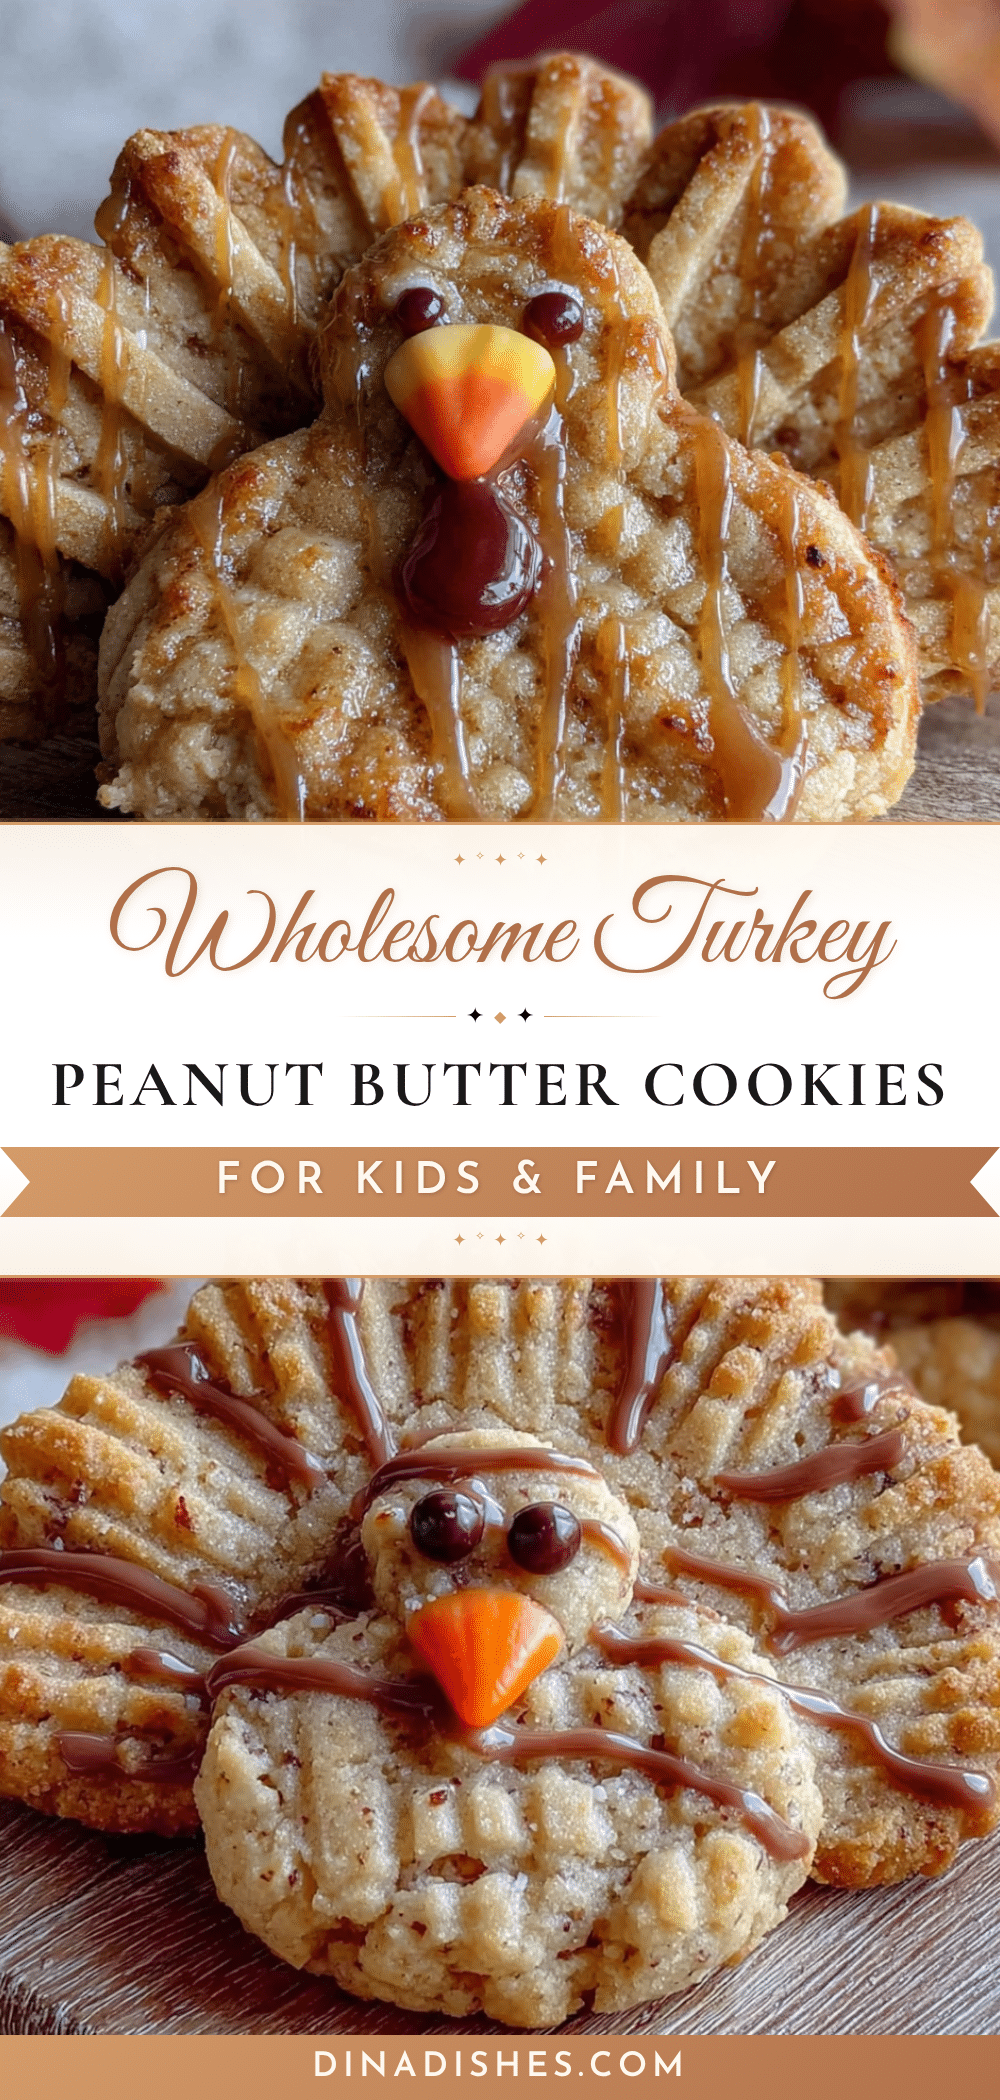
Wholesome Turkey Peanut Butter Cookies Easy Recipe for Kids
These wholesome turkey-shaped peanut butter cookies are perfect for kids to help make and decorate. Sweetened with honey and made with whole wheat pastry flour, they’re a healthier holiday treat that’s sturdy enough for little hands.
- Prep Time: 15 minutes
- Cook Time: 10 minutes
- Total Time: 25 minutes
- Yield: 24 cookies 1x
- Category: Dessert
- Cuisine: American
Ingredients
- 1 cup (250g) natural peanut butter, creamy
- ½ cup (170g) honey
- ¼ cup (56g) unsalted butter, softened
- 1 large egg, room temperature
- 1 teaspoon vanilla extract
- 1½ cups (180g) whole wheat pastry flour
- ½ teaspoon baking soda
- ¼ teaspoon salt
- 24 pairs candy eyes
- ¼ cup mini chocolate chips
- 24 pieces candy corn
- Red icing or mini red M&Ms
Instructions
- Preheat oven to 350°F (175°C). Line two baking sheets with parchment paper.
- In a mixing bowl, combine softened butter, peanut butter, and honey. Beat on medium speed for about 2 minutes until smooth and well-combined.
- Add egg and vanilla extract. Beat on low until incorporated, about 30 seconds.
- In a separate bowl, whisk together flour, baking soda, and salt.
- Add flour mixture to wet ingredients in two batches, mixing on low after each addition. Dough will be stiff.
- Chill dough in plastic wrap for 20 minutes (optional but recommended).
- Lightly flour work surface and rolling pin. Roll dough to ¼-inch thickness. Cut out turkey shapes and transfer to prepared baking sheets, spacing 2 inches apart.
- Bake one sheet at a time on middle rack for 8-10 minutes, rotating halfway through. Edges should be just barely golden brown.
- Let cookies sit on baking sheet for 5 minutes, then transfer to a cooling rack to cool completely.
- Once cool, decorate with candy eyes, mini chocolate chips for beaks, candy corn for tail feathers, and red M&Ms for wattles. Use a dab of icing to help stick if needed.
Notes
Chill dough between batches to prevent spreading. Don’t overbake; cookies will firm up as they cool. Use a thin metal spatula to transfer warm cookies. Let kids decorate on wax paper for easy cleanup.
Nutrition
- Serving Size: 1 cookie
- Calories: 140
- Sugar: 6
- Sodium: 80
- Fat: 8
- Saturated Fat: 2
- Carbohydrates: 15
- Fiber: 2
- Protein: 4
Keywords: turkey cookies, peanut butter cookies, Thanksgiving cookies, kid-friendly cookies, healthy cookies, holiday cookies, easy cookie recipe


