My niece, who is seven and has very strong opinions about snacks, asked why I couldn’t just stick a pretzel rod into a bowl of melted white chocolate and call it a day. I started to explain why that wouldn’t work—something about presentation, about the chocolate pooling at the bottom, about needing a proper dipping technique. Then I stopped. She was holding a bag of pretzel rods with this look of pure, unshakeable confidence. So I handed her a spoon, melted the chocolate, and let her go to town.
Honestly? She was completely right. The chocolate didn’t pool anywhere problematic. The pretzel stayed perfectly intact. And the whole process took about twelve minutes, most of which was me standing there with my mouth half-open, realizing I’d been overcomplicating a snack for years. We ended up making a whole batch that afternoon, adding little almond slivers for fingernails because, well, it was October and the witch finger thing just made sense. My kitchen looked like a tiny chocolate factory exploded, but the joy on her face was worth every sticky countertop.
That’s how these wholesome witch finger pretzel rods with white chocolate came to be. They’re not fussy. They’re not fancy. They’re just really, really good—and maybe you’ve been there, standing in the aisle of a grocery store, trying to decide between a bag of chips and something that feels a little more fun. These are that fun thing. They’re the snack that makes you feel like you’re treating yourself without the guilt, and they come together so fast you’ll wonder why you ever bought the packaged stuff. I keep making them because they remind me that sometimes the simplest ideas are the ones worth holding onto.
Why You’ll Love This Recipe
I’ve tested this recipe about seven times now—yes, seven—because I wanted to make sure the chocolate coating stayed smooth, the pretzels stayed crunchy, and the whole thing felt like an actual treat, not a compromise. As someone who develops recipes for a living, I can tell you that the balance here is spot on. The saltiness of the pretzel cuts through the sweetness of the white chocolate, and the almond fingernails add this little crunch that makes each bite interesting.
- Quick & Easy: From start to finish, you’re looking at about 20 minutes. That includes melting, dipping, and decorating. Perfect for last-minute Halloween parties or a lazy Sunday afternoon craving.
- Simple Ingredients: You probably already have pretzel rods in your pantry. White chocolate chips are a staple in most baking drawers. Almonds? Optional, but highly recommended. No fancy grocery trips required.
- Perfect for Halloween: These are the kind of treat that kids and adults both go crazy for. The witch finger theme is playful without being over-the-top, and they look impressive on a dessert table with zero effort.
- Crowd-Pleaser: I brought a batch to my neighbor’s potluck last week, and they were gone in fifteen minutes. One guy asked for the recipe twice.
- Unbelievably Delicious: The combination of salty pretzel, creamy white chocolate, and crunchy almond is honestly addictive. It’s comfort food reimagined—healthier, faster, but with the same soul-soothing satisfaction.
What makes this recipe different from the rest is the technique. Instead of using candy melts or complicated coatings, we’re using high-quality white chocolate that melts like a dream. The secret is adding a tiny splash of coconut oil to the chocolate, which keeps it from seizing and gives it that glossy, professional finish. It’s not just another version of a dipped pretzel—it’s my best version, tested and tweaked until every bite feels just right.
What Ingredients You Will Need
This recipe uses simple, wholesome ingredients to deliver that perfect sweet-and-salty crunch without any fuss. Most of these are pantry staples, so you can whip up a batch anytime the mood strikes.
- Pretzel rods (1 standard 12-ounce bag, about 30 rods) — Look for thick, sturdy rods that won’t snap easily when dipped. I prefer the Snyder’s brand for their consistent crunch, but any brand works fine.
- White chocolate chips or melting wafers (12 ounces, about 2 cups) — Quality matters here. Ghirardelli or Guittard white chocolate chips melt beautifully and taste rich without being overly sweet. Avoid generic white chips that contain artificial flavors.
- Coconut oil or vegetable shortening (1 tablespoon) — This is the secret ingredient that keeps the chocolate smooth and gives it that glossy finish. It also helps the chocolate set faster in the fridge.
- Sliced almonds (¼ cup, about 30 slivers) — These become the witch fingernails. Look for raw or lightly toasted slices that are thin enough to stick easily. You can also use whole almonds cut into slivers if that’s what you have.
- Green food coloring (gel or liquid, optional) — For that spooky witchy vibe. Gel coloring works best because it doesn’t thin out the chocolate. A few drops go a long way.
- Edible glitter or sanding sugar (optional, for decoration) — Adds a little sparkle that makes these feel extra special. Silver, purple, or orange colors work great for Halloween.
Substitution Guidance: If you’re dairy-free, use dairy-free white chocolate chips and coconut oil. For a nut-free version, skip the almonds and use small candy eyes or sunflower seed slivers instead. If you don’t have coconut oil, vegetable shortening works just as well—just use the same amount.
Ingredient Selection Tip: When choosing white chocolate, check the label for cocoa butter content. Real white chocolate contains cocoa butter, which melts more smoothly and tastes creamier. Products labeled “white morsels” or “white baking chips” often skip the cocoa butter and use palm oil instead—they’ll still work, but the texture won’t be as luxurious.
Equipment Needed
You don’t need a professional kitchen to make these. I’ve made them in my tiny apartment with minimal tools, and they turned out just as good as the batch I tested in a full commercial kitchen.
- Microwave-safe bowl (medium size) — For melting the chocolate. Glass or ceramic works best.
- Baking sheet — Lined with parchment paper or a silicone mat. This is where your pretzels will set.
- Spatula or spoon — For stirring the chocolate and dipping the pretzels. A small offset spatula gives you more control.
- Piping bag or small zip-top bag — For drizzling extra chocolate or adding details. If you don’t have a piping bag, a zip-top bag with the corner snipped off works perfectly.
- Measuring spoons — For the coconut oil and any optional food coloring.
- Tweezers or small tongs — This is my secret weapon for placing the almond slivers exactly where I want them without getting chocolate all over my fingers.
Budget-Friendly Options: Don’t have a piping bag? Use a clean plastic sandwich bag. No tweezers? Toothpicks work great for placing small decorations. The key is to work with what you have—I once used a butter knife to spread chocolate, and honestly, it was fine.
Preparation Method
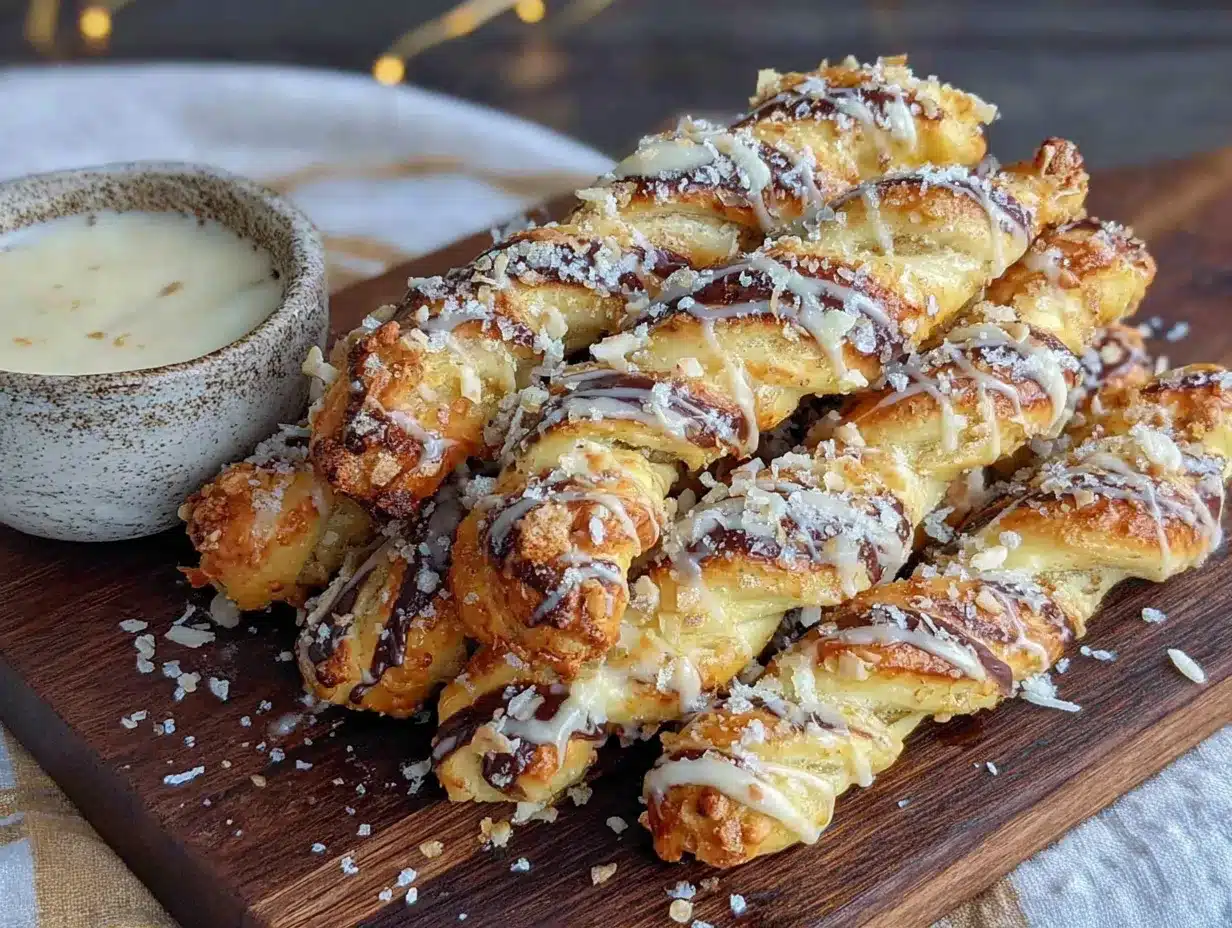
- Line your baking sheet with parchment paper or a silicone mat. Make sure it’s clean and dry. You want a non-stick surface so your pretzels lift off easily once set.
- Prepare your almonds if they aren’t already sliced. Take whole almonds and carefully slice them lengthwise into thin slivers. You want pieces that look like tiny fingernails—about ½ inch long and ¼ inch wide. Set them aside in a small bowl.
- Melt the white chocolate: Place the white chocolate chips and coconut oil in a microwave-safe bowl. Microwave in 30-second intervals, stirring well after each interval. The chocolate will look like it’s not melting at first—that’s normal. Keep stirring, and it will come together into a smooth, glossy liquid. This usually takes about 2 to 3 minutes total. Warning: White chocolate burns easily, so don’t walk away. If you see any lumps forming, you’ve overheated it—start over with fresh chocolate.
- Add food coloring (optional): If you want that spooky green hue, add a few drops of gel food coloring to the melted chocolate and stir until evenly distributed. Start with one drop and add more until you reach your desired shade. Remember, a little goes a long way.
- Dip the pretzels: Hold a pretzel rod at one end and dip the other end into the melted chocolate. Rotate the pretzel gently to coat about two-thirds of the rod. Let the excess chocolate drip back into the bowl for a few seconds. You want a thick, even coating—not too thin, not too gloppy.
- Place on baking sheet: Transfer the dipped pretzel to the prepared baking sheet, placing it with the chocolate-covered end pointing away from you. Leave about an inch of space between each pretzel so they don’t stick together.
- Add the fingernails: While the chocolate is still wet, take a sliced almond and press it gently into the tip of the chocolate-covered end. Angle it slightly upward so it looks like a fingernail growing from the finger. Use tweezers for precision if you have them. Repeat for each pretzel.
- Add decorations: If you’re using edible glitter or sanding sugar, sprinkle it over the wet chocolate now. You can also add small lines or wrinkles to make the fingers look more realistic—use a toothpick to draw gentle lines in the chocolate before it sets.
- Let them set: Place the baking sheet in the refrigerator for 15 to 20 minutes, or until the chocolate is completely firm. If you’re in a hurry, the freezer works too—just 5 to 7 minutes, but keep an eye on them so they don’t get too cold and crack.
- Optional drizzle: If you have leftover chocolate, warm it up slightly and transfer it to a piping bag or zip-top bag. Snip a tiny corner off the bag and drizzle thin lines of chocolate over the set pretzels for a decorative finish. Let this set for another 5 minutes.
- Serve or store: Once the chocolate is fully set, gently lift the pretzels off the parchment paper. They’re ready to eat immediately or store for later.
Cooking Tips & Techniques
I’ve made a lot of mistakes with dipped pretzels over the years, and I’m sharing them so you don’t have to repeat them. The first time I tried this, I used cheap white chocolate that seized into a grainy mess. I stood there staring at the bowl, wondering what I’d done wrong. The answer was simple—I’d skipped the coconut oil and microwaved the chocolate too long.
Keep the chocolate warm but not hot. White chocolate has a low melting point, and if it gets above 110°F, it will seize. That means it turns into a thick, lumpy paste that’s impossible to dip. If this happens, you can try whisking in a tablespoon of hot water or cream, but honestly, it’s easier to start fresh. Keep your microwave intervals short and stir frequently.
Work in small batches. Don’t dip all 30 pretzels at once. Dip 5 to 7 at a time, add the almonds, and then move on to the next batch. This keeps the chocolate from cooling down and becoming too thick to work with. If the chocolate starts to thicken, pop it back in the microwave for 10 seconds and stir.
Use a deep, narrow bowl. A wider bowl means more surface area for the chocolate to cool. A smaller, deeper bowl keeps the chocolate warm longer and makes dipping easier. I use a 2-cup glass measuring cup—it’s the perfect size for dipping pretzel rods.
Don’t skip the parchment paper. Wax paper works in a pinch, but parchment is better because it’s non-stick and heat-resistant. I once used aluminum foil, and the chocolate stuck so badly that I had to peel each pretzel off, leaving half the coating behind. Learn from my laziness.
Timing is everything. If you’re making these for a party, dip them the day before and store them in an airtight container. The flavors actually meld together overnight, and the pretzels stay perfectly crunchy. Just don’t refrigerate them for more than a few hours, or the pretzels can start to soften from condensation.
Variations & Adaptations
One of the things I love about this recipe is how flexible it is. I’ve made about six different versions, and each one has its own charm. Here are some of my favorites:
Dark Chocolate Witch Fingers: Swap the white chocolate for dark chocolate (at least 60% cacao) and use the same coconut oil trick. The bitterness of the dark chocolate pairs beautifully with the salty pretzel. For fingernails, use white chocolate chips or sliced almonds. This version is lower in sugar and feels a little more grown-up.
Monster Mash Pretzels: Skip the witch finger theme altogether and go for monster eyes. After dipping the pretzels in white chocolate, press two candy eyes into the chocolate before it sets. Add a little red gel coloring for veins or drool. My nephew’s friends went absolutely wild for these at a Halloween party last year.
Spiced Pumpkin Pretzels: Add ½ teaspoon of pumpkin pie spice to the melted white chocolate before dipping. The warm spices—cinnamon, nutmeg, ginger—give the pretzels a cozy fall flavor that’s perfect for Thanksgiving or harvest parties. Top with crushed graham crackers instead of almonds for a pumpkin pie vibe.
Vegan & Dairy-Free Version: Use dairy-free white chocolate (I like the Enjoy Life brand) and coconut oil. The texture is slightly different—a little softer at room temperature—but the taste is still amazing. Store these in the fridge to keep them firm.
Nut-Free Option: Instead of almonds, use small pretzel sticks broken into fingernail-sized pieces, or use sunflower seed slivers. You can also skip the fingernails entirely and just decorate with sprinkles. The pretzels will still look festive and taste delicious.
Serving & Storage Suggestions
These pretzels are best served at room temperature. The chocolate is firm but not hard, and the pretzel stays perfectly crunchy. If you’ve refrigerated them, let them sit out for about 10 minutes before serving to take the chill off.
How to serve: Arrange the pretzels upright in a tall glass jar or vase for a dramatic presentation. You can also lay them flat on a platter, grouped together like a handful of witch fingers reaching up from the plate. For a Halloween party, label them with a spooky sign—”Witch Fingers” or “Monster Snacks” always gets a laugh.
What to serve with them: These pair beautifully with warm apple cider or hot chocolate. For a dessert board, arrange them alongside caramel apples, popcorn balls, and pumpkin cookies. They also work as a fun topping for ice cream sundaes—just stick one into a scoop of vanilla ice cream for an instant Halloween dessert.
Storage instructions: Store the pretzels in an airtight container at room temperature for up to 5 days. If you live in a humid climate, keep them in the refrigerator to prevent the pretzels from getting soft. Layer them between sheets of parchment paper so they don’t stick together. Do not freeze them—the condensation when thawing will ruin the chocolate coating.
Flavor development: I’ve noticed that these pretzels actually taste better on day two. The salt from the pretzel migrates slightly into the chocolate, creating this perfect sweet-salty balance that’s even more addictive. So don’t worry if you make them ahead of time—they’ll only get better.
Nutritional Information & Benefits
Each pretzel rod (using the standard recipe) contains approximately 120 calories, 7 grams of fat, 14 grams of carbohydrates, and 2 grams of protein. These numbers will vary depending on the brand of chocolate and pretzels you use.
While these are definitely a treat, there are a few silver linings. Pretzels are lower in fat than many other snack options, and they provide a small amount of iron and B vitamins. White chocolate contains calcium from the milk solids, and almonds add healthy monounsaturated fats and vitamin E. The coconut oil provides medium-chain triglycerides, which some studies suggest may support energy metabolism.
Dietary considerations: This recipe is vegetarian. For a gluten-free version, use gluten-free pretzel rods (they’re available at most health food stores). For vegan and dairy-free options, see the variations section above. The main allergens are dairy (white chocolate) and tree nuts (almonds).
My personal perspective: I believe in balance. These pretzels aren’t health food, but they’re made with real ingredients that you can recognize. There’s no high-fructose corn syrup, no artificial preservatives, and no hydrogenated oils—unless you choose to add them. For me, that’s the sweet spot. A treat that feels indulgent but doesn’t leave you wondering what you just ate.
Conclusion
These wholesome witch finger pretzel rods with white chocolate are proof that you don’t need a complicated recipe to make something memorable. They’re quick, they’re fun, and they taste genuinely good. Whether you’re making them for a Halloween party, a school bake sale, or just a Tuesday afternoon that needs a little magic, they deliver every time.
I love this recipe because it reminds me of that afternoon with my niece—the mess, the laughter, the way she looked at her creation like it was the most beautiful thing in the world. And honestly? It kind of was. So go ahead and make a batch. Dip them in green chocolate, add the almond fingernails, and sprinkle on some glitter. Or skip all that and just dip them plain. The beauty of this recipe is that it works no matter what.
I’d love to hear how yours turn out! Drop a comment below and let me know what variations you tried, or tag me in your photos on social media. Happy snacking, and don’t forget to save this recipe for your next Halloween celebration!
Frequently Asked Questions
Can I use milk chocolate instead of white chocolate?
Absolutely. Milk chocolate melts just as easily and gives a sweeter, creamier result. Just add the same amount of coconut oil to keep it smooth. The green food coloring won’t show up as well on milk chocolate, so skip it or use orange or purple coloring instead.
How do I prevent the chocolate from cracking when I bite into it?
Let the pretzels come to room temperature before eating. Cold chocolate is more brittle and can crack or shatter. If you’ve stored them in the fridge, take them out 10 to 15 minutes before serving. The chocolate will soften slightly and won’t crack when you bite into it.
Can I make these ahead of time for a party?
Yes, and I actually recommend it. Make them up to 2 days in advance and store them in an airtight container at room temperature. The flavors meld together beautifully, and the pretzels stay crunchy. Just keep them away from heat and humidity.
My white chocolate seized and turned lumpy. Can I fix it?
Sometimes you can rescue seized chocolate by whisking in a tablespoon of hot water or heavy cream, one teaspoon at a time. Stir vigorously until the chocolate comes back together. If it’s still lumpy after adding 2 tablespoons of liquid, it’s best to start over. Prevention is easier—always add coconut oil and microwave in short intervals.
How do I make the witch fingers look more realistic?
Use a toothpick to draw gentle lines on the chocolate before it sets—these look like knuckle wrinkles. Place the almond fingernail at a slight upward angle, and add a tiny dab of chocolate at the base of the almond to create a cuticle effect. You can also dust the finished pretzels with a little cocoa powder for a dirtier, more “dug up” look.
Pin This Recipe!
Wholesome Witch Finger Pretzel Rods with White Chocolate

These quick and easy witch finger pretzel rods are dipped in creamy white chocolate, decorated with almond sliver fingernails, and make a fun, spooky Halloween treat that kids and adults love. Ready in about 20 minutes with simple ingredients.
- Prep Time: 10 minutes
- Cook Time: 10 minutes
- Total Time: 20 minutes
- Yield: 30 servings 1x
- Category: Dessert
- Cuisine: American
Ingredients
- 1 standard 12-ounce bag pretzel rods (about 30 rods)
- 12 ounces white chocolate chips or melting wafers (about 2 cups)
- 1 tablespoon coconut oil or vegetable shortening
- ¼ cup sliced almonds (about 30 slivers)
- Green food coloring (gel or liquid, optional)
- Edible glitter or sanding sugar (optional, for decoration)
Instructions
- Line your baking sheet with parchment paper or a silicone mat.
- Prepare your almonds if they aren’t already sliced. Take whole almonds and carefully slice them lengthwise into thin slivers about ½ inch long and ¼ inch wide. Set them aside in a small bowl.
- Melt the white chocolate: Place the white chocolate chips and coconut oil in a microwave-safe bowl. Microwave in 30-second intervals, stirring well after each interval, until smooth and glossy (about 2 to 3 minutes total). Warning: White chocolate burns easily, so don’t walk away.
- Add food coloring (optional): If you want a spooky green hue, add a few drops of gel food coloring to the melted chocolate and stir until evenly distributed.
- Dip the pretzels: Hold a pretzel rod at one end and dip the other end into the melted chocolate. Rotate the pretzel gently to coat about two-thirds of the rod. Let the excess chocolate drip back into the bowl for a few seconds.
- Place on baking sheet: Transfer the dipped pretzel to the prepared baking sheet, placing it with the chocolate-covered end pointing away from you. Leave about an inch of space between each pretzel.
- Add the fingernails: While the chocolate is still wet, take a sliced almond and press it gently into the tip of the chocolate-covered end. Angle it slightly upward so it looks like a fingernail. Use tweezers for precision if you have them.
- Add decorations: If you’re using edible glitter or sanding sugar, sprinkle it over the wet chocolate now. Use a toothpick to draw gentle lines in the chocolate for knuckle wrinkles before it sets.
- Let them set: Place the baking sheet in the refrigerator for 15 to 20 minutes, or until the chocolate is completely firm. If in a hurry, use the freezer for 5 to 7 minutes.
- Optional drizzle: If you have leftover chocolate, warm it up slightly and transfer it to a piping bag or zip-top bag. Snip a tiny corner and drizzle thin lines of chocolate over the set pretzels. Let set for another 5 minutes.
- Serve or store: Once the chocolate is fully set, gently lift the pretzels off the parchment paper. They’re ready to eat immediately or store for later.
Notes
Keep the chocolate warm but not hot; white chocolate seizes above 110°F. Work in small batches (5-7 pretzels at a time) to prevent chocolate from cooling. Use a deep, narrow bowl for easier dipping. Don’t skip parchment paper. For best results, make the day before serving; flavors meld overnight. Store in an airtight container at room temperature for up to 5 days. If humid, refrigerate. Let come to room temperature before eating to prevent chocolate from cracking.
Nutrition
- Serving Size: 1 pretzel rod
- Calories: 120
- Sugar: 10
- Sodium: 180
- Fat: 7
- Saturated Fat: 4
- Carbohydrates: 14
- Protein: 2
Keywords: witch finger pretzels, Halloween pretzels, white chocolate pretzels, spooky snacks, easy Halloween treats, dipped pretzel rods


