The woman at the community garden plot next to mine—her name is Mabel, and she’s been gardening that patch for over forty years—watched me trying to balance a basket of beets and a bag of soil. She didn’t say anything at first. Then she just reached over, took the beets out of my hands, and said, “You’re making this harder than it needs to be.” That was the beginning of a conversation that ended with her telling me about these cookies. She wasn’t teaching me a recipe, not formally. She was just telling a story about the Christmas party her church used to throw, and how she’d bring these red velvet crinkle cookies every year until she couldn’t stand the powdered sugar mess anymore. I laughed, and she laughed, and somehow I walked away with the mental notes for what would become my favorite cookie to bring to a dinner party.
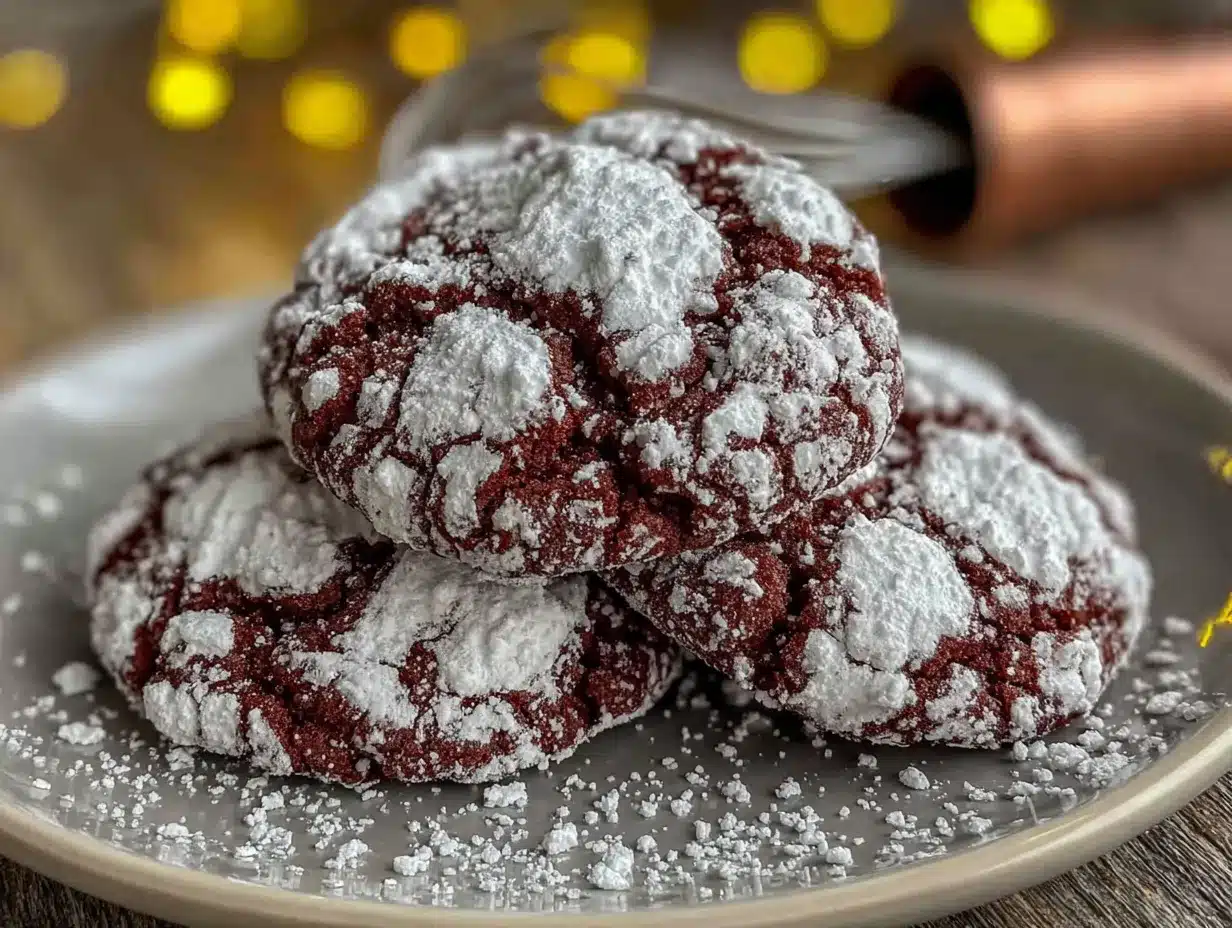
Honestly, I didn’t think much of it at first. I mean, red velvet is a cake thing, right? But these cookies? They have this way of showing up on a dessert table and just… commanding attention. It’s the color—that deep, dramatic red against the snowy powdered sugar. And the texture is this perfect middle ground: soft and fudgy in the center, with a slightly crackly, crinkly top. I’ve brought them to potlucks, to holiday gatherings, to casual Sunday dinners where someone inevitably asks for the recipe. I’ve even had a friend text me the next morning saying she hid the last three in the back of the fridge so her kids wouldn’t find them. I mean, if that’s not a win, I don’t know what is.
Maybe you’ve been there—standing in your kitchen, staring at a list of ingredients, hoping this batch will be the one that gets the “oh, these are amazing” reaction. These crinkle cookies are that batch. They’re the ones people hover around. And the best part? They’re surprisingly simple to pull off. No stand mixer required, no chilling for hours, no complicated techniques. Just a bowl, a spoon, and a little patience. Let me tell you, the first time I made them for a dinner party, I was nervous. I’d tweaked Mabel’s original idea a bit, adding a little more cocoa, a touch of vanilla extract. But when I saw that plate empty before the main course was even cleared? I knew I’d never stop making them.
Why You’ll Love This Recipe
I’ve tested this recipe about a dozen times—honestly, probably more. I wanted it to be foolproof, the kind of cookie you can whip up when you’re already running late for a gathering and need something that looks like you spent hours on it. This version is the one I keep coming back to, and here’s why I think you’ll love it too.
- Quick & Easy: From start to finish, these cookies are ready in under 30 minutes. No chilling the dough, no waiting around. Mix, scoop, roll, bake. That’s it.
- Simple Ingredients: You probably have most of these in your pantry already. Cocoa powder, flour, sugar, butter, eggs. The only “special” ingredient is red food coloring, and you can find that at any grocery store.
- Perfect for Hosting: These are the ultimate dinner party or potluck cookie. They look fancy—that crinkled, snowy top is genuinely impressive—but they’re secretly low-stress. You can make the dough ahead of time and bake them right before guests arrive, or bake them a day ahead and store them in an airtight container.
- Crowd-Pleaser: I’ve never met someone who didn’t like these. Kids love the color, adults love the rich, fudgy texture. They disappear fast.
- Unbelievably Delicious: The combination of the soft, almost brownie-like center with the slight crunch of the powdered sugar coating is just… chef’s kiss. It’s comfort food in cookie form.
What makes this recipe different from all the other red velvet cookie recipes out there? It’s the ratio. I spent a lot of time tweaking the flour to cocoa powder balance so the cookies spread just enough without becoming flat pancakes. They stay thick, puffy, and soft. And the powdered sugar? It clings perfectly, creating that signature crinkle look that makes everyone think you’re a pastry chef. This isn’t just another version—it’s the one I’d stake my reputation on.
What Ingredients You Will Need
This recipe uses simple, everyday ingredients to create something that feels special. No weird or hard-to-find items here—just pantry staples that come together beautifully. Here’s what you’ll need, along with a few notes from my own trials in the kitchen.
- 1 ½ cups (190g) all-purpose flour – I use Gold Medal or King Arthur Flour for consistent results. Spoon and level your flour; don’t scoop directly from the bag or you’ll end up with dry cookies.
- ¼ cup (25g) unsweetened cocoa powder – I prefer Dutch-processed cocoa for a deeper, richer color and flavor, but natural cocoa works fine too. Hershey’s Special Dark is a solid budget-friendly option.
- 1 teaspoon baking powder – Make sure it’s fresh. If your baking powder is more than six months old, it’s time for a new can.
- ¼ teaspoon salt – Just regular table salt. It balances the sweetness and enhances the chocolate flavor.
- ½ cup (115g) unsalted butter, softened to room temperature – Leave it out on the counter for about 30 minutes. Don’t microwave it to soften; melted butter will change the texture of the cookies.
- ¾ cup (150g) granulated sugar – Regular white sugar. No need for anything fancy.
- 1 large egg, room temperature – Cold eggs can seize the butter mixture. If you forgot to take it out ahead of time, place the egg in a bowl of warm water for 5 minutes.
- 1 teaspoon vanilla extract – Pure vanilla extract is best, but imitation works in a pinch. I’ve used both, and honestly, the difference is subtle in this recipe.
- 1 tablespoon milk – Any kind works. Whole milk gives a slightly richer dough, but I’ve used 2% and even oat milk with good results.
- 1 tablespoon red food coloring – Gel food coloring is more concentrated and gives a deeper red without thinning the dough. If you’re using liquid food coloring, you might need 1 ½ tablespoons. I prefer the gel from Wilton or AmeriColor.
- ½ cup (60g) powdered sugar, for rolling – This is what creates the crinkled, snowy top. Don’t skip it, and don’t substitute with granulated sugar—it won’t work the same way.
One quick note: if you’re looking for a natural red coloring alternative, you can try beet powder, but I’ll be honest—I haven’t had great luck with it. The color comes out more pinkish-brown than red. For that classic red velvet look, stick with food coloring.
Equipment Needed
You don’t need a lot of fancy equipment for these cookies, which is part of their charm. Here’s what I use:
- Mixing bowls: One medium bowl for dry ingredients, one large bowl for wet ingredients. I prefer glass or stainless steel.
- Whisk: For combining the dry ingredients. A fork works too, but a whisk is faster.
- Electric hand mixer or stand mixer: You can cream the butter and sugar by hand with a wooden spoon, but it takes some elbow grease. A hand mixer makes it much easier.
- Rubber spatula: For scraping down the sides of the bowl and folding in the dry ingredients.
- Cookie scoop (1.5 tablespoon size): This gives you evenly sized cookies that bake uniformly. I’ve used a regular tablespoon in a pinch, but a scoop is worth the investment.
- Baking sheets: Two rimmed baking sheets work best. I use Nordic Ware aluminum sheets—they heat evenly and don’t warp.
- Parchment paper or silicone baking mat: Parchment paper is my go-to. It prevents sticking and makes cleanup a breeze.
- Cooling rack: Letting the cookies cool on a wire rack prevents the bottoms from getting soggy.
If you don’t have a cookie scoop, you can use two spoons to portion the dough. Just try to make them roughly the same size so they bake evenly. And if you’re using dark-colored baking sheets, reduce the oven temperature by 25°F—dark pans absorb more heat and can burn the bottoms.
Preparation Method
Alright, let’s get to it. This is straightforward, but I’ll walk you through each step with the little details I’ve learned from making these dozens of times.
- Preheat your oven to 350°F (175°C). Line two baking sheets with parchment paper. Do not grease the paper—the cookies don’t need it, and it can affect how they spread.
- In a medium bowl, whisk together the flour, cocoa powder, baking powder, and salt. Make sure there are no lumps. I usually give it a good 15-20 seconds of whisking. Set this aside.
- In a large bowl, beat the softened butter and granulated sugar together until light and fluffy. Using a hand mixer on medium speed, this takes about 2-3 minutes. You’re looking for a pale, creamy texture. Scrape down the sides of the bowl with a rubber spatula halfway through.
- Add the egg, vanilla extract, and milk, and beat until combined. The mixture might look slightly separated at this point—that’s normal. Don’t panic.
- Add the red food coloring and beat until the color is evenly distributed. If you’re using gel coloring, it will take a bit more mixing to get it fully incorporated. The dough should be a vibrant, even red. If it looks streaky, keep mixing.
- Gradually add the dry ingredients to the wet ingredients, mixing on low speed until just combined. I add about a third of the flour mixture at a time. Stop mixing as soon as you don’t see any more white streaks. Overmixing will make the cookies tough.
- The dough will be soft and slightly sticky. That’s exactly what you want. Don’t be tempted to add more flour. If the dough feels too sticky to handle, you can pop it in the fridge for 10 minutes, but honestly, it should be fine.
- Place the powdered sugar in a shallow bowl. Using a cookie scoop or a tablespoon, portion out about 1.5 tablespoons of dough. Roll it into a ball between your palms—the warmth of your hands helps it come together.
- Roll each dough ball generously in the powdered sugar. Make sure it’s completely coated. I like to roll it around until you can’t see any red through the sugar. This is what gives the cookies that beautiful crinkled look after baking.
- Place the coated dough balls on the prepared baking sheets, spacing them about 2 inches apart. I fit 8 cookies per sheet. Don’t overcrowd—they spread a little.
- Bake for 10-12 minutes. The cookies will look puffy and slightly cracked on top. The edges should be set, but the centers will look soft and a little underdone. That’s good. Overbaking gives you dry cookies.
- Let the cookies cool on the baking sheet for 5 minutes. This is important—they’re fragile right out of the oven. After 5 minutes, transfer them to a wire rack to cool completely.
One thing I learned the hard way: don’t skip the rolling-in-powdered-sugar step. I once thought I’d just sprinkle it on top before baking. Big mistake. The cookies spread and the sugar just sort of melted into the dough. The crinkle effect comes from the dough expanding and cracking the sugar coating as it bakes. So roll them generously.
Cooking Tips & Techniques
I’ve made plenty of mistakes with these cookies so you don’t have to. Here are the things I wish someone had told me the first time.
Don’t overmix the dough. I know I said this already, but it bears repeating. Once you add the flour, mix just until it disappears. Overmixing develops gluten, and that makes cookies tough instead of tender and fudgy.
Use room temperature ingredients. Cold butter won’t cream properly with the sugar, and cold eggs can make the batter seize up. Take everything out of the fridge about 30 minutes before you start. If you’re in a hurry, cut the butter into small cubes—they’ll soften faster.
Roll the dough balls generously in powdered sugar. I mean really coat them. I’ve found that rolling them once, then rolling them again for good measure, gives the best crinkle effect. The sugar should look thick and snowy. If you can see red through it, add more sugar.
Bake one sheet at a time. If you try to bake two sheets at once, the heat distribution gets uneven, and you’ll end up with some cookies overdone and some underdone. Just bake them in batches. The extra 10 minutes is worth it.
Watch the clock. These cookies go from perfectly soft to dry in about 60 seconds. Start checking at 10 minutes. The edges should be set, but the centers will look slightly puffy and soft. They’ll continue to set as they cool on the baking sheet.
Let them cool completely before storing. If you stack warm cookies, they’ll stick together and the powdered sugar will get clumpy. Patience, my friend.
Variations & Adaptations
One of the best things about this recipe is how easy it is to tweak. Here are some variations I’ve tried and loved.
- White Chocolate Chips: Add ½ cup of white chocolate chips to the dough before rolling. The sweetness of the white chocolate pairs beautifully with the rich cocoa. I did this for a friend’s baby shower, and they were gone in minutes.
- Gluten-Free Version: Substitute the all-purpose flour with a 1:1 gluten-free baking flour blend. I’ve used Bob’s Red Mill and King Arthur Flour’s gluten-free blends with good results. The texture is slightly more delicate, but the taste is spot on.
- Extra Chocolatey: Add ¼ cup of mini chocolate chips to the dough. This gives you little pockets of melted chocolate in every bite. I prefer mini chips because they distribute more evenly.
- Peppermint Twist: Add ½ teaspoon of peppermint extract along with the vanilla. This is perfect for the holidays. You can also crush up a candy cane and sprinkle it on top after baking (while the cookies are still warm so it sticks).
- Vegan Option: Use vegan butter (I like Earth Balance), a flax egg (1 tablespoon ground flaxseed mixed with 3 tablespoons water, let sit for 5 minutes), and your favorite plant-based milk. The texture is a bit more cake-like, but they’re still delicious.
My personal favorite variation is the white chocolate chip version. I made them for a Fourth of July barbecue last year, and someone asked me if I could bring them to every party from then on. I mean, I’m not complaining.
Serving & Storage Suggestions
These cookies are best served at room temperature, straight from the cooling rack. The powdered sugar should be intact and the centers should be soft and fudgy. Here’s how to make them work for your gathering.
For a dinner party or potluck: Arrange the cookies on a pretty platter or cake stand. I like to add a few fresh raspberries or strawberries around the edges—the red and white color scheme looks gorgeous. You can also dust them with a little extra powdered sugar right before serving for that freshly baked look.
What to serve alongside: These cookies pair beautifully with a glass of cold milk, a hot cup of coffee, or a creamy vanilla milkshake. For a dessert spread, serve them next to brownies, cheesecake bites, or fresh fruit. They’re also amazing alongside a scoop of vanilla ice cream.
Storage: Store leftover cookies in an airtight container at room temperature for up to 5 days. Place a sheet of parchment paper between layers to prevent sticking. The powdered sugar may absorb a bit of moisture over time, but they’ll still taste great.
Freezing: You can freeze the baked cookies for up to 3 months. Place them in a single layer in a freezer-safe container, with parchment between layers. Thaw at room temperature for about 30 minutes before serving. You can also freeze the unbaked dough balls—just roll them in powdered sugar, place them on a baking sheet, freeze until solid, then transfer to a freezer bag. Bake directly from frozen, adding 1-2 minutes to the baking time.
Reheating: If you want that just-baked texture, pop a cookie in the microwave for about 10 seconds. It softens the center and makes it taste fresh out of the oven. Just don’t overdo it, or the sugar will melt.
Nutritional Information & Benefits
I’m not a nutritionist, but I can give you a rough idea of what’s in these cookies based on standard calculations. One cookie (using the recipe as written, yielding about 24 cookies) contains approximately:
- Calories: 120
- Fat: 5g
- Saturated Fat: 3g
- Carbohydrates: 18g
- Sugar: 12g
- Protein: 1.5g
- Sodium: 55mg
These are cookies, so I wouldn’t call them health food. But there are a few bright spots. The cocoa powder contains antioxidants called flavonoids, which can support heart health. And the butter and eggs provide a small amount of vitamin A and protein. If you’re looking for a slightly lighter option, you can reduce the sugar by a tablespoon or two, but I’ll be honest—it does affect the texture.
For those with dietary restrictions, this recipe contains gluten, dairy, and eggs. The gluten-free and vegan variations I mentioned earlier are good alternatives. And if you’re watching your sugar intake, you could try using a sugar substitute like monk fruit sweetener, but I haven’t tested that myself, so proceed with caution.
Conclusion
These red velvet crinkle cookies are the kind of recipe that becomes a staple. They’re easy enough for a Tuesday night baking session, but impressive enough to bring to a dinner party where you want to make a statement. The deep red color, the snowy powdered sugar, the soft, fudgy center—every bite is a little moment of joy.
I love this recipe because it reminds me of Mabel and that afternoon in the garden. It’s a reminder that the best recipes aren’t always the most complicated ones. Sometimes they’re just a conversation, a shared laugh, and a willingness to try something new. I hope you make these cookies your own. Tweak the color, add some chips, experiment with the flavor. And when you do, I’d love to hear about it.
Drop a comment below and tell me how they turned out. Did you add white chocolate chips? Did you bring them to a party and watch them disappear? I want to know. And if you have any questions, ask away—I’m here to help. Happy baking, friend!
Frequently Asked Questions
Can I make these cookies without a hand mixer?
Absolutely. You can cream the butter and sugar by hand with a wooden spoon. It takes a bit more effort—about 5-6 minutes of vigorous stirring—but it works perfectly fine. Just make sure the butter is very soft to start.
Why did my cookies turn out flat?
Flat cookies usually mean the butter was too soft or melted, or the dough was overmixed. Make sure your butter is softened but not greasy, and stop mixing as soon as the flour is incorporated. Also, check that your baking powder is fresh.
Can I use natural food coloring instead of red?
You can use beet powder or natural red coloring, but the color won’t be as vibrant. It will be more of a pinkish-brown. For that classic red velvet look, I recommend gel food coloring.
How do I get the perfect crinkle effect?
The key is rolling the dough balls generously in powdered sugar. Make sure every surface is coated thickly. As the cookies bake, the dough expands and cracks the sugar coating, creating that beautiful crinkled look.
Can I double this recipe?
Yes, this recipe doubles beautifully. Just make sure you don’t overcrowd your mixing bowl. If you’re using a stand mixer, it will handle the doubled batch easily. Bake in batches to ensure even baking.
Pin This Recipe!

Best Red Velvet Crinkle Cookies Recipe – Easy Homemade

These red velvet crinkle cookies are soft, fudgy, and have a beautiful crinkled top dusted with powdered sugar. They’re easy to make with simple ingredients and perfect for dinner parties, potlucks, or holiday gatherings.
- Prep Time: 15 minutes
- Cook Time: 12 minutes
- Total Time: 27 minutes
- Yield: 24 cookies 1x
- Category: Dessert
- Cuisine: American
Ingredients
- 1 ½ cups (190g) all-purpose flour
- ¼ cup (25g) unsweetened cocoa powder
- 1 teaspoon baking powder
- ¼ teaspoon salt
- ½ cup (115g) unsalted butter, softened to room temperature
- ¾ cup (150g) granulated sugar
- 1 large egg, room temperature
- 1 teaspoon vanilla extract
- 1 tablespoon milk
- 1 tablespoon red food coloring (gel preferred)
- ½ cup (60g) powdered sugar, for rolling
Instructions
- Preheat your oven to 350°F (175°C). Line two baking sheets with parchment paper.
- In a medium bowl, whisk together the flour, cocoa powder, baking powder, and salt until no lumps remain.
- In a large bowl, beat the softened butter and granulated sugar together with a hand mixer on medium speed until light and fluffy, about 2-3 minutes. Scrape down the sides halfway through.
- Add the egg, vanilla extract, and milk, and beat until combined. The mixture may look slightly separated.
- Add the red food coloring and beat until the color is evenly distributed and vibrant.
- Gradually add the dry ingredients to the wet ingredients, mixing on low speed until just combined. Do not overmix.
- Place the powdered sugar in a shallow bowl. Using a cookie scoop or tablespoon, portion out about 1.5 tablespoons of dough and roll into a ball between your palms.
- Roll each dough ball generously in the powdered sugar until completely coated, so no red shows through.
- Place the coated dough balls on the prepared baking sheets, spacing them about 2 inches apart. Fit 8 cookies per sheet.
- Bake for 10-12 minutes. The cookies should look puffy with slightly cracked tops; edges should be set but centers soft.
- Let the cookies cool on the baking sheet for 5 minutes, then transfer to a wire rack to cool completely.
Notes
Don’t skip rolling the dough balls generously in powdered sugar—this creates the crinkle effect. Use room temperature ingredients for best results. Bake one sheet at a time for even baking. Start checking cookies at 10 minutes to avoid overbaking.
Nutrition
- Serving Size: 1 cookie
- Calories: 120
- Sugar: 12
- Sodium: 55
- Fat: 5
- Saturated Fat: 3
- Carbohydrates: 18
- Protein: 1.5
Keywords: red velvet crinkle cookies, red velvet cookies, crinkle cookies, easy cookie recipe, holiday cookies, fudgy cookies