My youngest had refused to eat pumpkin seeds for years. For nearly a decade, every Halloween or pumpkin carving session ended the same way—he’d wrinkle his nose at the bowl of seeds I’d set aside and announce, “Those are for squirrels, Mom.” Then last October, I made this version of cinnamon sugar pumpkin seeds just for myself while he was playing video games in the other room. I found him standing over the cooling rack, fingers dusted with cinnamon sugar, trying to pretend he hadn’t just eaten a handful. Or maybe two.
Honestly, I didn’t say a word. I just poured him his own bowl and watched him try to explain why he suddenly liked something he’d spent eight years rejecting. “It’s different,” he mumbled with his mouth half full. “They taste like those little donut holes from the bakery.” That right there—that’s the moment this recipe became a permanent fixture in our fall rotation. I mean, converting a pumpkin seed hater into someone who asks for them by name? That’s a win I’ll take.
Maybe you’ve been there—spending time roasting seeds only to have half the family turn up their noses. Or maybe you’ve never bothered because you assumed kids just won’t eat them. Let me tell you, the trick is all in the coating. These aren’t those salty, savory seeds you’re used to. They’re sweet, crunchy, and just a little bit addictive, with a cinnamon-sugar crust that makes them taste more like a treat than a snack you’re trying to be healthy about. The power went out halfway through our last batch, and we finished them by flashlight. That’s how good they are.
This recipe stayed with me because it proved something I already suspected—sometimes you just need the right version of a thing. And this version? It’s the one that finally got my kid to change his mind without me even trying.
Why You’ll Love This Recipe
These cinnamon sugar pumpkin seeds have become my secret weapon for fall snacking, and I’ve tested enough batches to know they work every single time. Here’s what makes them different from every other pumpkin seed recipe you’ve tried:
- Quick & Easy : From pumpkin to plate in under 30 minutes. Most of that time is hands-off baking, so you can clean up the pumpkin carving mess while they cook.
- Simple Ingredients : You probably already have everything in your pantry. Sugar, cinnamon, butter, salt—that’s it. No specialty store trips required.
- Perfect for Fall : Great for Halloween parties, Thanksgiving snacking, or just keeping the kids busy while you prep the big meal. They disappear fast at any gathering.
- Crowd-Pleaser : My picky eater went from refusing them to asking if we can carve extra pumpkins just for the seeds. If that’s not a testimonial, I don’t know what is.
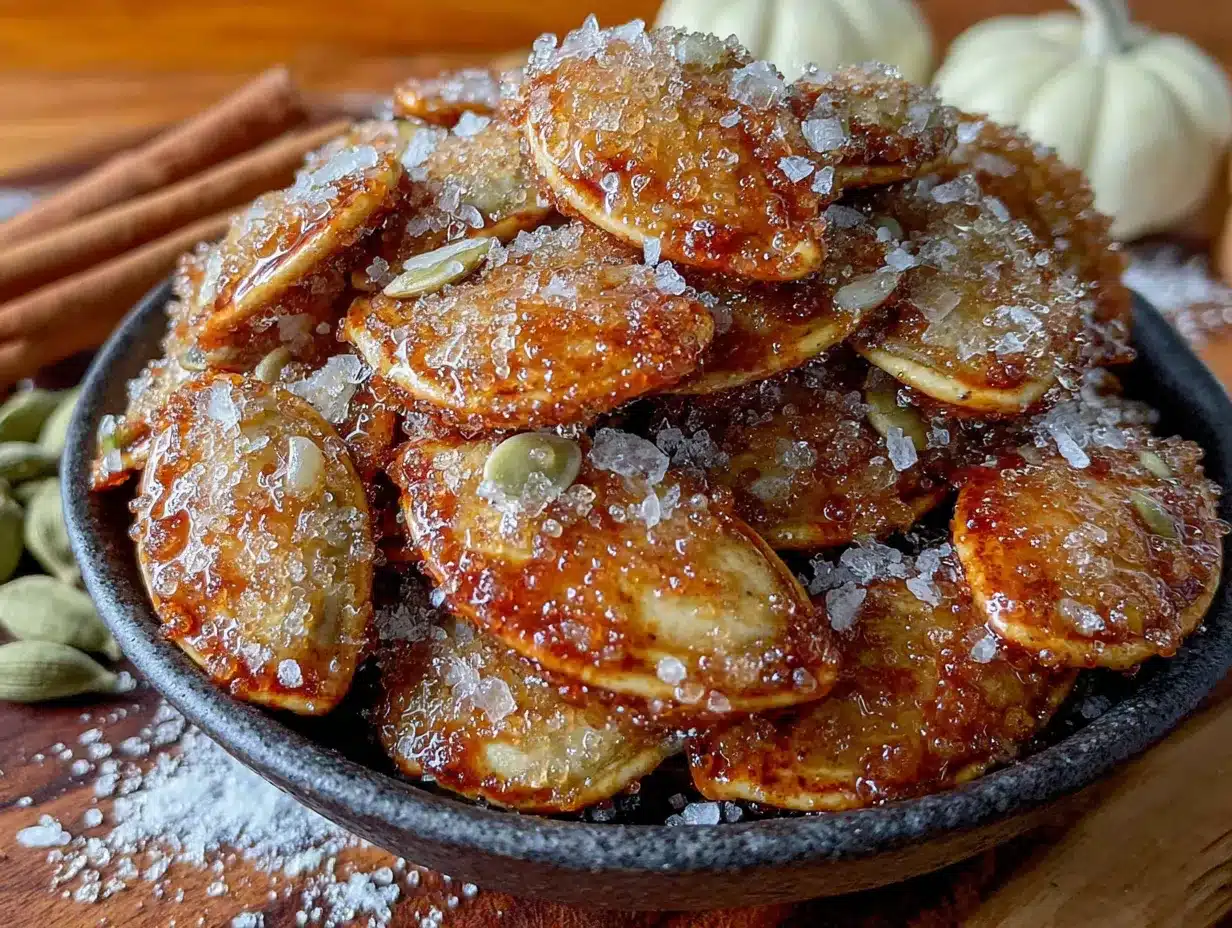
- Unbelievably Delicious : The texture is what gets everyone—crunchy on the outside with a slight chewiness inside, coated in a buttery cinnamon sugar layer that’s not too sweet.
What makes this recipe different is the technique. Most baked pumpkin seed recipes leave them either too chewy or burnt on the edges. I figured out the exact temperature and timing that gives you that perfect crunch without drying them out. Plus, the cinnamon sugar coating actually sticks—no sad piles of sugar at the bottom of the bowl.
This isn’t just another snack recipe. It’s the kind that makes you close your eyes after the first bite because it tastes exactly like fall should taste. And honestly, for the pennies it costs to make a batch? You can’t beat that.
What Ingredients You Will Need
This recipe uses simple, wholesome ingredients to deliver big flavor without any fuss. Most of these are pantry staples you likely already have on hand, which makes this perfect for those spontaneous pumpkin carving afternoons.
- Fresh pumpkin seeds – about 1 ½ cups, straight from your carving pumpkin. You’ll want to rinse them well and pat them mostly dry. Don’t stress about getting every bit of pumpkin string off—a little adds flavor.
- Unsalted butter – 3 tablespoons, melted. I use salted butter in a pinch and just reduce the added salt. Land O’Lakes is my go-to for consistent results.
- Granulated sugar – ¼ cup. Regular white sugar works best here. It melts into the butter and creates that crackly coating. I’ve tried coconut sugar and it doesn’t give the same crunch.
- Ground cinnamon – 1 ½ teaspoons. This is the star of the show. I prefer McCormick or Simply Organic for the strongest flavor. Fresh cinnamon makes a noticeable difference.
- Salt – ½ teaspoon. Don’t skip this! The salt balances the sweetness and makes the cinnamon flavor pop. I use fine sea salt for even distribution.
- Vanilla extract – ½ teaspoon (optional but recommended). This adds a warmth that makes them taste even more like bakery treats. Pure vanilla is worth the splurge here.
Ingredient selection tips: Look for pumpkins labeled “pie pumpkins” or “sugar pumpkins” if you want bigger, meatier seeds. The decorative carving pumpkins work fine too, but their seeds are smaller and more delicate. Both work for this recipe—just adjust your baking time by a few minutes if the seeds are on the smaller side.
Substitution guidance: For a dairy-free version, use coconut oil or a plant-based butter alternative. The flavor changes slightly but still works wonderfully. If you want to cut back on sugar, you can reduce it to 3 tablespoons, but the coating won’t be quite as crackly. For a warmer spice profile, add ¼ teaspoon of nutmeg or pumpkin pie spice along with the cinnamon.
Equipment Needed
You don’t need much for this recipe, which is part of why I love it. Here’s what you’ll want to have ready:
- Baking sheet – A rimmed half-sheet pan works best. The rim keeps the butter mixture from dripping off. I’ve used my old warped one for years and it still works fine.
- Parchment paper or silicone baking mat – Not strictly necessary, but makes cleanup infinitely easier. The sugar can caramelize onto your pan, and scraping that off is no fun.
- Mixing bowls – One medium bowl for the seeds and one small bowl for the coating mixture.
- Colander – For rinsing those slimy seeds. A mesh strainer works even better for catching small seeds.
- Paper towels or clean kitchen towel – For drying the seeds. Don’t skip this step—wet seeds won’t crisp up properly.
- Spatula – For stirring the seeds halfway through baking. A silicone spatula won’t scratch your pan.
Budget-friendly options: If you don’t have parchment paper, you can grease the pan directly with butter. Just watch the seeds a little more carefully so they don’t stick. No silicone mat? No problem—aluminum foil works in a pinch, though the seeds might brown a bit faster on the bottom.
Preparation Method
- Preheat your oven to 325°F (163°C). Getting the temperature right is crucial. Too hot and the sugar burns before the seeds crisp. Too low and they turn chewy instead of crunchy. I learned this the hard way after three sad batches.
- Clean your pumpkin seeds. Separate the seeds from the pumpkin guts as best you can. Place them in a colander and rinse under cool water, rubbing them gently to remove the stringy bits. Don’t worry about getting them perfectly clean—a little pumpkin fiber adds flavor and won’t hurt anything.
- Dry the seeds thoroughly. Spread them out on a clean kitchen towel or paper towels and pat them dry. Let them sit for about 5 minutes to air dry a bit more. This step matters more than you think. Wet seeds steam instead of roast, and you’ll end up with sad, chewy seeds instead of crunchy ones.
- Melt the butter in a small microwave-safe bowl or on the stovetop. Let it cool for a minute so it doesn’t cook the sugar when you mix them together.
- Mix the coating. In a small bowl, combine the granulated sugar, ground cinnamon, and salt. Stir with a fork to break up any clumps. Add the vanilla extract to your melted butter if you’re using it.
- Combine everything. Place the dried pumpkin seeds in a medium mixing bowl. Pour the melted butter over them and toss until every seed is coated. Sprinkle the cinnamon sugar mixture over the top and stir again. Make sure there are no dry patches—every seed should look glossy and sandy.
- Spread on baking sheet. Line your baking sheet with parchment paper. Spread the coated seeds in a single, even layer. Try not to overlap them too much, or they’ll steam instead of roast. A little crowding is fine, but you want mostly one layer.
- Bake for 12 minutes. Place the sheet in the preheated oven. Set a timer—these can go from perfect to burnt faster than you’d think.
- Stir halfway through. After 6 minutes, pull the sheet out and stir the seeds with a spatula. This ensures even toasting and prevents the sugar from burning on the edges. Spread them back into a single layer and return to the oven.
- Check for doneness. At 12 minutes, the seeds should be golden brown and smell incredibly fragrant—like a cinnamon bakery. The coating should look set and slightly crackly. If they’re still pale, give them 2-3 more minutes, watching carefully.
- Cool completely. Transfer the seeds to a plate or another piece of parchment paper in a single layer. Don’t leave them on the hot baking sheet or they’ll continue cooking. Let them cool for at least 15 minutes. They’ll crisp up as they cool, so don’t panic if they seem slightly soft right out of the oven.
- Break apart any clusters. Once cool, gently break apart any seeds that stuck together. They should separate easily. If any are stubborn, they probably need another minute or two of cooling.
Visual cue: You’re looking for a deep golden color with visible crystallized sugar on the surface. The kitchen should smell like a cinnamon-sugar donut shop. If you see any dark brown spots, pull them out immediately—that’s the sugar starting to burn.
Cooking Tips & Techniques
I’ve made this recipe more times than I can count, and I’ve definitely made every mistake along the way. Here’s what I’ve learned so you don’t have to repeat my failures:
Dry those seeds like your life depends on it. My first batch was a disaster because I was impatient. I tossed wet seeds into the butter mixture, and they came out chewy and sad. Take the extra five minutes to pat them dry. Your future self will thank you.
Don’t crank the heat. I thought I’d speed things up by baking at 375°F. Big mistake. The sugar caramelized and burned before the seeds had a chance to crisp up. 325°F is the sweet spot—low enough to dry the seeds slowly, high enough to create that crackly coating.
Stirring is non-negotiable. I forgot to stir one batch while I was helping with homework, and the edges came out dark while the center was still pale. Set a timer for the halfway point. It makes a real difference.
Let them cool completely. This is where patience pays off. The seeds continue to crisp as they cool. If you eat them warm, they’ll taste soft and almost doughy. Give them the full 15 minutes, and you’ll be rewarded with that perfect crunch.
Double the batch. Seriously. These disappear fast. I learned to make two sheets at once because one batch barely lasts an afternoon in my house. Just rotate the pans halfway through baking.
Variations & Adaptations
One of the best things about this recipe is how easy it is to switch up. Here are some variations I’ve tried and loved:
Pumpkin Pie Spice Version: Swap the cinnamon for 2 teaspoons of pumpkin pie spice. It adds that warm, cozy flavor that screams fall. I made this for Thanksgiving last year and it was the first thing to disappear from the snack table.
Maple Cinnamon Seeds: Replace the granulated sugar with 3 tablespoons of maple sugar and add 1 tablespoon of maple syrup to the melted butter. The flavor is deeper and more complex. My neighbor tried these and demanded the recipe immediately.
Spicy-Sweet Version: Add ¼ teaspoon of cayenne pepper along with the cinnamon. The heat sneaks up on you and balances the sweetness perfectly. My husband loves these, though the kids prefer the original.
Chocolate Drizzle: Once the seeds are cool, drizzle melted dark chocolate over them and let it set. It turns them into a dessert that rivals any candy bar. Dangerous, but worth it.
Air Fryer Method: Cook at 300°F for 8-10 minutes, shaking the basket halfway through. The air fryer makes them even crunchier, though you’ll need to work in batches. I use this method when I’m only making a small batch.
Coconut Sugar Swap: For a less refined option, use coconut sugar instead of white sugar. The flavor is more caramel-like, and the color turns a deeper brown. Just note that the coating won’t be quite as crackly.
Serving & Storage Suggestions
These cinnamon sugar pumpkin seeds are best served at room temperature, straight from the cooling rack. The texture is perfect when they’ve had time to set completely—crunchy, but not hard enough to crack a tooth.
Serving ideas: I like to pile them into a pretty bowl and set them out for snacking. They’re perfect for Halloween parties, Thanksgiving appetizers, or just afternoon munching. My kids love them in their lunchboxes as a treat. You can also sprinkle them over yogurt, oatmeal, or even ice cream for extra crunch.
Storage: Store in an airtight container at room temperature for up to two weeks. Don’t refrigerate them—the moisture will make them soft. If they do lose their crunch, you can pop them back in a 300°F oven for 3-4 minutes to re-crisp them. I’ve done this many times with leftover batches.
Freezer instructions: These freeze beautifully for up to three months. Place them in a freezer-safe bag or container, squeeze out as much air as possible, and freeze. Thaw at room temperature for about 10 minutes before serving. They might lose a tiny bit of crunch, but they’re still delicious.
Flavor development: Honestly, these are best within the first 24 hours. The coating stays perfectly crackly, and the cinnamon flavor is strongest. After a few days, the sugar can start to soften slightly, but they’re still plenty tasty.
Nutritional Information & Benefits
While these are definitely a treat, pumpkin seeds themselves are packed with good stuff. Here’s a rough estimate per ¼ cup serving:
- Calories: Approximately 180-200
- Fat: 14g (mostly healthy unsaturated fats from the seeds)
- Carbohydrates: 12g (including 8g sugar)
- Protein: 7g
- Fiber: 2g
- Iron: 10% of daily value
- Magnesium: 20% of daily value
Health benefits: Pumpkin seeds are a great source of magnesium, which supports muscle function and sleep quality. They also contain zinc, which is important for immune health—perfect for cold and flu season. The fiber and protein help keep you full, so a small handful goes a long way.
Dietary considerations: This recipe is naturally gluten-free and vegetarian. For a vegan version, use coconut oil instead of butter. For lower sugar, reduce to 2 tablespoons of sugar and add an extra ½ teaspoon of cinnamon for flavor.
Potential allergens: Contains dairy from butter. Seeds are generally safe for nut allergies, but check your specific situation. The recipe is egg-free, soy-free, and grain-free.
Conclusion
These cinnamon sugar pumpkin seeds are the kind of recipe that makes you wonder why you didn’t try it sooner. They’re simple enough for a weekday snack but special enough for holiday gatherings. My kid went from calling them “squirrel food” to asking if we can carve extra pumpkins just for the seeds. If that’s not a win, I don’t know what is.
I hope you give these a try, whether you’re a longtime pumpkin seed lover or someone who’s been burned by bad batches in the past. Play around with the spices, make them your own, and don’t be surprised if they disappear faster than you expected. And if your kids suddenly decide they love something they’ve always hated? Well, you’ll know exactly why.
I’d love to hear how yours turn out! Drop a comment below and let me know if your family loved them as much as mine does. Happy snacking!
Frequently Asked Questions
Can I use store-bought pumpkin seeds instead of fresh?
Yes, absolutely! Just use raw, unsalted pepitas (hulled pumpkin seeds). They’re smaller and thinner, so reduce the baking time to 8-10 minutes and watch them carefully. The coating might not stick quite as well since they don’t have the natural texture of fresh seeds, but they still taste great.
Why are my pumpkin seeds chewy instead of crunchy?
This usually happens for one of two reasons: either the seeds weren’t dried thoroughly before baking, or they weren’t baked long enough. Make sure you pat them completely dry before adding the butter mixture. If they’re still chewy after cooling, pop them back in the oven at 300°F for 3-4 more minutes.
Can I make these ahead of time for a party?
Definitely! You can make them up to two weeks in advance and store them in an airtight container at room temperature. If you want them extra fresh, you can re-crisp them in a 300°F oven for 3-4 minutes before serving. Just let them cool completely before putting them out.
How do I get the cinnamon sugar to stick better?
The key is making sure the seeds are coated in butter first before adding the sugar mixture. Toss the seeds in melted butter until they’re completely glossy, then add the cinnamon sugar and stir again. Don’t skip the butter step—it’s what helps the sugar adhere and creates that crackly coating.
Can I double this recipe?
Yes, but use two separate baking sheets instead of crowding everything onto one. Overcrowding traps steam and prevents the seeds from getting crispy. If you’re doubling, just rotate the pans halfway through baking and expect it to take a few extra minutes since the oven has more to heat.
Pin This Recipe!
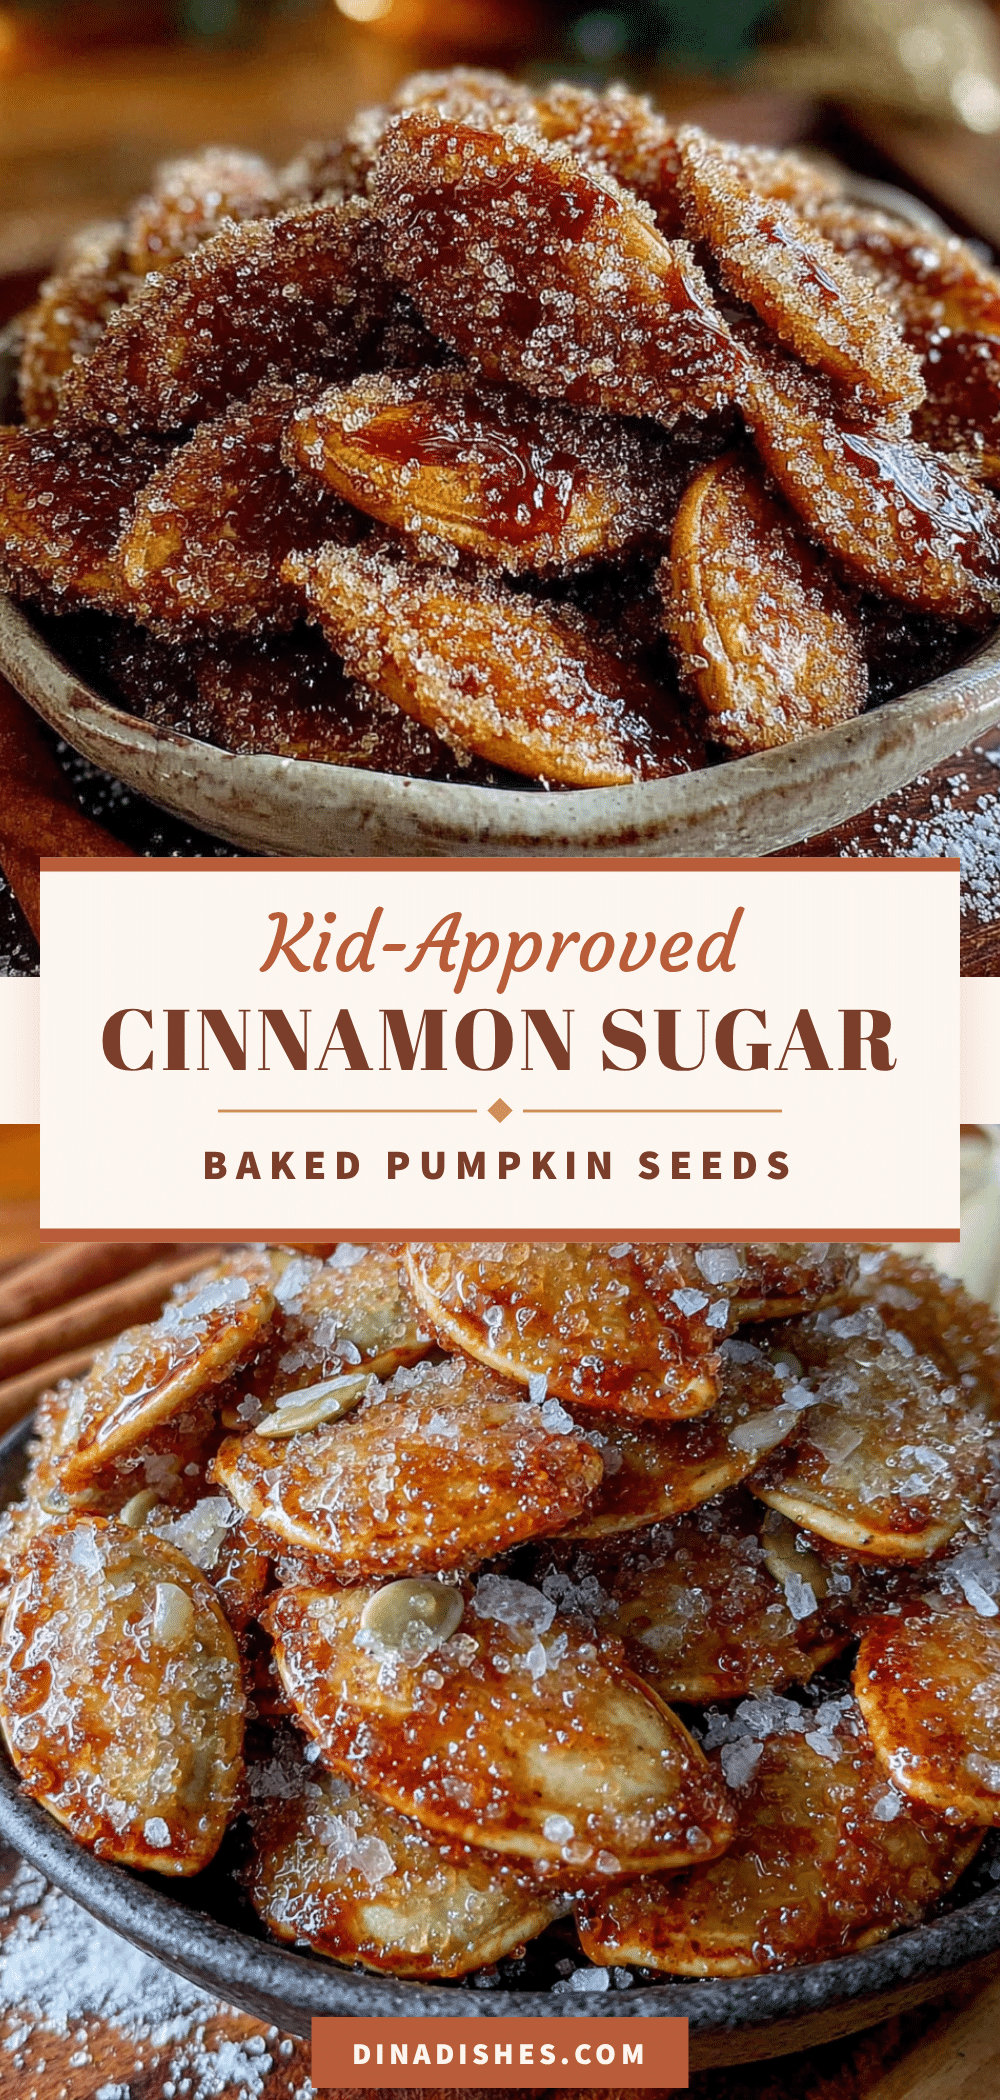
Best Easy Cinnamon Sugar Pumpkin Seeds Recipe Kid Approved
These sweet, crunchy cinnamon sugar pumpkin seeds are a fall favorite that even picky eaters love. Coated in a buttery cinnamon-sugar crust, they taste like a treat and are ready in under 30 minutes.
- Prep Time: 10 minutes
- Cook Time: 12 minutes
- Total Time: 22 minutes
- Yield: 4 servings 1x
- Category: Snack
- Cuisine: American
Ingredients
- 1 ½ cups fresh pumpkin seeds
- 3 tablespoons unsalted butter, melted
- ¼ cup granulated sugar
- 1 ½ teaspoons ground cinnamon
- ½ teaspoon salt
- ½ teaspoon vanilla extract (optional)
Instructions
- Preheat your oven to 325°F (163°C).
- Clean your pumpkin seeds: separate seeds from pumpkin guts, rinse under cool water, and remove stringy bits.
- Dry the seeds thoroughly: spread on a clean towel and pat dry. Let sit for 5 minutes to air dry.
- Melt the butter in a small microwave-safe bowl or on the stovetop. Let cool for a minute.
- Mix the coating: in a small bowl, combine granulated sugar, ground cinnamon, and salt. Stir with a fork. Add vanilla extract to melted butter if using.
- Combine everything: place dried pumpkin seeds in a medium bowl. Pour melted butter over them and toss until coated. Sprinkle cinnamon sugar mixture over and stir again.
- Spread on baking sheet: line a baking sheet with parchment paper. Spread coated seeds in a single, even layer.
- Bake for 12 minutes.
- Stir halfway through: after 6 minutes, pull the sheet out and stir seeds with a spatula. Spread back into a single layer and return to oven.
- Check for doneness: seeds should be golden brown and smell fragrant. If still pale, give 2-3 more minutes.
- Cool completely: transfer seeds to a plate or parchment paper in a single layer. Let cool for at least 15 minutes.
- Break apart any clusters once cool.
Notes
Dry seeds thoroughly for best crunch. Do not skip stirring halfway through. Cool completely before serving. For dairy-free, use coconut oil or plant-based butter. For lower sugar, reduce to 3 tablespoons. Store in airtight container at room temperature for up to 2 weeks.
Nutrition
- Serving Size: ¼ cup
- Calories: 190
- Sugar: 8
- Sodium: 150
- Fat: 14
- Saturated Fat: 4
- Carbohydrates: 12
- Fiber: 2
- Protein: 7
Keywords: cinnamon sugar pumpkin seeds, roasted pumpkin seeds, fall snack, kid-friendly, easy pumpkin seeds