My neighbor Carol watched me trying to balance a baking sheet on my hip while fumbling for my keys. She didn’t say anything at first. Then she just shook her head, smiled, and said, “Come inside. I’ve got something better than whatever you’re carrying.” I followed her into her kitchen, and honestly, I wasn’t expecting much. I mean, Carol was in her seventies and mostly ate plain oatmeal for breakfast. But she pulled out a tray of the most perfect peanut butter blossom cookies I had ever seen. Not a single crumb on the plate. Not one. She handed me one still warm, and let me tell you, that first bite changed everything I thought I knew about these cookies. I asked her what her secret was, and she just laughed and said, “I’ve been making these since 1967. You learn a thing or two.” I stood there in her tiny kitchen with the yellow linoleum floor, eating three more cookies while she told me about the neighbor who first shared the recipe with her back when she was a new bride. Maybe you’ve been there — standing in someone else’s kitchen, realizing that the best recipes aren’t found online. They’re handed over the fence, scribbled on index cards, passed along with a story.
Why You’ll Love This Recipe
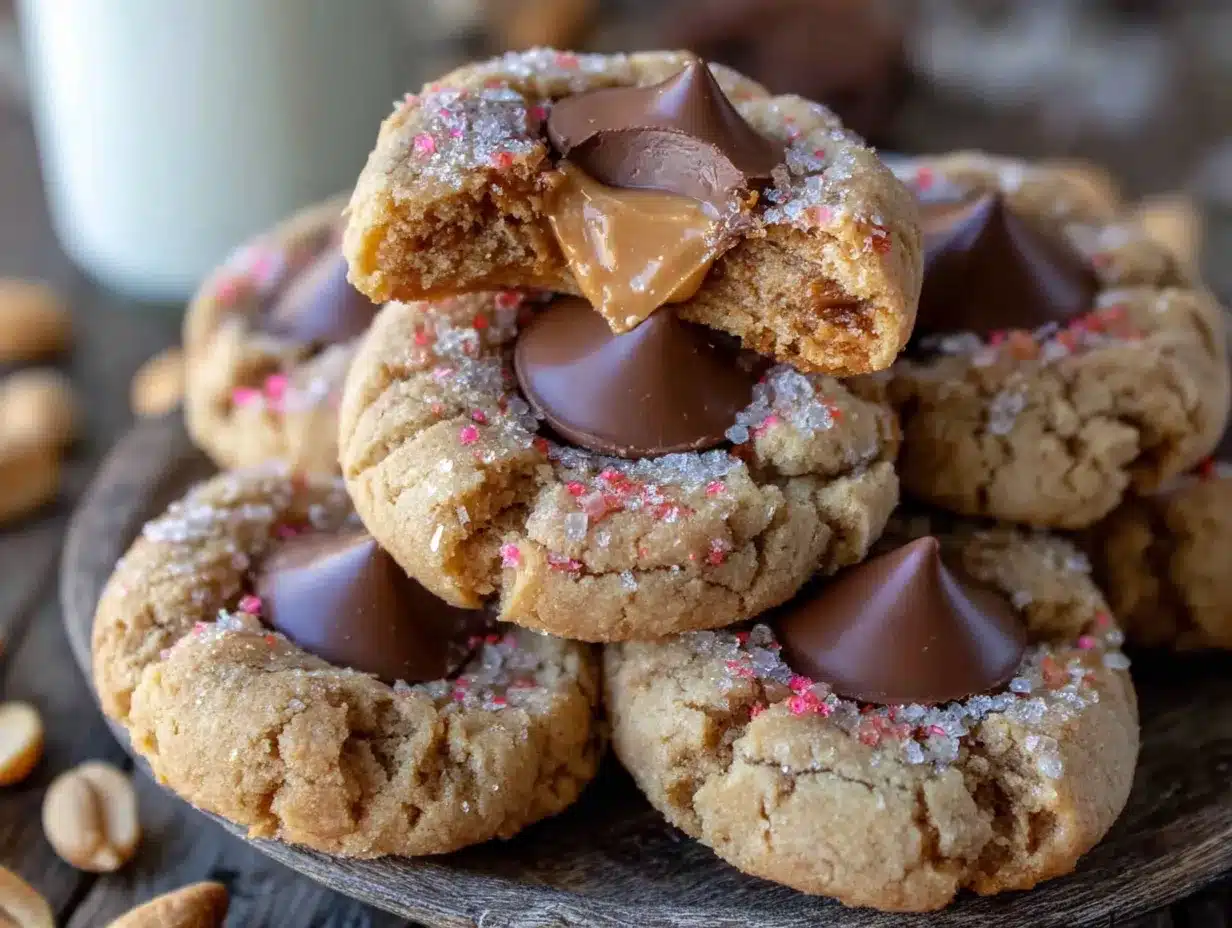
Let’s be honest — peanut butter blossom cookies have a reputation problem. Too often they turn out dry, crumbly, or that chocolate kiss just falls right off. Not these. I’ve tested this recipe at least a dozen times, tweaking the butter-to-peanut butter ratio and the baking time until I got it exactly right. What I ended up with is a cookie that stays soft for days, holds that chocolate kiss like it’s glued on, and honestly tastes better than any bakery version I’ve ever tried.
- No Crumble, No Drama : These cookies hold together perfectly. No falling apart when you bite into them. No sad little crumbs all over your shirt.
- Perfectly Soft : The texture is what dreams are made of. Soft, chewy centers with slightly crisp edges. Every single time.
- Simple Ingredients : You probably already have everything in your pantry. No weird specialty items here.
- Crowd-Pleaser : I brought these to a potluck last month and three people asked for the recipe before I even sat down.
- Kid-Friendly Baking : This is the perfect recipe to make with little helpers. Pressing the chocolate kisses into the warm cookies is basically the most fun step ever.
What makes this version different from all the others? It’s the technique. I use a specific ratio of brown sugar to granulated sugar that keeps the cookies tender. And I chill the dough — I know, I know, it’s an extra step, but it makes all the difference. The cookies hold their shape, they don’t spread into flat puddles, and they stay soft long after they’ve cooled.
This is the kind of cookie that makes you close your eyes after the first bite. It’s nostalgia in cookie form. It’s the recipe you’ll make for holiday cookie exchanges, for bake sales, for Tuesday afternoons when you just need something warm and sweet. It’s comfort food that actually delivers.
What Ingredients You Will Need
This recipe uses simple, everyday ingredients to create something truly special. The magic is in how they come together, not in fancy components. Most of these are probably sitting in your kitchen right now.
- 1/2 cup unsalted butter, softened (I use Land O’Lakes — it has the right fat content for soft cookies. Make sure it’s truly softened, not melted.)
- 1/2 cup creamy peanut butter (I recommend Jif or Skippy for consistent results. Natural peanut butter that separates can make the cookies greasy and crumbly.)
- 1/2 cup granulated sugar (plus extra for rolling the dough balls)
- 1/2 cup packed light brown sugar (this is the key to softness — the molasses in brown sugar keeps the cookies tender)
- 1 large egg, room temperature (cold egg can seize up the dough. Leave it out for 30 minutes before baking.)
- 2 tablespoons milk (whole milk works best, but 2% is fine. This adds moisture that prevents crumbliness.)
- 1 teaspoon vanilla extract (pure vanilla, not imitation, if you can swing it. The flavor difference is real.)
- 1 1/2 cups all-purpose flour (spoon and level your flour — don’t scoop straight from the bag or you’ll end up with dry cookies)
- 1 teaspoon baking soda (make sure it’s fresh — test it by dropping a bit in vinegar to see if it fizzes)
- 1/2 teaspoon salt (fine sea salt or table salt. This balances the sweetness.)
- 36 milk chocolate Hershey’s Kisses, unwrapped (you can use dark chocolate or white chocolate kisses for variation. Just unwrap them before you start baking so they’re ready to go.)
Ingredient Notes: If you’re using a natural peanut butter that’s just peanuts and salt, your cookies may spread more and be less tender. Stick with commercial peanut butter for best results. For a dairy-free version, use vegan butter and plant-based milk — I’ve tested it with Miyoko’s butter and oat milk and it worked beautifully.
Equipment Needed
Nothing fancy here. You probably already own everything you need.
- Electric mixer (handheld or stand mixer both work. I use my KitchenAid, but honestly, a hand mixer is easier for small batches.)
- Large mixing bowl
- Medium mixing bowl
- Cookie sheets (light-colored metal sheets work best. Dark sheets can over-brown the bottoms.)
- Parchment paper or silicone baking mats (I prefer parchment — it’s cheap and cleanup is a breeze)
- Cooling rack (absolutely necessary for getting that perfect texture)
- 1-inch cookie scoop or tablespoon measure
- Small bowl for rolling sugar
- Wire whisk for mixing dry ingredients
- Spatula for scraping the bowl
If you don’t have a cookie scoop, just use a tablespoon and roll the dough into balls with your hands. It works fine — just make sure they’re all roughly the same size so they bake evenly.
Preparation Method
This recipe comes together in about 30 minutes, plus chilling time. The key is to not rush the process. Trust me on this one.
- Cream the butter and sugars. In your large mixing bowl, beat the softened butter, peanut butter, granulated sugar, and brown sugar together on medium speed until light and fluffy. This takes about 2-3 minutes. You want it to look pale and airy. Scrape down the sides of the bowl halfway through. Don’t rush this step — proper creaming is what gives the cookies their tender texture.
- Add the wet ingredients. Beat in the egg, milk, and vanilla extract until everything is well combined. The mixture might look a little curdled at this point — that’s totally normal. Don’t panic. Just keep mixing until it comes back together into a smooth, glossy mixture.
- Mix the dry ingredients. In a separate medium bowl, whisk together the flour, baking soda, and salt. Make sure there are no lumps. I always whisk for a good 20 seconds to distribute the baking soda evenly.
- Combine wet and dry. Gradually add the dry ingredients to the wet mixture, mixing on low speed. Stop as soon as the flour disappears. Overmixing at this stage will make the cookies tough. You want to see a soft, cohesive dough that pulls away from the sides of the bowl.
- Chill the dough. This is the most important step. Cover the bowl with plastic wrap and refrigerate for at least 1 hour. I know you want to bake them right now, but don’t skip this. Chilling prevents the cookies from spreading too much and keeps them thick and soft. The dough will be firm and slightly sticky when you take it out.
- Preheat and prepare. Preheat your oven to 375°F (190°C). Line your cookie sheets with parchment paper. Pour about 1/4 cup of granulated sugar into a small bowl for rolling.
- Shape the cookies. Using your cookie scoop or a tablespoon, scoop out rounded balls of dough. Roll each ball between your palms until smooth. Then roll each ball in the granulated sugar until completely coated. Place them on the prepared cookie sheets about 2 inches apart. They will spread a bit, so give them room.
- Bake. Bake for 8-10 minutes. The cookies should look puffed and slightly cracked on top. The edges should be set but the centers will still look soft and slightly underdone. That’s exactly what you want. Don’t overbake — they continue cooking on the hot sheet after you take them out.
- Add the kisses. Remove the cookie sheet from the oven. Immediately press one Hershey’s Kiss into the center of each cookie. Press gently — you want it to sit in the cookie, not sink all the way through. The warmth of the cookie will soften the chocolate slightly.
- Cool completely. Let the cookies cool on the baking sheet for 5 minutes. This is crucial — trying to move them too early will cause them to fall apart. After 5 minutes, transfer them to a wire cooling rack to cool completely. The chocolate kisses will firm up as they cool.
Pro tip: If the kisses start to melt too much when you press them in, let the cookies cool for an extra minute or two on the sheet before adding the chocolate. Every oven is different, so adjust accordingly.
Cooking Tips & Techniques
I’ve made these cookies more times than I can count, and I’ve learned a few things the hard way. Let me save you some trouble.
Don’t overbake. This is the number one mistake people make. Pull them out when they still look slightly underdone in the center. The residual heat from the baking sheet finishes the job. Overbaked peanut butter cookies turn dry and crumbly — exactly what we’re trying to avoid.
Use room temperature ingredients. Cold butter doesn’t cream properly. Cold egg can make the dough stiff and uneven. Take everything out of the fridge 30 minutes before you start. Your cookies will thank you.
Chill the dough, no exceptions. I once skipped the chilling step because I was in a hurry. The cookies spread into thin, crispy discs that barely held a kiss. Never again. That hour in the fridge is non-negotiable.
Unwrap the kisses before you start baking. You don’t want to be fumbling with foil wrappers while your cookies are cooling. Trust me, I’ve burned my fingers doing exactly that. Set them all out in a bowl before you even preheat the oven.
Rotate your baking sheets halfway through. If you’re baking multiple sheets at once, swap them between racks halfway through the baking time. Ovens have hot spots, and this ensures even baking.
Let them cool properly. That 5-minute rest on the baking sheet is not optional. The cookies are fragile when they’re hot. Trying to move them too soon is a recipe for disaster. I learned this when I ended up with a cookie crumble instead of a cookie.
Variations & Adaptations
Once you’ve mastered the basic recipe, feel free to play around. Here are some of my favorite variations.
Chocolate Peanut Butter Blossoms: Use dark chocolate kisses instead of milk chocolate. The slight bitterness of dark chocolate balances the sweet peanut butter beautifully. I tried this on a whim one rainy Sunday and honestly, it might be my new favorite.
Gluten-Free Version: Substitute the all-purpose flour with a 1:1 gluten-free baking flour blend. I’ve tested this with King Arthur’s Measure for Measure flour and it works perfectly. Just make sure your blend contains xanthan gum for structure.
Vegan Peanut Butter Blossoms: Use vegan butter (I like Miyoko’s), a flax egg (1 tablespoon ground flaxseed mixed with 3 tablespoons water, let sit for 5 minutes), and plant-based milk. Use dairy-free chocolate kisses — Enjoy Life makes good ones. The texture is slightly different but still soft and delicious.
Holiday Variation: Swap the milk chocolate kisses for candy cane kisses during the holidays. Or use white chocolate kisses and sprinkle crushed candy canes on top. They look gorgeous on a cookie platter.
Extra Peanut Butter Flavor: Add 1/2 cup of mini chocolate chips to the dough along with the dry ingredients. It adds another layer of texture and makes the cookies even more indulgent.
Serving & Storage Suggestions
These cookies are best served slightly warm, when the chocolate kiss is still a little soft. But honestly, they’re fantastic at room temperature too.
Serving: Arrange them on a pretty plate with the chocolate kisses facing up. They look beautiful on a holiday cookie tray alongside sugar cookies and gingerbread. They’re also perfect with a cold glass of milk or a hot cup of coffee. For a fun dessert, serve them warm with a scoop of vanilla ice cream.
Storage: Store the cookies in an airtight container at room temperature for up to 5 days. Place a piece of bread in the container — it absorbs excess air and keeps the cookies soft. Replace the bread every day or two. I learned this trick from Carol, and it works like magic.
Freezing: These cookies freeze beautifully. Place them in a single layer in a freezer-safe container with parchment paper between layers. They’ll keep for up to 3 months. To thaw, just leave them at room temperature for about 30 minutes. You can also freeze the unbaked dough balls — roll them in sugar, place them on a baking sheet, freeze until solid, then transfer to a freezer bag. Bake directly from frozen, adding 1-2 minutes to the baking time.
Reheating: Pop a cookie in the microwave for 8-10 seconds for that fresh-from-the-oven experience. The chocolate gets soft and the cookie warms up perfectly.
Nutritional Information & Benefits
Let’s be honest — these are cookies, not health food. But they do have some redeeming qualities.
Per cookie (based on 36 cookies): Approximately 120 calories, 7g fat, 14g carbohydrates, 2g protein, 9g sugar. These are estimates and will vary based on specific ingredients used.
Peanut butter provides protein and healthy monounsaturated fats. It also contains vitamin E, magnesium, and potassium. Dark chocolate kisses (if you choose that variation) are rich in antioxidants. And honestly, there’s something to be said for the mental health benefits of a homemade cookie. Baking is therapeutic, and sharing food with people you love is good for the soul.
Dietary considerations: This recipe contains dairy, eggs, gluten, peanuts, and soy (in the chocolate). For allergen-friendly versions, see the variations section above.
Conclusion
These soft peanut butter blossom cookies are everything you want in a cookie — tender, flavorful, and absolutely gorgeous. No crumble, no drama, just pure cookie perfection. They’re the kind of cookies that make people’s eyes light up when you bring them out. The kind that disappear from the cookie jar in a day. The kind that become your signature recipe.
I still think about Carol every time I make these. She moved away a few years ago, but her recipe lives on in my kitchen. And now it lives in yours too. I’d love to hear how they turn out for you. Did you try a variation? Did your kids help press in the kisses? Did you burn your fingers on the first batch like I did? Drop a comment below and let me know. And if you share them on social media, tag me — I want to see your beautiful cookies.
Happy baking, friend. And remember — the secret ingredient is always patience.
Frequently Asked Questions
Why did my peanut butter blossom cookies turn out crumbly?
The most common reason is overbaking. Pull them out when they still look slightly underdone in the center. Using natural peanut butter can also cause crumbliness because it doesn’t have the stabilizers that help hold the cookie together. Stick with commercial peanut butter for best results.
Can I use crunchy peanut butter instead of creamy?
You can, but it will change the texture. The cookie won’t be as smooth and tender. If you love crunch, go for it — just know that the texture will be different. I’d recommend sticking with creamy for the classic version.
How do I keep the chocolate kisses from falling off?
Press the kiss into the cookie while it’s still hot from the oven. The warmth softens the chocolate just enough that it adheres to the cookie. Let the cookies cool completely on the baking sheet before moving them — this gives the chocolate time to set.
Can I make these cookies ahead of time?
Absolutely. You can make the dough up to 3 days ahead and keep it refrigerated. Or freeze the baked cookies for up to 3 months. They’re perfect for holiday baking when you want to spread out the work.
Why did my cookies spread too much?
This usually happens when the dough isn’t chilled long enough. Make sure you refrigerate it for at least 1 hour. Also, check that your butter isn’t too soft — if it’s borderline melted, the cookies will spread. And make sure you’re using room temperature ingredients, not warm ones.
Pin This Recipe!
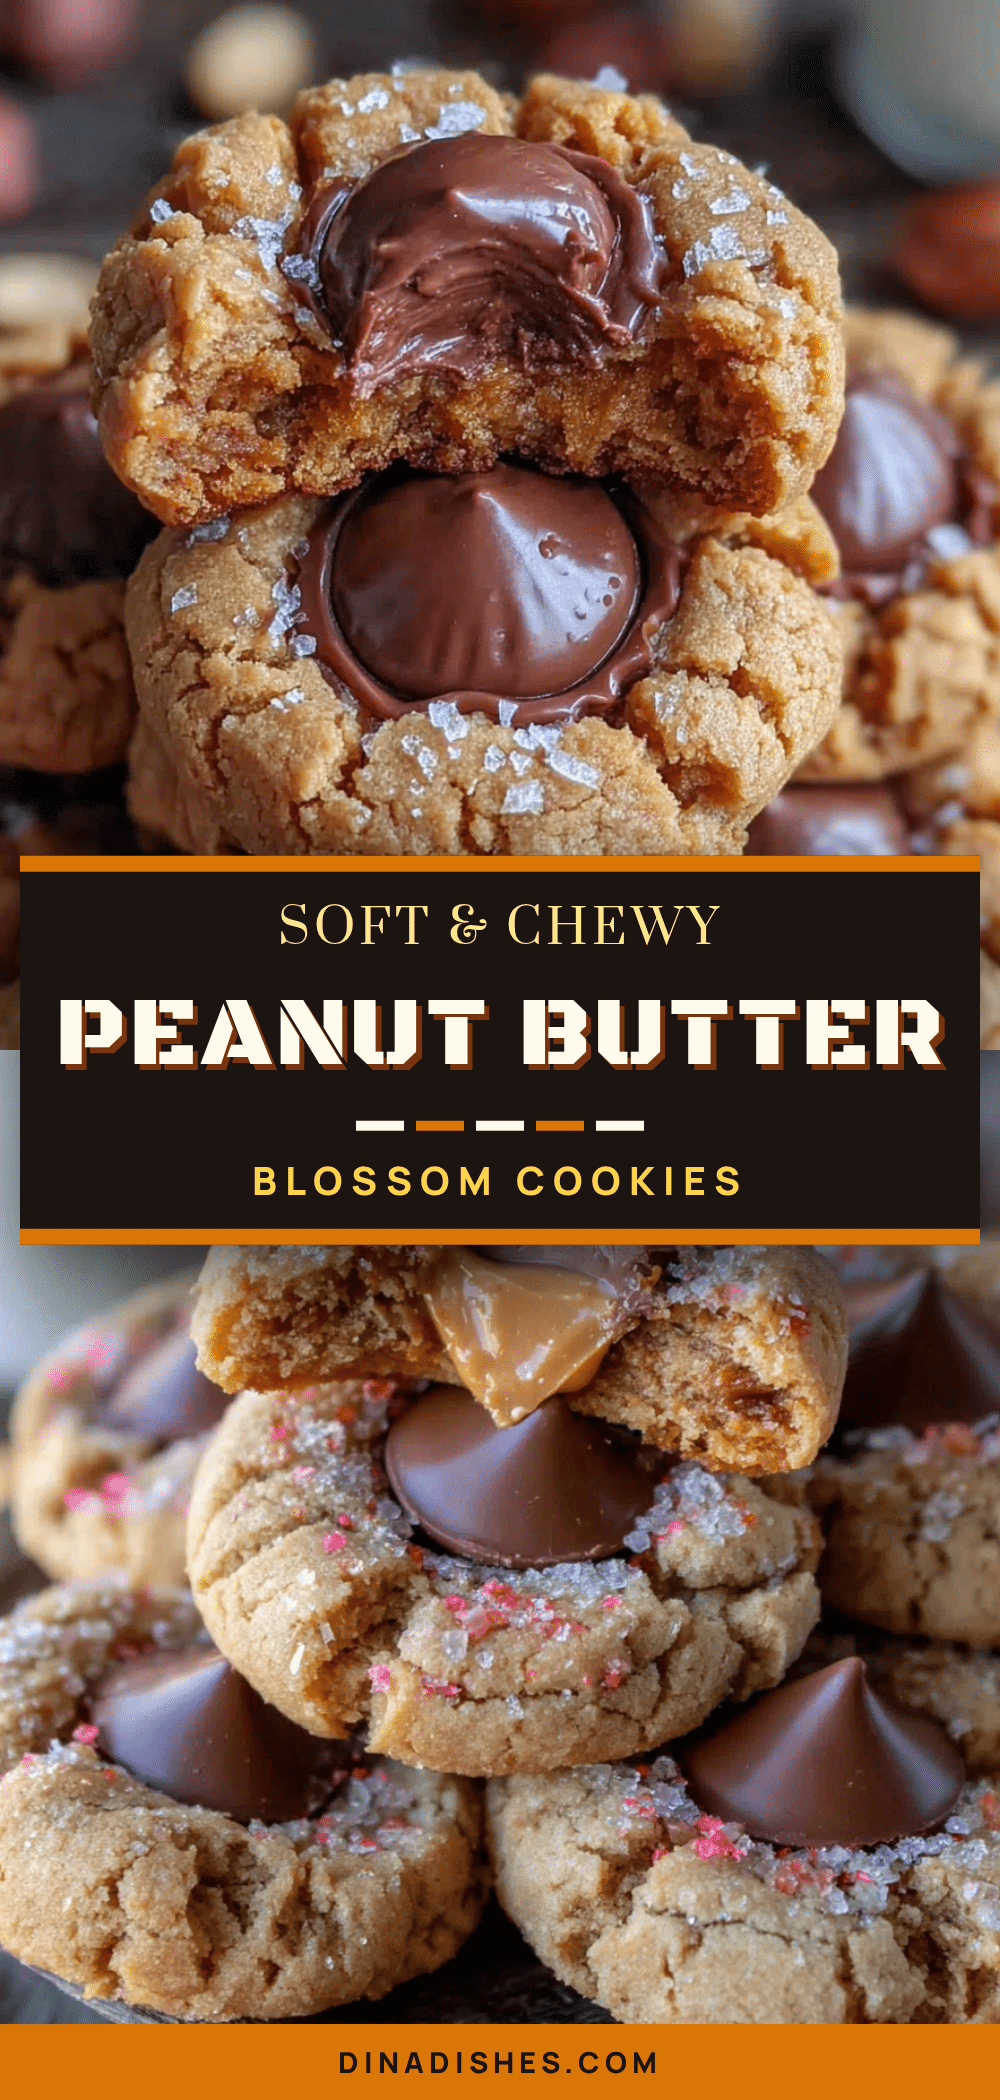
Best Soft Peanut Butter Blossom Cookies (No Crumble)

These soft peanut butter blossom cookies are tender, flavorful, and absolutely gorgeous. No crumble, no drama, just pure cookie perfection that stays soft for days and holds that chocolate kiss like it’s glued on.
- Prep Time: 15 minutes
- Cook Time: 10 minutes
- Total Time: 1 hour 25 minutes (includes 1 hour chilling)
- Yield: 36 cookies 1x
- Category: Dessert
- Cuisine: American
Ingredients
- 1/2 cup unsalted butter, softened
- 1/2 cup creamy peanut butter
- 1/2 cup granulated sugar (plus extra for rolling)
- 1/2 cup packed light brown sugar
- 1 large egg, room temperature
- 2 tablespoons milk
- 1 teaspoon vanilla extract
- 1 1/2 cups all-purpose flour
- 1 teaspoon baking soda
- 1/2 teaspoon salt
- 36 milk chocolate Hershey’s Kisses, unwrapped
Instructions
- Cream the butter and sugars. In your large mixing bowl, beat the softened butter, peanut butter, granulated sugar, and brown sugar together on medium speed until light and fluffy, about 2-3 minutes. Scrape down the sides of the bowl halfway through.
- Add the wet ingredients. Beat in the egg, milk, and vanilla extract until well combined and smooth.
- Mix the dry ingredients. In a separate medium bowl, whisk together the flour, baking soda, and salt for about 20 seconds.
- Combine wet and dry. Gradually add the dry ingredients to the wet mixture, mixing on low speed until just combined. Do not overmix.
- Chill the dough. Cover the bowl with plastic wrap and refrigerate for at least 1 hour.
- Preheat and prepare. Preheat oven to 375°F (190°C). Line cookie sheets with parchment paper. Pour about 1/4 cup granulated sugar into a small bowl for rolling.
- Shape the cookies. Using a cookie scoop or tablespoon, scoop rounded balls of dough. Roll each ball between your palms until smooth, then roll in the granulated sugar until completely coated. Place on prepared cookie sheets about 2 inches apart.
- Bake for 8-10 minutes. Cookies should look puffed and slightly cracked on top with set edges but soft centers.
- Add the kisses. Remove from oven and immediately press one Hershey’s Kiss into the center of each cookie gently.
- Cool completely. Let cookies cool on the baking sheet for 5 minutes, then transfer to a wire cooling rack to cool completely.
Notes
Chill the dough for at least 1 hour – this is non-negotiable for preventing spreading. Use commercial peanut butter like Jif or Skippy for best results, not natural peanut butter. If kisses start to melt too much when pressed in, let cookies cool an extra minute on the sheet first. Store in an airtight container at room temperature for up to 5 days with a piece of bread to keep them soft. Freeze for up to 3 months.
Nutrition
- Serving Size: 1 cookie
- Calories: 120
- Sugar: 9
- Sodium: 85
- Fat: 7
- Saturated Fat: 3
- Carbohydrates: 14
- Fiber: 1
- Protein: 2
Keywords: peanut butter blossom cookies, soft peanut butter cookies, no crumble cookies, Hershey's kiss cookies, holiday cookies, easy cookie recipe