I swore I didn’t need another chocolate chip cookie recipe. For years, honestly, I was that person—the one who’d roll their eyes at yet another “perfect” cookie claim on the internet. I had my go-to recipe, the one my grandmother wrote on a stained index card, and I figured that was it. Game over. Then last Tuesday, I found myself standing in my kitchen at 9 PM, craving something warm and sweet but absolutely not wanting to deal with a full batch of cookies staring me down for the next week. That’s when this little experiment happened.
I mean, let me tell you, the idea of a single serving of cookies felt almost wrong at first. Like cheating or something. But I was tired, it was raining, and I just wanted that moment—you know the one—where you bite into a cookie fresh from the oven and the chocolate is still liquid and the edges are just barely golden. So I grabbed a bowl, tossed in some butter, and figured I’d just wing it. I wasn’t expecting much, honestly. I was just trying to satisfy a craving without committing to forty-eight cookies.
The first batch came out a little flat. The second, a bit too cakey. But the third? Something clicked. The texture was this perfect middle ground—crispy on the outside, almost fudgy in the center, with those big pools of melted chocolate that make you close your eyes for a second. I ate two standing at the counter, still warm, and I knew I’d accidentally created something I’d make again and again. Maybe you’ve been there, too—that moment when a recipe you didn’t plan on becomes the one you reach for most. That’s this cookie for me. It’s not trying to be fancy. It’s just trying to be exactly what you need on a quiet, cozy night.
Why You’ll Love This Recipe
Let’s be real for a second. There are a million chocolate chip cookie recipes out there. But this one? It’s different in all the right ways. I’ve tested this batch more times than I care to admit, tweaking the butter temperature, the resting time, even the brand of chocolate chips. What I landed on is a cookie that delivers that gooey, bakery-style texture without requiring a stand mixer or a trip to a specialty grocery store. It’s the kind of recipe that feels like a secret weapon in your back pocket.
- Quick & Easy: From start to finish, you’re looking at about 20 minutes. That’s it. No chilling the dough for hours, no complicated techniques—just mix, scoop, and bake. Perfect for those evenings when the craving hits hard and fast.
- Simple Ingredients: You probably have everything in your kitchen right now. Butter, sugar, an egg, flour, baking soda, salt, and chocolate chips. That’s the whole list. No obscure extracts or specialty flours required.
- Perfect for Cozy Nights: This is the cookie you make when you want something warm without the commitment of a full batch. It’s made for one or two people, which means no leftovers tempting you for days (unless you want them, of course).
- Crowd-Pleaser: Every single person I’ve handed one of these to has asked for the recipe. And when I tell them how small the batch is, they always look surprised. It’s proof that bigger isn’t always better.
- Unbelievably Gooey: The texture is the star here. The centers stay soft and almost underdone, while the edges crisp up just enough to give you that satisfying contrast. It’s the kind of cookie that makes you slow down and actually taste it.
What really sets this recipe apart is the technique. I found that using a slightly higher ratio of brown sugar to white sugar gives the cookies that deep, almost caramel-like flavor. And melting the butter instead of creaming it with the sugar? That’s the trick for that chewy, fudgy texture without needing to chill the dough. It’s a small change, but it makes all the difference. This isn’t just another cookie recipe—it’s the one you’ll come back to when you need comfort in a hurry.
What Ingredients You Will Need
This recipe uses simple, pantry-friendly ingredients that come together to create something genuinely special. I’ve kept the list short on purpose because I know that when you want a cookie, you don’t want to run to the store for seventeen things. Here’s what you’ll need and why each one matters.
For the Cookie Dough
- Unsalted butter, melted and slightly cooled (4 tablespoons / 57g) — I prefer using unsalted so I can control the salt level myself. Melting the butter is key here; it gives the cookies that chewy, fudgy texture without needing to cream anything. Let it cool for a minute or two after melting so it doesn’t cook the egg when you mix it in.
- Light brown sugar, packed (¼ cup / 50g) — This is where the magic happens. Brown sugar adds moisture and that deep, molasses-like flavor that makes these cookies taste almost caramelized. I’ve tried dark brown sugar in a pinch, and it works fine, but light brown gives a more balanced sweetness.
- Granulated sugar (2 tablespoons / 25g) — Just a little bit to help with spreading and to give the edges that slight crispiness. The combination of brown and white sugar is what gives these cookies their perfect texture contrast.
- One large egg yolk (save the white for breakfast or another recipe) — Using just the yolk adds richness and tenderness without making the dough too wet. If you’re in a hurry, you can use the whole egg, but the cookies will spread a bit more and be slightly less gooey.
- Vanilla extract (½ teaspoon) — I use pure vanilla extract here, not imitation. It makes a noticeable difference in the depth of flavor. If you have vanilla bean paste, even better—those little specks look beautiful in the finished cookie.
- All-purpose flour (½ cup + 2 tablespoons / 75g) — Standard all-purpose flour works perfectly. For a slightly chewier texture, you can substitute bread flour, but it’s not necessary. Spoon and level your flour—don’t scoop directly from the bag, or you’ll end up with dry cookies.
- Baking soda (¼ teaspoon) — This helps the cookies spread just enough and gives them that slight lift. Make sure your baking soda is fresh; if it’s been sitting in your pantry for a year, it might not work as well.
- Fine sea salt (¼ teaspoon) — Salt isn’t just for flavor—it balances the sweetness and makes the chocolate taste more chocolatey. I use fine sea salt for the dough and a pinch of flaky salt on top before baking.
- Semi-sweet chocolate chips or chopped chocolate (⅓ cup / 60g) — This is where you can really customize. I love using a mix of semi-sweet chips and chopped dark chocolate for those big, melty pools. Ghirardelli chips are my go-to, but any good-quality chocolate works. If you prefer milk chocolate, go for it—just note that the cookies will be sweeter.
For Topping (Optional but Highly Recommended)
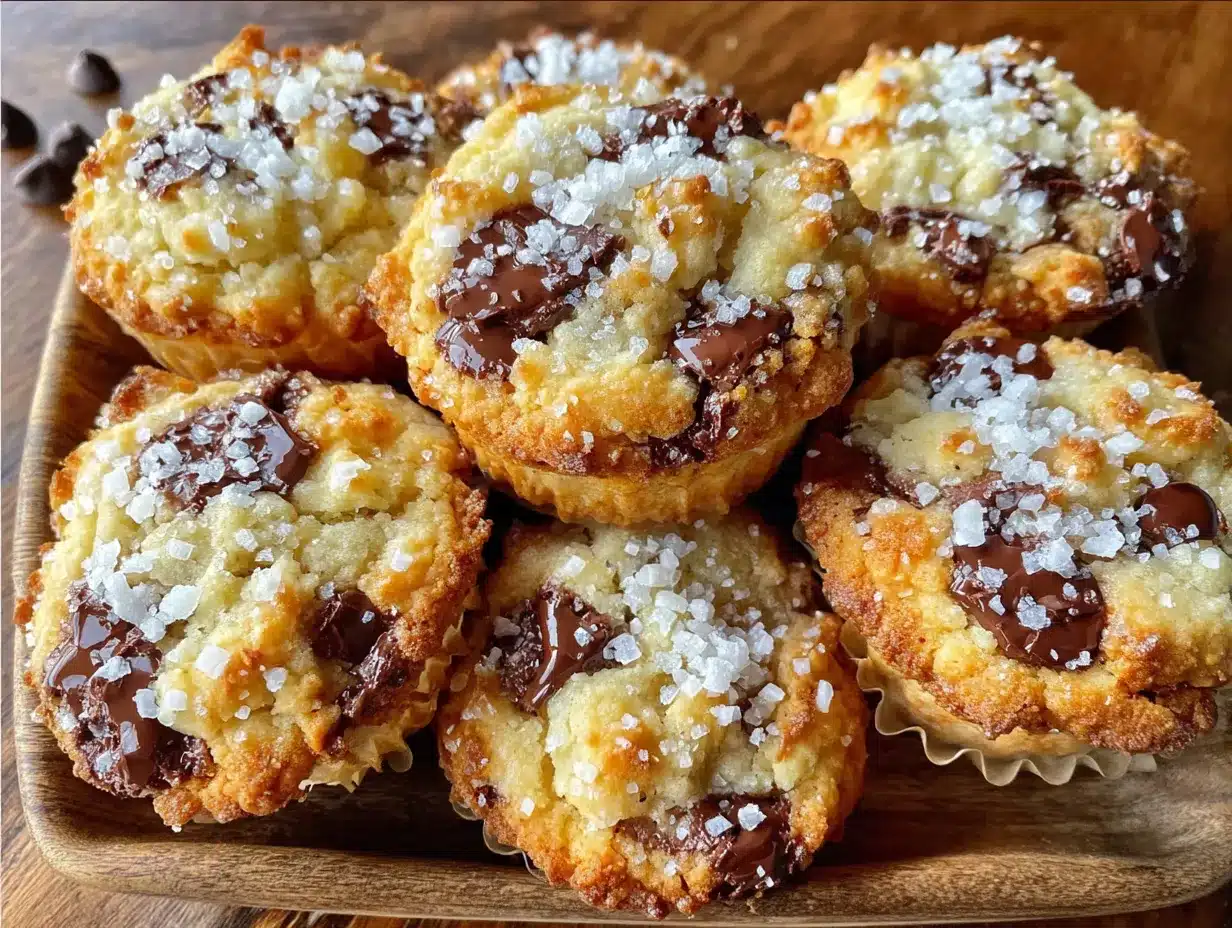
- Flaky sea salt (a pinch) — Trust me on this. That little sprinkle of salt right when the cookies come out of the oven takes them from good to unforgettable. It cuts through the sweetness and makes the chocolate sing.
Equipment Needed
One of the best things about this recipe is how little equipment it requires. You don’t need a stand mixer or any fancy gadgets—just a few basic tools you probably already own.
- Mixing bowl: Any medium-sized bowl will work. I use a glass or ceramic bowl because they don’t retain heat, but metal is fine too.
- Whisk or fork: For mixing the wet ingredients together. A fork works surprisingly well if you don’t want to dirty another utensil.
- Rubber spatula or wooden spoon: For folding in the flour and chocolate chips. A spatula is easier for scraping the bowl clean.
- Measuring cups and spoons: Since this is a small batch, precise measurements matter more than usual. I recommend using proper measuring spoons rather than estimating.
- Kitchen scale (optional but helpful): If you have one, weighing the flour and sugar ensures consistent results every time. I’ve included both volume and weight measurements in the ingredient list.
- Baking sheet: A small quarter-sheet pan works perfectly, but a regular half-sheet pan is fine too. Just make sure it’s not warped, or your cookies might spread unevenly.
- Parchment paper or silicone baking mat: Absolutely essential for preventing sticking and ensuring even browning. Parchment paper is cheaper and disposable; silicone mats are reusable and work just as well.
- Cookie scoop or two spoons: For portioning the dough evenly. A small cookie scoop (about 1.5 tablespoons) gives you perfectly round cookies. If you don’t have one, two spoons work fine—just try to make the portions the same size.
- Cooling rack: Not strictly necessary, but it helps the cookies cool evenly without getting soggy on the bottom. If you don’t have one, just let them cool on the baking sheet for a few minutes before transferring.
Preparation Method
Alright, let’s get to the good part. This recipe comes together in about 20 minutes, and most of that is hands-off baking time. Follow these steps, and you’ll have warm, gooey cookies in no time.
- Preheat your oven to 350°F (175°C). Line a small baking sheet with parchment paper or a silicone mat. I like to do this first so the oven is fully hot by the time the dough is ready. If your oven runs hot, consider dropping the temperature to 345°F—cookies can be finicky about heat.
- Melt the butter. In a small microwave-safe bowl, melt 4 tablespoons of unsalted butter in 20-second intervals, stirring between each, until fully melted. You can also melt it in a small saucepan over low heat. Let it cool for about 2 minutes—you want it warm, not hot, so it doesn’t scramble the egg yolk later.
- Mix the sugars and butter. In your mixing bowl, combine the melted butter, ¼ cup packed light brown sugar, and 2 tablespoons granulated sugar. Whisk vigorously for about 30 seconds until the mixture looks smooth and slightly thickened. You should see it lighten in color just a bit. This step is important—it helps dissolve the sugar and creates that shiny, crackly top on the finished cookies.
- Add the egg yolk and vanilla. Drop in the egg yolk and ½ teaspoon vanilla extract. Whisk again until everything is fully combined and the mixture looks glossy. It might look a little separated at first, but keep whisking—it will come together. If you accidentally get any egg white in there, don’t panic; just whisk it in. The cookies will still be good, just slightly less tender.
- Add the dry ingredients. Sprinkle the ½ cup plus 2 tablespoons flour, ¼ teaspoon baking soda, and ¼ teaspoon fine sea salt over the wet mixture. Use a rubber spatula or wooden spoon to fold everything together gently. Stop as soon as you no longer see streaks of flour—overmixing will make the cookies tough. The dough should be soft and slightly sticky but not wet.
- Fold in the chocolate chips. Add ⅓ cup chocolate chips or chopped chocolate and fold them in with a few gentle strokes. Make sure they’re evenly distributed throughout the dough. If you want extra chocolate in every bite, press a few extra chips onto the tops of the dough balls after portioning.
- Portion the dough. Using a small cookie scoop or two spoons, divide the dough into 4 equal portions (about 2 tablespoons each). Place them on the prepared baking sheet, spacing them at least 2 inches apart. These cookies spread, so don’t crowd them. I usually put two on one sheet and bake them in two batches if I’m using a small pan.
- Bake the cookies. Place the baking sheet in the preheated oven and bake for 10-12 minutes. At 10 minutes, the cookies will look puffy and slightly underdone in the center—that’s exactly what you want. The edges should be golden brown, but the centers will still look soft and a bit glossy. If you prefer crispier cookies, bake for 12 minutes, but keep an eye on them; they go from perfect to overdone quickly.
- Add flaky salt (optional). As soon as the cookies come out of the oven, sprinkle a tiny pinch of flaky sea salt over each one. This step is optional, but I honestly think it’s what makes these cookies unforgettable. The salt crystals add little bursts of flavor that balance the sweetness perfectly.
- Cool on the baking sheet. Let the cookies rest on the hot baking sheet for 5 minutes. This is crucial—the residual heat continues to cook the centers gently while the edges set. If you try to move them too soon, they’ll fall apart. After 5 minutes, transfer them to a cooling rack (or just eat them straight from the sheet—I won’t judge).
Cooking Tips & Techniques
After making this recipe more times than I’d like to admit, I’ve picked up a few tricks that make a real difference. Here’s what I’ve learned the hard way so you don’t have to.
Don’t skip the resting step. I know it’s tempting to grab a cookie right out of the oven, but those 5 minutes on the hot baking sheet are non-negotiable. The cookies continue to set during this time, and moving them too early will result in a crumbly mess. Trust the process—they’ll still be warm when you eat them.
Watch your flour measurement. This is the most common mistake I see with small-batch recipes. If you scoop your flour directly from the bag, you can end up with up to 25% more flour than the recipe calls for, which leads to dry, cakey cookies. Instead, spoon the flour into your measuring cup and level it off with a knife. If you have a kitchen scale, even better—75 grams is the sweet spot.
Room temperature ingredients matter. I learned this one the hard way. Cold egg yolk straight from the fridge can seize the melted butter and make the dough grainy. Let your egg sit out for 15 minutes before starting, or place it in a bowl of warm water for 5 minutes. It’s a small step, but it makes the mixing process much smoother.
Bake one tray at a time. If you’re making the full batch of 4 cookies, resist the urge to cram them all onto one sheet. They need room to spread, and crowded cookies will steam instead of bake, giving you pale, flat discs. Bake them in two batches if necessary—the second batch will be ready in no time while you’re enjoying the first one warm.
Freeze the dough for later. This recipe is perfect for making ahead. Portion the dough into balls, place them on a small tray, and freeze until solid (about 30 minutes). Then transfer the frozen dough balls to a zip-top bag. When you’re ready to bake, just add 2-3 minutes to the baking time. Fresh cookies on demand—what’s better than that?
One mistake I made early on: I once used margarine instead of butter because I thought it wouldn’t matter. Big mistake. The cookies spread into flat, greasy puddles that never set properly. Butter is non-negotiable here—it’s what gives these cookies their structure and that rich, buttery flavor.
Variations & Adaptations
One of the things I love most about this recipe is how adaptable it is. Here are some of my favorite variations, all tested and approved.
Double Chocolate Chip: Replace 1 tablespoon of the flour with 1 tablespoon of unsweetened cocoa powder. Use dark chocolate chips instead of semi-sweet. The result is a rich, fudgy cookie that tastes almost like a brownie. I made these for a friend who claims she doesn’t like chocolate chip cookies, and she ate three before admitting she was wrong.
Peanut Butter Swirl: After mixing the dough, drop 2 tablespoons of creamy peanut butter on top and gently swirl it through with a knife. Don’t fully mix it in—you want ribbons of peanut butter running through the cookie. Bake as directed. The salty-sweet combination is absolutely addictive.
Gluten-Free Option: Substitute the all-purpose flour with a 1:1 gluten-free baking flour blend that contains xanthan gum. I’ve tested this with Bob’s Red Mill 1-to-1 Baking Flour, and the texture is remarkably close to the original. The cookies might spread slightly more, so keep an eye on them at the 10-minute mark.
Vegan Adaptation: Use vegan butter (I like Miyoko’s or Earth Balance) and replace the egg yolk with 1 tablespoon of aquafaba (the liquid from a can of chickpeas) mixed with 1 teaspoon of cornstarch. The texture won’t be quite as gooey, but it’s still delicious. Use dairy-free chocolate chips to keep it fully vegan.
Add-In Ideas: Feel free to get creative with your mix-ins. Chopped toasted walnuts or pecans add a lovely crunch. White chocolate chips and dried cranberries make a festive version. A tablespoon of shredded coconut gives a chewy, tropical twist. Just keep the total add-in amount to about ⅓ cup so the dough doesn’t get overwhelmed.
My personal favorite variation: I once made these with browned butter instead of regular melted butter. I cooked the butter in a small saucepan over medium heat until it turned golden brown and smelled nutty, then let it cool slightly before using. The cookies had this incredible depth of flavor that made them taste almost like butterscotch. It takes an extra 5 minutes, but it’s absolutely worth it for a special occasion.
Serving & Storage Suggestions
These cookies are at their absolute best warm from the oven, but I’ve got a few tips for serving and storing them that will help you enjoy them at their peak.
Serving Temperature: Serve these cookies warm, ideally within 10 minutes of baking. The chocolate should still be soft and melty, and the edges should have that slight crispiness that contrasts with the gooey center. If they’ve cooled completely, pop them in the microwave for 10-15 seconds to bring back that fresh-from-the-oven texture.
Presentation Ideas: For a cozy presentation, arrange 2-3 cookies on a small plate with a glass of cold milk or a scoop of vanilla ice cream. A drizzle of warm chocolate sauce or a dusting of powdered sugar makes them feel extra special. If you’re serving them to guests, stack them on a small cake stand for a rustic, inviting look.
Complementary Pairings: These cookies pair beautifully with a cold glass of milk (obviously), but they’re also fantastic with a hot cup of coffee or a rich hot chocolate. For a grown-up twist, try them with a small glass of bourbon or a dark rum—the smoky notes complement the chocolate perfectly.
Storage Instructions: Store any leftover cookies in an airtight container at room temperature for up to 3 days. To keep them soft, add a slice of bread to the container—the cookies will absorb the moisture from the bread and stay chewy. Change the bread slice every day if you’re storing them for more than a day.
Freezing Instructions: Baked cookies freeze beautifully for up to 3 months. Let them cool completely, then place them in a single layer in a freezer-safe bag or container. To thaw, let them sit at room temperature for about 15 minutes, or microwave for 15-20 seconds. The texture won’t be quite as perfect as fresh, but it’s pretty close.
Flavor Development: Here’s something interesting—these cookies actually taste even better the next day. The flavors meld together overnight, and the texture becomes even more chewy and cohesive. So if you can resist eating them all right away, you’re in for a treat.
Nutritional Information & Benefits
Let’s be honest—these are cookies, not health food. But that doesn’t mean you can’t enjoy them as part of a balanced diet. Here’s what you need to know.
| Nutrient | Per Cookie (1 of 4) |
|---|---|
| Calories | ~280 |
| Total Fat | 16g |
| Saturated Fat | 10g |
| Carbohydrates | 33g |
| Sugar | 22g |
| Protein | 4g |
| Fiber | 1g |
| Sodium | 190mg |
Health Benefits of Key Ingredients: Dark chocolate (if you use it) contains antioxidants called flavonoids that may support heart health. The small amount of fiber in the flour and chocolate helps with digestion. And honestly? There’s a mental health benefit too. Taking 20 minutes to bake something for yourself is a form of self-care that’s hard to quantify but very real.
Dietary Considerations: This recipe contains gluten, dairy, and eggs. For gluten-free and vegan options, see the variations section above. The cookies are relatively low in sodium compared to store-bought versions, especially if you skip the flaky salt topping.
My Personal Perspective: I believe in enjoying treats in moderation without guilt. These cookies are made with real ingredients, and they’re portioned to serve just one or two people. That means you can have a warm, satisfying dessert without a week’s worth of leftovers tempting you. It’s about quality over quantity, and sometimes that small batch of cookies is exactly what you need to feel grounded and cared for.
Conclusion
Look, I get it. There are a lot of cookie recipes out there, and it’s easy to feel like you’ve seen them all. But this small batch version is different. It’s not trying to be the biggest, the most impressive, or the most complicated. It’s just trying to be exactly what you need on a quiet night when you want something warm and chocolatey and good.
What I love most about this recipe is how forgiving it is. You don’t need to be a pastry chef to nail it. You don’t need special equipment or rare ingredients. You just need a few minutes, a little patience, and a craving for something cozy. And honestly? That’s the kind of recipe worth keeping around.
I’d love to hear how these turn out for you. Did you try a variation? Did you eat all four in one sitting? (No judgment here.) Drop a comment below and let me know—your stories and adaptations are what make this community so special. And if you share a photo on Pinterest, tag me so I can see your beautiful cookies. Until next time, happy baking!
Frequently Asked Questions
Can I make these cookies without an egg yolk?
Yes, you can substitute the egg yolk with 1 tablespoon of milk or water mixed with 1 teaspoon of cornstarch. The texture will be slightly less rich, but the cookies will still be delicious. For a vegan option, use aquafaba as mentioned in the variations section.
Why did my cookies spread too much?
This usually happens for one of three reasons: the butter was too warm, the dough wasn’t chilled enough, or the flour was measured incorrectly. Make sure your melted butter is just warm, not hot, and try chilling the dough for 10 minutes before baking if you’re in a warm kitchen. Also, double-check your flour measurement—too little flour leads to flat cookies.
Can I double this recipe?
Absolutely! Just double all the ingredients and use a whole egg instead of two egg yolks (it’s easier and works fine). Bake in batches to avoid crowding the pan. The baking time might increase by a minute or two, so keep an eye on them.
How do I get that bakery-style crackly top?
The key is letting the sugar dissolve properly in the melted butter. Whisk the butter and sugars together for a full 30 seconds until the mixture looks smooth and slightly thickened. Also, using an egg yolk instead of a whole egg helps create that shiny, crackly surface.
Can I use different types of chocolate?
Yes! Feel free to experiment. Milk chocolate makes sweeter, creamier cookies. Dark chocolate (60-70% cocoa) gives a more intense, sophisticated flavor. White chocolate chips are great if you want a milder, buttery taste. You can even mix different types for variety. Just keep the total amount to about ⅓ cup so the dough stays balanced.
Pin This Recipe!
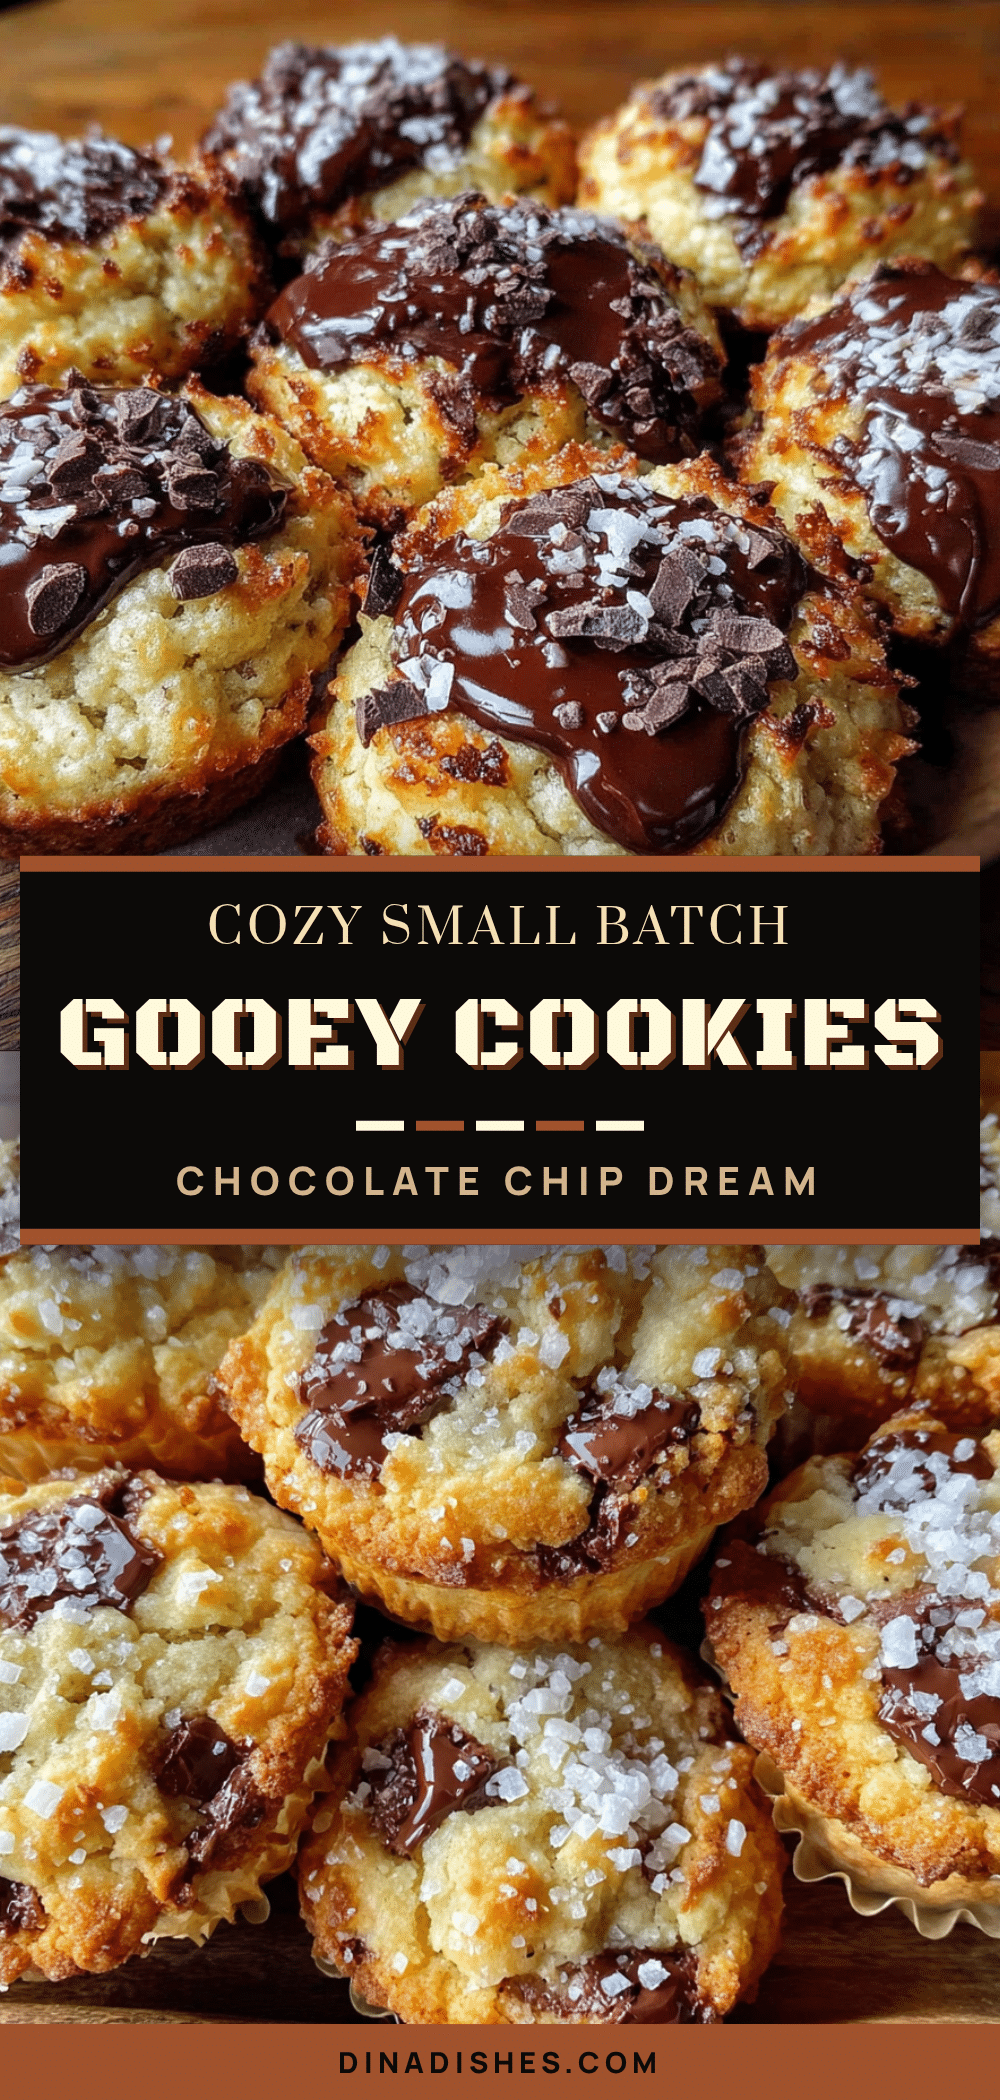
Cozy Small Batch Gooey Chocolate Chip Cookies

These small batch chocolate chip cookies are perfectly gooey, crispy on the edges, and fudgy in the center. Made with simple ingredients and ready in about 20 minutes, they’re the ultimate cozy treat for one or two people.
- Prep Time: 10 minutes
- Cook Time: 10-12 minutes
- Total Time: 20-22 minutes
- Yield: 4 cookies 1x
- Category: Dessert
- Cuisine: American
Ingredients
- 4 tablespoons unsalted butter, melted and slightly cooled
- 1/4 cup packed light brown sugar
- 2 tablespoons granulated sugar
- 1 large egg yolk
- 1/2 teaspoon vanilla extract
- 1/2 cup plus 2 tablespoons all-purpose flour
- 1/4 teaspoon baking soda
- 1/4 teaspoon fine sea salt
- 1/3 cup semi-sweet chocolate chips or chopped chocolate
- Flaky sea salt for topping (optional)
Instructions
- Preheat your oven to 350°F (175°C). Line a small baking sheet with parchment paper or a silicone mat.
- Melt the butter in a small microwave-safe bowl in 20-second intervals, stirring between each, until fully melted. Let cool for about 2 minutes.
- In a mixing bowl, combine the melted butter, brown sugar, and granulated sugar. Whisk vigorously for about 30 seconds until smooth and slightly thickened.
- Add the egg yolk and vanilla extract. Whisk until fully combined and glossy.
- Sprinkle the flour, baking soda, and fine sea salt over the wet mixture. Fold gently with a rubber spatula or wooden spoon until no streaks of flour remain.
- Fold in the chocolate chips until evenly distributed.
- Portion the dough into 4 equal portions (about 2 tablespoons each) using a cookie scoop or two spoons. Place on the prepared baking sheet, spacing at least 2 inches apart.
- Bake for 10-12 minutes. At 10 minutes, the edges should be golden brown and the centers still soft and slightly glossy.
- If desired, sprinkle a pinch of flaky sea salt over each cookie immediately after removing from the oven.
- Let the cookies cool on the baking sheet for 5 minutes, then transfer to a cooling rack or serve warm.
Notes
For best results, use room temperature egg yolk. Don’t skip the 5-minute resting step on the baking sheet. For a bakery-style crackly top, whisk the butter and sugars for a full 30 seconds. Store leftovers in an airtight container at room temperature for up to 3 days. Freeze unbaked dough balls for up to 3 months.
Nutrition
- Serving Size: 1 cookie
- Calories: 280
- Sugar: 22
- Sodium: 190
- Fat: 16
- Saturated Fat: 10
- Carbohydrates: 33
- Fiber: 1
- Protein: 4
Keywords: small batch chocolate chip cookies, gooey chocolate chip cookies, easy cookie recipe, single serving cookies, cozy cookies