My neighbor Karen wasn’t trying to impress anyone. I’d stopped by to borrow a bag of sugar—classic, right?—and the smell hit me before I even got to her screen door. Buttery, savory, with this weirdly festive something in the air. She was standing at her kitchen counter, hands dusted in flour, laughing at something on her phone, and there they were. A baking sheet full of the cutest little wrapped-up things I’d ever seen. Little mummies. Made from hot dogs. Honestly, I forgot about the sugar entirely.
Karen just shrugged when I asked what they were. “Oh, those? Just pigs in a blanket for the kid’s Halloween party. I made them look like mummies.” She said it like it was nothing. Like she hadn’t just created the most adorable, snackable, party-perfect thing I’d ever laid eyes on. I stood there, probably staring a little too long, while she went back to rolling out crescent dough. “You want one?” she asked, already sliding the pan toward me. I mean, did I want one? I wanted the whole tray.
That first bite was warm, flaky, salty, and just a little bit ridiculous—in the best way. The little mustard-dot eyes stared up at me from the plate, and I couldn’t help but smile. Maybe you’ve been there. That moment when a simple, last-minute idea turns into something you know you’ll be making for years. That’s what these Easy Halloween Mummy Pigs in a Blanket are. They’re the recipe you didn’t know you needed until you see them, and then suddenly, you can’t imagine a Halloween party without them.
I asked Karen for the details, and she rattled it off between sips of coffee. “Crescent rolls, hot dogs, bake ’em. The eyes are just mustard.” That’s it. That’s the whole secret. No fancy techniques, no special equipment. Just a little bit of wrapping and a whole lot of charm. I’ve been making them every October since, and let me tell you—they never get old. They’re the first thing to disappear at every party, and they always get that same reaction. “Wait, you made these? They’re so cute!” And I just smile, thinking of Karen and her sugar.
Why You’ll Love This Recipe
Let’s be real for a second. Halloween appetizers can be a total pain. You want something festive, but you also don’t want to spend hours in the kitchen when you could be carving pumpkins or watching scary movies. These Easy Halloween Mummy Pigs in a Blanket solve that problem completely. They look like you tried so hard, but honestly? They’re almost too easy.
- Quick & Easy : From fridge to table in about 25 minutes. Seriously. You can make these while your kids are still arguing over costumes.
- Simple Ingredients : You probably already have crescent rolls and hot dogs in your fridge. If not, they’re a two-item grocery run. No weird specialty stuff.
- Perfect for Halloween Parties : Whether it’s a school party, a neighborhood gathering, or just a spooky movie night at home, these fit right in.
- Crowd-Pleaser : Kids love them because they’re cute. Adults love them because they’re delicious. Everyone wins.
- Unbelievably Delicious : That buttery, flaky crescent dough wrapped around a juicy hot dog? It’s classic comfort food with a festive twist.
What makes these different from regular pigs in a blanket? It’s the presentation, honestly. The way the dough is wrapped to look like bandages changes the whole experience. It makes people smile before they even take a bite. And the little mustard eyes? Pure genius. I’ve tested this with different brands of crescent dough and different types of hot dogs, and I can tell you with confidence—it works every single time. This isn’t just another Halloween snack. It’s the one that’ll get photographed, shared, and requested year after year.
What Ingredients You Will Need
This recipe uses the simplest lineup of ingredients you can imagine. That’s the beauty of it—you don’t need a fancy grocery trip or a special trip to a specialty store. Just a few basics that come together to make something truly memorable.
- 1 can (8 oz) refrigerated crescent roll dough : This is the star of the show. I recommend Pillsbury for consistent results, but any brand works. The dough is pre-scored into triangles, which makes it easy to cut into strips. (Pro tip: Keep it cold until you’re ready to use it—warm dough is sticky and harder to work with.)
- 8 cocktail-sized hot dogs or smoked sausages : These are perfect because they’re already bite-sized. Look for brands like Hebrew National or Oscar Mayer for quality. If you can only find full-sized hot dogs, just cut them into thirds. (For a fancier option, try mini smoked sausages or even little cheese-filled sausages.)
- Yellow mustard for the eyes : You only need a tiny bit. A squeeze bottle makes it super easy to dot on the little eyes, but you can also dip a toothpick in mustard and dot it on. (Honey mustard or spicy brown mustard work too, if that’s what you have.)
- Optional: Cooking spray or butter for greasing : Most baking sheets are non-stick these days, but a light spray ensures nothing sticks. You can also line the pan with parchment paper for zero cleanup.
That’s it. Four ingredients. Maybe five if you count the cooking spray. I love recipes like this because they prove you don’t need a dozen fancy items to make something that looks impressive. The magic is all in the technique—or, in this case, the wrapping.
One thing I’ve learned from making these dozens of times: the quality of your crescent dough really matters. The cheaper store-brand versions sometimes have less butter, which means they don’t brown as nicely. Stick with a name brand if you can. And for the hot dogs, I’ve found that the cocktail-sized ones wrap more evenly than full-sized ones cut into pieces. They’re just the right proportions for that mummy look.
If you’re feeding a crowd, double the recipe. These disappear fast, and you’ll be glad you made extra. I’ve also experimented with different types of sausages—turkey dogs, beef dogs, even vegetarian options—and they all work great. Just make sure whatever you use is fully cooked, since you’re only baking long enough to brown the dough.
Equipment Needed
The equipment list for this recipe is almost as short as the ingredient list. That’s the beauty of these Easy Halloween Mummy Pigs in a Blanket—they don’t require any fancy gadgets or specialty tools.
- Baking sheet : A standard half-sheet pan works perfectly. I use my old Nordic Ware one that’s seen better days, but anything oven-safe will do.
- Parchment paper or silicone baking mat : Not strictly necessary, but it makes cleanup so much easier. Plus, it prevents the bottoms from getting too dark.
- Knife or pizza cutter : You’ll need something sharp to cut the crescent dough into strips. A pizza cutter is actually my favorite tool for this—it glides right through the dough without pulling it.
- Small bowl for mustard : Just for dipping your toothpick or squeeze bottle tip.
- Toothpick or squeeze bottle : For adding those adorable mustard eyes. A toothpick gives you more control if you’re nervous about making a mess.
- Cooling rack : Optional, but it helps the mummies stay crispy on the bottom instead of getting soggy.
That’s really all you need. No stand mixer, no food processor, no special pans. Just basic kitchen tools you probably already own. If you don’t have a pizza cutter, a sharp knife works fine—just be careful not to tear the dough. And if you don’t have a squeeze bottle, a toothpick or even the tip of a butter knife can do the job for the mustard eyes.
Preparation Method
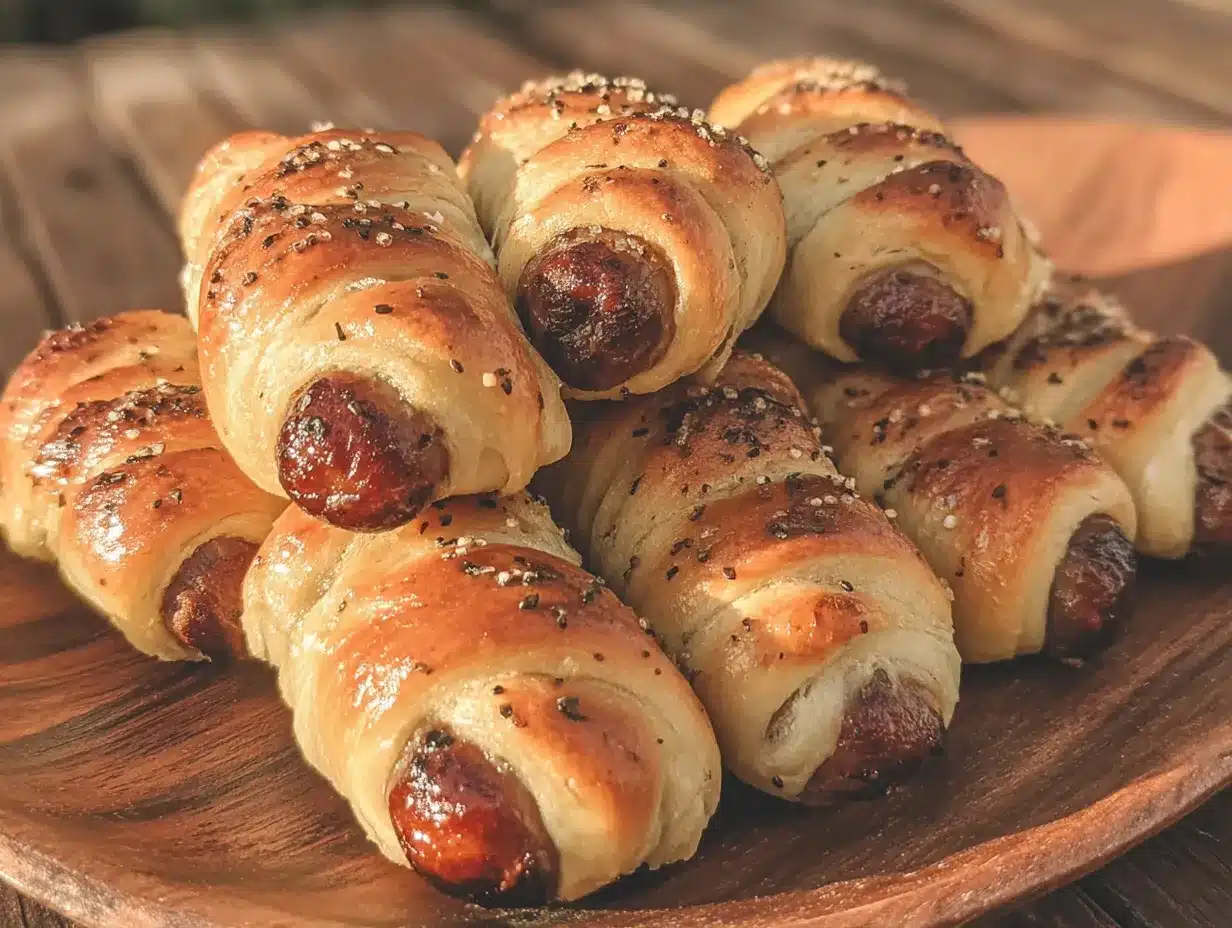
Alright, let’s get to the fun part. Here’s how to make these little mummies come to life. I’ve broken it down step by step so even if you’ve never made pigs in a blanket before, you’ll nail it on the first try.
- Preheat your oven to 375°F (190°C). While it’s heating up, line your baking sheet with parchment paper or a silicone mat. This step isn’t just for easy cleanup—it also helps the bottoms of your mummies brown evenly without burning.
- Open the can of crescent roll dough. I know, I know—the pop sound makes me jump every time too. Carefully unroll the dough and separate it into the 8 pre-scored triangles. Place them on a clean work surface.
- Cut each triangle into thin strips. Using your pizza cutter or a sharp knife, slice each triangle lengthwise into 3 or 4 long, thin strips. The strips should be about 1/2 inch wide. Don’t worry if they’re not perfectly even—mummies are supposed to look a little messy, right? (I’ve made them with uneven strips before, and they actually look more authentic that way.)
- Wrap the hot dogs. Take one cocktail hot dog and start wrapping a strip of dough around it, slightly overlapping as you go. Leave a small gap near the top for the “face.” Don’t wrap too tightly—the dough will expand as it bakes, and you want it to look like loose bandages. Repeat with the remaining hot dogs and dough strips. You should get about 8 mummies from one can of dough.
- Place the wrapped mummies on the prepared baking sheet. Space them about an inch apart so they have room to puff up. They won’t spread much, but a little breathing room helps them brown evenly.
- Bake for 10-12 minutes, or until the dough is golden brown and cooked through. Keep an eye on them after the 10-minute mark—ovens vary, and you want them golden, not burnt. The hot dogs are already cooked, so you’re really just baking the dough.
- Let them cool for 2-3 minutes on the baking sheet. This is important! The dough is fragile right out of the oven, and moving them too soon can cause the bandages to fall apart. After a few minutes, transfer them to a cooling rack or serving platter.
- Add the mustard eyes. Once they’re cool enough to handle (but still warm), use a toothpick or squeeze bottle to add two small dots of yellow mustard near the top of each mummy. Don’t overthink this—just two little dots. If you’re feeling creative, you can add a tiny dot of ketchup for a “bloodshot” eye, but I prefer the classic look.
And that’s it! You’ve just made a batch of the cutest Halloween appetizer I’ve ever seen. The whole process takes about 25 minutes from start to finish, and most of that is hands-off baking time.
One thing I learned the hard way: don’t over-wrap the hot dogs. My first batch looked more like doughy cocoons than mummies because I used too many strips. The key is to leave visible gaps of hot dog peeking through. It looks more like bandages that way, and it ensures the dough bakes all the way through.
Another tip: if the dough starts to feel sticky or hard to work with, pop it in the fridge for 5 minutes. Cold dough is much easier to handle, especially if your kitchen is warm.
Cooking Tips & Techniques
I’ve made these Easy Halloween Mummy Pigs in a Blanket more times than I can count, and I’ve picked up a few tricks along the way. Some came from trial and error. Others came from moments of pure kitchen panic. Let me save you the trouble.
Keep the dough cold. This is the number one tip I can give you. Crescent dough gets sticky and hard to work with when it’s warm. If you’re making these for a party and you’re prepping ahead, keep the unopened can in the fridge until you’re ready. If the dough starts sticking to your fingers while you’re cutting strips, just wash your hands and dry them well. Or, better yet, dust your work surface with a tiny bit of flour.
Don’t stretch the dough. When you’re wrapping the strips around the hot dogs, let the dough lie naturally. If you pull it tight, it’ll shrink back as it bakes and might tear. Loose, slightly messy wrappings look more like mummy bandages anyway. Embrace the imperfection.
Use the right hot dogs. Cocktail-sized hot dogs are ideal because they’re already the perfect size. If you can only find full-sized ones, cut them into thirds. I’ve also used mini smoked sausages, which add a nice smoky flavor. Just avoid anything too thick—it throws off the proportions and makes the mummies look chunky instead of cute.
Space them out. I know it’s tempting to cram as many as possible onto one baking sheet, but crowding them leads to uneven browning. Give them at least an inch of space. If you’re making a double batch, use two baking sheets or bake in batches.
Watch the oven. Every oven runs a little differently. My old one used to run hot, so I’d start checking at 9 minutes. Your oven might need the full 12. Look for golden brown edges and a slightly puffy appearance. If the bottoms are getting too dark but the tops are still pale, move the baking sheet to a higher rack.
One of my biggest failures? I once forgot to cut the dough into strips and just wrapped whole triangles around the hot dogs. They looked like sad, doughy blobs. Learn from my mistake. Those thin strips are what make the mummy effect work.
Another thing: if you’re making these ahead of time, bake them completely but hold the mustard eyes until just before serving. The mustard can bleed into the dough if it sits too long, and it doesn’t look as clean. Plus, adding the eyes right before serving keeps them looking fresh and cute.
Variations & Adaptations
One of the best things about this recipe is how easy it is to adapt. I’ve tried several variations over the years, and they’ve all been hits. Here are some of my favorites.
Spicy Mummies : Use spicy hot links or chorizo-style sausages instead of regular hot dogs. The little kick of heat pairs surprisingly well with the buttery dough. I made these for a Halloween party last year, and they were gone in minutes.
Cheesy Mummies : Before wrapping the hot dogs, slice them lengthwise and insert a thin strip of cheddar or pepper jack cheese. The cheese melts as the dough bakes, creating a gooey surprise inside. Just make sure the cheese is fully enclosed so it doesn’t leak out.
Veggie Mummies : For a vegetarian option, use plant-based hot dogs or even carrot sticks roasted until tender. The carrot version is surprisingly good—the natural sweetness pairs nicely with the salty dough. Just par-boil the carrots first so they’re soft enough to eat.
Breakfast Mummies : Swap the hot dogs for breakfast sausages and serve them at a Halloween morning party. They’re perfect for a spooky brunch. I’ve even made them with pancake batter instead of crescent dough, but that’s a whole different recipe.
Gluten-Free Mummies : Use gluten-free crescent dough if you can find it. Some brands make a decent version, though the texture is slightly different. You can also use gluten-free puff pastry sheets cut into strips.
Air Fryer Mummies : If you have an air fryer, these cook beautifully in it. Set the temperature to 350°F (175°C) and cook for 6-8 minutes, flipping halfway through. They come out extra crispy and golden. I actually prefer this method for smaller batches because it’s faster and doesn’t heat up the whole kitchen.
I’ve also experimented with different dipping sauces. While the classic mustard eyes are perfect, serving them with a side of ketchup, ranch dressing, or even a spicy sriracha mayo adds another layer of fun. For a Halloween-themed dip, mix ketchup with a little hot sauce and call it “monster blood.” The kids love it.
Serving & Storage Suggestions
These Easy Halloween Mummy Pigs in a Blanket are best served warm, right after the mustard eyes go on. The dough is at its flakiest and most buttery when it’s fresh from the oven. I like to arrange them on a platter in a circle, with a small bowl of extra mustard or ketchup in the center for dipping.
For a Halloween party spread, pair them with other spooky snacks like:
- Ghost-shaped cheese slices
- Veggie sticks arranged to look like broomsticks
- Pumpkin-shaped cheese ball with crackers
- Spiderweb dip (sour cream with olive oil drizzle)
If you’re serving them at a kid’s party, set them out on a platter lined with black or orange napkins. The contrast makes the golden mummies pop. You can even add a few plastic spider rings or Halloween sprinkles around the platter for extra fun.
Storage : Leftover mummies (if there are any!) can be stored in an airtight container in the refrigerator for up to 3 days. The dough will soften slightly, but they’re still tasty. To reheat, pop them in a 350°F (175°C) oven for 5 minutes, or in the air fryer for 2-3 minutes. The microwave works in a pinch, but the dough gets a bit chewy.
Freezing : You can freeze the unbaked mummies on a baking sheet until solid, then transfer them to a freezer bag. When you’re ready to bake, add a couple of extra minutes to the cooking time. Don’t add the mustard eyes until after they’re baked and cooled.
One thing I’ve noticed: the flavors actually meld together nicely after a day in the fridge. The mustard soaks into the dough slightly, creating this tangy-savory combination that’s really good. Not that they ever last that long in my house.
Nutritional Information & Benefits
Let’s be honest—these are a treat, not a health food. But that doesn’t mean they can’t fit into a balanced diet. Here’s the estimated nutritional breakdown for one mummy (based on using standard crescent dough and cocktail hot dogs):
- Calories : Approximately 120-150 per mummy
- Protein : 4-5 grams
- Carbohydrates : 10-12 grams
- Fat : 8-10 grams
- Sodium : 350-400 mg
These numbers will vary depending on the brands you use and the size of your hot dogs. If you’re watching your sodium intake, look for low-sodium hot dogs or turkey dogs. For a lower-fat option, use reduced-fat crescent dough.
The hot dogs provide a decent amount of protein, which helps keep you full. The crescent dough offers quick energy from carbohydrates. And honestly? Sometimes you just need a fun, indulgent snack that makes you smile. I think there’s nutritional value in joy too.
If you’re serving these at a party, consider offering a veggie tray alongside them to balance things out. That way, everyone can grab a mummy and some carrot sticks and feel good about their choices.
Conclusion
These Easy Halloween Mummy Pigs in a Blanket are everything I love about holiday cooking. They’re simple, they’re fun, and they bring people together. Every time I make them, I think of Karen standing in her kitchen, laughing at her phone, not realizing she was creating a new tradition for me. That’s the thing about good recipes—they have a way of sticking with you.
I hope you give these a try. Don’t overthink the wrapping. Don’t stress about the mustard eyes. Just have fun with it. Let the kids help if you have them. Make a mess. Laugh at the ones that look a little wonky. Because at the end of the day, they’re still delicious, and they’ll still disappear.
Have you made these before? Or do you have your own Halloween appetizer tradition? I’d love to hear about it in the comments below. Share your photos, your tips, your variations—let’s keep this conversation going. And if you try these mummies, tag me so I can see your creations. Happy Halloween, and happy snacking!
Frequently Asked Questions
Can I make these ahead of time?
Yes! You can assemble the mummies up to a day in advance and keep them covered in the refrigerator. Just add the mustard eyes after baking. You can also freeze the unbaked mummies for up to a month.
What if I don’t have cocktail hot dogs?
No problem. Just use regular hot dogs and cut them into thirds. You can also use mini smoked sausages, kielbasa cut into chunks, or even cheese sticks for a vegetarian option.
Can I use puff pastry instead of crescent dough?
Absolutely. Thaw a sheet of puff pastry, cut it into thin strips, and wrap the hot dogs the same way. The baking time might be slightly longer—about 15 minutes at 400°F (200°C). Puff pastry gives a flakier, more buttery result.
How do I keep the dough from unraveling while baking?
Make sure the end of each dough strip is tucked under the hot dog or pressed gently against the dough. The heat of the oven will seal it as it bakes. If you’re really worried, you can brush a tiny bit of water or egg wash on the end to help it stick.
What can I use instead of mustard for the eyes?
Ketchup works, though it’s a bit runnier. You can also use sriracha for a spicy kick, or even tiny dots of cream cheese for a milder look. For a totally different vibe, use black sesame seeds or poppy seeds pressed gently into the dough before baking.
PrintEasy Halloween Mummy Pigs in a Blanket: Best Bite-Sized Appetizer

These adorable mummy pigs in a blanket are made with crescent dough and cocktail hot dogs, then topped with mustard eyes. They’re the perfect quick and easy Halloween appetizer that looks impressive but comes together in just 25 minutes.
- Prep Time: 15 minutes
- Cook Time: 12 minutes
- Total Time: 27 minutes
- Yield: 8 servings 1x
- Category: Appetizer
- Cuisine: American
Ingredients
- 1 can (8 oz) refrigerated crescent roll dough
- 8 cocktail-sized hot dogs or smoked sausages
- Yellow mustard for the eyes
- Optional: Cooking spray or butter for greasing
Instructions
- Preheat your oven to 375°F (190°C). Line a baking sheet with parchment paper or a silicone mat.
- Open the can of crescent roll dough. Carefully unroll and separate into 8 pre-scored triangles on a clean work surface.
- Using a pizza cutter or sharp knife, cut each triangle lengthwise into 3 or 4 thin strips, about 1/2 inch wide.
- Take one cocktail hot dog and wrap a strip of dough around it, slightly overlapping as you go. Leave a small gap near the top for the face. Repeat with remaining hot dogs and dough strips.
- Place the wrapped mummies on the prepared baking sheet, spacing them about an inch apart.
- Bake for 10-12 minutes, or until the dough is golden brown and cooked through.
- Let them cool on the baking sheet for 2-3 minutes, then transfer to a cooling rack or serving platter.
- Once cool enough to handle but still warm, use a toothpick or squeeze bottle to add two small dots of yellow mustard near the top of each mummy for eyes.
Notes
Keep the dough cold for easier handling. Don’t over-wrap the hot dogs; leave visible gaps for a mummy look. Add mustard eyes just before serving to prevent bleeding. For a spicier version, use spicy hot links or chorizo-style sausages. For a vegetarian option, use plant-based hot dogs or roasted carrot sticks. Air fryer: 350°F (175°C) for 6-8 minutes, flipping halfway.
Nutrition
- Serving Size: 1 mummy
- Calories: 135
- Sugar: 2
- Sodium: 375
- Fat: 9
- Saturated Fat: 3
- Carbohydrates: 11
- Protein: 4
Keywords: Halloween, mummy, pigs in a blanket, appetizer, crescent rolls, hot dogs, party food, easy, kid-friendly


