The woman at the community garden plot next to mine watched me for a solid five minutes before she said anything. I was wrestling with a tangle of rogue tomato vines that had escaped their cage, sweating in the July humidity, and frankly, making a mess of things. She didn’t offer gardening advice. Instead, she just shook her head with a little smile and said, “You look like you need a good banana bread. Not one of those fussy ones.”
Her name was Pat, and she was in her seventies, with dirt permanently under her fingernails and the calmest energy I have ever encountered. A few days later, she handed me a slightly crumpled index card across the fence. The recipe was handwritten in blue ink, and the first instruction was literally “Mush up some bananas in a bowl.” No mixer. No sifting. No nonsense. I made it that very night, and let me tell you, I was skeptical. I mean, how good could a banana bread that simple really be?
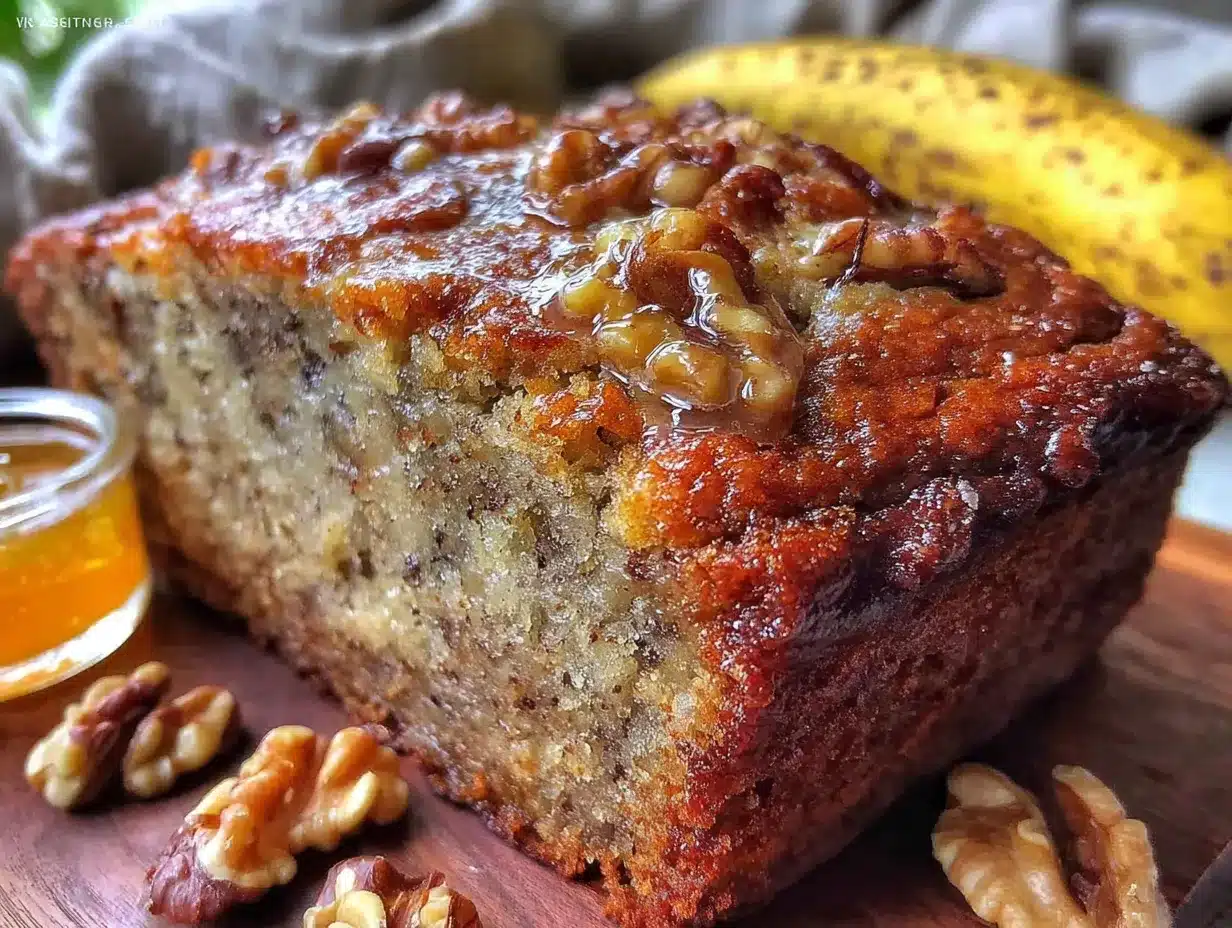
Honestly, it was the best I had ever made. The texture was incredibly moist, the banana flavor was pure and intense, and the crust had this beautiful, sugary crackle. I’ve tweaked it a little over the years—added some toasted walnuts, swapped in a bit of yogurt for extra tang—but the heart of it is still Pat’s no-fuss philosophy. This easy one-bowl banana nut bread is the answer to those evenings when you’re tired, the counter has three sad, brown bananas, and you just want something that feels like a hug without a sink full of dishes. You know the feeling, right?
Why You’ll Love This Recipe
This isn’t just another banana bread recipe. This is the one you will come back to again and again because it actually delivers on its promises. I have tested this more times than I can count, tweaking the flour, the fat, the sugar ratios. This version is the sweet spot—pun intended. Here is why it works so well for busy people like us.
- Quick & Easy: From mixing bowl to oven in under 10 minutes. Seriously. No mixer to drag out, no creaming butter and sugar until your arm hurts. Just a bowl, a fork, and a spoon.
- Simple Ingredients: You probably have everything in your pantry right now. Butter, sugar, eggs, flour, baking soda, salt, and those spotty bananas you were about to throw out.
- Perfect for Weeknights: It is the ultimate “I need something baked but I have zero energy” recipe. It comes together while you are unloading the dishwasher or helping with homework.
- Crowd-Pleaser: My kids devour it, my husband packs it for his lunch, and it disappears at every bake sale I bring it to. It is impossible to dislike.
- Unbelievably Delicious: The combination of sweet, ripe bananas and crunchy, toasted walnuts is pure comfort. The texture is so moist and tender, it practically melts in your mouth.
What makes this recipe different from the dozens of others out there? It is the technique of mashing the bananas with the sugar first. This simple step releases their natural juices and creates a more intense banana flavor that permeates every single crumb. It is not just a hint of banana; it is a full-on, unapologetic banana experience. This is the kind of bread that makes you close your eyes after the first bite. It is comfort food at its finest—simple, fast, and deeply satisfying.
What Ingredients You Will Need
This recipe uses simple, humble ingredients to create something truly special. Most of these are pantry staples, which is exactly what you want on a busy weeknight. Let me walk you through each one, including a few little tricks I have learned along the way.
- Ripe Bananas: This is non-negotiable. You want bananas that are heavily spotted, almost black. The browner they are, the sweeter and more flavorful your bread will be. I often buy extra bananas just to let them ripen on my counter for this recipe. (Pro tip: If you are in a hurry, you can ripen bananas in a low oven—200°F for about 20 minutes—but the flavor is never quite as good as naturally ripened.)
- Unsalted Butter, Melted: I use unsalted so I can control the salt level. Melted butter gives the bread a wonderfully tender crumb. You can use salted butter in a pinch, just reduce the added salt to ¼ teaspoon. I prefer using a good quality butter like Kerrygold for a richer flavor, but any brand works fine.
- Granulated Sugar: Standard white sugar provides the perfect sweetness and helps create that beautiful, crackly top crust. Do not be tempted to reduce it too much, or you will lose that signature texture.
- Large Eggs: Eggs bind everything together and add richness. Make sure they are at room temperature so they incorporate smoothly into the batter. If you forgot to take them out of the fridge, just place them in a bowl of warm water for 5 minutes.
- Vanilla Extract: Pure vanilla extract adds depth and warmth, complementing the banana flavor beautifully. Avoid imitation vanilla if you can—it makes a real difference.
- All-Purpose Flour: Standard all-purpose flour gives the bread its structure. I have tested this with a 1:1 gluten-free baking blend, and it works well, though the texture is slightly more delicate. Do not overmix once you add the flour, or you will end up with a tough loaf.
- Baking Soda: This is the leavening agent that helps the bread rise. Make sure your baking soda is fresh—test it by dropping a little into vinegar; it should fizz vigorously.
- Salt: A crucial ingredient that balances the sweetness and enhances all the flavors. Do not skip it.
- Walnuts, Toasted and Chopped: Toasted walnuts add a wonderful crunch and nutty flavor that pairs perfectly with banana. I toast them in a dry skillet over medium heat for 3-4 minutes, stirring frequently, until they are fragrant. Let them cool before chopping. You can substitute pecans or even chocolate chips, but walnuts are my favorite.
Equipment Needed
The beauty of this recipe is that you barely need any equipment. That is the whole point, right? Here is what you will need to have on hand.
- Large Mixing Bowl: Any bowl will do, but a wide, deep one makes mashing and mixing much easier. I use my grandmother’s old ceramic bowl, but a stainless steel one works perfectly.
- Fork or Potato Masher: For mashing the bananas. A fork is the most common tool, but a potato masher makes the job even faster. You want a few small lumps remaining for texture.
- Wooden Spoon or Rubber Spatula: For mixing the batter. A spatula is great for scraping down the sides of the bowl.
- 9×5-Inch Loaf Pan: The standard size for this recipe. If you use a smaller pan, your bread will be very tall and may not bake through in the center. If you use a larger pan, it will be flatter and bake faster. I recommend a metal pan for even browning.
- Parchment Paper: Not strictly necessary, but it makes removing the bread from the pan so much easier. I always line my pan with a sling of parchment paper.
- Cooling Rack: Essential for cooling the bread properly so the bottom doesn’t get soggy.
Preparation Method
Alright, let’s get to it. This is where the magic happens. Follow these steps, and you will have the most incredible banana bread in about an hour. I have included all my little tips and tricks to make sure you succeed on your first try.
- Preheat and Prep: First things first, preheat your oven to 350°F (175°C). While it is heating up, grease a 9×5-inch loaf pan with butter or non-stick spray. Then, cut a piece of parchment paper long enough to hang over the two long sides of the pan—this creates a sling for easy removal. Set the pan aside.
- Mash the Bananas: In your large mixing bowl, add the 3 ripe bananas. Use a fork or a potato masher to mash them until they are mostly smooth with a few small lumps remaining. Do not over-mash them into a puree; you want some texture. You should have about 1 ½ cups of mashed banana.
- Add Sugar and Melted Butter: Add ½ cup (100g) of granulated sugar and ⅓ cup (75g) of melted unsalted butter to the bowl with the mashed bananas. Stir vigorously with your wooden spoon or spatula until the mixture is well combined and looks slightly glossy. This step is important—the sugar helps to further break down the bananas and release their flavor.
- Incorporate Eggs and Vanilla: Crack in 1 large egg and add 1 teaspoon of vanilla extract. Stir until everything is fully incorporated and the batter is smooth. It might look a little separated at this point, but that is okay.
- Combine Dry Ingredients: Sprinkle 1 ½ cups (190g) of all-purpose flour, 1 teaspoon of baking soda, and ½ teaspoon of salt evenly over the wet mixture. Use a gentle hand here. Stir the dry ingredients into the wet ingredients with a few broad strokes. Stop mixing as soon as you no longer see any streaks of white flour. A few small lumps are perfectly fine. Overmixing at this stage will develop the gluten and make your bread tough and dense.
- Fold in the Walnuts: Add ½ cup (60g) of toasted and chopped walnuts to the bowl. Fold them in gently with just 2 or 3 strokes. You want them evenly distributed throughout the batter without overmixing.
- Bake to Perfection: Pour the batter into your prepared loaf pan and spread it into an even layer. Place the pan in the preheated oven and bake for 55-65 minutes. The exact time will depend on your oven. The bread is done when a toothpick inserted into the center comes out clean or with just a few moist crumbs attached. The top should be a deep golden brown and cracked beautifully.
- Cool and Enjoy: Remove the pan from the oven and place it on a cooling rack. Let the bread cool in the pan for about 10-15 minutes. Then, use the parchment paper sling to lift the bread out of the pan and transfer it to the cooling rack to cool completely. If you try to slice it while it is still warm, it will crumble. I know it is hard to wait, but trust me on this one.
Cooking Tips & Techniques
I have made this easy one-bowl banana nut bread more times than I can count, and I have definitely had my share of failures. Here are the most important lessons I have learned so you can skip the mistakes.
The biggest mistake is using under-ripe bananas. I know it is tempting when you are craving banana bread, but under-ripe bananas lack the sweetness and moisture that make this recipe work. They will also be harder to mash. If your bananas are only slightly spotty, you can try to quickly ripen them by baking them at 300°F for 15-20 minutes until the skins turn black. The flavor won’t be quite as deep, but it is a decent backup plan.
Do not overmix the batter. This is the number one reason for tough banana bread. Once you add the flour, you are developing gluten. Stir just until the flour disappears. A few lumps are your friend. I once had a friend who insisted on mixing until the batter was completely smooth, and her bread always came out dense and rubbery. She finally believed me after she tried my method.
Check for doneness with a toothpick. Every oven runs a little differently. Start checking at the 50-minute mark. If the top is browning too quickly but the center is still raw, tent the pan loosely with aluminum foil for the last 15 minutes of baking. This will prevent the crust from burning while the inside finishes cooking.
Let it cool completely. I know, I know. The smell is intoxicating. But slicing into warm banana bread is a recipe for a crumbly mess. The bread continues to set as it cools, and slicing it too early will ruin the texture. I usually bake mine in the evening and let it cool overnight for the perfect slice the next morning.
Variations & Adaptations
One of the best things about this recipe is how adaptable it is. Here are a few of my favorite variations that I have tried over the years.
- Chocolate Chip Banana Bread: Swap the walnuts for ½ cup of semi-sweet or dark chocolate chips. The combination of banana and chocolate is a classic for a reason. You can even use mini chocolate chips for a more even distribution.
- Gluten-Free Version: Substitute the all-purpose flour with a good quality 1:1 gluten-free baking blend that contains xanthan gum. I have had great success with Bob’s Red Mill 1-to-1 Baking Flour. The texture will be slightly more tender and crumbly, but it is still incredibly delicious.
- Vegan Adaptation: Replace the egg with a flax egg (1 tablespoon of ground flaxseed mixed with 3 tablespoons of water, let sit for 5 minutes). Use melted coconut oil or a neutral vegetable oil instead of butter. The bread will be a little denser but still very moist and flavorful.
- Spiced Banana Bread: Add 1 teaspoon of ground cinnamon, ½ teaspoon of ground nutmeg, and ¼ teaspoon of ground ginger to the dry ingredients. This gives the bread a warm, cozy fall flavor that is perfect for chilly evenings.
- Blueberry Banana Bread: Gently fold in 1 cup of fresh or frozen blueberries (do not thaw them) along with the walnuts. The burst of tart berry juice against the sweet banana is absolutely wonderful.
Serving & Storage Suggestions
This banana nut bread is delicious on its own, but there are a few ways to take it over the top. For a simple breakfast, I love a thick slice toasted until the edges are golden and then slathered with a pat of salted butter. It is also fantastic with a drizzle of honey or a dollop of Greek yogurt for a little protein.
For a dessert, try serving a slice warm with a scoop of vanilla ice cream and a drizzle of caramel sauce. It is pure heaven. It also makes a fantastic gift—wrap a loaf in plastic wrap and tie it with a ribbon, and you have a thoughtful, homemade present.
Storage: Store the cooled bread tightly wrapped in plastic wrap or in an airtight container at room temperature for up to 4 days. The moisture from the bananas actually helps it stay soft and delicious for days. I find that the flavor actually improves on the second day as the banana flavor has time to meld with the other ingredients.
Freezing: This bread freezes beautifully. Wrap the cooled loaf tightly in plastic wrap, then in a layer of aluminum foil, and place it in a freezer-safe bag. It will keep for up to 3 months. To thaw, simply leave it on the counter overnight, or unwrap individual slices and toast them directly from frozen.
Reheating: The best way to reheat a slice is in a toaster or a toaster oven. It brings back the crisp edges and warms the center perfectly. You can also microwave a slice for about 20 seconds, but it will be softer and less crispy.
Nutritional Information & Benefits
While this is definitely a treat, it does offer some surprising nutritional benefits thanks to its key ingredients. Please note that these are estimates and will vary based on specific brands and substitutions.
Per serving (1 slice, assuming 10 slices per loaf):
- Calories: ~290
- Fat: ~14g
- Carbohydrates: ~38g
- Fiber: ~2g
- Sugar: ~18g
- Protein: ~5g
Health Benefits: Bananas are an excellent source of potassium, which is important for heart health and muscle function. They also provide vitamin B6 and vitamin C. Walnuts are packed with omega-3 fatty acids, which are great for brain health. The fiber from both the bananas and the walnuts helps with digestion and keeps you feeling full longer.
Dietary Considerations: This recipe can be easily adapted to be gluten-free or vegan (see variations above). It is nut-free if you omit the walnuts. It is not low-carb or keto-friendly due to the bananas and sugar.
Conclusion
This easy one-bowl banana nut bread is more than just a recipe—it is a solution for those busy weeknights when you need something comforting and delicious without a lot of effort. It is forgiving, adaptable, and always, always a hit. I love that it uses up those sad, forgotten bananas on the counter and transforms them into something truly special.
I really hope you give this recipe a try. Do not be afraid to make it your own—add your favorite nuts, swap in chocolate chips, or sprinkle some cinnamon sugar on top before baking. The best recipes are the ones that become a part of your family’s story. I would love to hear how it turns out for you. Leave a comment below and let me know if you tried any fun variations. Happy baking, friend!
Frequently Asked Questions
Can I use frozen bananas for this recipe?
Absolutely! Frozen bananas are actually perfect for banana bread. Thaw them completely first, then drain off any excess liquid that has accumulated. They will be very soft and mushy, which makes them even easier to mash.
Why did my banana bread sink in the middle?
This usually happens for a few reasons. The most common is that the bread was underbaked. Make sure you test it with a toothpick in the center. Another reason could be that you opened the oven door too early, letting cold air in before the structure was set.
Can I make this into muffins instead of a loaf?
Yes, you can! Grease a 12-cup muffin tin or line it with paper liners. Fill each cup about ¾ full. Bake at 350°F (175°C) for 18-22 minutes, or until a toothpick inserted into the center of a muffin comes out clean.
How do I know when my bananas are ripe enough?
Look for bananas that are heavily speckled with brown spots or even mostly black. They should be soft to the touch and smell very sweet. If they are still yellow or have only a few spots, they are not ready yet.
Can I reduce the sugar in this recipe?
You can reduce the sugar to ⅓ cup (65g) without too much trouble, but the bread will be slightly less sweet and the top crust will not be as crackly. If your bananas are extremely ripe and sweet, you might not miss the extra sugar at all.
Pin This Recipe!
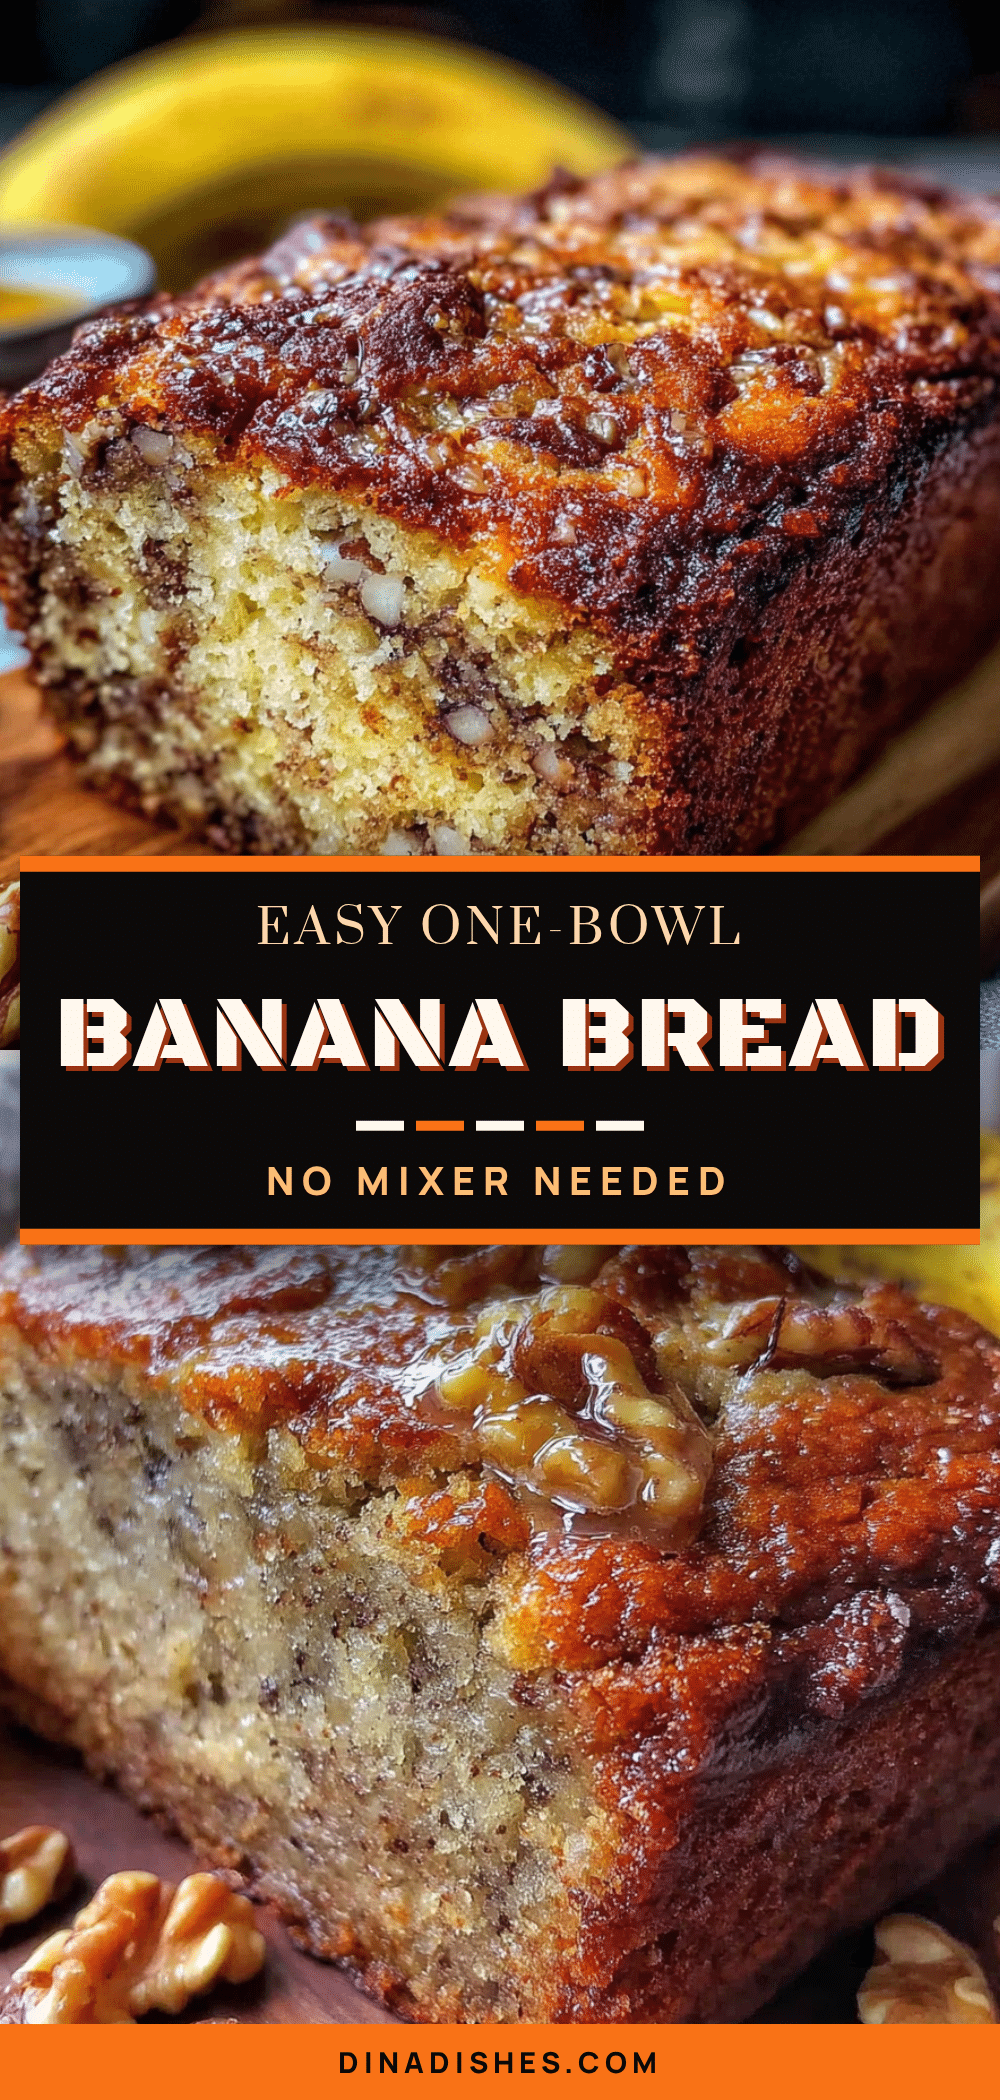
Easy One-Bowl Banana Nut Bread: The Best Homemade Recipe
This easy one-bowl banana nut bread is incredibly moist with pure banana flavor and a beautiful sugary crackle on top. It’s the perfect solution for busy weeknights when you need a comforting, delicious treat without a lot of effort.
- Prep Time: 10 minutes
- Cook Time: 55-65 minutes
- Total Time: 1 hour 15 minutes
- Yield: 10 servings 1x
- Category: Dessert
- Cuisine: American
Ingredients
- 3 ripe bananas (about 1 ½ cups mashed)
- ½ cup (100g) granulated sugar
- ⅓ cup (75g) unsalted butter, melted
- 1 large egg, room temperature
- 1 teaspoon vanilla extract
- 1 ½ cups (190g) all-purpose flour
- 1 teaspoon baking soda
- ½ teaspoon salt
- ½ cup (60g) walnuts, toasted and chopped
Instructions
- Preheat oven to 350°F (175°C). Grease a 9×5-inch loaf pan with butter or non-stick spray. Line with parchment paper, leaving a sling over the long sides.
- In a large mixing bowl, mash the bananas with a fork or potato masher until mostly smooth with a few small lumps.
- Add the sugar and melted butter to the mashed bananas. Stir vigorously until well combined and slightly glossy.
- Add the egg and vanilla extract. Stir until fully incorporated and smooth.
- Sprinkle the flour, baking soda, and salt evenly over the wet mixture. Stir gently with a few broad strokes until no streaks of flour remain. Do not overmix; a few small lumps are fine.
- Fold in the toasted and chopped walnuts with 2-3 strokes.
- Pour the batter into the prepared loaf pan and spread evenly. Bake for 55-65 minutes, or until a toothpick inserted into the center comes out clean or with a few moist crumbs. If browning too quickly, tent with foil for the last 15 minutes.
- Remove from oven and let cool in the pan on a cooling rack for 10-15 minutes. Use the parchment sling to lift the bread out and transfer to the rack to cool completely before slicing.
Notes
Use heavily spotted, almost black bananas for the best flavor and sweetness. Do not overmix the batter once flour is added to avoid tough bread. Let the bread cool completely before slicing to prevent crumbling. Store tightly wrapped at room temperature for up to 4 days, or freeze for up to 3 months.
Nutrition
- Serving Size: 1 slice
- Calories: 290
- Sugar: 18
- Sodium: 220
- Fat: 14
- Saturated Fat: 6
- Carbohydrates: 38
- Fiber: 2
- Protein: 5
Keywords: banana bread, banana nut bread, easy banana bread, one bowl banana bread, homemade banana bread, moist banana bread