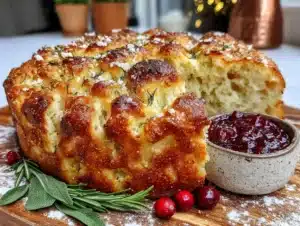
I was at the town dump last November, unloading a trunk full of cardboard boxes, when the guy sorting recycling started talking about Thanksgiving bread. Not the kind of conversation you expect while trying to dodge a gust of wind carrying someone else’s coffee grounds. But there he was, this older guy in a bright orange vest, telling me about the sourdough starter his grandmother brought over from Italy and how he uses it to make focaccia every single holiday. “The kids go crazy for it,” he said, wiping his hands on his jeans. “And I barely have to do any work.”
Now, I’ve made my fair share of complicated breads over the years. I’ve spent entire afternoons kneading dough until my wrists ached, only to end up with something that looked more like a hockey puck than artisan bread. So when a man at the dump starts explaining a no-knead method that even his five-year-old granddaughter can handle, honestly, I’m listening. He scribbled the basics on a scrap of cardboard from my trunk, and I tucked it into my pocket like a secret.
That cardboard note sat on my counter for a week before I finally tried it. And let me tell you, the first time I pulled this focaccia out of the oven, golden and bubbling with olive oil, my kids actually stopped what they were doing to stare. My youngest, who usually picks the herbs off everything, asked for seconds. My teenager said it reminded her of the bread from that fancy Italian place downtown. I mean, that’s the kind of win you don’t forget.
Maybe you’ve been there too, standing in your kitchen wondering if you can pull off a homemade bread for Thanksgiving without losing your mind. This focaccia is the answer. It’s the bread that makes you look like a hero without the stress. And it all started with a guy in an orange vest and a piece of cardboard.
Why You’ll Love This Recipe
Let’s be real for a second. Thanksgiving dinner is already a marathon of cooking, and the last thing you need is a complicated bread recipe that requires a degree in baking science. This focaccia is different, and I’ve tested it enough times to know it works every single time.
- No Kneading Required : This is the kind of recipe that respects your time. You mix the ingredients, walk away, and let the sourdough do all the work. No sore arms, no flour all over your kitchen counters.
- Kid-Approved and Kid-Friendly : My kids help me make this every Thanksgiving now. They press their little fingers into the dough to make the dimples, sprinkle on the rosemary, and drizzle the olive oil. It’s become our tradition, and they actually eat it without complaint.
- Budget-Friendly Ingredients : You probably already have flour, olive oil, and salt in your pantry. The sourdough starter is just flour and water that you’ve been keeping alive. No fancy grocery runs or expensive specialty items needed.
- Perfect for Thanksgiving : This focaccia fills your kitchen with the most incredible smell while it bakes. It’s the perfect bread for sopping up gravy, pairing with turkey, or just eating plain while you’re waiting for dinner to be ready.
- Make-Ahead Magic : You can start this dough the day before and let it cold-proof in the refrigerator overnight. That means less stress on Thanksgiving morning and more time to focus on the turkey.
What makes this recipe different from every other focaccia out there is the sourdough starter. It gives the bread this subtle tangy flavor that cuts through all the rich, heavy Thanksgiving dishes. Plus, the long fermentation makes it easier to digest, which honestly, is a blessing when you’re about to eat your weight in mashed potatoes.
This isn’t just another bread recipe. It’s the kind that makes you close your eyes after the first bite because it tastes like something you’d pay fifteen dollars for at a bakery. But you made it yourself, with your own hands, and maybe with a little help from your kids.
What Ingredients You Will Need
This recipe uses simple, wholesome ingredients to deliver that signature sourdough flavor and airy, chewy texture without any complicated steps. Most of these are pantry staples you likely already have on hand, which makes this perfect for busy holiday prep.
- Bread Flour : 4 cups (500 grams). Bread flour has a higher protein content than all-purpose flour, which gives the focaccia that chewy, bakery-style crumb. I prefer King Arthur Bread Flour for consistent results, but any brand works fine.
- Active Sourdough Starter : 1 cup (240 grams), fed and bubbly. This is the heart of the recipe. Your starter should be at its peak activity, meaning it’s doubled in size and full of bubbles. If you don’t have a starter, you can borrow some from a friend or start one a week ahead of time.
- Warm Water : 1 ½ cups (360 ml), around 90°F. The water temperature matters here. Too hot and you’ll kill the yeast in your starter. Too cold and the fermentation will take forever. I test it on my wrist, like baby bottle warm.
- Olive Oil : ⅓ cup (80 ml), plus extra for the pan and drizzling. Use a good quality extra virgin olive oil here because it adds flavor to the bread. I like California Olive Ranch for everyday baking.
- Salt : 2 teaspoons (10 grams) fine sea salt. Don’t skip this or reduce it. Salt controls the fermentation and gives the bread flavor. I use Morton’s Fine Sea Salt.
- Honey : 1 tablespoon (15 ml). This is optional, but I find it helps the sourdough ferment a little faster and adds a subtle sweetness that balances the tang. Local honey is nice if you have it.
- Fresh Rosemary : 2 tablespoons, chopped. For the topping. Dried rosemary works in a pinch, but fresh gives that aromatic, piney flavor that screams Thanksgiving.
- Flaky Sea Salt : 1 teaspoon, for sprinkling on top. Maldon Sea Salt Flakes are my go-to. They add little bursts of saltiness that make every bite interesting.
Substitution Notes: If you don’t have bread flour, all-purpose flour will work, but the texture will be slightly less chewy. For a whole wheat version, replace 1 cup of bread flour with whole wheat flour, but add an extra 2 tablespoons of water. If you’re dairy-free, this recipe is already dairy-free, so no substitutions needed there.
I always recommend using a kitchen scale for baking because it’s more accurate than measuring cups, especially with flour. But if you don’t have one, spoon the flour into your measuring cup and level it off with a knife. Don’t scoop directly from the bag or you’ll end up with too much flour.
Equipment Needed
You don’t need a fancy bread machine or a stand mixer for this recipe. In fact, that’s the whole point. Here’s what you’ll need:
- Large Mixing Bowl : Any bowl works, but I prefer a glass or ceramic one because it doesn’t retain heat or cold. My grandmother’s old Pyrex mixing bowl is my go-to.
- Measuring Cups and Spoons : For measuring your ingredients. A liquid measuring cup for the water and dry measuring cups for the flour.
- Kitchen Scale : Optional but highly recommended. It makes measuring so much easier and more accurate.
- Rubber Spatula or Danish Dough Whisk : For mixing the dough. A rubber spatula works great and is easy to clean. A Danish dough whisk is nice because it doesn’t get clogged with sticky dough.
- 9×13-inch Baking Pan : This is the perfect size for a family-sized focaccia. A metal pan gives a crisper bottom crust, while a glass or ceramic pan works fine too.
- Plastic Wrap or a Clean Kitchen Towel : For covering the dough while it rises. I use a reusable beeswax wrap to cut down on waste.
- Cooling Rack : For cooling the bread after baking. This prevents the bottom from getting soggy.
If you don’t have a 9×13 pan, you can use a 10-inch cast iron skillet or a round cake pan. Just adjust the baking time slightly, keeping an eye on the color of the crust. I’ve even made this in a disposable aluminum pan when I needed to bring it to a friend’s house, and it worked perfectly.
Preparation Method
This is the part where I walk you through every step, including all the little tricks I’ve learned from making this bread more times than I can count.
- Feed Your Starter : About 6 to 8 hours before you plan to make the dough, feed your sourdough starter. You’ll need 1 cup of active, bubbly starter for this recipe. I usually feed mine in the morning and make the dough in the afternoon. The starter should be doubled in size and full of bubbles when you’re ready to use it.
- Mix the Dough : In your large mixing bowl, combine the warm water and the active sourdough starter. Stir them together until the starter is mostly dissolved. Add the olive oil and honey, and give it another stir. Now add the bread flour and salt. Use your rubber spatula to mix everything together until no dry bits of flour remain. The dough will look shaggy and sticky, and that’s exactly what you want. Don’t be tempted to add more flour.
- First Rise (Bulk Fermentation) : Cover the bowl with plastic wrap or a damp kitchen towel and let it sit at room temperature for 4 to 6 hours. During this time, the dough should double in size and get bubbly. The timing depends on how warm your kitchen is. If your kitchen is cold, it might take longer. I set my bowl near the warm spot where my refrigerator vents heat, and it works beautifully.
- Stretch and Fold (Optional but Helpful) : Every hour during the first rise, do a quick stretch and fold. Wet your hands so the dough doesn’t stick, grab one side of the dough, stretch it up, and fold it over the top. Turn the bowl a quarter turn and repeat. Do this four times total. This builds strength in the dough without kneading. If you forget, honestly, the bread still turns out fine. I’ve done it both ways.
- Prepare the Pan : When the dough is almost done with its first rise, pour a generous amount of olive oil into your 9×13 pan, about 2 to 3 tablespoons. Use your fingers or a brush to coat the bottom and sides of the pan completely.
- Transfer the Dough : Gently scrape the dough out of the bowl and into the oiled pan. It will be sticky and wobbly. Don’t try to shape it too much. Just let it fall into the pan naturally.
- Second Rise : Cover the pan with plastic wrap or a towel and let the dough rise for another 2 to 3 hours. It should puff up and spread to fill the pan. If it doesn’t quite reach the edges, that’s okay. It will spread more when you dimple it.
- Preheat the Oven : About 30 minutes before you’re ready to bake, preheat your oven to 425°F (220°C). Place a rack in the middle position.
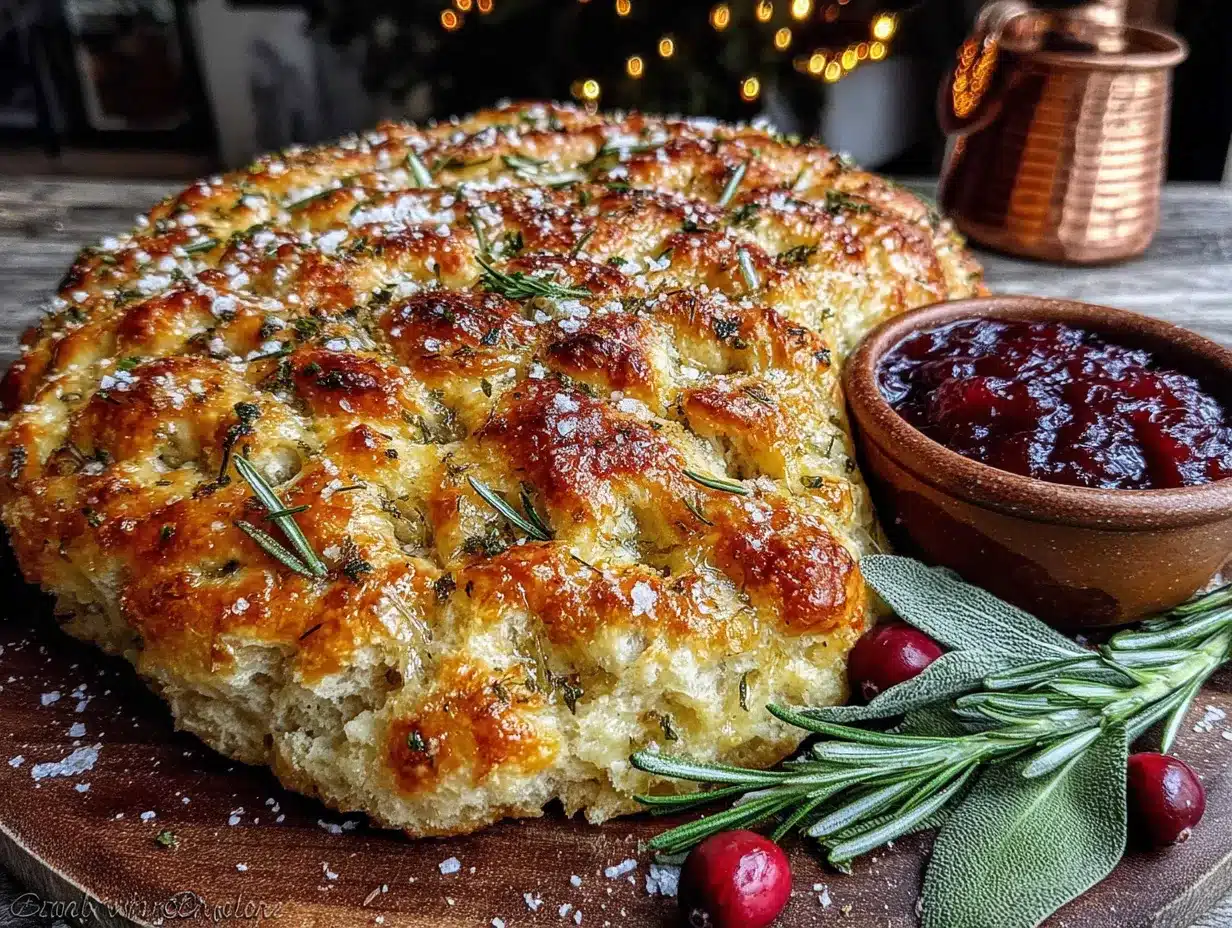
- Dimple the Dough : This is the fun part, especially if you have kids helping. Drizzle another tablespoon of olive oil over the top of the dough. Then, using your fingertips, press straight down into the dough to create deep dimples all over the surface. Don’t be shy here. Really press down until you feel the bottom of the pan. This creates those classic focaccia pockets that catch all the oil and toppings.
- Add Toppings : Sprinkle the chopped fresh rosemary evenly over the top. Then sprinkle the flaky sea salt. If you want to get fancy, you can add some halved cherry tomatoes or thinly sliced garlic, but I keep it simple for Thanksgiving.
- Bake : Place the pan in the preheated oven and bake for 20 to 25 minutes. The focaccia should be deep golden brown on top and sound hollow when you tap it. If the top is browning too fast but the bottom isn’t done, tent it loosely with foil for the last 5 minutes.
- Cool : Let the focaccia cool in the pan for 5 minutes, then transfer it to a cooling rack. Don’t skip this step, or the bottom will get soggy from the steam. Let it cool for at least 15 minutes before slicing, if you can wait that long.
The first time I made this, I forgot to dimple the dough before baking. It still tasted amazing, but it looked more like a flatbread than focaccia. Now I always set a timer on my phone to remind me. Learn from my mistakes, friends.
Cooking Tips & Techniques
After making this focaccia about a dozen times, I’ve picked up a few tricks that make a real difference.
Use a Thermometer for Water Temperature : I know it sounds fussy, but water temperature really matters for sourdough. If your water is too cold, the fermentation will be sluggish. Too hot, and you’ll kill the natural yeast. I use an instant-read thermometer and aim for 90°F. If I don’t have one, I test the water on my wrist, like I’m testing a baby’s bottle.
Don’t Skip the Stretch and Folds : I know the recipe says no kneading, but those stretch and folds during the first rise are what give this bread its structure. They help develop the gluten without the work. I do them while I’m waiting for my coffee to brew or while I’m on a phone call. It takes less than a minute each time.
Watch Your Oven : Every oven is different. My old oven ran hot, and I burned the bottom of my first two focaccias. Now I always check the bread at 18 minutes and rotate the pan if needed. If your oven has hot spots, rotate the pan halfway through baking.
Let It Cool : I know it’s tempting to cut into hot bread, but the crumb needs time to set. If you cut it too soon, the inside will be gummy. I’ve done this more times than I care to admit. Let it cool on a rack for at least 15 minutes, and you’ll be rewarded with a perfect texture.
Make It Ahead : This is my favorite tip for Thanksgiving. After the first rise, you can cover the bowl and put it in the refrigerator overnight. The next day, let it come to room temperature for about an hour, then proceed with the second rise and baking. This actually improves the flavor because the long cold fermentation develops more of that sourdough tang.
One time, I forgot to add the salt. The bread was bland and flat. Now I always measure my salt first and set it aside so I don’t forget. It’s the little things that make the difference.
Variations & Adaptations
This recipe is super flexible, and I’ve tried several variations that turned out great.
Herb and Garlic Focaccia : Instead of just rosemary, mix in 2 teaspoons of dried oregano and 1 teaspoon of dried thyme with the flour. Add 3 cloves of thinly sliced garlic on top before baking. My husband says this version reminds him of the bread at his favorite Italian restaurant.
Everything Bagel Focaccia : After dimpling the dough, sprinkle everything bagel seasoning generously over the top. This is my teenager’s absolute favorite. It’s salty, savory, and addictive. I buy the seasoning from Trader Joe’s, but you can make your own with sesame seeds, poppy seeds, dried garlic, dried onion, and salt.
Cheese and Herb Focaccia : Sprinkle ½ cup of shredded Parmesan or Pecorino Romano over the top before baking. The cheese gets crispy and golden in the oven, adding this incredible savory crunch. My kids fight over the corner pieces when I make this version.
Gluten-Free Adaptation : I’ve tested this with a gluten-free all-purpose flour blend, and it works but with a slightly different texture. Use a cup-for-cup gluten-free flour blend that contains xanthan gum. The dough will be more like a batter, and it won’t rise as much, but the flavor is still delicious. Add an extra 30 minutes to the first rise.
Sweet Version : For a Thanksgiving brunch twist, skip the rosemary and salt and instead top the focaccia with a mixture of cinnamon and sugar, plus some thinly sliced apples. Drizzle with a little honey after baking. It’s like a cross between bread and dessert, and it’s amazing with coffee.
I made the everything bagel version for a potluck last month, and someone asked me for the recipe before they even sat down. That’s the kind of reaction that makes all the effort worth it.
Serving & Storage Suggestions
This focaccia is best served warm, straight from the oven, but it’s still incredible at room temperature. For Thanksgiving, I like to serve it in a bread basket lined with a cloth napkin, with a small dish of olive oil and balsamic vinegar for dipping.
What to Serve With It : This bread is perfect for sopping up gravy, turkey juices, or the last bits of cranberry sauce on your plate. It also pairs beautifully with soups and salads. I’ve served it alongside my roasted butternut squash soup, and it was a hit. For a lighter meal, try it with a simple crispy garlic chicken and a green salad.
Storage : Store leftover focaccia in an airtight container or wrapped tightly in foil at room temperature for up to 2 days. Do not refrigerate it, because the cold temperature will dry it out and make it stale faster. If you have a lot left over, slice it and freeze it.
Freezing : To freeze, wrap the cooled focaccia tightly in plastic wrap, then in a layer of foil. It will keep in the freezer for up to 3 months. When you’re ready to eat it, thaw it at room temperature, then reheat it in a 350°F oven for about 10 minutes. It comes back to life like magic.
Reheating : The best way to reheat focaccia is in the oven. Place it directly on the oven rack or on a baking sheet at 350°F for 5 to 10 minutes. The microwave will make it rubbery, so avoid that if you can. If you’re in a hurry, you can toast it in a toaster oven.
The flavors actually develop and get better after a day. I’ve found that day-old focaccia is even more flavorful, especially if you used the cold fermentation method. It’s the perfect make-ahead bread for your Thanksgiving table.
Nutritional Information & Benefits
This focaccia is made with simple, whole ingredients, and the sourdough fermentation process offers some surprising benefits.
Estimated Nutritional Values (per serving, 1/12 of the recipe):
- Calories: 210
- Carbohydrates: 35g
- Protein: 6g
- Fat: 6g
- Fiber: 1g
- Sodium: 390mg
Health Benefits : Sourdough bread is easier to digest than bread made with commercial yeast because the long fermentation process breaks down some of the gluten and phytic acid. This means your body can absorb more of the nutrients from the flour. Plus, the natural fermentation creates beneficial probiotics that support gut health.
Dietary Considerations : This recipe is dairy-free and vegan, as long as you use a vegan-friendly honey substitute like maple syrup or agave. It contains gluten, so it’s not suitable for those with celiac disease, but the gluten-free adaptation works for those with gluten sensitivity.
Potential Allergens : Wheat (gluten). If you’re using the gluten-free adaptation, check that your flour blend doesn’t contain any other allergens like soy or nuts.
I personally love that this bread feels nourishing and satisfying without being heavy. It’s the kind of food that makes you feel good after eating it, not sluggish and bloated. On Thanksgiving, that’s a real gift.
Conclusion
This no-knead sourdough focaccia has become a non-negotiable part of our Thanksgiving tradition. It’s the bread that brings my family together, from the youngest fingers pressing dimples into the dough to the oldest reaching for seconds at the dinner table. It proves that you don’t need fancy equipment or hours of kneading to make something truly special.
I love that this recipe lets me slow down and enjoy the process, even on the busiest cooking day of the year. The smell of it baking fills the house with warmth and anticipation, and the first bite always makes me smile. It’s comfort food at its finest, made with love and a little bit of patience.
I’d love to hear how this focaccia turns out for you. Did your kids help make the dimples? Did you try a different topping combination? Drop a comment below and let me know. And if you’re looking for another easy Thanksgiving side dish, check out my recipe for Thanksgiving stuffing muffins that kids actually eat. Happy baking, and happy Thanksgiving!
Frequently Asked Questions
Can I use all-purpose flour instead of bread flour?
Yes, you can. The focaccia will still be delicious, but the texture will be slightly less chewy and a bit more tender. Bread flour has more protein, which creates more gluten and gives the bread that classic bakery-style chew. If you only have all-purpose flour, it will still work great.
How do I know when my sourdough starter is ready to use?
Your starter is ready when it has doubled in size, is full of bubbles, and has a slightly tangy, yeasty smell. It should look active and alive, not flat or separated. If you’re not sure, do the float test: drop a small spoonful of starter into a glass of water. If it floats, it’s ready. If it sinks, give it more time.
Can I make this recipe without a sourdough starter?
This recipe is specifically designed for sourdough, but if you don’t have a starter, you can use 1 teaspoon of active dry yeast mixed with the warm water and let it sit for 5 minutes until foamy. Skip the honey in that case. The flavor won’t have that sourdough tang, but it will still be a delicious, easy focaccia.
Why is my focaccia dense and not airy?
This usually happens for one of three reasons: your starter wasn’t active enough, your dough didn’t rise long enough, or you added too much flour. Make sure your starter is bubbly and active before you start. Be patient with the rise times, especially if your kitchen is cold. And resist the urge to add extra flour when mixing the dough. A sticky dough makes a light, airy focaccia.
Can I add other toppings besides rosemary?
Absolutely! This focaccia is a blank canvas. Try cherry tomatoes, thinly sliced red onion, kalamata olives, sun-dried tomatoes, or roasted garlic. You can also sprinkle on different herbs like thyme, oregano, or sage. Just be careful not to overload the top, or the bread won’t bake evenly. A light, even layer is all you need.
Pin This Recipe!

Easy Thanksgiving Sourdough Focaccia Recipe Kids Love

This no-knead sourdough focaccia is a kid-friendly, budget-friendly Thanksgiving bread that fills your kitchen with an incredible aroma. It’s easy to make with simple ingredients and a bubbly sourdough starter.
- Prep Time: 15 minutes
- Cook Time: 25 minutes
- Total Time: 8 hours 40 minutes (includes rising time)
- Yield: 12 servings 1x
- Category: Bread
- Cuisine: Italian-American
Ingredients
- 4 cups (500 grams) bread flour
- 1 cup (240 grams) active sourdough starter, fed and bubbly
- 1 ½ cups (360 ml) warm water (about 90°F)
- ⅓ cup (80 ml) olive oil, plus extra for the pan and drizzling
- 2 teaspoons (10 grams) fine sea salt
- 1 tablespoon (15 ml) honey (optional)
- 2 tablespoons fresh rosemary, chopped
- 1 teaspoon flaky sea salt (for topping)
Instructions
- Feed your sourdough starter 6 to 8 hours before making the dough. You’ll need 1 cup of active, bubbly starter.
- In a large mixing bowl, combine warm water and active sourdough starter. Stir until the starter is mostly dissolved. Add olive oil and honey, and stir again.
- Add bread flour and salt. Mix with a rubber spatula until no dry bits remain. The dough will be shaggy and sticky.
- Cover the bowl with plastic wrap or a damp towel and let it sit at room temperature for 4 to 6 hours, until doubled in size and bubbly. Optionally, perform a stretch and fold every hour during this first rise.
- Generously coat a 9×13-inch baking pan with 2 to 3 tablespoons of olive oil.
- Gently scrape the dough into the oiled pan. Let it fall naturally without shaping.
- Cover the pan and let the dough rise for another 2 to 3 hours, until puffed and spread to fill the pan.
- Preheat the oven to 425°F (220°C) about 30 minutes before baking.
- Drizzle another tablespoon of olive oil over the dough. Use your fingertips to press deep dimples all over the surface, reaching the bottom of the pan.
- Sprinkle chopped rosemary and flaky sea salt evenly over the top.
- Bake for 20 to 25 minutes, until deep golden brown and hollow-sounding when tapped. If browning too fast, tent with foil for the last 5 minutes.
- Let cool in the pan for 5 minutes, then transfer to a cooling rack. Cool for at least 15 minutes before slicing.
Notes
For best results, use a kitchen scale for accuracy. The dough should be sticky; do not add extra flour. For make-ahead, after the first rise, refrigerate the dough overnight. Let it come to room temperature for an hour before the second rise. The stretch and folds during the first rise are optional but help develop gluten. Let the focaccia cool completely before slicing to avoid a gummy texture.
Nutrition
- Serving Size: 1/12 of the recipe
- Calories: 210
- Sugar: 1
- Sodium: 390
- Fat: 6
- Saturated Fat: 1
- Carbohydrates: 35
- Fiber: 1
- Protein: 6
Keywords: sourdough focaccia, Thanksgiving bread, no-knead bread, kid-friendly bread, easy focaccia recipe