This was supposed to be a regular batch of chocolate crinkle cookies. You know the ones—powdered sugar snowdrifts, perfect for a Christmas cookie swap. But it was mid-October, my toddler was “helping” by dumping sprinkles into the mixing bowl, and I was already running late for a playdate. I grabbed what I thought was vanilla extract, but my hand closed around the bottle of white food coloring I’d bought for a cake disaster weeks earlier. I mean, honestly, I just shrugged and poured it in. What was the worst that could happen?
The dough looked weird—streaky, like a bad tie-dye project. But I’d already committed, and the kid was now licking the beater, so there was no turning back. I rolled the dough into balls, tossed them in powdered sugar, and popped them in the oven. When I pulled them out, I nearly dropped the tray. The white coloring had bled into the cracks in the most perfect, spooky spiderweb pattern. I stood there, oven mitt still on, staring at these cookies like they were magic. My neighbor, who had just knocked to borrow an egg, walked in and said, “Whoa, those are Halloween. You made those on purpose, right?”
I laughed and said yes, because sometimes the best recipes come from a happy accident and a toddler with a sprinkle addiction. And honestly, that’s how these Kid-Approved Spider Web Chocolate Crinkle Cookies were born. They’re the kind of treat that makes you look like a kitchen genius when really, you just got lucky. Maybe you’ve been there—the moment when a mistake turns into the thing everyone asks for year after year. That’s this cookie for me. It’s the one that stayed.
Why You’ll Love This Recipe
Let me tell you, I’ve tested this recipe about seven times now. The first batch was a fluke, but the next six were me trying to break it on purpose. I wanted to make sure it wasn’t a one-hit wonder. And you know what? It’s bulletproof. Here’s why these cookies are going to become your new Halloween tradition:
- Quick & Easy: From mixing bowl to cooling rack in under 30 minutes. No chilling required, which is a game-changer when you’ve got impatient little ghouls hovering.
- Simple Ingredients: You probably have everything in your pantry right now. No special Halloween sprinkles or fancy extracts needed—just a bottle of white food coloring (which costs about two bucks).
- Perfect for Halloween: These aren’t just cookies; they’re an activity. Kids love watching the spiderwebs appear in the oven. It’s like a science experiment you can eat.
- Crowd-Pleaser: I brought these to a school potluck, and they disappeared before the cupcakes. Both kids and adults were fighting over the ones with the best webs.
- Unbelievably Delicious: The cookie itself is a classic fudgy chocolate crinkle—soft, rich, and perfectly crackly. The spiderweb effect is just the icing on the (Halloween) cake.
What makes this recipe different from every other chocolate crinkle cookie out there? It’s the technique. Most recipes just give you a plain chocolate cookie with powdered sugar. But by adding a tiny bit of white food coloring to the dough, you get that dramatic web effect without any extra work. No piping, no stencils, no mess. It’s the kind of trick that makes you look like a pro baker, even if you’re just a tired parent trying to make October fun.
This recipe isn’t just good—it’s the kind that makes you close your eyes after the first bite. It’s comfort food reimagined for spooky season: fudgy, crackly, and full of childhood nostalgia. Perfect for impressing guests at a Halloween party, or turning a regular Tuesday into something memorable.
What Ingredients You Will Need
This recipe uses simple, pantry-friendly ingredients to deliver that fudgy texture and the surprise spiderweb effect. No weird stuff here—just baking basics with one sneaky addition.
- All-purpose flour, 1 ½ cups (180g) – The backbone of the cookie. Spoon and level it for accuracy; don’t scoop straight from the bag or you’ll get dense cookies.
- Unsweetened cocoa powder, ½ cup (50g) – I prefer Hershey’s Special Dark for a richer color, but regular works fine. The darker the cocoa, the more dramatic the web.
- Baking powder, 1 teaspoon – Helps the cookies spread just enough to crackle beautifully.
- Salt, ¼ teaspoon – Balances the sweetness and deepens the chocolate flavor.
- Unsalted butter, ½ cup (113g), softened – Let it sit out for 30 minutes. Cold butter won’t cream properly, and your cookies will be flat.
- Granulated sugar, 1 cup (200g) – For sweetness and that crackly top. Don’t reduce it—the sugar is what creates the crinkle.
- Large eggs, 2, room temperature – Crack them into a bowl first to avoid shell bits. Cold eggs can seize the butter mixture.
- Vanilla extract, 1 teaspoon – Pure vanilla adds warmth; imitation works in a pinch.
- White gel food coloring, ½ teaspoon – This is the magic. I recommend Americolor or Wilton brand. Liquid food coloring won’t work—it’s too watery and won’t create the web effect. Gel is thick and stays put.
- Powdered sugar, ½ cup (60g), for rolling – You’ll need more for re-coating if you work in batches. It creates that snowy, crinkly crust.
Ingredient tips from my kitchen: I’ve tested this with Dutch-process cocoa, and it works beautifully—just know the color will be even darker, so the white web really pops. If you’re out of butter, you can substitute with ½ cup of coconut oil (solid, not melted), but the cookies will spread a tad more. For a dairy-free version, use plant-based butter sticks, not the spreadable kind in a tub. And please, please don’t skip the salt. I did once, and the cookies tasted flat—like a sad brownie.
Equipment Needed
You don’t need a fancy kitchen for these cookies. Here’s what I use every time:
- Large mixing bowl – Any bowl works, but a wide one makes mixing easier. I use my grandmother’s old Pyrex bowl, which is slightly chipped—adds character.
- Electric hand mixer or stand mixer – You can cream butter and sugar by hand, but your arm will get tired. I’ve done it both ways; the mixer is faster, but hand-mixing builds arm strength, I guess.
- Measuring cups and spoons – For accuracy. I once eyeballed the cocoa and ended up with cookies that looked like mud pucks.
- Baking sheets – Two standard half-sheet pans work best. If you only have one, let it cool completely between batches, or the dough will spread too fast.
- Parchment paper or silicone baking mats – Non-negotiable. Without it, the bottoms will stick and the spiderwebs will tear. I prefer parchment for easy cleanup.
- Cooling rack – Lets air circulate so the cookies don’t get soggy. If you don’t have one, transfer them to a plate after 5 minutes.
- Spatula – For scraping every last bit of dough. I use a silicone one that doesn’t scratch my bowls.
- Small bowl for powdered sugar – For rolling. I use a shallow cereal bowl—wide enough to dunk the dough balls without making a mess.
Budget-friendly tip: Don’t run out and buy a fancy stand mixer. A $15 hand mixer from the grocery store works perfectly. I used one for years before upgrading, and honestly, the cookies taste the same.
Preparation Method
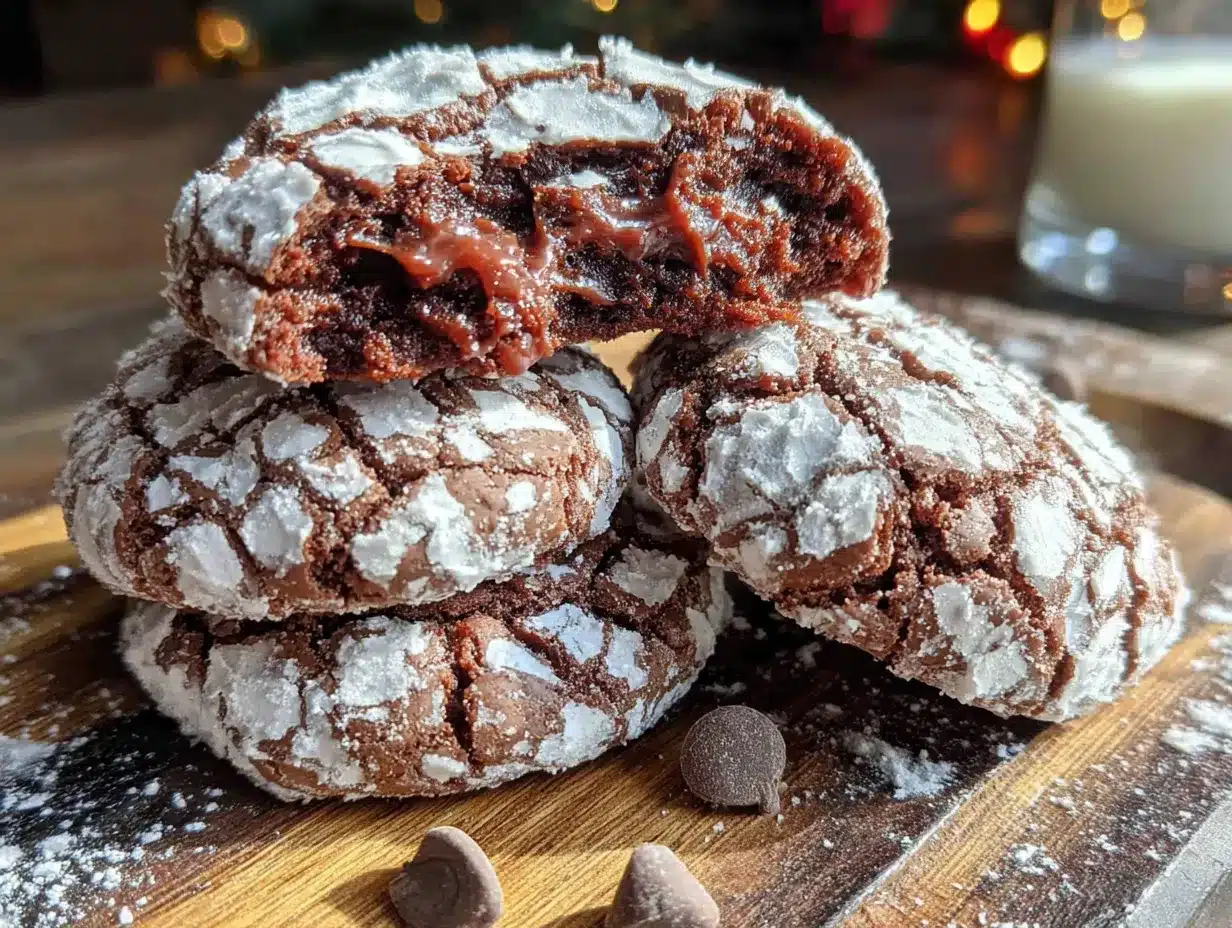
Alright, let’s make some magic. Preheat your oven to 350°F (175°C) and line two baking sheets with parchment paper. This recipe makes about 24 cookies, depending on how big you roll them.
- Cream the butter and sugar. In a large bowl, beat the softened butter and granulated sugar together until light and fluffy—about 2-3 minutes with an electric mixer. You’re looking for a pale, airy mixture. Scrape down the sides once. If it looks greasy, you’ve overmixed. Relax—it’s still fine.
- Add the eggs and vanilla. Beat in the eggs one at a time, mixing well after each. Then add the vanilla. The mixture might look a little curdled at this point—that’s okay. It’s just the eggs and butter doing their thing.
- Add the white food coloring. This is the step that makes these cookies special. Add ½ teaspoon of white gel food coloring and mix until it’s just combined. Don’t overmix—you want streaks of white throughout the dough. Those streaks are what create the spiderweb pattern as the cookie spreads. I know it looks weird. Trust the process.
- Mix the dry ingredients. In a separate bowl, whisk together the flour, cocoa powder, baking powder, and salt. This ensures even distribution—no one wants a pocket of baking powder in their cookie.
- Combine wet and dry. Gradually add the dry ingredients to the wet mixture, mixing on low speed until just combined. The dough will be thick and slightly sticky—like a brownie batter that’s ready to be scooped. If it’s too sticky to handle, refrigerate it for 10 minutes.
- Chill the dough (optional but helpful). If you have time, pop the dough in the fridge for 15 minutes. This makes it easier to roll and prevents the cookies from spreading too thin. I’ve skipped this step many times, and the cookies still turn out great—they just spread a little more.
- Roll and coat. Place the powdered sugar in a small bowl. Scoop tablespoon-sized portions of dough (about 1.5 inches) and roll them into balls with your hands. Drop each ball into the powdered sugar and roll until fully coated. Don’t be shy—you want a thick, snowy layer. Place the coated balls on the prepared baking sheets, spacing them about 2 inches apart.
- Bake. Bake for 10-12 minutes. The cookies will look puffy and crackly when they come out. The edges should be set, but the centers will still look soft. That’s perfect—they’ll firm up as they cool. Let them cool on the baking sheet for 5 minutes, then transfer to a wire rack to cool completely.
- Watch the magic happen. As the cookies bake, the white food coloring will bleed into the cracks, creating those spiderweb patterns. It’s honestly the most satisfying thing to watch through the oven door. Don’t open the oven to peek too often, though—the temperature drop can affect the crackling.
My personal efficiency tip: While the first batch bakes, roll the second batch. That way, you’re not waiting around. And if the dough gets too warm and sticky, just pop it back in the fridge for 5 minutes.
Cooking Tips & Techniques
I’ve learned a few things the hard way so you don’t have to. Here’s what I wish someone had told me the first time I made these:
- Don’t skip the white food coloring gel. I tried this with liquid food coloring once because that’s all I had. The cookies came out looking like they had gray mold spots. Not cute. Gel is thick and stays where you put it, creating those distinct web lines.
- Underbake slightly. The key to that fudgy, chewy texture is pulling them out when they still look a little underdone in the center. They’ll continue baking on the hot sheet. Overbaked crinkle cookies are just crunchy chocolate discs—still tasty, but not the same.
- Roll generously in powdered sugar. I used to be stingy with the sugar, thinking it would make the cookies healthier. Wrong. The thick coating is what creates the dramatic white-on-dark crackle. Be generous—it’s Halloween, not a diet.
- Use room temperature eggs. I forgot to take my eggs out of the fridge once, and the butter mixture seized up into little clumps. The cookies still baked, but they were lumpy and didn’t spread evenly. Warm eggs emulsify better.
- Let the baking sheet cool between batches. If you put dough on a hot sheet, the butter melts immediately, and you get flat, sad cookies with no crinkle. Run the sheet under cold water and dry it, or use a second sheet.
I once made a batch where I forgot the baking powder entirely. The cookies came out like chocolate rocks—dense and hard. My toddler still ate them, but I knew better. Double-check your ingredients before you start mixing. It saves a lot of heartache.
Variations & Adaptations
This recipe is super flexible. Here are a few ways I’ve tweaked it over the years:
- Gluten-Free Version: Substitute the all-purpose flour with a 1:1 gluten-free baking blend (like Bob’s Red Mill). Add an extra tablespoon of flour—gluten-free dough tends to be stickier. The cookies will be slightly more tender, but the spiderweb effect still works beautifully.
- Vegan Version: Use ½ cup of coconut oil (solid) instead of butter, and replace each egg with a flax egg (1 tablespoon ground flaxseed + 3 tablespoons water, let sit for 5 minutes). The cookies will be a little flatter, but still delicious. Use vegan powdered sugar—some brands use bone char in processing.
- Peppermint Twist: Add ½ teaspoon of peppermint extract along with the vanilla. It gives the cookies a holiday vibe—perfect for a Christmas Halloween crossover party (yes, those exist).
- Spiderweb Color Swap: Instead of white, use orange or green gel food coloring for a different Halloween look. The effect is the same, but the colors are more playful. I did orange one year, and my kids called them “pumpkin web cookies.”
- Stuffed Cookies: Press a small marshmallow or a chocolate kiss into the center of each dough ball before rolling in powdered sugar. The filling melts into a gooey surprise. Just be careful—they’re hot!
My personal favorite variation? I added a pinch of cinnamon and cayenne pepper to the dough for a Mexican hot chocolate twist. The kids didn’t notice the heat, but the adults loved the kick. It’s a sneaky way to make the same recipe feel grown-up.
Serving & Storage Suggestions
These cookies are best served at room temperature, but they’re also amazing slightly warm—the chocolate gets all melty and fudgy. For a Halloween party, arrange them on a platter with some fake spider rings or plastic spiders scattered around. The visual effect is chef’s kiss.
Storage: Keep the cookies in an airtight container at room temperature for up to 5 days. Place a slice of bread in the container to keep them soft—the cookies absorb the moisture from the bread. I learned this trick from my grandmother, and it works like a charm. Just replace the bread every other day.
Freezing: You can freeze the baked cookies for up to 3 months. Layer them between sheets of parchment paper in a freezer-safe container. Thaw at room temperature for about 30 minutes. The spiderwebs might fade slightly, but they’ll still look spooky.
Reheating: Pop a cookie in the microwave for 10 seconds for that fresh-from-the-oven taste. Or, if you’re feeling fancy, warm them in a 300°F oven for 5 minutes. The texture comes back beautifully.
Flavor note: These cookies actually taste better the next day. The flavors meld together, and the chocolate becomes deeper and richer. So if you can resist eating them all on day one, you’re in for a treat.
Nutritional Information & Benefits
Let’s be real—these are cookies, not health food. But here’s the breakdown per cookie (based on 24 servings):
- Calories: ~150
- Fat: 6g
- Carbohydrates: 23g
- Protein: 2g
- Fiber: 1g
- Sugar: 14g
Health highlights: Cocoa powder is rich in antioxidants called flavonoids, which can support heart health and reduce inflammation. So technically, you’re eating a superfood. The butter provides vitamin A, and the eggs offer a little protein. It’s not a salad, but it’s not junk food either—it’s a treat made with real ingredients.
Dietary considerations: This recipe contains gluten, dairy, and eggs. For allergen-friendly versions, check the variations section above. If you’re watching your sugar intake, you can reduce the granulated sugar by ¼ cup, but the cookies won’t crackle as much. The sugar is what creates that signature crinkle texture.
My personal wellness perspective: I believe in balance. These cookies are part of a happy Halloween, and one cookie isn’t going to derail anyone’s health goals. Enjoy them mindfully, and maybe share a few with the neighbors.
Conclusion
These Kid-Approved Spider Web Chocolate Crinkle Cookies are proof that the best recipes often come from happy accidents. They’re fudgy, crackly, and spooky in the most delightful way—perfect for Halloween parties, school treats, or just a fun afternoon baking with your little monsters.
I love this recipe because it’s forgiving. You can mess up the measurements, forget an ingredient, or let the kids “help,” and they still turn out beautiful. That’s the kind of cooking I believe in—low stress, high reward. Plus, watching those spiderwebs appear in the oven never gets old. It’s like a little magic trick every time.
So go ahead, grab that bottle of white food coloring you’ve been ignoring, and make a batch. Customize them however you like—add sprinkles, stuff them with marshmallows, or keep them classic. And when you do, I’d love to hear about it. Drop a comment below, share a photo on Pinterest, or tag me in your Instagram stories. Let’s make this Halloween the most delicious one yet.
Happy baking, and may your spiderwebs be magnificent!
Frequently Asked Questions
Can I make the dough ahead of time?
Yes! You can refrigerate the dough for up to 3 days. Just let it sit at room temperature for 10 minutes before rolling, since cold dough is harder to shape. You can also freeze the dough balls (uncoated) for up to 3 months—just roll them in powdered sugar right before baking.
Why didn’t my cookies crackle?
Several reasons: Your oven might be too cool (use an oven thermometer), you might have overmixed the dough (which deflates the air bubbles), or you didn’t roll them in enough powdered sugar. Also, make sure your baking powder is fresh—test it by dropping a bit in hot water; it should fizz.
Can I use regular food coloring instead of gel?
I don’t recommend it. Liquid food coloring is too thin and will just dissolve into the dough, leaving no visible web pattern. Gel food coloring is thick and stays in streaks, which is exactly what you want. You can find it at any craft store or in the baking aisle.
How do I get the spiderweb effect to be more dramatic?
Use a generous amount of white gel coloring (up to 1 teaspoon) and don’t mix it in completely—leave visible streaks. Also, roll the dough balls very heavily in powdered sugar. The contrast between the dark cookie and the white sugar is what makes the webs pop.
Can I double this recipe?
Absolutely. I double it all the time for school parties. Just make sure you have enough baking sheets and space in your oven. The dough keeps well in the fridge, so you can bake in batches over a couple of days if needed.
Pin This Recipe!
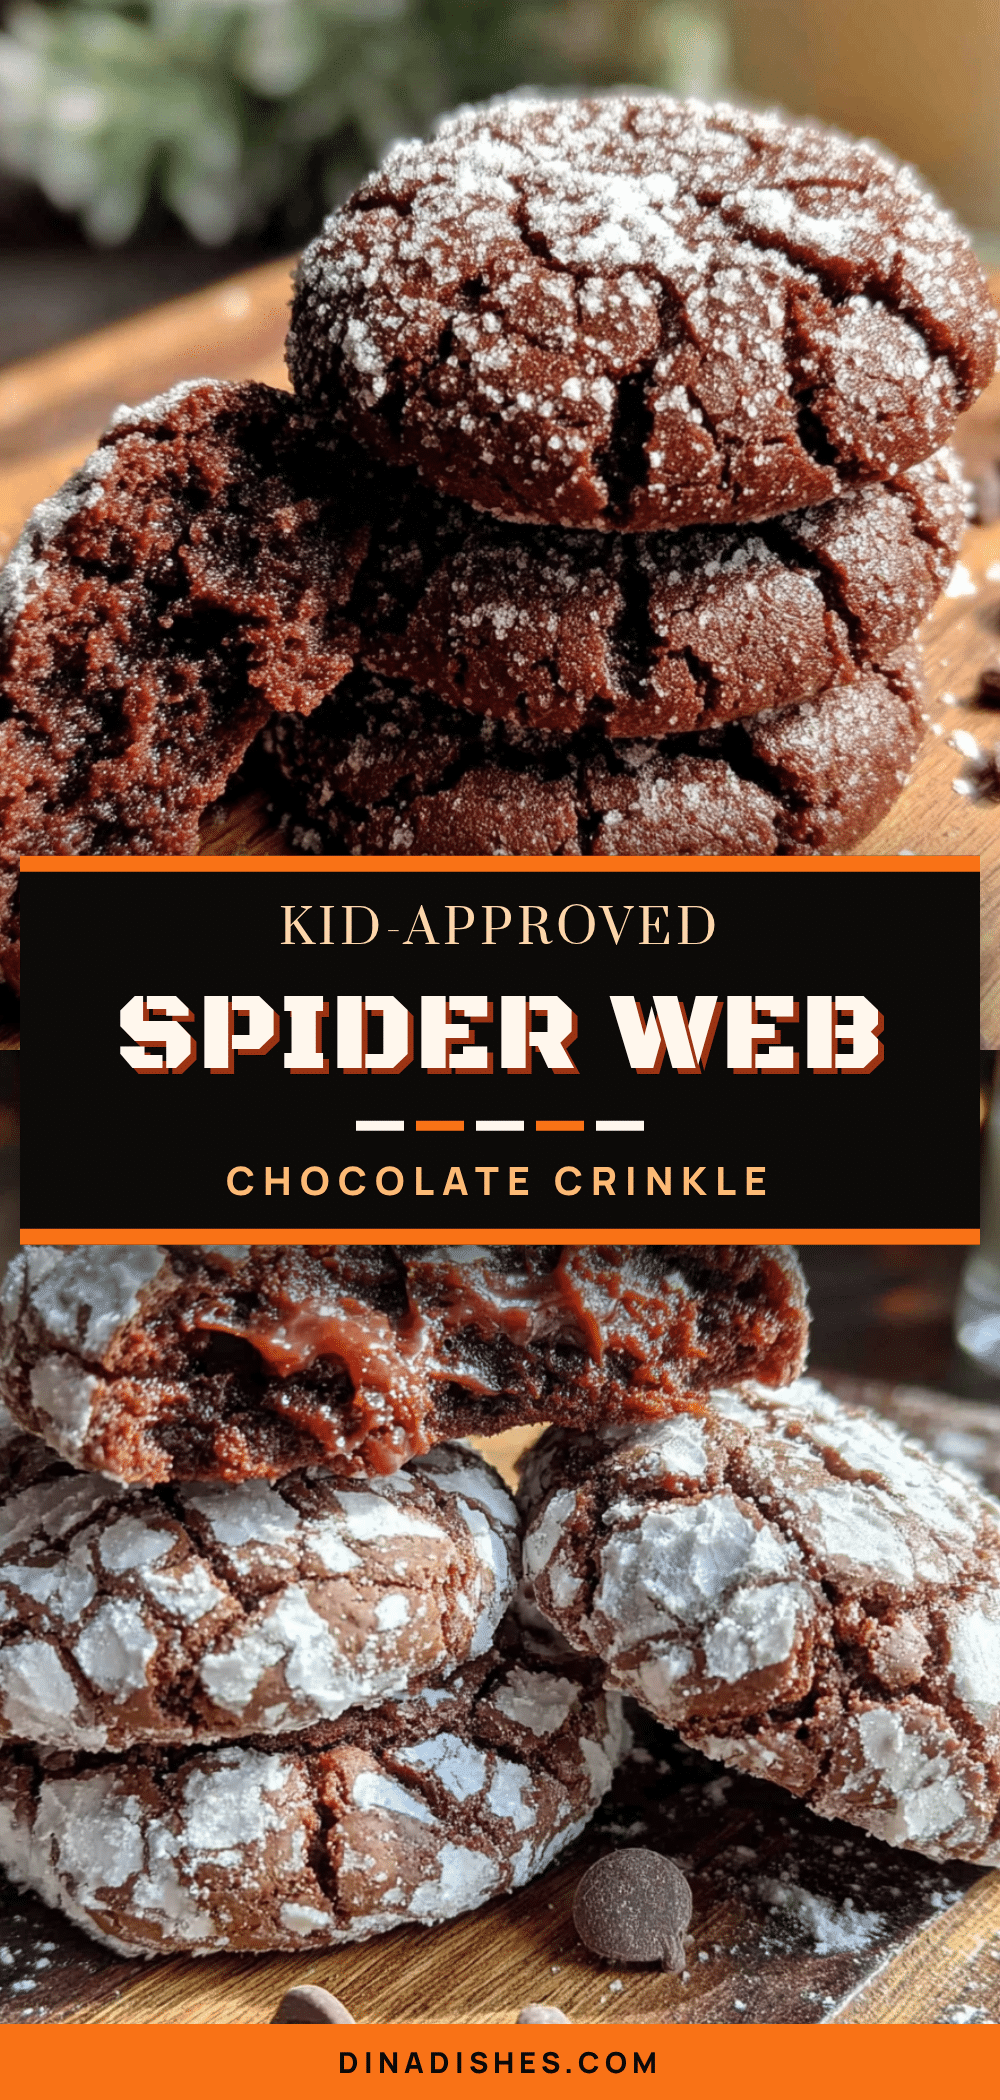
Kid-Approved Spider Web Chocolate Crinkle Cookies: Easy Halloween Treat

These fudgy chocolate crinkle cookies feature a dramatic spiderweb pattern that appears magically in the oven. Made with simple ingredients and no chilling required, they’re the perfect quick and easy Halloween treat that kids and adults love.
- Prep Time: 15 minutes
- Cook Time: 12 minutes
- Total Time: 27 minutes
- Yield: 24 cookies 1x
- Category: Dessert
- Cuisine: American
Ingredients
- 1 ½ cups (180g) all-purpose flour
- ½ cup (50g) unsweetened cocoa powder
- 1 teaspoon baking powder
- ¼ teaspoon salt
- ½ cup (113g) unsalted butter, softened
- 1 cup (200g) granulated sugar
- 2 large eggs, room temperature
- 1 teaspoon vanilla extract
- ½ teaspoon white gel food coloring
- ½ cup (60g) powdered sugar, for rolling
Instructions
- Preheat oven to 350°F (175°C). Line two baking sheets with parchment paper.
- In a large bowl, beat softened butter and granulated sugar together until light and fluffy, about 2-3 minutes.
- Beat in eggs one at a time, then add vanilla extract. Mix until combined.
- Add white gel food coloring and mix until just combined, leaving streaks of white in the dough.
- In a separate bowl, whisk together flour, cocoa powder, baking powder, and salt.
- Gradually add dry ingredients to wet mixture, mixing on low speed until just combined. Dough will be thick and slightly sticky.
- If desired, chill dough for 15 minutes for easier handling.
- Place powdered sugar in a small bowl. Scoop tablespoon-sized portions of dough (about 1.5 inches) and roll into balls. Roll each ball generously in powdered sugar until fully coated.
- Place coated balls on prepared baking sheets, spacing them about 2 inches apart.
- Bake for 10-12 minutes. Cookies will look puffy and crackly; edges should be set but centers still soft.
- Let cookies cool on baking sheet for 5 minutes, then transfer to a wire rack to cool completely.
Notes
For best results, use white gel food coloring (not liquid) to create the spiderweb effect. Underbake slightly for fudgy texture. Roll generously in powdered sugar for dramatic crackle. Let baking sheets cool between batches. Cookies taste even better the next day.
Nutrition
- Serving Size: 1 cookie
- Calories: 150
- Sugar: 14
- Sodium: 75
- Fat: 6
- Saturated Fat: 3.5
- Carbohydrates: 23
- Fiber: 1
- Protein: 2
Keywords: Halloween cookies, chocolate crinkle cookies, spider web cookies, easy Halloween treat, kid-friendly cookies, fudgy chocolate cookies


