The neighborhood spring potluck was in two hours and I had completely forgotten. Everyone else would be bringing elaborate salads, homemade pies, and those fancy layered dips that take an entire afternoon. I had a pack of chicken thighs in the fridge, a stick of butter, and honestly, a mild sense of panic. My neighbor Sarah had texted me a reminder—”Don’t forget, 5 PM sharp!”—and I’d responded with a thumbs-up emoji while meaning to figure something out later. Later was now, and I was staring into my fridge like it might offer a miracle.
I mean, you know that feeling when you’ve promised to bring a dish and suddenly realize you have nothing impressive to show? That was me, standing there with the fridge door open, the cool air hitting my face while my brain scrambled. I grabbed the chicken thighs because they were there, and the garlic because I always have a bulb rolling around somewhere. The butter was a no-brainer. And let me tell you, I wasn’t trying to win anything—I just wanted to show up with something edible.
What came out of that skillet was honestly ridiculous. The chicken thighs got all golden and crispy on the outside, and the garlic butter sauce turned into this glossy, fragrant thing that made my whole kitchen smell like a restaurant. I threw some fresh thyme in there because it was sitting on my windowsill, and suddenly it felt like I’d planned this all along. I walked into that potluck with my skillet (still warm, wrapped in a kitchen towel), and people actually stopped talking to ask what smelled so good. I didn’t win a prize or anything, but I left with an empty dish and three people asking for the recipe. That’s how Quick Garlic Butter Chicken Thighs became my go-to spring dinner—the one I make when I want to look like I tried without actually trying all that hard.
Why You’ll Love This Recipe
This isn’t just another chicken recipe. After testing this dish about seven times (my family was happy to be taste testers), I can tell you exactly why it works so well. The chicken thighs stay juicy because of that perfect fat content, and the garlic butter sauce does something magical when it hits the hot skillet.
- Quick & Easy: From fridge to table in under 30 minutes. Seriously, this is faster than ordering takeout on most nights.
- Simple Ingredients: You probably have everything already. Butter, garlic, chicken thighs, and some herbs. No fancy grocery store trips needed.
- Perfect for Spring: This dish screams spring dinners—light enough for warm evenings but hearty enough to satisfy after a long day in the garden or at work.
- Crowd-Pleaser: My kids devour these thighs, and my husband always goes back for seconds. Even my picky mother-in-law asked for the recipe.
- Unbelievably Delicious: The crispy skin, the tender meat, that garlicky butter sauce—it’s comfort food that feels special without the stress.
What makes this different from other garlic chicken recipes? It’s the technique. You start the chicken skin-side down in a cold skillet, which renders the fat slowly and gives you that crackling-crisp skin without burning the butter. Then you finish with a garlic bath that infuses every bite. I’ve tried the versions where you just dump everything in at once, and trust me, this method is worth the extra couple of minutes.
What Ingredients You Will Need
This recipe uses simple, wholesome ingredients to deliver bold flavor and satisfying texture without the fuss. Most of these are pantry staples, especially in spring when fresh herbs start popping up everywhere.
- Chicken Thighs – 4 to 6 bone-in, skin-on chicken thighs (about 2 pounds total). The bone keeps the meat juicy, and the skin gets that gorgeous crispiness. I prefer organic or free-range when I can find them on sale.
- Unsalted Butter – 4 tablespoons (half a stick). Using unsalted lets you control the salt level. If you only have salted butter, just reduce the added salt later.
- Garlic – 6 to 8 cloves, minced fresh. Please don’t use the jarred stuff here—fresh garlic makes a huge difference in the sauce. I like to smash the cloves with the flat of my knife before mincing for maximum flavor release.
- Fresh Thyme – 6 to 8 sprigs. Spring thyme is so fragrant and pairs beautifully with garlic and butter. You can use dried if that’s all you have (about 1 teaspoon), but fresh really shines here.
- Chicken Broth – 1/2 cup, low-sodium preferred. This deglazes the pan and creates the base for your sauce. I use Kitchen Basics brand most of the time.
- Lemon Juice – 2 tablespoons fresh-squeezed (about half a lemon). That little bit of acid cuts through the richness and makes everything taste brighter.
- Salt – 1 teaspoon kosher salt, plus more for seasoning. I use Diamond Crystal kosher salt—it’s less salty by volume than table salt, so adjust if you’re using something different.
- Black Pepper – 1/2 teaspoon freshly ground, plus more for finishing.
- Olive Oil – 1 tablespoon, for getting that initial sear without burning the butter.
- Optional Garnish – Fresh parsley, chopped, and lemon wedges for serving. Makes it look pretty and adds a fresh pop of flavor.
Ingredient Tips: For the best texture, look for chicken thighs that are similar in size so they cook evenly. If you’re feeding a crowd, you can easily double everything—just use a larger skillet or work in batches. In spring, I love adding a handful of fresh asparagus or snap peas to the skillet during the last few minutes of cooking for a complete meal.
Equipment Needed
You don’t need a fancy kitchen for this recipe. Here’s what you’ll need:
- Large Skillet – 12-inch cast iron or heavy-bottomed stainless steel. Cast iron gives you that perfect even heat and amazing crust. I’ve been using my grandmother’s old Lodge skillet for years, and it just gets better with time.
- Tongs – For flipping the chicken without tearing the skin. Silicone-tipped ones are gentle on non-stick pans if that’s what you’re using.
- Sharp Knife – For mincing garlic and chopping herbs. A good chef’s knife makes prep so much faster.
- Cutting Board – Wood or plastic, whatever you have.
- Measuring Spoons – For the salt, pepper, and lemon juice.
- Small Bowl – To hold your minced garlic and herbs before adding them to the pan.
- Meat Thermometer – Optional but recommended. Chicken thighs are done at 165°F, but I pull mine at 170°F for that fall-apart tenderness.
Budget-Friendly Options: If you don’t have a cast iron skillet, any heavy-bottomed pan will work—just watch the heat so the butter doesn’t burn. A non-stick skillet is fine, but you won’t get quite as crispy skin. And honestly, I’ve made this with a regular old spatula when my tongs were in the dishwasher. It still turned out great.
Preparation Method

- Pat the chicken dry – Take your chicken thighs out of the package and pat them completely dry with paper towels. This is crucial for crispy skin. Season both sides generously with salt and pepper. Let them sit at room temperature for 10 minutes while you prep everything else. (Trust me on this—cold chicken hits the pan and the skin won’t crisp properly.)
- Get your skillet ready – Place your large skillet over medium heat and add the olive oil. Swirl it around to coat the bottom. Here’s the trick: place the chicken thighs in the skillet skin-side down while the pan is still warming up. Yes, cold pan, chicken in, then heat. This slowly renders the fat and gives you the crispiest skin you’ve ever had. I learned this from a chef friend who said it’s the “secret to perfect chicken skin.”
- Sear the chicken – Let the chicken cook undisturbed for 7 to 8 minutes on medium heat. Don’t peek, don’t move it around. You’ll see the fat rendering and the skin turning golden brown. The edges will start looking opaque. When the skin is deep golden and crispy, flip each thigh using your tongs. Cook for another 5 minutes on the other side.
- Add the butter and garlic – Reduce the heat to medium-low. Add the 4 tablespoons of butter to the skillet, letting it melt around the chicken. Toss in the minced garlic and the fresh thyme sprigs. Stir the garlic into the butter, being careful not to let it burn. Let it cook for about 1 minute until fragrant—your kitchen will smell incredible at this point.
- Create the sauce – Pour in the chicken broth and lemon juice. Use a wooden spoon or spatula to scrape up all those browned bits from the bottom of the pan—that’s pure flavor right there. Let the sauce simmer gently for 3 to 4 minutes, spooning it over the chicken as it cooks. The sauce will reduce slightly and thicken into a glossy, buttery coating.
- Finish cooking – Check the internal temperature of the thickest part of a thigh. You’re looking for 165°F to 170°F. If it’s not there yet, continue cooking for another 2 to 3 minutes, spooning sauce over the top. The total cook time from start to finish is usually about 20 to 22 minutes.
- Rest and serve – Remove the skillet from heat. Let the chicken rest in the pan for 5 minutes. This lets the juices redistribute so every bite is tender. Sprinkle with fresh parsley if you’re using it, and serve with lemon wedges on the side. The sauce will be loose but that’s perfect for spooning over rice, mashed potatoes, or crusty bread.
Sensory Cue: When the garlic hits the butter, you should hear a gentle sizzle and smell that sweet, nutty aroma. The sauce should be bubbling lazily, not furiously. If it’s boiling hard, your heat is too high.
Cooking Tips & Techniques
After making this recipe about a dozen times, I’ve learned a few things the hard way. Let me save you some trouble.
The cold pan trick works. I know it sounds weird, but starting chicken skin-side down in a cold skillet is the best way to get ultra-crispy skin. The fat renders slowly instead of seizing up. I ruined my first batch by using screaming-hot oil and ended up with burnt skin and raw centers.
Don’t crowd the pan. If you’re doubling the recipe, cook the chicken in batches. When you overcrowd, the chicken steams instead of sears. You want that golden crust, not pale, sad skin. Trust me, I made this mistake at a family dinner and ended up with gray-ish chicken that nobody raved about.
Watch your garlic. Garlic burns in seconds. Once you add it to the butter, keep stirring and don’t walk away. Burnt garlic tastes bitter and will ruin your sauce. If you’re nervous, add the garlic with the broth instead—it’ll infuse more gently.
Let it rest. I know you’re hungry, but those 5 minutes of resting time make a real difference. The juices settle, the meat relaxes, and every bite is more tender. I’ve cut into chicken right out of the pan and watched all the juices run out onto the cutting board. Such a waste.
Save the extra sauce. If you have leftover garlic butter sauce, pour it over vegetables or rice the next day. It’s honestly the best part of this dish.
Variations & Adaptations
This recipe is super flexible. Here are some ways I’ve changed it up depending on what I have or who I’m cooking for.
- Dairy-Free Version: Swap the butter for a good quality vegan butter or use olive oil mixed with a splash of coconut milk. The sauce won’t be as rich, but it’s still delicious. I’ve done this for a friend with lactose intolerance and she went back for thirds.
- Herb Swap: No thyme? Use rosemary, oregano, or even dried Italian seasoning. In summer, I love using fresh basil thrown in at the very end. In fall, sage is amazing with the garlic butter.
- Spicy Kick: Add a pinch of red pepper flakes along with the garlic, or toss in a sliced chili pepper. My husband loves this version with a sprinkle of cayenne.
- One-Pan Meal: During the last 5 minutes of cooking, toss in some asparagus spears, green beans, or halved cherry tomatoes. They’ll cook in the sauce and pick up all that garlic butter goodness. This is my favorite spring adaptation.
- Boneless Option: Use boneless, skinless thighs if that’s what you have. Reduce cooking time by about 5 minutes total, and watch the temperature closely so they don’t dry out.
- Lemon-Garlic Version: Double the lemon juice and add lemon zest along with the garlic. It’s brighter and more citrus-forward—perfect for spring evenings.
Serving & Storage Suggestions
This chicken is best served hot, right out of the skillet. The garlic butter sauce should be glossy and warm, coating each piece of chicken beautifully.
What to serve with it: I love spooning the sauce over creamy mashed potatoes or fluffy rice. It’s also amazing with crusty bread for sopping up every last drop. For a lighter spring meal, serve with a simple arugula salad dressed with lemon vinaigrette, or roasted asparagus. The bright, peppery greens balance the richness of the butter sauce perfectly.
Storage: Store leftover chicken in an airtight container in the refrigerator for up to 3 days. The sauce will solidify from the butter, but that’s normal. Reheat gently in a skillet over low heat, adding a splash of broth or water to loosen the sauce. You can also microwave it, but the skin won’t be as crispy.
Freezing: This freezes well for up to 2 months. Place cooled chicken and sauce in a freezer-safe container. Thaw overnight in the fridge, then reheat in a skillet. The texture of the sauce might separate slightly, but a good stir will bring it back together.
Flavor development: Honestly, the leftovers taste even better the next day. The garlic and herbs have more time to meld together. I’ve been known to make a double batch just so I can have it for lunch the next day.
Nutritional Information & Benefits
Here’s the approximate nutritional breakdown for one serving (one chicken thigh with sauce, based on 4 servings):
- Calories: 420
- Protein: 32g
- Fat: 30g
- Carbohydrates: 4g
- Fiber: 0g
- Sugar: 1g
- Sodium: 680mg
Health Benefits: Chicken thighs are a great source of protein, iron, and B vitamins. Garlic is known for its immune-boosting properties—perfect for spring when allergies start acting up. Butter provides fat-soluble vitamins A, D, E, and K, especially if you use grass-fed butter. And the lemon juice adds a nice dose of vitamin C.
Dietary Considerations: This recipe is naturally gluten-free and low-carb. It’s not dairy-free because of the butter, but you can easily adapt it as mentioned above. If you’re watching sodium, use low-sodium broth and go easy on the added salt.
I’m not a nutritionist, but I do believe in cooking with real ingredients. This dish feels indulgent, but it’s actually pretty balanced—protein, healthy fats, and minimal carbs. Plus, you’re in control of what goes in it, which is always a win.
Conclusion
This Quick Garlic Butter Chicken Thighs recipe has honestly become my secret weapon for spring dinners. It’s the dish I make when I want to feel like a good cook without spending all day in the kitchen. The crispy skin, the tender meat, that glorious garlic butter sauce—it all comes together in one skillet in under 30 minutes.
I love that you can dress it up or keep it simple. Serve it over rice for a cozy weeknight meal, or pair it with a salad and a glass of white wine for a dinner party that looks way more impressive than it actually was. And the best part? You probably already have everything you need to make it tonight.
If you give this recipe a try, I’d love to hear how it turns out. Leave a comment below and let me know if you added any twists—I’m always looking for new ideas. And if you share a photo on Pinterest, tag me so I can see your gorgeous skillet dinner! Happy cooking, friends.
Frequently Asked Questions
Can I use chicken breasts instead of thighs?
Yes, you can, but the results will be different. Chicken breasts are leaner and can dry out more easily. If you swap them, cook for less time—about 12 to 15 minutes total—and use a meat thermometer to avoid overcooking. The sauce will still be delicious, just watch the cooking time closely.
How do I prevent the garlic from burning?
Lower the heat before adding the garlic, and keep stirring. If you’re nervous, add the garlic with the chicken broth instead of directly into the butter. This gives it more liquid to cook in and reduces the risk of burning. Burnt garlic tastes bitter, so it’s worth being careful here.
Can I make this recipe ahead of time?
You can prep the ingredients ahead—mince the garlic, chop the herbs, and have the chicken seasoned in the fridge. But for the best texture, cook the chicken right before serving. The skin loses its crispiness as it sits. Leftovers reheat well, but that first fresh batch is unbeatable.
What if I don’t have a cast iron skillet?
No problem at all. Any heavy-bottomed skillet works—stainless steel, non-stick, even a good quality frying pan. Just adjust the heat as needed because different pans conduct heat differently. Non-stick won’t give you as dark a crust, but the flavor will still be amazing.
Can I add vegetables to the same pan?
Absolutely! During the last 5 minutes of cooking, toss in asparagus, green beans, snap peas, or even spinach. They’ll cook in the garlic butter sauce and pick up all that flavor. Just don’t overcrowd the pan—add a handful at a time so they cook evenly.
Pin This Recipe!
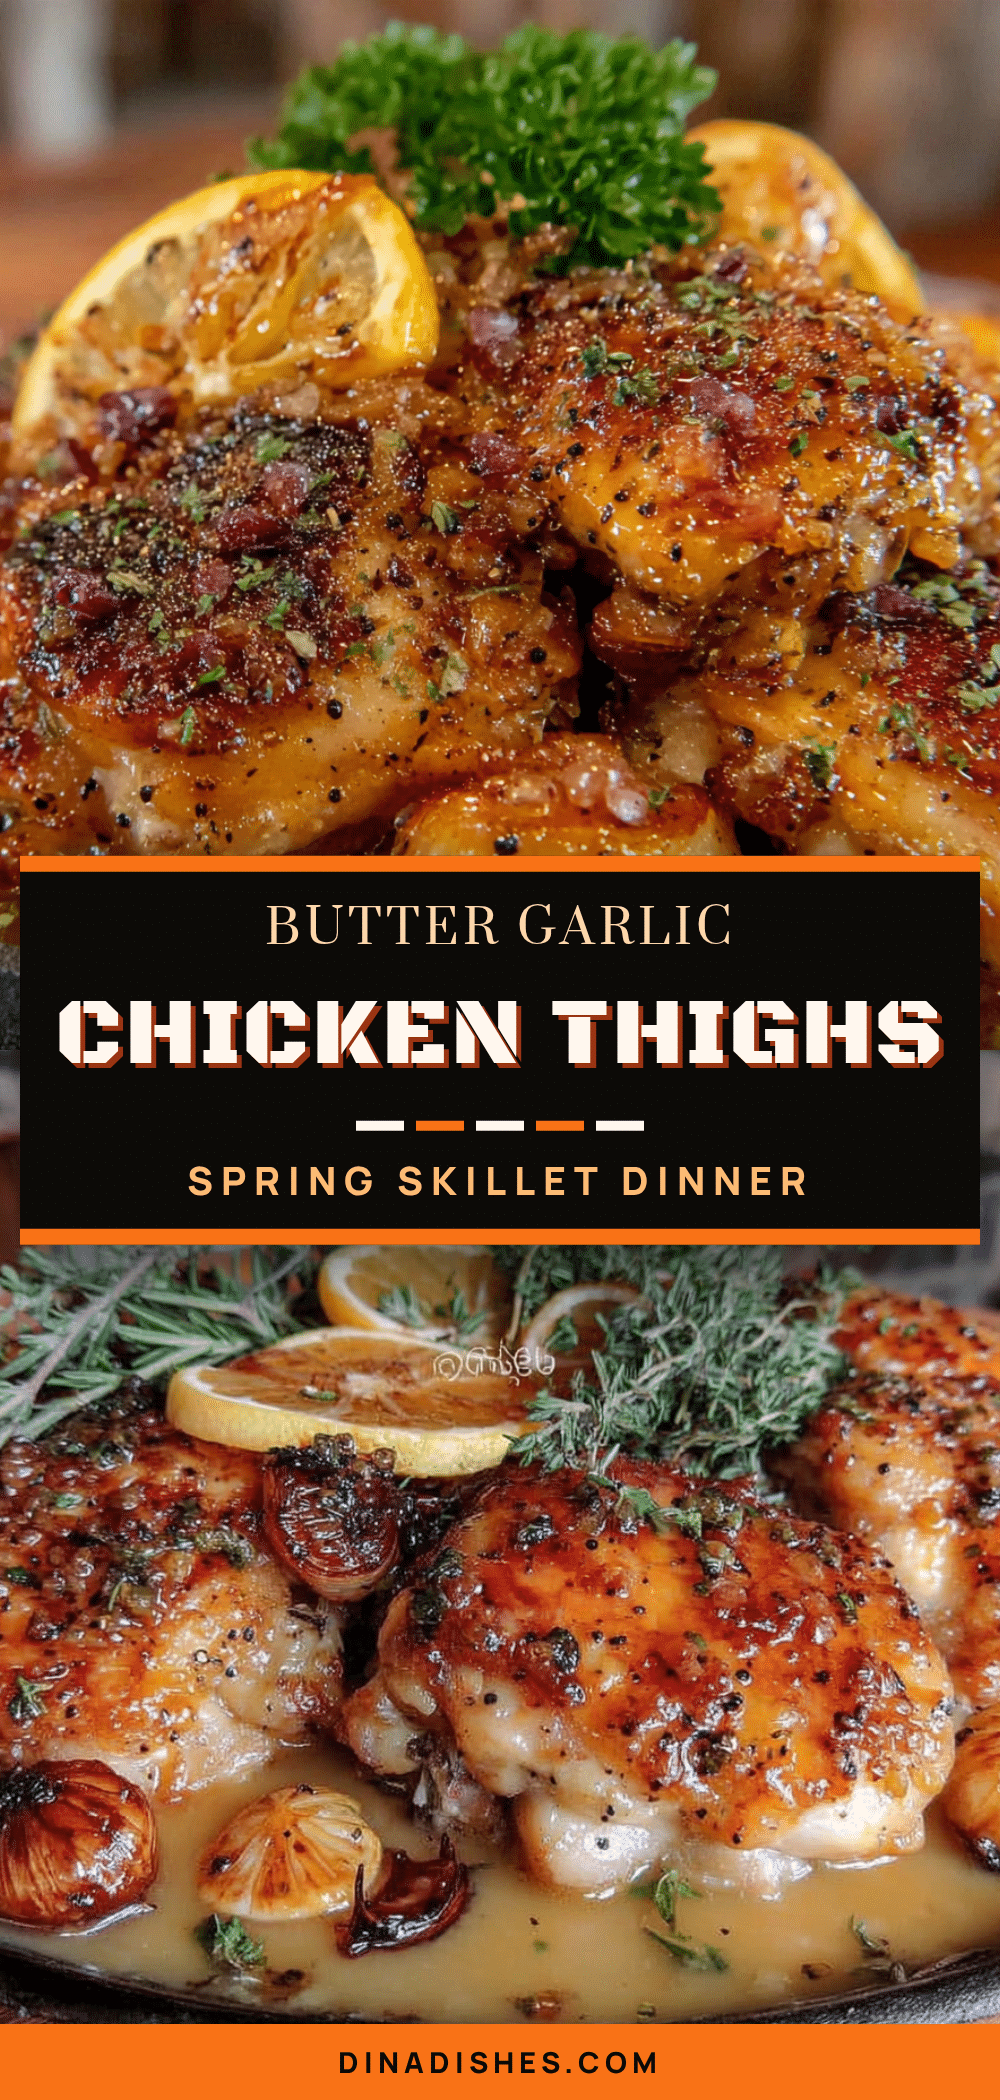
Quick Garlic Butter Chicken Thighs: Easy Spring Skillet Dinner

Crispy, golden chicken thighs in a rich garlic butter sauce, ready in under 30 minutes. Perfect for a quick spring dinner that feels special without the stress.
- Prep Time: 10 minutes
- Cook Time: 20 minutes
- Total Time: 30 minutes
- Yield: 4 servings 1x
- Category: Main Course
- Cuisine: American
Ingredients
- 4 to 6 bone-in, skin-on chicken thighs (about 2 pounds total)
- 4 tablespoons unsalted butter
- 6 to 8 cloves garlic, minced
- 6 to 8 sprigs fresh thyme
- 1/2 cup low-sodium chicken broth
- 2 tablespoons fresh lemon juice
- 1 teaspoon kosher salt
- 1/2 teaspoon freshly ground black pepper
- 1 tablespoon olive oil
- Fresh parsley, chopped (optional garnish)
- Lemon wedges (for serving)
Instructions
- Pat the chicken thighs dry with paper towels. Season both sides generously with salt and pepper. Let sit at room temperature for 10 minutes.
- Place a large skillet over medium heat and add olive oil. Swirl to coat. Place chicken thighs skin-side down in the cold skillet, then turn on the heat.
- Cook undisturbed for 7 to 8 minutes until skin is deep golden and crispy. Flip and cook for another 5 minutes.
- Reduce heat to medium-low. Add butter, minced garlic, and thyme sprigs. Stir garlic into butter for about 1 minute until fragrant.
- Pour in chicken broth and lemon juice. Scrape up browned bits from the pan. Simmer gently for 3 to 4 minutes, spooning sauce over chicken.
- Check internal temperature: 165°F to 170°F. If needed, cook 2 to 3 more minutes.
- Remove from heat. Let rest in pan for 5 minutes. Sprinkle with parsley and serve with lemon wedges.
Notes
Start chicken skin-side down in a cold skillet for extra crispy skin. Don’t crowd the pan; cook in batches if doubling. Watch garlic carefully to avoid burning. Let chicken rest 5 minutes before serving. Leftovers taste even better the next day.
Nutrition
- Serving Size: 1 chicken thigh with
- Calories: 420
- Sugar: 1
- Sodium: 680
- Fat: 30
- Saturated Fat: 12
- Carbohydrates: 4
- Protein: 32
Keywords: garlic butter chicken, chicken thighs, spring dinner, quick dinner, skillet chicken, easy chicken recipe


