I swore I hated apple crisp. For years. The whole thing seemed like a waste of perfectly good apples, if I’m being honest. A sad, soggy topping over mushy fruit that just tasted like cinnamon and regret. Then I came home last Tuesday absolutely wrecked from back-to-back meetings, starving, and found a bag of apples staring at me from the counter like a dare.
I had thirty minutes and zero patience for anything fussy. So I threw something together in a single skillet—no peeling, no fancy equipment, just apples, butter, oats, and a bottle of salted caramel sauce I’d bought on a whim. Honestly? I was just trying to get dinner on the table without crying. The power went out halfway through baking, which forced me to finish it under the broiler, and I was convinced this thing was headed straight for the trash.
But that first bite—warm, buttery, with that salty-sweet crunch—stopped me mid-chew. I stood there in my dim kitchen, fork in hand, and actually laughed at myself. Maybe you’ve been there, judging a dish before you’ve even tried the right version. This quick salted caramel apple crisp with oat crumble changed my mind so fast I got whiplash. And now? I keep making it, because nothing else hits that sweet-salty, warm-and-crunchy spot this fast on a weeknight.
Why You’ll Love This Recipe
Let me tell you why this quick salted caramel apple crisp has become my weeknight hero. I’ve tested it at least a dozen times, tweaking the oat-to-butter ratio until it was just right, and I can promise you this isn’t your grandma’s fussy dessert.
- Quick & Easy: From start to table in under 45 minutes. No peeling apples, no complicated steps. You can literally have this in the oven before your main dish finishes cooking.
- Simple Ingredients: You probably have most of this in your pantry right now. Oats, flour, butter, brown sugar, apples—no fancy grocery store runs required.
- Perfect for Weeknights: This is the kind of dessert that makes a regular Tuesday feel like a celebration. Minimal cleanup, maximum payoff.
- Crowd-Pleaser: I brought this to a neighbor’s potluck last month, and three people asked for the recipe before I even sat down. Kids love the caramel, adults love the saltiness.
- Unbelievably Delicious: The contrast between the tender, caramel-coated apples and the crunchy oat topping is pure magic. That salted caramel takes it from good to “close your eyes and savor it” territory.
What makes this version different? It’s the salted caramel, honestly. Most apple crisps rely on plain sugar and cinnamon, but that drizzle of salted caramel sauce adds a depth of flavor that feels like you spent hours in the kitchen. And the oat crumble? I use a higher oat-to-flour ratio than most recipes, which gives it that irresistible, almost granola-like crunch. It’s comfort food reimagined—faster, more satisfying, but with the same soul-soothing warmth.
What Ingredients You Will Need
This recipe uses simple, wholesome ingredients to deliver bold flavor and satisfying texture without the fuss. Most of these are pantry staples, which is exactly what you want on a busy weeknight.
For the Apple Filling
- 6 medium apples (about 2 pounds or 900g) – I prefer Honeycrisp or Granny Smith for their firm texture and balanced sweetness. No need to peel them unless you want to; the skin adds fiber and color.
- 3 tablespoons granulated sugar (36g) – Helps draw out the apple juices and creates that syrupy base.
- 1 tablespoon lemon juice (15ml) – Keeps the apples from browning and brightens the flavor.
- 1 teaspoon ground cinnamon (2.5g) – Warm, classic spice that pairs perfectly with apples.
- ¼ teaspoon salt (1.5g) – Enhances all the flavors and balances the sweetness.
- 2 tablespoons all-purpose flour (16g) – Thickens the juices so you don’t end up with a watery filling.
For the Oat Crumble Topping

- 1 cup old-fashioned rolled oats (90g) – Not quick oats! They’ll get mushy. Old-fashioned oats give that perfect chewy-crunchy texture.
- ½ cup all-purpose flour (60g) – Provides structure to the crumble.
- ½ cup packed brown sugar (100g) – Adds moisture and a deeper caramel flavor than white sugar.
- ½ teaspoon ground cinnamon (1.25g) – Extra warmth in the topping.
- ¼ teaspoon salt (1.5g) – Crucial for balancing the sweetness.
- ½ cup unsalted butter (113g), cold and cut into small cubes – This is key. Cold butter creates those craggy, buttery clumps. I use Kerrygold for its rich flavor.
For the Salted Caramel Drizzle
- ½ cup store-bought salted caramel sauce (about 120ml) – I’m a fan of Trader Joe’s or Stonewall Kitchen. Homemade is lovely, but on a weeknight? No shame in the shortcut game.
- Flaky sea salt (like Maldon) for finishing – Just a pinch on top makes everything pop.
Substitution Tips: Use gluten-free all-purpose flour and certified gluten-free oats for a GF version. Swap coconut oil for butter if dairy-free. For a lower-sugar option, reduce the brown sugar to ⅓ cup and use a sugar-free caramel sauce.
Equipment Needed
You don’t need much for this one, which is exactly how I like it on a busy night. Here’s what you’ll need:
- 9-inch square baking dish or 10-inch cast iron skillet – I use my cast iron skillet because it holds heat beautifully and gives the edges that extra-crispy finish. A glass or ceramic dish works just fine too.
- Large mixing bowl – For the crumble topping.
- Small bowl – For tossing the apples with the cinnamon-sugar mixture.
- Chef’s knife and cutting board – For slicing the apples. No need to be precise here; rustic chunks are fine.
- Measuring cups and spoons – Because eyeballing butter is a slippery slope.
- Pastry blender or two forks – For cutting the butter into the dry ingredients. You can also use your hands, but work quickly so the butter stays cold.
- Spatula or wooden spoon – For mixing.
Budget-Friendly Tip: If you don’t have a pastry blender, just use two forks or your fingertips. The key is keeping the butter cold, not the tool you use.
Preparation Method
Preheat your oven to 375°F (190°C). While it’s heating up, let’s get everything moving. This whole process takes about 15 minutes of active prep time.
- Prep the apples: Wash your apples thoroughly. Cut them into quarters, remove the cores, and slice each quarter into ½-inch chunks. Don’t bother peeling them—seriously, the skin softens during baking and adds nice texture. Toss the apple chunks in a large bowl with the granulated sugar, lemon juice, cinnamon, salt, and flour. Stir until every piece is coated. Let them sit while you make the topping; this gives the sugar time to start drawing out the juices.
- Make the oat crumble: In a separate large mixing bowl, combine the rolled oats, flour, brown sugar, cinnamon, and salt. Whisk them together to break up any brown sugar clumps. Add the cold butter cubes. Using a pastry blender or your fingertips, work the butter into the dry ingredients until the mixture looks like coarse meal with some pea-sized butter pieces remaining. You want those visible chunks—they melt into crispy, buttery pockets during baking. Don’t overwork it, or the topping will be dense instead of crumbly.
- Assemble the crisp: Transfer the apple mixture to your baking dish or cast iron skillet. Spread them into an even layer. Drizzle half of the salted caramel sauce (about ¼ cup) over the apples. Don’t stir it in—let it pool and sink naturally. Sprinkle the oat crumble evenly over the top, covering all the apples. Squeeze some of the crumble between your fingers to create larger clumps; those will turn into the best crunchy bits.
- Bake: Place the dish on a baking sheet to catch any drips (trust me on this one—I learned the hard way). Bake for 30-35 minutes, until the filling is bubbly around the edges and the topping is golden brown. If the topping is browning too quickly after 20 minutes, tent loosely with foil. Your kitchen should smell like heaven at this point.
- Finish with caramel: Remove from the oven and let it cool for 5 minutes—just enough so you don’t burn your mouth. Drizzle the remaining salted caramel sauce over the top. Sprinkle with a pinch of flaky sea salt. That final salt hit right before serving is non-negotiable.
- Serve: Scoop into bowls while still warm. A scoop of vanilla ice cream or a dollop of whipped cream is highly recommended, but honestly, it’s incredible on its own.
Cooking Tips & Techniques
I’ve made this quick salted caramel apple crisp enough times to know where things can go sideways. Here’s what I’ve learned the hard way so you don’t have to.
Don’t skip the flour in the apple mixture. I forgot it once, and the filling was basically apple soup. That tablespoon of flour thickens the juices into a gorgeous syrup rather than a watery mess. If your apples are especially juicy (like Honeycrisp in peak season), add an extra teaspoon of flour.
Keep that butter cold. This is the single most important tip for a crispy topping. If your butter softens while you’re working it into the flour, pop the bowl in the fridge for 10 minutes before sprinkling it over the apples. Warm butter = dense, greasy topping. Cold butter = light, crunchy, beautiful crumble.
Use a mix of apple varieties. My favorite combo is half Granny Smith (for tartness and structure) and half Honeycrisp (for sweetness and juiciness). If you use all soft apples like McIntosh, you’ll end up with applesauce. Not the end of the world, but not what we’re going for here.
Let it rest before serving. I know it’s hard to wait, but those 5 minutes of cooling allow the filling to set up. If you scoop it straight out of the oven, it’ll be runny. Patience pays off.
Multitasking strategy: While the crisp bakes, wipe down your counter and wash your mixing bowls. You’ll thank yourself when dinner’s over and there’s minimal cleanup. I like to set out the ice cream or whipped cream while it’s cooling too.
Variations & Adaptations
This recipe is endlessly adaptable, which is part of why I love it. Here are some ways to switch things up:
- Gluten-Free Version: Swap the all-purpose flour with a 1:1 gluten-free baking blend. Use certified gluten-free oats. I’ve tested this with Bob’s Red Mill 1:1, and honestly, nobody noticed the difference.
- Dairy-Free Version: Use cold coconut oil or vegan butter in place of regular butter. Just make sure it’s solid and cold before cutting it into the dry ingredients. The texture will be slightly different but still delicious.
- Spiced Apple Crisp: Add ¼ teaspoon each of nutmeg, allspice, and ground ginger to the apple mixture. It gives a chai-like warmth that’s perfect for fall. My sister-in-law added cardamom once, and I’ve been doing it ever since.
- Berry-Apple Crisp: Toss in a cup of fresh or frozen cranberries, blueberries, or raspberries with the apples. You’ll need to add an extra tablespoon of flour to handle the extra moisture. This is gorgeous for Thanksgiving.
- Savory-Sweet Twist: Add 2 tablespoons of bourbon or dark rum to the apple mixture before baking. The alcohol cooks off, leaving behind a rich, complex flavor that pairs beautifully with the caramel.
- Individual Servings: Divide the mixture among 4-6 ramekins and reduce the baking time to 20-22 minutes. Perfect for when you want to feel fancy on a Tuesday.
Serving & Storage Suggestions
This quick salted caramel apple crisp is best served warm, straight from the oven. The contrast between the hot, tender apples and the cold ice cream is honestly one of life’s simple pleasures. But here’s how to handle leftovers, if you have any.
Serving Temperature: Aim for warm, not piping hot. Let it rest 5-10 minutes so the filling sets up. Top with vanilla bean ice cream, whipped cream, or a drizzle of heavy cream. For a brunch twist, serve it over Greek yogurt with a sprinkle of granola.
Complementary Dishes: This crisp pairs beautifully with a cup of hot coffee or a glass of cold milk. If you’re serving it after dinner, a dark roast coffee or a dessert wine like late-harvest Riesling works wonders. For a full fall spread, serve alongside a roasted butternut squash soup or a simple green salad with apple cider vinaigrette.
Storage: Cover the dish tightly with foil or transfer leftovers to an airtight container. Store in the refrigerator for up to 5 days. The topping will soften over time, but it’s still delicious.
Reheating: The best way to revive that crunchy topping is in the oven or air fryer. Reheat at 350°F (175°C) for 10-15 minutes, or until warmed through and the topping crisps up again. The microwave works in a pinch (about 60 seconds), but the topping won’t be as crunchy. If you’re reheating individual portions, the air fryer at 350°F for 5 minutes is magic.
Flavor Development: Honestly, this crisp tastes even better the next day. The flavors meld together overnight, and the caramel seeps deeper into the apples. I’ve been known to make it just for the leftovers.
Nutritional Information & Benefits
Here’s the honest breakdown for one serving (about ⅙ of the recipe, without ice cream):
- Calories: Approximately 380
- Total Fat: 16g
- Saturated Fat: 10g
- Carbohydrates: 58g
- Fiber: 5g
- Sugar: 38g
- Protein: 4g
- Sodium: 310mg
While this is definitely a treat, there are some redeeming qualities. Apples are packed with fiber and vitamin C, and the oats provide slow-release energy and beta-glucan, which supports heart health. The cinnamon has anti-inflammatory properties, and the butter (in moderation) contains fat-soluble vitamins A, D, and E.
Dietary Considerations: This recipe contains gluten (from flour and oats) and dairy (butter). For gluten-free or dairy-free options, see the variations section above. It’s not low-carb or keto-friendly due to the oats and caramel, but it is vegetarian.
My personal take? This is a dessert to enjoy mindfully, not a health food. But it’s made with real ingredients, and there’s something to be said for that. I’d rather have a smaller portion of this than a larger portion of something full of artificial flavors and preservatives.
Conclusion
Look, I get it. Weeknights are hard, and the last thing you want to do is spend an hour making dessert. But this quick salted caramel apple crisp with oat crumble is the exception. It’s fast, forgiving, and delivers that warm, cozy feeling we all need after a long day.
What I love most about this recipe is how it proves you don’t need complicated techniques or exotic ingredients to make something genuinely special. A few simple pantry staples, one skillet, and thirty minutes—that’s all it takes to turn a regular Tuesday into something worth savoring. And honestly? The fact that it changed my mind about apple crisp makes me smile every time I make it.
I’d love to hear how yours turns out. Did you try a variation? Add something unexpected? Forget to set a timer and let it get extra crispy? (That’s happened to me more than once, and honestly, the burnt edges are my favorite part.) Drop a comment below and let me know—I read every single one. And if you loved it, share it with a friend who needs a little weeknight magic.
Now go preheat that oven. You’ve got a crisp to make.
Frequently Asked Questions
Can I make this quick salted caramel apple crisp ahead of time?
Absolutely. Assemble the crisp completely (without baking), cover it tightly, and refrigerate for up to 24 hours. When you’re ready to bake, add about 10 minutes to the baking time since you’re starting from cold. You can also bake it fully, then reheat as directed above.
Do I really need to use salted caramel sauce, or can I make my own?
Store-bought works perfectly and saves time, which is the whole point of this recipe. But if you have 10 extra minutes, homemade salted caramel is incredible. Just melt ½ cup sugar in a saucepan until amber, whisk in 3 tablespoons butter and ¼ cup heavy cream, then add a pinch of salt. Easy and worth it.
What’s the best apple for this recipe?
I recommend a mix of firm, tart apples (like Granny Smith) and sweet, juicy ones (like Honeycrisp or Fuji). The tart apples hold their shape during baking, while the sweet ones break down slightly and create that luscious, syrupy filling. Avoid Red Delicious or McIntosh—they turn to mush too quickly.
Can I freeze this apple crisp?
Yes! Bake the crisp, let it cool completely, then wrap the dish tightly in plastic wrap and foil. Freeze for up to 3 months. To serve, thaw overnight in the fridge, then reheat at 350°F for 15-20 minutes until warmed through. The topping won’t be quite as crunchy as fresh, but it’s still delicious.
Why is my oat crumble topping not crunchy?
This usually happens for one of three reasons: 1) Your butter was too warm when you mixed it in, 2) You overworked the topping, creating a paste instead of crumbles, or 3) The crisp wasn’t baked long enough. Next time, make sure your butter is cold straight from the fridge, and stop mixing as soon as you see pea-sized butter pieces. If the topping is browning too fast but the filling isn’t bubbly yet, tent with foil and continue baking.
Pin This Recipe!
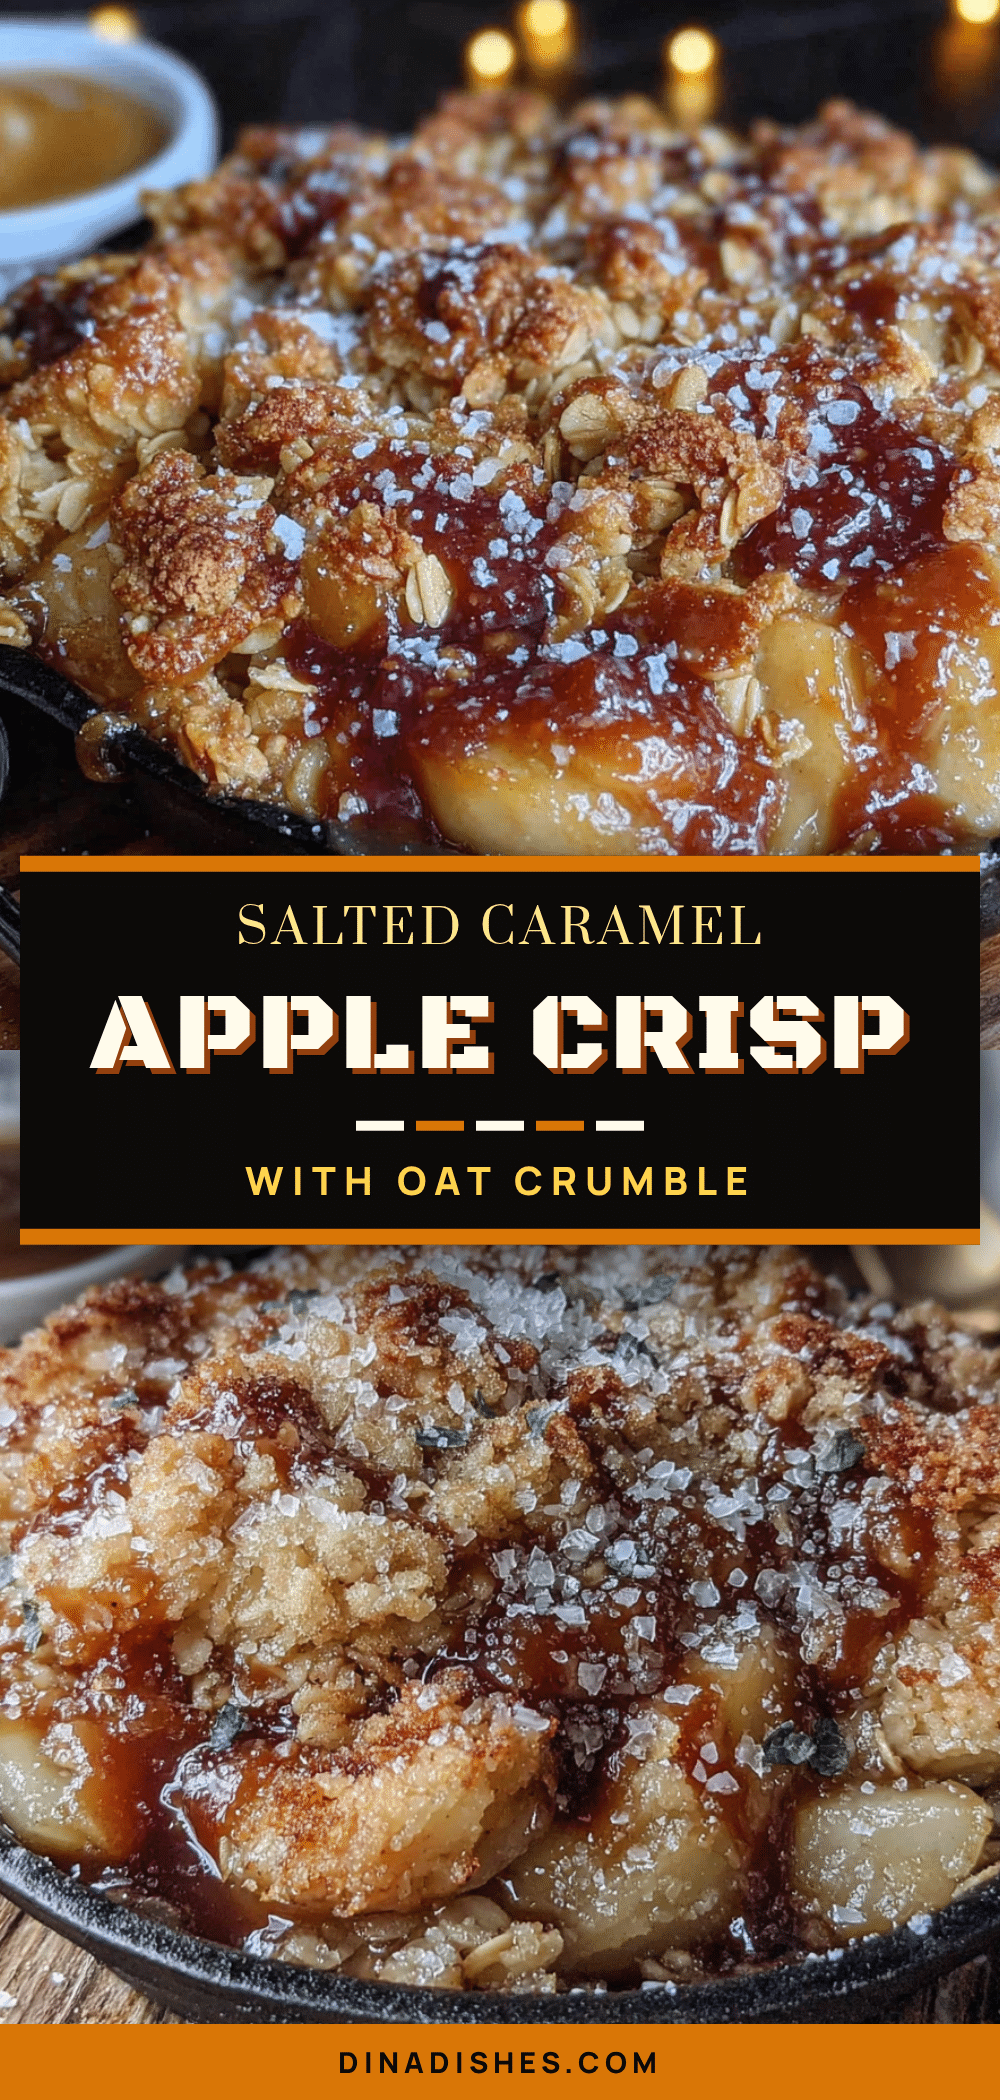
Quick Salted Caramel Apple Crisp: Easy Oat Crumble Recipe

A quick and easy salted caramel apple crisp with a crunchy oat crumble topping, made in under 45 minutes with simple pantry ingredients. Perfect for weeknight desserts.
- Prep Time: 15 minutes
- Cook Time: 30-35 minutes
- Total Time: 45 minutes
- Yield: 6 servings 1x
- Category: Dessert
- Cuisine: American
Ingredients
- 6 medium apples (about 2 pounds or 900g), preferably Honeycrisp or Granny Smith
- 3 tablespoons granulated sugar (36g)
- 1 tablespoon lemon juice (15ml)
- 1 teaspoon ground cinnamon (2.5g)
- ¼ teaspoon salt (1.5g)
- 2 tablespoons all-purpose flour (16g)
- 1 cup old-fashioned rolled oats (90g)
- ½ cup all-purpose flour (60g)
- ½ cup packed brown sugar (100g)
- ½ teaspoon ground cinnamon (1.25g)
- ¼ teaspoon salt (1.5g)
- ½ cup unsalted butter (113g), cold and cut into small cubes
- ½ cup store-bought salted caramel sauce (about 120ml)
- Flaky sea salt (like Maldon) for finishing
Instructions
- Preheat oven to 375°F (190°C).
- Wash apples, cut into quarters, remove cores, and slice each quarter into ½-inch chunks. Do not peel.
- In a large bowl, toss apple chunks with granulated sugar, lemon juice, cinnamon, salt, and flour until coated. Let sit while making topping.
- In a separate large bowl, combine rolled oats, flour, brown sugar, cinnamon, and salt. Whisk to break up clumps.
- Add cold butter cubes. Using a pastry blender or fingertips, work butter into dry ingredients until mixture resembles coarse meal with pea-sized butter pieces. Do not overwork.
- Transfer apple mixture to a 9-inch square baking dish or 10-inch cast iron skillet. Spread evenly.
- Drizzle half of the salted caramel sauce (about ¼ cup) over the apples. Do not stir.
- Sprinkle oat crumble evenly over the top, squeezing some between fingers to create larger clumps.
- Place dish on a baking sheet. Bake for 30-35 minutes, until filling is bubbly and topping is golden brown. If topping browns too quickly after 20 minutes, tent loosely with foil.
- Remove from oven and let cool for 5 minutes.
- Drizzle remaining salted caramel sauce over the top. Sprinkle with flaky sea salt.
- Serve warm, optionally with vanilla ice cream or whipped cream.
Notes
For a gluten-free version, use gluten-free all-purpose flour and certified gluten-free oats. For dairy-free, substitute cold coconut oil or vegan butter. For a lower-sugar option, reduce brown sugar to ⅓ cup and use sugar-free caramel sauce. Let the crisp rest 5 minutes before serving to allow the filling to set. Store leftovers covered in the refrigerator for up to 5 days; reheat in the oven or air fryer for best crunch.
Nutrition
- Serving Size: 1 serving (about ⅙ o
- Calories: 380
- Sugar: 38
- Sodium: 310
- Fat: 16
- Saturated Fat: 10
- Carbohydrates: 58
- Fiber: 5
- Protein: 4
Keywords: apple crisp, salted caramel, oat crumble, quick dessert, weeknight dessert, easy apple crisp


