My sister-in-law had claimed to hate pumpkin for as long as I’d known her. Fifteen years, give or take. She’d make this face—you know the one, like she’d just bitten into a lemon wrapped in a gym sock—every time someone mentioned pumpkin bread or pumpkin spice lattes. Then last October, I brought these cookie bars to a family dinner, and I won’t lie, I made them mainly for myself. I figured she’d skip dessert, and more for me, right? Halfway through the evening, I caught her standing by the kitchen counter, picking at the edges of the pan with her fingers, trying to look casual about it. “These are fine,” she said, with crumbs on her chin. “Fine” turned into her asking for the recipe before she left.
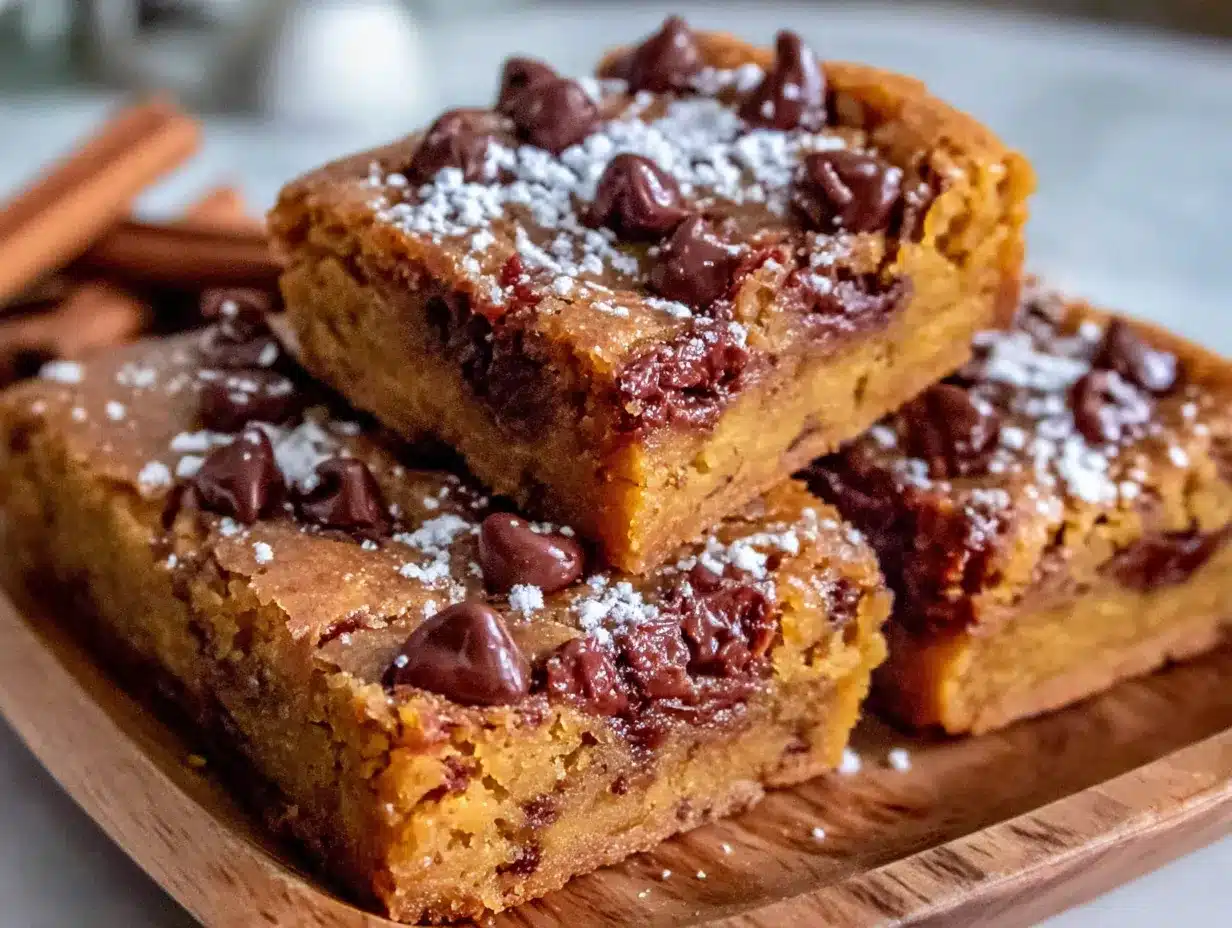
Honestly, I wasn’t surprised. These bars have a way of winning people over. They’re not aggressively pumpkiny—they’re more like a soft, chewy oatmeal cookie that happens to have this warm, cozy undertone. The chocolate chips do a lot of the heavy lifting, and the whole thing comes together in one bowl, which is my favorite kind of baking. No stand mixer required, no chilling the dough for hours, no complicated steps. Just stir, spread, bake, and try not to eat the entire pan in one sitting.
I think what got her—and gets most people—is the texture. The edges get slightly crisp, almost like a granola bar, while the center stays tender and almost fudgy. It’s the kind of dessert that makes you close your eyes after the first bite, even if you’re standing over the kitchen sink at eleven o’clock at night. Maybe you’ve been there. Maybe you’ve also sworn off a certain ingredient only to find yourself proven gloriously wrong. That’s the thing about good recipes—they don’t care about your opinions. They just work.
Why You’ll Love This Recipe
Let me tell you why these bars have become my go-to fall dessert, and honestly, my go-to dessert year-round. I’ve tested this recipe about seven times to get the ratios exactly right—the first batch was too cakey, the second too dense, the third just right but needed more chocolate. My kitchen looked like a pumpkin explosion for two weeks. But you know what? It was worth every sticky countertop and every spilled chocolate chip.
- Quick & Easy: From start to oven in about 15 minutes. No stand mixer, no chilling, no rolling dough into individual cookies. Just mix everything in one bowl and spread it into a pan. Perfect for those afternoons when a cookie craving hits and you need satisfaction fast.
- Simple Ingredients: You probably have most of these in your pantry right now. Canned pumpkin puree, oats, flour, chocolate chips, and basic baking staples. No weird specialty ingredients that you’ll use once and forget about.
- Perfect for Fall Gatherings: These bars are ideal for Thanksgiving dessert tables, Halloween parties, or cozy Sunday afternoons with a cup of coffee. They travel well, they don’t need frosting, and they please both pumpkin lovers and pumpkin skeptics.
- Crowd-Pleaser: I’ve brought these to potlucks, office parties, and family dinners. They disappear fast. Kids love them because they’re basically oatmeal chocolate chip cookies in bar form. Adults love them because they feel slightly virtuous eating pumpkin.
- Unbelievably Delicious: The combination of warm pumpkin spice, sweet chocolate, and chewy oats is next-level comfort food. The texture is what really gets you—crispy edges, soft center, melty chocolate in every bite.
What makes these bars different from other pumpkin recipes is the texture trick. Most pumpkin baked goods turn out cakey or dense, but these have this incredible chewy quality thanks to the oats and the right ratio of pumpkin to flour. It’s not another sad, soggy pumpkin bar. It’s a proper cookie bar that happens to have pumpkin in it. The kind that makes you forget you’re eating something with a vegetable in the name.
What Ingredients You Will Need
This recipe uses simple, wholesome ingredients to deliver bold flavor and satisfying texture without the fuss. Most of these are pantry staples, which means you can whip up a batch whenever the mood strikes without a special trip to the store.
For the Cookie Bars
- 1 cup canned pumpkin puree (not pumpkin pie filling—make sure it’s 100% pure pumpkin. I prefer Libby’s for consistent texture, but store brands work fine too)
- 1/2 cup unsalted butter, melted (salted butter works too, just reduce the added salt by 1/4 teaspoon)
- 3/4 cup brown sugar, packed (light or dark both work; dark gives a deeper molasses flavor that pairs beautifully with pumpkin)
- 1/4 cup granulated sugar (adds a bit of crispness to the edges)
- 1 large egg, room temperature (cold egg will seize the melted butter, so let it sit out for 15 minutes)
- 1 teaspoon vanilla extract (pure vanilla if you have it, imitation works in a pinch)
- 1 1/2 cups old-fashioned rolled oats (not quick oats—they’ll turn mushy. Old-fashioned oats give that perfect chewy texture)
- 1 cup all-purpose flour (spoon and level it—don’t scoop directly from the bag or you’ll get too much)
- 1 teaspoon baking soda (helps the bars rise just enough without getting cakey)
- 1/2 teaspoon salt (enhances all the flavors and balances the sweetness)
- 2 teaspoons pumpkin pie spice (or make your own: 1 teaspoon cinnamon, 1/2 teaspoon ginger, 1/4 teaspoon nutmeg, 1/4 teaspoon cloves)
- 1 cup semi-sweet chocolate chips (I use Ghirardelli for the best melt, but any brand works. Dark chocolate is also fantastic here)
Optional Add-Ins
- 1/2 cup chopped pecans or walnuts (adds crunch and pairs beautifully with pumpkin)
- 1/4 cup dried cranberries (for a tart contrast to the sweet chocolate)
- 1 tablespoon chia seeds or flax seeds (for extra nutrition without affecting texture much)
A note on pumpkin: Make sure you’re using pure pumpkin puree, not pumpkin pie filling. The pie filling has added sugar and spices that will throw off the whole recipe. Also, if your pumpkin puree looks watery, give it a quick drain by pressing it through a fine-mesh sieve or patting it dry with paper towels. Too much moisture will make your bars soggy instead of chewy.
Equipment Needed
You don’t need a fancy kitchen to make these bars. Here’s what you’ll actually use:
- 8×8-inch baking pan (a 9×9 works too, but the bars will be slightly thinner and bake faster—check them at 22 minutes)
- Mixing bowls (one large bowl is all you need—I use a glass Pyrex bowl because it’s easy to see when everything’s combined)
- Whisk (for combining the wet ingredients without overmixing)
- Rubber spatula (for folding in the oats and chocolate chips—also great for scraping every last bit of batter into the pan)
- Parchment paper (this is non-negotiable for easy removal. Leave overhang on two sides to create “handles”)
- Measuring cups and spoons (dry measuring cups for flour and oats, liquid measuring cup for pumpkin)
- Cooling rack (helps the bars cool evenly so they set properly before cutting)
If you don’t have parchment paper, you can grease the pan thoroughly with butter or cooking spray. Just run a knife around the edges after baking and carefully flip the whole thing out onto a cutting board. It’s a little riskier, but it works in a pinch.
Preparation Method
Preheat your oven to 350°F (175°C). Line your 8×8 pan with parchment paper, leaving some overhang on two opposite sides. This will be your lifeline later when you’re trying to lift the whole block of bars out without breaking them.
- Melt the butter. Pop 1/2 cup of unsalted butter in a microwave-safe bowl and heat in 20-second bursts until just melted. Don’t let it get too hot—you want it liquid, not bubbling. Set it aside to cool for a minute while you gather your other ingredients.
- Mix the wet ingredients. In your large mixing bowl, whisk together the melted butter, brown sugar, and granulated sugar until they’re well combined. It should look like wet sand. Add the pumpkin puree, egg, and vanilla extract. Whisk until smooth and uniform. The mixture will look a bit thick and glossy—that’s exactly what you want.
- Combine the dry ingredients. In a separate small bowl, whisk together the flour, baking soda, salt, and pumpkin pie spice. This step is important—if you just dump the dry ingredients in without mixing them first, you’ll end up with pockets of baking soda that taste metallic. Trust me, I learned this the hard way.
- Fold everything together. Pour the dry ingredients into the wet ingredients and stir with your rubber spatula until just combined. Don’t overmix—a few streaks of flour are fine. Overmixing will make the bars tough instead of tender. Now fold in the rolled oats and chocolate chips. The dough will be thick and slightly sticky. If it looks too dry, don’t panic—the pumpkin adds moisture as it bakes.
- Spread into the pan. Scrape the dough into your prepared pan and spread it evenly. The dough is thick, so you’ll need to press it down with your spatula or lightly dampened fingers. Don’t be tempted to add more liquid—it spreads as it bakes. Make sure the corners are filled and the top is relatively even.
- Bake. Place the pan on the middle rack of your preheated oven. Bake for 25-30 minutes. At 25 minutes, check by inserting a toothpick into the center. If it comes out with a few moist crumbs, they’re done. If it’s wet batter, give it another 3-5 minutes. The edges should be golden brown and slightly pulling away from the sides of the pan.
- Cool completely. This is the hardest part. Let the bars cool in the pan on a wire rack for at least 20 minutes. Then use the parchment overhang to lift the entire block out and transfer it to the cooling rack. Let them cool completely before cutting—about 1 hour. I know you want to cut into them warm, but they’ll fall apart. Use a sharp knife and wipe it clean between cuts for neat squares.
Cooking Tips & Techniques
Here are the things I wish someone had told me before my first attempt at these bars.
The moisture problem. Pumpkin has a lot of water in it. If your pumpkin puree looks watery or has liquid pooling on top, blot it with a paper towel before adding it to the batter. I once skipped this step and ended up with bars that were more like pumpkin pudding. Still delicious, but you couldn’t pick them up without them falling apart.
The overmixing trap. I’m guilty of this in every recipe. You mix, and you mix, and you think “just one more stir to make sure.” Stop. Overmixing develops gluten, which makes baked goods tough and rubbery. You want these bars tender and chewy, not something you could use as a hockey puck. Mix until the flour disappears, then stop.
The chocolate chip distribution. Reserve a handful of chocolate chips and press them into the top of the batter after spreading it in the pan. This ensures you get visible, melty chocolate on top instead of all the chips hiding inside. It also makes the bars look prettier, which matters when you’re bringing them to a gathering.
The timing strategy. These bars are forgiving, but don’t walk away during the last 5 minutes of baking. Ovens vary wildly—my friend’s oven runs hot and her bars are done at 22 minutes, while mine take the full 30. Start checking early. The difference between perfect bars and dry bars is about 90 seconds.
The cooling patience. I know I said this already, but I’ll say it again: let them cool completely. Warm bars are soft and crumbly. Cold bars are firm and slice perfectly. If you’re impatient, pop the whole pan in the fridge for 30 minutes after the initial 20-minute counter cool. That speeds things up without sacrificing texture.
Variations & Adaptations
One of the best things about this recipe is how flexible it is. Here are some variations I’ve tried and loved:
Gluten-Free Version: Swap the all-purpose flour for a 1:1 gluten-free baking flour blend. I’ve used King Arthur Measure for Measure and Bob’s Red Mill with great results. Make sure your oats are certified gluten-free too, since regular oats are often processed with wheat. The texture will be slightly more delicate, but still delicious.
Dairy-Free Version: Use melted coconut oil or vegan butter instead of regular butter. I like using refined coconut oil because it doesn’t add coconut flavor. The bars will be slightly firmer when cold but soften up at room temperature. Enjoy Life brand makes great dairy-free chocolate chips.
Lower Sugar Option: Reduce the brown sugar to 1/2 cup and the granulated sugar to 2 tablespoons. The bars will be less sweet but still plenty flavorful from the pumpkin and chocolate. You can also use coconut sugar instead of brown sugar for a lower glycemic option.
Pumpkin Spice Variation: Add 1/2 cup of white chocolate chips along with the semi-sweet chocolate for a pumpkin spice latte vibe. Or swap the chocolate chips entirely for butterscotch chips—trust me, pumpkin and butterscotch are a match made in heaven.
Protein Boost: Replace 1/4 cup of the flour with vanilla or unflavored protein powder. You might need to add an extra tablespoon of milk or water to compensate for the dryness. This version is great for post-workout snacks that still feel like a treat.
Serving & Storage Suggestions
These bars are fantastic at room temperature, but they’re also amazing warmed up for about 10 seconds in the microwave. The chocolate gets all melty again, and the texture softens just enough to feel like a fresh-baked cookie. Serve them with a glass of cold milk, a scoop of vanilla ice cream, or a hot cup of coffee for the ultimate fall treat.
For storage, keep the bars in an airtight container at room temperature for up to 4 days. Place a piece of parchment paper between layers to prevent sticking. If your kitchen is humid, the bars might get a bit sticky on top—that’s fine, just dust them with a little powdered sugar before serving.
These bars freeze beautifully. Wrap individual bars in plastic wrap, then place them in a freezer-safe bag or container. They’ll keep for up to 3 months. To thaw, just leave them on the counter for about 30 minutes, or pop them in the microwave for 15-20 seconds. I always keep a stash in my freezer for when a pumpkin craving hits in the middle of July.
One thing I’ve noticed: the bars actually taste better on day two. The flavors meld together overnight, and the texture evens out. So if you can resist eating them all on day one, you’re in for a real treat on day two. Not that I’ve ever managed that level of self-control.
Nutritional Information & Benefits
Per bar (based on 16 servings): approximately 185 calories, 8g fat, 27g carbohydrates, 3g protein, 2g fiber, 14g sugar. These are estimates and will vary based on your specific ingredients and any substitutions.
Pumpkin is packed with vitamin A, which supports eye health and immune function. It’s also high in fiber, which helps keep you full and satisfied. The oats provide complex carbohydrates for steady energy, and the chocolate chips offer a dose of antioxidants. I mean, it’s still a dessert, but it’s a dessert that’s doing a little bit of good along the way.
For those watching their sugar intake, you can reduce the sugar as mentioned in the variations section. The bars are also easily adaptable for gluten-free or dairy-free diets. They contain eggs and wheat, so they’re not suitable for vegan or celiac diets without modifications.
I personally love that these bars feel indulgent without being over-the-top. They’re sweet enough to satisfy a dessert craving, but they don’t leave you with that heavy, regretful feeling you get from some baked goods. It’s comfort food that makes you feel good about what you’re eating.
Conclusion
These Wholesome Pumpkin Chocolate Chip Cookie Bars are the kind of recipe that proves you don’t have to choose between healthy and delicious. They’re quick enough for a weeknight baking project, impressive enough for a holiday gathering, and simple enough that you can make them with your eyes half-closed after a long day.
What I love most about this recipe is how adaptable it is. Make it your own—add nuts, swap the chocolate, adjust the spices, play with the sugar. The base is forgiving and friendly, like a good recipe should be. And if you have a pumpkin skeptic in your life, these bars might just change their mind. I’ve seen it happen.
I’d love to hear how these turn out for you. Did you make any substitutions? Did your family fight over the last piece? Drop a comment below and let me know. And if you’re looking for more fall baking inspiration, check out our cozy fall desserts collection for more seasonal treats. Happy baking, friends!
Frequently Asked Questions
Can I use fresh pumpkin instead of canned?
Yes, you can use fresh pumpkin puree. Just make sure to roast or steam the pumpkin until tender, then blend until smooth. Drain any excess liquid through a cheesecloth or fine-mesh sieve, as fresh pumpkin tends to be more watery than canned. You want it about the same consistency as canned puree.
Why did my bars turn out cakey instead of chewy?
This usually happens from too much pumpkin or overmixing the batter. Make sure you’re measuring exactly 1 cup of pumpkin and not packing it. Also, mix just until the flour disappears—overmixing develops gluten and creates a cakey texture. Using old-fashioned oats instead of quick oats also helps maintain chewiness.
Can I make these bars vegan?
You can try substituting the egg with a flax egg (1 tablespoon ground flaxseed mixed with 3 tablespoons water, let sit for 5 minutes) and using vegan butter or coconut oil. The texture will be slightly different—a bit more tender and crumbly—but still delicious. I haven’t tested a vegan version extensively, so let me know if you try it!
How do I know when the bars are done baking?
Insert a toothpick into the center of the pan. If it comes out with a few moist crumbs attached, they’re done. If it’s covered in wet batter, give them another 3-5 minutes. The edges should be golden brown and slightly pulling away from the sides of the pan. Don’t overbake, or they’ll be dry.
Can I double this recipe?
Absolutely! Double all ingredients and bake in a 9×13-inch pan. Increase the baking time to 30-35 minutes, checking for doneness with a toothpick. You might need to cover the top with foil halfway through if it’s browning too quickly. The bars will be slightly thicker but just as delicious.
Pin This Recipe!
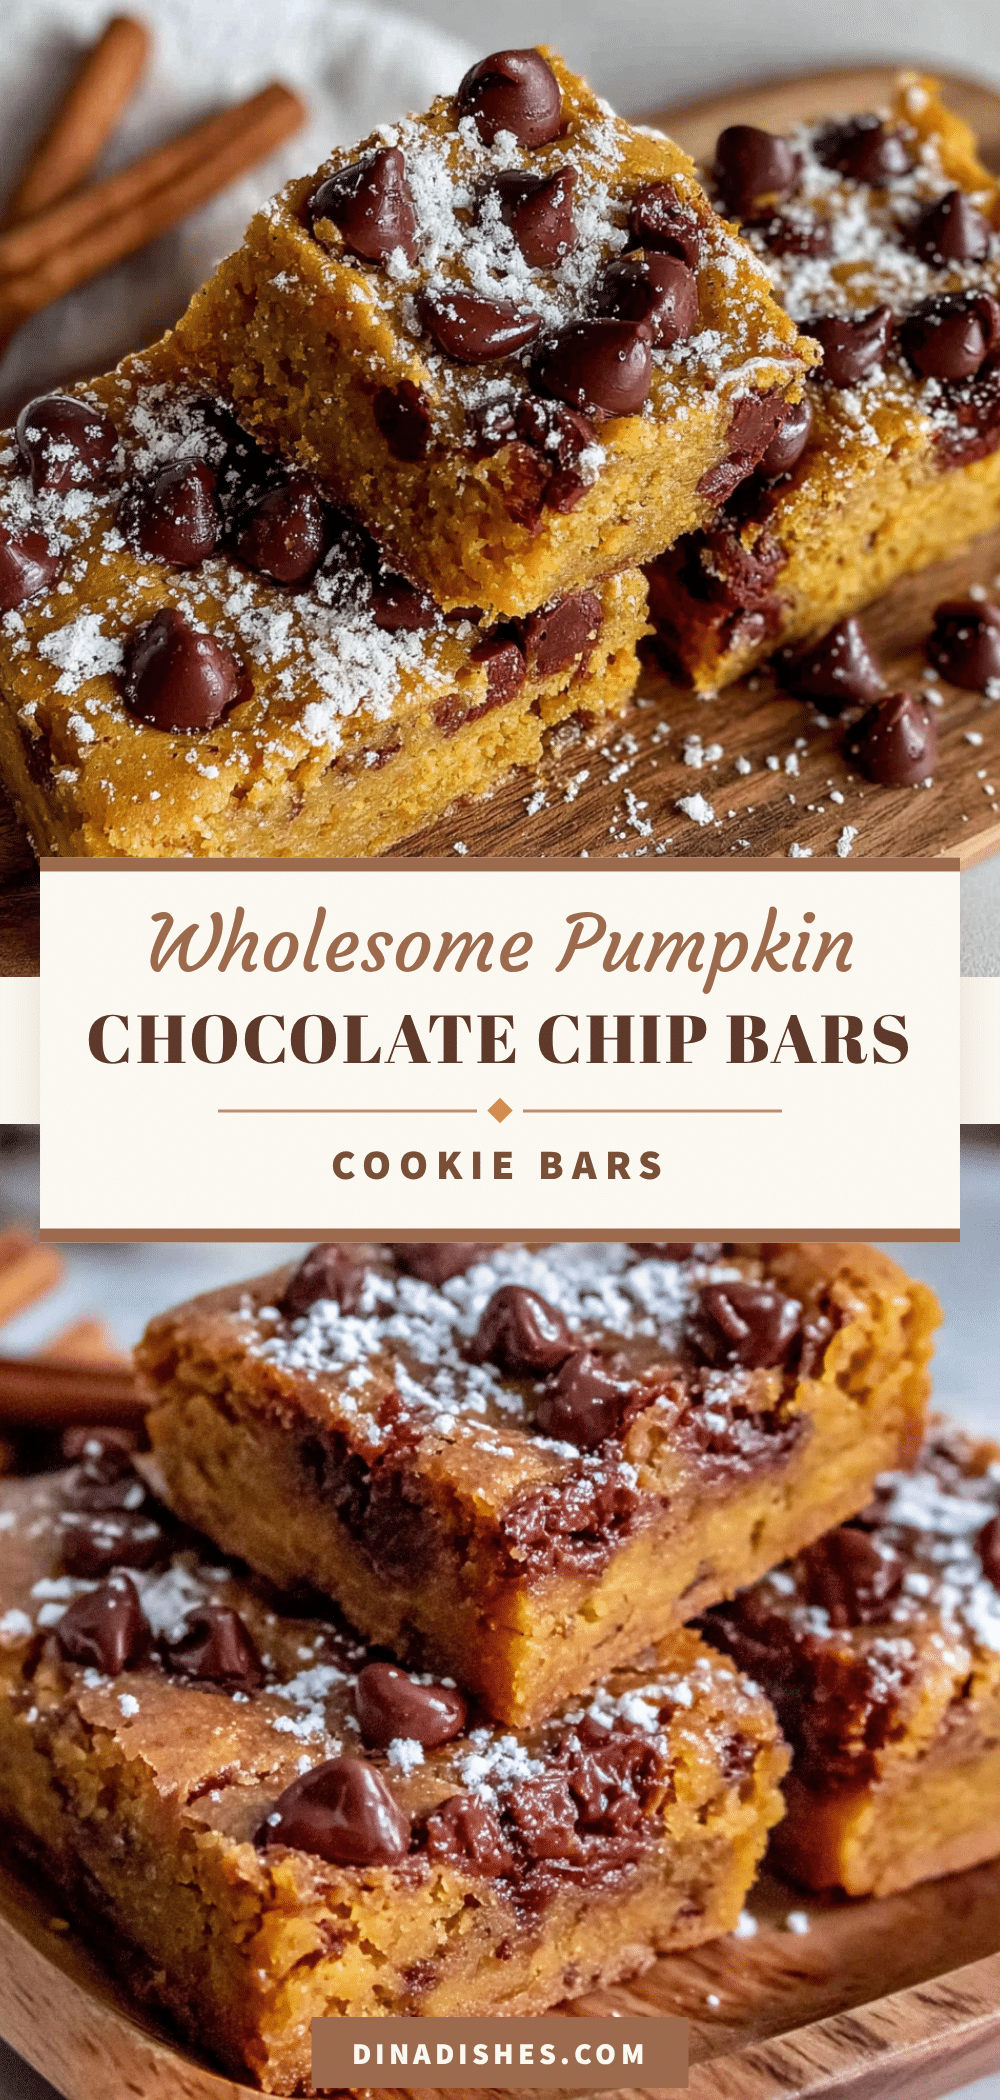
Wholesome Pumpkin Chocolate Chip Cookie Bars
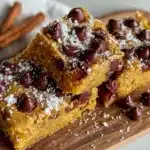
These soft, chewy pumpkin chocolate chip cookie bars are made in one bowl with simple ingredients. They have crispy edges, a tender center, and are perfect for fall gatherings or any time a cookie craving hits.
- Prep Time: 15 minutes
- Cook Time: 30 minutes
- Total Time: 45 minutes
- Yield: 16 servings 1x
- Category: Dessert
- Cuisine: American
Ingredients
- 1 cup canned pumpkin puree (not pumpkin pie filling)
- 1/2 cup unsalted butter, melted
- 3/4 cup brown sugar, packed
- 1/4 cup granulated sugar
- 1 large egg, room temperature
- 1 teaspoon vanilla extract
- 1 1/2 cups old-fashioned rolled oats
- 1 cup all-purpose flour
- 1 teaspoon baking soda
- 1/2 teaspoon salt
- 2 teaspoons pumpkin pie spice
- 1 cup semi-sweet chocolate chips
- 1/2 cup chopped pecans or walnuts (optional)
- 1/4 cup dried cranberries (optional)
- 1 tablespoon chia seeds or flax seeds (optional)
Instructions
- Preheat oven to 350°F (175°C). Line an 8×8-inch baking pan with parchment paper, leaving overhang on two opposite sides.
- Melt the butter in a microwave-safe bowl in 20-second bursts until just melted. Set aside to cool slightly.
- In a large mixing bowl, whisk together melted butter, brown sugar, and granulated sugar until well combined. Add pumpkin puree, egg, and vanilla extract; whisk until smooth.
- In a separate small bowl, whisk together flour, baking soda, salt, and pumpkin pie spice.
- Pour dry ingredients into wet ingredients and stir with a rubber spatula until just combined. Fold in rolled oats and chocolate chips (reserve a handful of chips for topping).
- Scrape dough into prepared pan and spread evenly. Press reserved chocolate chips into the top.
- Bake for 25-30 minutes, until a toothpick inserted in the center comes out with a few moist crumbs. Edges should be golden brown.
- Cool in the pan on a wire rack for 20 minutes, then use parchment overhang to lift out and cool completely before cutting into squares.
Notes
For best texture, use old-fashioned rolled oats, not quick oats. If pumpkin puree looks watery, blot with paper towels before adding. Let bars cool completely before cutting to prevent crumbling. Bars taste even better on day two.
Nutrition
- Serving Size: 1 bar
- Calories: 185
- Sugar: 14
- Sodium: 150
- Fat: 8
- Saturated Fat: 4
- Carbohydrates: 27
- Fiber: 2
- Protein: 3
Keywords: pumpkin chocolate chip cookie bars, easy pumpkin bars, one bowl pumpkin cookies, fall dessert, oatmeal pumpkin bars